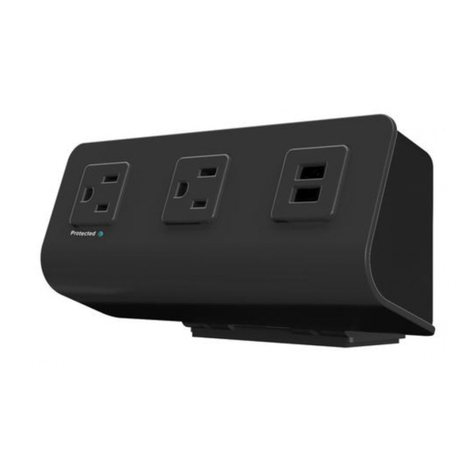
ERGONOMIC SOLUTIONS FlexCharge4-DSK User manual

Model FCH4-DSK
INSTALLATION AND USE
FlexCharge4-DSK
FCH4-DSK Rev B 5/17

FLEXCHARGE4-DSK SAFETY INSTRUCTIONS
Always read the safety instructions carefully.
• Do not install near heat sources such as radiators, heat registers stoves,
or other equipment (including amplifiers) that produce heat.
• Unplug the unit during lightning storms or when unused for extended
periods of time.
• To reduce the risk of fire or electric shock, do not expose this unit to rain
or moisture, including any drips or splashes.
• Objects filled with liquids such as vases, should never be placed on or
near the unit.
• Do not open due to risk of electric shock hazard.
• The outlet used to power the unit should be easily accessible and
located near the equipment.
• The unit is for indoor use only.
• Please refer to the marking label on the unit for input and output
ratings. Do not overload the power supply.
• DO NOT USE this product in life support applications where failure of
this unit can reasonably be expected to cause the failure of the life
support equipment or to significantly affect its safety or effectiveness is
not recommended. Do not use this equipment in the presence of a
flammable anesthetic mixture with air, oxygen or nitrous oxide.
• Failure to adhere to these instructions effectively voids the warranty.
Safety Instructions
2

FLEXCHARGE4-DSK PARTS AND TOOLS
PLEASE REVIEW these instructions before beginning the installation. Check
that all parts and tools needed were provided with your order. Contact your
that the product operates to your satisfaction.
PARTS AND TOOLS PROVIDED
Bottom Bracket (1)
Power Outlets
USB Charging
Ports
M4 Allen Key (1) M5x8 Socket Cap Screw (2)
M3x12 Panhead Screw (2) M4x14 Wood Screw (4)
CAUTION:
Hand-tighten screws only. Do not use power tools.
ADDITIONAL TOOLS REQUIRED
• Phillips screwdriver
• Power drill with 1
/8" drill bit (under-desk mounts only)
#6-32x¼ Flathead Screw (4)
3

DESK CLAMP FLEXCHARGE4-DSK
There are three ways to mount the FlexCharge4 power module:
• Desk Clamp (page 3)
• Grommet Mount (page 5)
• Under-Desk Mount (page 7)
Choose the best mounting method based on user preference and the
mounting circumstances.
Desk Clamp
With the edge mount method, the product is
clamped to the edge of the work surface.
• The Flexcharge 4 desk clamp comes
preassembled.
Attach Bracket/Clamp Assembly to Power Module
• Route the power cord through the
opening in the top bracket.
• Attach the top bracket to the
rear of the power module
using the two M3x12
panhead screws.
Tighten securely.
Power
Module
M3x12
4

FLEXCHARGE4-DSK DESK CLAMP
Clamp Power Module Assembly to Work Surface
• Position the assembly in the desired location and
clamp securely to the work surface by tightening
the triangle knob.
• Plug the power cord into an AC outlet.
YOU ARE NOW READY to use the two AC power outlets and two USB charging
ports on the FlexCharge4.
Work Surface
Grommet Mount
The grommet mount method is similar to the edge
mount method, except here the assembly is
clamped to the edge of a 2¼” grommet hole rather
than the edge of the work surface.
5

Remove the Desk Clamp
• Loosen the (2) M5x8 socket cap screws using the M4 Allen key.
- Desk clamp can be removed.
Attach Bracket Assembly to Power Module
• Route the power cord through the opening in the top
bracket.
• Attach the top bracket to the rear of the power module
using the two M3x12 panhead screws. Tighten securely.
Power
Module
M3x12
2”
DESK CLAMP FLEXCHARGE4-DSK
6

FLEXCHARGE4-DSK GROMMET MOUNT
Clamp Power Module Assembly to Work Surface
• Retighten the two M5x8 screws to the bottom bracket, leaving about 1
/8"
exposed between the screw heads and the bracket.
— With work surface thicknesses between 7/8" and 2", attach the screws to
the bottom two holes. Attach the clamp to the top two holes if the work
surface thickness is less than 1.5”.
• Insert the bottom bracket through the grommet hole.
• Attach the clamp to the bottom bracket.
— Fit the keyhole openings in the clamp over the M5x8 screw heads. Tighten
the screws securely over the narrow portion of the keyholes using the
M4 Allen key.
• Clamp the assembly securely to
the work surface by tightening the
triangle knob.
• Plug the power cord into an AC
outlet.
YOU ARE NOW READY to use the two AC power outlets and two USB charging
ports on the FlexCharge4.
1
/8"
Exposed
M5x8
Hook Clamp Keyholes
onto Screws and Tighten
Work Surface Grommet
Hole
Minimum hole
diameter = 2¼”
Tighten Knob
7

Under-Desk Mount
With this method, the top bracket is turned upside-
down so that it can be mounted to the underside of
the work surface with M4x14 wood screws. As with
the other methods, the power module is mounted
to the bracket using two M3x12 panhead screws.
Drill Pilot Holes
•
Use the top bracket as a template to
drill four pilot holes.
mark where
•
Drill 1
/2" deep pilot holes using a 1
/8" drill bit.
CAUTION: Be careful not to drill through the top of the work surface.
Attach Bracket to Underside of Work Surface
• Route the power cord through the opening in the top bracket.
• Attach the bracket in the desired location (typically at the front of the work
surface on the left or right side) using the four M4x14 wood screws. Tighten
securely.
Attach Power Module to Bracket
• Route the power cord through the opening in the top bracket.
• Attach the power module to the bracket using the two M3x12 panhead
screws. Tighten securely.
YOU ARE NOW READY to use the two AC power outlets and two USB charging
ports on the FlexCharge4.
Top Bracket Power
Module
M3x12
M4x14
DESK CLAMP FLEXCHARGE4-DSK
Remove the Desk Clamp
• Loosen the M5x8 socket cap screws using the M4 Allen key.
• Remove the bottom bracket by loosening the #6-32x1/4” flathead screws using
a Phillips screw driver
Top
Bracket
Bottom
Bracket
#6-32x¼
M5x8
Clamp
8

800.833.3746 esiergo.com
© 2017 ESI Ergonomic Solutions. All rights reserved.
• Built-in surge protection
Rotation AC outlet orientation designed to accomodate large plugs
Complies with UL 962A Standard for Furniture Power Distribution Units and meets
respective spill test criteria.
•
•
• 3.1A USB charging module
can charge one tablet and
one smart phone at the
same time.
Additional Features
FCH4-DSK Rev B 5/17
Table of contents
Other ERGONOMIC SOLUTIONS Portable Generator manuals
Popular Portable Generator manuals by other brands

Alpha tools
Alpha tools STE 850 operating instructions

Bohmer-AG
Bohmer-AG K Series Operation manual

ulsonix
ulsonix AIRCLEAN 15000-H20 user manual

Scheppach
Scheppach SG3500i Original instruction manual

Pasco Scientific
Pasco Scientific SE-8763 Instruction manual and experiment guide

iPower
iPower GXS2300iD owner's manual