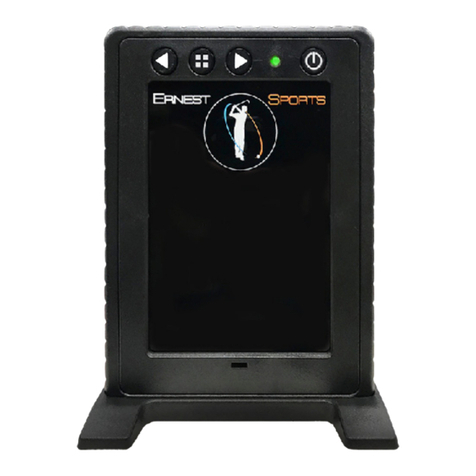
Ernest Sports ES15 User manual

» ES15 User Manual

INTRODUCTION 4-5
Description 4
Specification 5
PACKAGE CONTENTS 6
Standard And Optional Parts 6
ASSEMBLY OF THE ES15 7-9
Attach Stabilizing Feet 7
Installation of Battery 8
Optional Power Source 9
Low Battery Prompt 9
REMOTE CONTOL KEY FOB 10
Uses of the Key Fob 11
INSTALLATION OF THE ES15 12-14
TABLE OF CONTENTS
2

STARTING A RANGE SESSION 15-16
Data Provided 16
GETTING THE ES15 APP 17
ES15 APP 18-29
Bluetooth Connection 19
Range Session 20-21
Viewing Options 22-24
Club & Loft Selection 25
Default Information 26
Session Logs 27
Club Averages 28
Skills Challenge 29
WARRANTY 30
3

The ES15 Range Launch Monitor is a Doppler radar bay divider specifically designed for driving
ranges and hitting bays. This launch monitor displays distance, club speed, smash factor, spin
rate and ball speed of each shot hit on dual LCDs. (NOTE: launch angle is displayed on the
free app). These statistics remain on the screens until the next shot is hit.
This versatile device may be installed on grass, artificial turf, hitting mats, and wooden or
concrete flooring. Each ES15 features Bluetooth which allows connection of the golfer’s smart
device to the ES15. The free ES15 app records and stores each shot hit during a range
session, allowing the golfer to review his progress.
The ES15 Range is powered by a rechargeable battery which provides up to 140 hours of use.
There is an automatic shut off feature which powers the unit off after 8 minutes of idle time.
This feature helps to save the battery life.
INTRODUCTION
4
Description

Dimensions: Height: 30” Length: 48” Weight: 40 lbs.
Dual LCD Up Down Arrows and Power Button Instruction Panel
Stabilizing Foot Ball Placement Stabilizing Foot
--------------
-----
---
---
--------
Battery Panel
Stabilizing Foot Stabilizing Foot
------------
---
FRONT BACK
Specifications
-----------
---
5

Optional Parts
1. Remote Control Key Fob
2. Stabilizing Weights
3. Customized Panels
4. Waterproof Cover
5. Optional Power Source
The ES15 Range is packaged in its own box
to prevent damage during shipping.
In addition to the ES15, every order includes:
1. Two (2) stabilizing feet
2. Two (2) bolts
3. One (1) battery
4. One (1) battery charger
5. One (1) battery panel door
6. Assembly Instructions
Remove contents of both boxes and locate packing slips. Make sure all parts are accounted for.
NOTE: IF ANY PART IS MISSING FROM YOUR ORDER, OR IF CONTENTS ARE DAMAGED,
CONTACT ERNEST SPORTS AT 855-354-4653
PACKAGE CONTENTS
6
Standard Parts

7
ASSEMBLY OF THE ES15
Attach Stabilizing Feet
1. Locate the two (2) feet and two (2) bolts from smaller box
2. Working on a flat surface, stand the ES15 on its end.
WARNING! DO NOT LAY THE ES15 ON THE LCD DISPLAY!
THIS COULD DAMAGE THE DISPLAY AND ELECTRONICS.
3. Match the center hole in the foot to the hole on the bottom of the
ES15.
4. Insert the bolt in the center hole in the foot, then insert the bolt
into one of the holes on the bottom of the unit.
5. Tighten the bolt by hand until it is snug, then use a 9/16 socket
wrench to secure the bolt. CAUTION: DO NOT OVERTIGHTEN
THE BOLT. DAMAGE TO THE FOOT MAY OCCUR.
6. Repeat steps 3 – 5 to attach the second foot.
7. Place unit in an upright position and check to see if feet are
secure and unit is level.

Installation of Battery
1. Locate the metal contacts on the end of the battery.
2. Insert the battery with the contacts on the right into
the battery tray.
3. Slide the battery into place until the battery is secure.
4. Insert the battery panel by placing the top of the panel
in first (the latch is at the bottom).
5. Snap the panel in place.
6. Press the power button on the front of the unit to be
sure battery has been inserted properly.
8

Low Battery Prompt
“Battery” in the lower corner of the display indicates when the battery is low and should
be replaced. To remove battery panel door, push the latch up and lift the door up and out.
Remove battery and charge, then replace.
Optional Power Source
The ES15 can be configured to operate from electrical outlet. This is a special order feature.
Contact Ernest Sports at 855-354-4653 for more information.
9
Battery Battery charger

REMOTE CONTROL KEY FOB
An optional feature of the ES15 is the remote control key
fob that allows you to enable or disable power to the unit
remotely. The power button on the ES15 is still necessary
to activate the unit.
The power button on the unit will not work until the key fob
“A” button is pressed. The ES15 may be powered off by
either the remote control key fob or the power button on
the unit.
However, when installing or replacing the battery, the
remote control key fob MUST BE USED FIRST to enable
power for ES15.
PLEASE NOTE: IF YOU HAVE PURCHASED A REMOTE
CONTROL KEY FOB WITH YOUR ES15, YOU MUST
PRESS THE “A” BUTTON ON THE FOB TO ENGAGE THE
ELECTRONICS IN THE UNIT, THEN PRESS THE POWER
BUTTON ON THE FRONT OF THE ES15. ALWAYS
FOLLOW THIS PROCEDURE WHEN INSERTING OR
CHANGING THE BATTERY.
10
“A” BUTTON

Uses of the Remote Control Key Fob
Although an optional feature, the remote control key fob enhances the use of the ES15 in a
number of ways:
1. The range of the remote control allows the manager to enable or disable the ES15 without
having to physically touch the unit. If an instructor is working with a student and another
golfer finishes his session on an adjacent ES15, the instructor can quickly check to see if the
unit was powered off by pressing the “B” button on the key fob. This will save the life of the
battery.
2. If a facility chooses to add a fee for the use of the ES15, the range manager will have the
ability to enable or disable the unit remotely.
3. If a time limit is placed on the use of the ES15, the range manager is able to remotely enable
or disable at the appropriate time.
4. The remote control key fob provides the facility manager the means to control the use of the
ES15 easily and with little effort.
11

12
INSTALLATION OF THE ES15
Grass
If your Club’s Driving Range has a grass surface, simply
place the ES15 on the hitting area. When deep divots
occur, simply pick up the unit and adjust its position.
OPTION: Ernest Sports offers additional ten (10) pound
weights that may be attached to the stabilizing feet. The
weights have a pin that inserts in the exposed hole of the
foot. If your area experiences strong winds, the added
ten (10) to forty (40) pounds available would insure the
stability of your ES15.
The ES15 Range launch monitor may be used in a variety of settings: natural grass,
artificial turf, hitting mats, concrete or wooden floors. The unit may be used in both indoor
and outdoor settings, under covered bays or open ranges.

Artificial Turf
The ES15 may also be used on a hitting mat or artificial
turf. The optional weights that affix to the feet of the unit
can be used if extra stability is needed.
Wooden Floors or Cement
For permanent installation of the ES15, simply secure the
unit onto the wooden floor or cement by attaching
permanent anchors into the holes found on each
stabilizing foot.
13

14
Waterproof Cover
For extra protection, Ernest Sports offers an optional
waterproof cover. This cover, like the ES15 panels, may
have the Ernest logo or be customized with special club
branding.
Custom Panels
Enhance your facility’s look through uniquely designed
panels. Rent panels for local ads, promote events.

STARTING A RANGE SESSION
Start your session
1. Press the power button on
2. Use the arrow buttons to select the club you wish to use
3. Position your ball 12”-14” across from the orange circle,
found on the lower part of the front panel
4. Begin your session
NOTE:
Each ES15 software
is pre-programmed
with the consumers
altitude location
0 – 9,000 ft., choice
of unit of measure
(yds or meters) and 8
minutes of idle time
before automatic
shutoff.
15

After each shot is hit, five data points will be
displayed on the dual LCDs. The five statistics
are:
1. Distance
2. Ball Speed
3. Spin Rate
4. Smash Factor
5. Club Speed
These statistics will remain displayed until the
next shot is taken.
Data Provided
Dual LCD
* Launch Angle only displayed in app.
16

GETTING THE ES15 APP
Windows and iOS users search for ES14 app.
Another added feature of the ES15 Range is the
ability of each unit to connect with a golfer’s smart
device and then record each range session. To
take advantage of this feature:
1. For Apple devices go to the App Store and
search ES14. Be sure to download the FREE
APP. Ernest Sports also offers a Club Fitting
app for iPads for a small fee.
2. For Android devices go the Play Store and
search ES15.
3. For Windows devices using Windows 8 or
Windows 10 go to Microsoft Store and serch
ES14.
ATTENTION:
iOS users: To download the
app for the iPad, go to the
app store.
1. Type in ES14 in the search
bar and search.
2. At the top left of the page
iPad Only will appear.
3. Click on iPad Only and
change the selection from
iPad Only to iPhone Only.
4. The correct app will then
appear on screen to select
and download.
Find the App
17

18
ES15 APP
Range Session
Start a new range session or join a saved session.
Session Logs
View data from previously recorded sessions.
Club Averages
View averages of all statistical information for each club.
Settings
Change settings for Averages, Units, Distance Type and Links.
Tutorial
Digital version of the ES14 Quickstart Guide.
Skills Challenge
The purpose of the Skills Challenge is to test how
well you know your distances.

Apple Connecting:
On your Apple device, go to “Settings” and then to “Bluetooth”. Turn Bluetooth ON. Scan for
devices. Once found, select ES14 to connect. You will need to repeat these steps each time
the ES15 is powered off.
Android Pairing:
On your Android device, go to “Settings.” Go to “Wireless and Network,” then “Bluetooth
Settings.” Scan for devices and select ES15. Accept the pairing request when prompted. The
ES15 will connect as needed after this point. However, It may be necessary to cycle the power
for the ES15 between range sessions.
Location of Bluetooth Settings may vary between versions of Android devices. Not all Android
operating systems are the same. Please call Ernest Sports for further assistance.
Windows Pairing:
On your Windows device go to “Settings” and then to “Bluetooth”. Turn Bluetooth On. Scan for
devices. Once found, select ES14 then select Pair. The ES15 will connect as needed after this.
Bluetooth Connection
19

20
To begin using the app with your ES15 device
1. Connect your smart device with the ES15 via Bluetooth.
2. Once device states it is connected, allow 5-6 seconds for
cconnection to complete.
3. Select your club on your ES15.
4. Select RANGE SESSION on the Home Page of the App.
5. Select Start Session in the app and NAME THE SESSION.
6. Your are ready to begin. Once you hit, the information for that
shot will be displayed on the ES15 and then in the app.
7. When finished with your session, choose End/Save.
Range Session
Table of contents
Other Ernest Sports Video Gaming Accessories manuals
Popular Video Gaming Accessories manuals by other brands
Paron Tech
Paron Tech Doctor Putting user manual
Saitek
Saitek Pro Flight Rudder Pedals user manual
AUSTRIAN GAMING INDUSTRIES
AUSTRIAN GAMING INDUSTRIES NOVOSUPERVISION FV-626 CF2 manual

Razer
Razer ATROX user manual

AllSportSystems
AllSportSystems SUPERBAY 10W Setup guide
Carmelli
Carmelli AUGUSTA Assembly instructions
