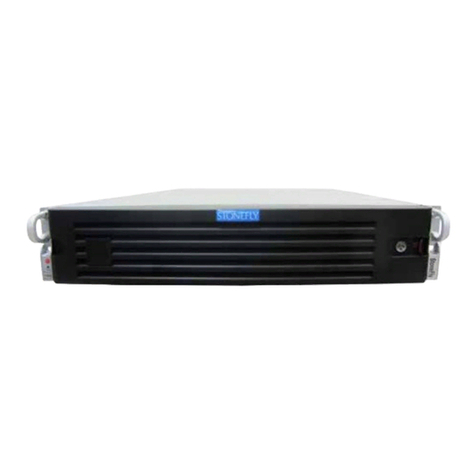
ESCAM PVR208 User manual

PVR Series Product Manual
Website: www.escam.cn Support email: support@escam.cn
1、Preface..............................................................................................................2
2、Local basic operation ......................................................................................3
2.1 Mouse operation instruction .....................................................................3
2.2 keyboard instruction..................................................................................3
2.3 Interface icon description..........................................................................3
2.4 Start up........................................................................................................4
2.5 Boot wizard and devices added................................................................5
2.6 Other methods to add device....................................................................9
2.7 Local playback............................................................................................9
3、WEB access....................................................................................................11
3.1 LAN WEB access......................................................................................11
4、APP remote preview ......................................................................................12

PVR Series Product Manual
Website: www.escam.cn Support email: support@escam.cn
1.Preface
Please follow the instructions when you use this product:
Do not place any container with liquid on the PVR (for example: cup)
Please unplug the power when you clean the device
Make sure good ventilation openings to avoid product overheating damage
Make sure the PVR work on the allowable temperature and humidity
The dust on the board may cause short-circuit problem, please clean the dust on the
circuit board, connector, case, fan by banister brush regularly
Changing the battery improperly may cause explosion, Please don’t change it
without professional guidance. If battery needs to be changed, please use the same
type or equivalent type battery.
Turn off all the related devices power when installing
Please check the product and accessories according to packing list when you get
the box.
Please change the default password after installing to avoid security problem
Make sure the device is installed in a horizontal and stable place to avoid falling
down
Some contents regarding some technique may be
not accurate in this user instruction; new content will be
updated regularly without prior notice.

PVR Series Product Manual
Website: www.escam.cn Support email: support@escam.cn
2. Local basic operation
2.1 Mouse operation instruction
Notice: If the mouse can’t be detected after plug in, usually it’s compatible issue, so
please change the mouse.
2.2 keyboard instruction
Input method description
Icon
Description
Capital letter and small letter switching
Shift between various input ways
PageUp
PageDown
Current language
2.3 Interface icon description
Interface icon
Name
Description
Menu
Enter the corresponding sub-menu when
locating one menu icon
Toolbar
The icons are, in order, main menu, single
screen, 4-screen, 9-screen, Auto-switch screen,

PVR Series Product Manual
Website: www.escam.cn Support email: support@escam.cn
zoom, pan-tilt, record, device information,
snapshot, playback, backup, shutdown
Check box
Choose this function or not
Drop-down
box
Choose one option(at least two)
Input box
Click to edit or set
Save button
Click to save the current setting
Cancel button
Click to return current page
Save & Exit
Click to save & Exit
Click , and then the following page is showed up:
OK:Save the current setting and exit
Cancel:Cancel the current setting and exit
Apply: Save the current and stay at current main menu.
2.4 Start up
Step 1、Connect the device with display;
Step 2、Connect with power supply 12V;
After start up, it will show boot screen, and after a while, it start up successfully

PVR Series Product Manual
Website: www.escam.cn Support email: support@escam.cn
2.5 Boot wizard and devices added
After it starts up, it will go into boot wizard page, If there’s no HDD or HDD is unformatted, the device will give hint
and alarm.
Choose password check box, and modify the password
Notice:If you don’t choose password check box to modify the password, you can also input administrator password
for next step.
Default account is: admin, password is null. To protect personal privacy and data, please modify the password.
Click【Next】,You can make some simple configuration, for example: change language or time, open or close witzard,
choose IPC time synchronization

PVR Series Product Manual
Website: www.escam.cn Support email: support@escam.cn
Click【Next】,Enter into P2P interface
Left QR is device’s P2P UID QR code, Right one is APP QR code. Open mobile browser to scan right QR to
downloadAPP.
After APP is installed, Use left UID QR to add the device, after adding successfully, you can remote preview and
playback.
Note:If the status is Network ready, then you can use app to remote preview or playback. Please check table【4.APP
preview】
Click【IPC Configure】,you can go into device management page.
The added cameras will be shown on this page, click device searching to add device.

PVR Series Product Manual
Website: www.escam.cn Support email: support@escam.cn
Click【search】, you can search the devices in LAN
Button description:
Refresh current device list
Modify IP (Only for device added by IP), When you choose UID, this column is gray
Click this box to add manually, when the IP camera is not in the same LAN with PVR,
it can’t be searched, then you need to add the camera by UID manually.
There’re 3 protocol, when you add, please choose the corresponding protocol.
P6S--- Private PVR and camera’s local protocol
ZWP2P--- Private PVR and camera’s WAN protocol
When this is checked, PVR can only search the cameras in LAN via UID, if the
camera is without UID, it can’t be shown
When this is checked, PVR can only search the cameras in LAN by IP address
When this is checked, the added devices won’t be shown, after it is cancelled, the
added devices can be searched again and added
Add all the searched devices
Only add the checked devices(The white box before series number)
After the device is added, you can preview
If the camera’s password or other information is not correct, then network will be off (for example: Channel CAM01,
CAM02)
The channel with camera in normal status will be shown, if HDD is installed, then red dot shown on the top right
corner means it’s recording(For example: Channel CAM03)
If the channel shows PVR, that means no camera is added at this channel(For example: channel CAM04-CAM08)。

PVR Series Product Manual
Website: www.escam.cn Support email: support@escam.cn
2.6 Other methods to add device
Method 1:Click the channel without adding camera, Click the bottom right corner【+】to add the device
Method 2:Click the channel management button on the toolbar, you will enter the channel management page
to add the camera
Note: Please refer to【2.4 boot wizard and add camera】for detail information
Method 3:Add byAPP
Open APP, Click the device’s edit button, (right side of the device【>】), to edit camera. For PVR added by app,
pls refer to the table of【4.APP remote preview】

PVR Series Product Manual
On this page, you can click the channel management button On this page, the devices added by PVR can be
shown, you can edit or delete by long-press.
2.7 Local playback
Right-click the mouse when preview, the following toolbar will show
Click record button, choose【Playback by time】

PVR Series Product Manual
Button description
Button
Description
Button
Description
Single screen/4-screen
Start/Stop cut
Reverse/Pause
Play/Pause
Slow down when play,
reverse per second when
pause
Speed up when play, play
per fps when pause
Zoom
Full screen
Narrow timeline
Amplify timeline
Back to default timeline
Record playback
Shift to the left
Shift to the right
Playback start time
setting
Exit playback interface

PVR Series Product Manual
3. WEB access
3.1 LAN WEB access
After the device connects with network, input the device’s IP address on the browser, then you can access via WEB
Step 1: Open IE browser
Step 2: Input the device’s IP address: http://IP address
Step 3: Input correct user name and password
Click 4: Click “login”to preview
After login, you can use the function of preview, playback, configuration, and log query, etc
Note:
If the port of device’s HTTP is changed(default is 80), pls input http://IP:HTTP port,for example:192.168.1.9:81
For the first access, please download the plug-in,
4. APP remote preview
Download APP: APP name is P6SPro, you can search it on Google Play or APP Store. Also use the phone to scan
QR code to download.

PVR Series Product Manual
Add device: Open the top-right button【+】on the app to add the devices
Note: P2P status on the device must be online to remote preview
P2P status can be checked on the wizard page or 【main menu】--【system device】--【Network setting】--【P2P】
Manual Add:
Input UID manually to add
Scan:
Scan UID QR to add
Search:
Mobile and PVR should
be in the same LAN, Click
search to search PVR’s
series number in the same
LAN
Image Add: Device’s QR
code image is in the
mobile, Click the image to
add
Input device’s name and
password and save
After saving, return to
the device
management page,
when the device is
online, click to preview
directly
Click the button on the
top-left corner ,to
get more functions
This manual suits for next models
1
Table of contents

