Escape P9 User manual

P9 QSG #3 – English (V1.0)
1
Escape™ P9 Quick-start guide
1 Electrical safety advisory
1.1 Important safety information
Make sure that you have read the complete safety information on the
www.escapespeakers.com website before using this product.
Read and keep these instructions.
Do not submerge the unit in water or other liquids. The product is
weather-resistant but not water-resistant. Place the speaker inside if
you are not using it for a long period of time.
Do not install near any heat sources. Do not place open flames, such as
lighted candles, on or near the product.
Do not defeat the safety purpose of the polarized or grounding-type
plug. If the provided plug does not fit into your power outlet, consult
an electrician to replace the obsolete outlet.
Protect the power cord from being walked on or pinched, particularly
at power outlets, convenience receptacles, and the point where they
exit the unit. Do not touch the power cord with wet hands.
Unplug this unit during lightning storms or when you do not use it for
long periods of time.
Polyester and plastic bags can be dangerous. To avoid danger of
suffocation, keep the unit's packaging away from babies and children.
Be careful when placing the Escape™ P9 outdoors and directly
exposed to sunlight. The aluminum handle absorbs and disperses heat.
Make sure to take the necessary precautions to prevent injuries and
dangerous situations.
Only use the built-in charger of the Escape™ P9 to charge the battery.
2
If the battery leaks and the electrolyte gets into your eyes, do not rub
them, instead, thoroughly rinse the eyes with clean running water for
at least 15 minutes, and immediately seek medical attention to avoid
eyes injury.
If the battery gives off an odor, generates heat, becomes discolored or
deformed, or in any way appears abnormal during use, recharging or
storage, immediately remove it from the device and dispose of it.
If the battery's useful life expires, wrap the fully discharged battery in
insulating tape and put the battery in the specialized recycle bin.
2Introduction
Thank you for choosing the Escape™ P9 portable loudspeaker. It will transform
your outdoor space into one of the most popular places in your home. Every
aspect of its design and development has been studied carefully to find better
ways of engineering and to build a product that results in an incredible audio
experience.
3Itemsincluded
Escape™ P9
Country-specific right-angle AC power cord:
– length: 1.5 meters (5 feet)
3.5mm stereo jack cable:
–length: 50cm (20 inch)
4 Getting started
4.1 Keypad control buttons
3
Control button Function
Power
Turn the Escape™ P9 on and off
Previous track
Play the previous song
Play/pause
Start or pause a song
Next track
Play the next song
Volume down
Decrease the volume
Volume up
Increase the volume
Bluetooth®
Connect a device using Bluetooth®
Twin mode
Connect a second Escape™ P9
using Twin mode
4
4.2 Charging the internal battery
A complete charging cycle takes between two and three hours. You can use
the Escape™ P9 during the charging process.
Never leave the unit unattended while charging.
The built-in battery is partially charged in the factory for the purpose of
testing. Before using the Escape™ P9 for the first time, you have to completely
charge the internal battery.
The battery will slowly discharge if:
it is not connected to the AC power
it is not used for several weeks
1Open the protective cover from the AC power socket located at the
bottom of the unit.
2Connect the right-angle AC power cord to the three-prong outlet and
insert the power cord plug into an AC outlet.
The power LED light will be red, indicating that the unit is charging. The
battery is fully charged when the red LED is off.
3Remove the right-angle AC power cord from the three-prong outlet
and close the protective cover.
IMPORTANT: If you place the
device on its side to connect the
AC power cord make sure it is on
a flat, clean surface. Placing the
unit on uneven surfaces or
objects may damage the grill.
1
2
13
6.4 Aux 2: universal 3.5mm auxiliary input inside the compartment
located underneath the keypad
The Escape™ P9 has a weather-proof compartment underneath the keypad
with a 3.5mm auxiliary input and USB power supply output to accommodate
future generation receivers.
1Open the keypad lid from the USB input and press against the
snap-lock mechanism to release the keypad out of the compartment.
2Remove the keypad from the top cover completely. Do not disconnect
the keypad from the wire connector.
3To re-install the keypad, slide it into the locking hook (3) next to the
auxiliary input and gently press the keypad back into the snap-lock (4)
mechanism.
7 Additional features
For additional features and information please check the complete user guide
of the P9 on the www.escapespeakers.com website. (Standby mode, locking
the keypad, anti-theft anchor point, replacing the battery, frequently asked
questions, cleaning instructions and fabric care)
NOTE: To perform a factory reset, turn on the P9 and press the Play/pause
button for 10 seconds until the unit switches off.
1
2
2
3
4
14
8App
Dedicated Escape™ P9 app for iOS® and Android™. Select different audio
sources, adjust the start-up volume, choose between 3 different optimized
DSP and equalizer pre-settings (standard, indoor, outdoor) and 1 custom
setting via a 5-band graphic equalizer to create a responsive curve more
appealing to your personal taste. Thanks to the dual 24-bit DSP processor you
can switch between a direct or wide soundstage. Adjust the balance between
two speakers in Twin mode and lock the keypad control buttons (useful in
professional settings such as bars and restaurants).
The Escape™ P9 App can be downloaded on the Apple App Store or the
Google Play Store. The separate user manual for the app can be downloaded
on the website.
9 Warranty and compliance
9.1 Limited warranty for the unit
The unit is covered by a 1-year limited warranty (*) from the date of invoice
when used in accordance with the Escape™ P9 user manual. The warranty
includes any spare parts and labor required to repair the product. This
warranty does not cover damage caused by abuse, accident, misuse,
negligence, or improper operation or installation, products that have been
modified or products whose identifying number or serial number have been
altered, defaced, or removed. For this warranty to apply, you must use the unit
according to the instructions.
9.2 Limited warranty for the battery
The battery is covered by a 6-month warranty worldwide.
15
9.3 Returning a device for repairs
1Pack the speaker in the original shipping box or a corrugated container
with at least 3 inches / 7.5cm of resilient material to protect the unit
from damage in transit.
NOTE: Escape™ is not responsible for any damage during
transportation.
2Bring the unit and proof of purchase to your retail store, along with a
note explaining the nature of service required.
3If the store of purchase's personnel cannot help you, please send an
defect, proof of purchase and serial number for a Return Merchandise
Authorization number before returning the unit for repair.
4Write the RMA number on the shipping label and ship to: Escape™ -
Ter Heidelaan 50a - 3200 Aarschot - Belgium or an authorized service
center.
Escape™ sells products only through authorized channels to ensure that
customers obtain proper support and service. Any Escape™ product
purchased from an unauthorized dealer or source will not be honored or
repaired under the existing warranty policy. Any sale of products by an
unauthorized source or other manner not authorized by Escape shall void the
warranty on the applicable product. Please check our website for the list of
authorized Escape™ retailers.
NOTE: (*) Escape™’s limited warranty does not modify, affect or substitute the
rights under statutory consumer protection laws that may vary from country
to country.
16
9.4 European Union
Escape bvba hereby declares that this product is in compliance with the
essential requirements and other relevant provisions of Directive 2014/53/EU
and all other applicable EU directive requirements.
9.5 EU WEEE
In accordance with the European Union WEEE (Waste Electrical and Electronic
Equipment) directive effective August 13, 2005, we would like to notify you
that this product may contain regulated materials which upon disposal,
according to the WEEE directive, require special reuse and recycling
processing. When disposing of packaging and other related shipping materials
we encourage you to recycle these items through the normal channels.
Escape™ P9 battery meets the UN38.3 regulations.

5
4.3 Power LED - battery status indicator
The power LED light indicates the status of the internal battery.
4.4 Turning the Escape™ P9 on and off
1Press and hold down the power button on the keypad for one second.
The power LED will light up and turn green. After 3 seconds, all keypad
LEDs will turn white.
2To turn the unit off, shortly press the power button again.
4.5 Track controls
You can navigate through tracks, pause and play using:
the Escape™ P9 keypad control buttons
the music app of your choice
the Escape™ P9 app
LED appearance Battery status
flashing red for 3 seconds and white
for 0.5 seconds
The battery charge has reached
approximately 20%. The unit is not
connected to a power outlet and
the battery needs to be charged.
solid red The unit is connected to a power
outlet and is charging.
white The battery is fully charged.
rapidly flashing red for 10 seconds Battery error, for example when the
power cable is connected to a
power outlet but no battery has
been installed.
6
4.6 Volume control
You can increase or decrease the volume using:
the Escape™ P9 keypad control buttons
the music app of your choice
the volume buttons on your device (in Bluetooth® mode only)
the Escape™ P9 app
5 Bluetooth® pairing
5.1 Connecting an Android™ and Apple® device
The Escape™ P9 memory can hold up to 8 different Bluetooth® devices. If a
new device is paired after the maximum of 8 has been reached, the new one
will replace the paired device with the oldest connection.
1Press and hold down the power button on the keypad for one second.
The power LED will light up and turn green. After 3 seconds, all keypad
LEDs will turn white.
2To start the Bluetooth® pairing sequence, shortly press the Bluetooth®
button.
The white LED will start flashing blue and white for 2 minutes.
3Go to Settings on your Apple® (iOS®) or Android™ device and turn on
Bluetooth®.
4Select Escape™ P9 xxxx from the device list.
The xxxx represents the last 4 digits of the device name and is a unique
combination that is also part of the serial number. You can find the
complete serial number on the label next to the battery compartment,
located on the bottom of the unit or on the shipping box.
Do not select Escape™ P9 xxxx App on your device if listed. You will
not be able to stream music if you do.
Once the connection has been established, the Bluetooth® symbol on
the Escape™ P9 keypad will be solid blue.
5Adjust the volume and navigate through tracks using your device or
the buttons on the keypad.
9
Unit A will act as the master device.
4Press and hold the Twin button on unit B until you hear a confirmation
tone.
The pairing sequence between unit A and B will start. Both Twin
buttons will start flashing blue and white every 2 seconds. Unit B will
act as the Twin device.
The pairing sequence between unit A and B is successful when the Twin
button LEDs on unit A and B are solid blue. Both units will now play the same
stereo signal.
NOTE: If you accidentally activate the Twin mode, you must switch the P9 off
and on again to end the activation or wait until the Twin mode search function
automatically ends after 2 minutes.
Unit A Unit B
Unit A Unit B
10
Keypad functions in Twin mode
When streaming music from an Apple® or Android™ device using Bluetooth®,
the control buttons will work on both units. Volume up and down is
synchronised and can be controlled on the device and on the Escape™ P9
keypad.
Turning off one of the speakers in Twin mode
The master device will remain active when the twin unit is turned off. Music
will be paused first in Bluetooth® mode. When the master is turned off, the
twin unit will no longer receive an audio signal.
External audio sources connected to the master speaker
Once the Twin mode has been set up, you can connect external audio sources
to the master device, such as MP3 players or a USB flash drive. (For more
details see external audio sources). External sources connected to the master
will also play on the twin unit.
Disabling the Twin mode between devices
Press and hold down the Twin and the volume down button simultaneously for
2-3 seconds on either master or twin speaker until you hear a short
confirmation tone.
The blue LEDs on master and twin unit will turn white, indicating that Twin
mode has been disabled on both units.
Unit A Unit B
or
7
IMPORTANT: If the Escape™ P9 is not listed the first time please turn
Bluetooth® off and on again.
TIP: Learn more about the Escape™ P9 app.
5.2 Clearing the Bluetooth® memory
Press and hold down the Bluetooth® button on the Escape™ P9 keypad for 10
seconds until you hear a short confirmation tone.
All Bluetooth® devices stored in the memory will be erased.
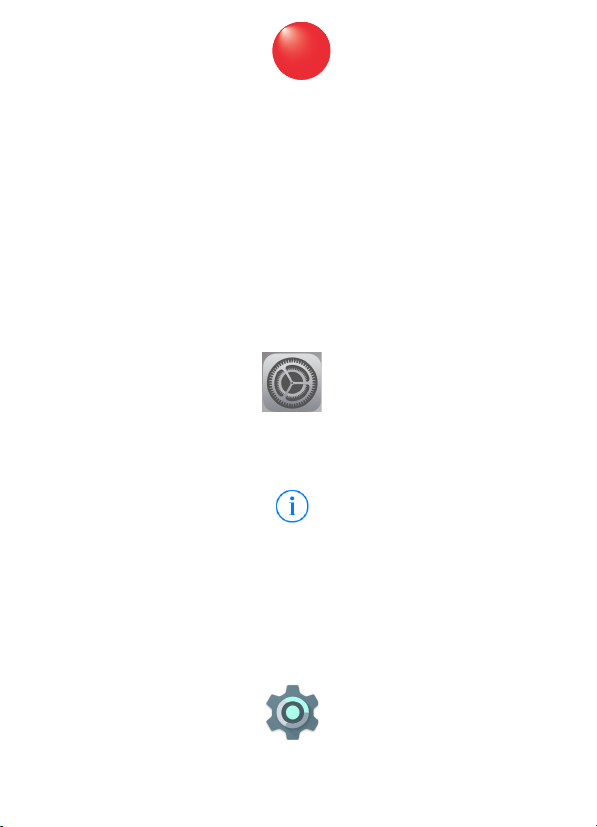
5.3 Disconnecting an Apple® (iOS®) device
1On your device, go to Settings > Bluetooth®.
2In the My Device list, select the Escape™ P9 and tap the information
symbol next to Connected.
3Select either Disconnect or Forget This Device.
The Bluetooth® button on the keypad will start flashing blue and white. The
device is no longer paired with the Escape™ P9.
5.4 Disconnecting an Android™ device
1On your device, go to Settings > Connections.
2Select Bluetooth®.
3Select the Escape™ P9 in the list of paired devices.
8
4Select Unpair.
The Bluetooth® button on the keypad will start flashing blue and white. The
device is no longer paired with the Escape™ P9.
5.5 Bluetooth® Twin mode
Bluetooth® audio streaming has been limited to one speaker for many years.
Now you can connect two Escape™ P9 speakers via Bluetooth® thanks to Twin
mode.
Setting up Bluetooth® Twin mode
Make sure that both units are in close range during setup. The maximum range
(5 to 10 meters) between the two speakers may vary depending on
environmental factors and the presence or absence of shields and obstacles.
During setup, make sure that the Bluetooth® symbol on the Escape™ P9
keypad is not green. No external audio input should be activated (Aux 1, Aux
2 or USB Flash Drive) on any of the two devices.
1Turn on unit A and connect your music device via Bluetooth®.
The Bluetooth® LED on the keypad of unit A needs to be solid blue.
IMPORTANT: Do not stream music during Twin setup.
2Turn on unit B.
All keypad LEDs must be white. If the Bluetooth® LED is blue, unit B is
connected to another audio device than unit A. Disconnect the
Bluetooth® link on this other device (see Disconnecting an Apple® (iOS®)
device and Disconnecting an Android™ device) or reset the Bluetooth®
memory on unit B (see Clearing the Bluetooth® memory). Make sure that
unit A and unit B are in close proximity.
3Press the Twin button on unit A twice within a very short time. The
Twin button on unit A will be flashing blue and white every 2 seconds.
12
The volume controls on the external player and the keypad are no
longer synchronized and the track control buttons will not function.
3For optimum playback quality, set the volume of the external audio
player to approximately 80%.
4Adjust the desired output volume of the Escape™ P9 via the control
buttons on the keypad.
6.3 USB flash drive
The Escape™ P9 can read audio files in MP3 and WMA formats. Files in
DRM (Digital Rights Management) copyright protection or files
downloaded from an online music store cannot be played.
The USB input will not work as a playback input for Apple® devices.
The input is in compliance with USB 2.0 (Full Speed).
The USB flash drive input is not a charging port.
1Lift up the right side of the keypad.
2Plug a USB flash drive into the USB port.
3Adjust the volume and navigate through tracks with the control
buttons of the keypad.
11
6 Connecting external audio sources
You can connect the Escape™ P9 to the following external audio sources:
1Aux 1: universal 3.5mm auxiliary input
2USB flash drive
3Aux 2: universal 3.5mm auxiliary input inside the compartment located
underneath the keypad
6.1 Priority
External audio sources are listed in order of priority. Lower priority audio
sources will be deactivated when an audio input of a higher priority is
activated. When one of the 3 external source inputs is activated, the
Bluetooth® button on the Escape™ P9 keypad will change from solid blue to
green.
IMPORTANT: Please observe all warnings in this section that may void
warranty.
6.2 Aux 1: universal 3.5mm auxiliary input
The 3.5mm aux input has the highest priority.
1Lift up the left side of the keypad.
2Connect any portable music player to the aux input using the 3.5mm
stereo jack cable provided with the unit.

5
4.3 Power LED - battery status indicator
The power LED light indicates the status of the internal battery.
4.4 Turning the Escape™ P9 on and off
1Press and hold down the power button on the keypad for one second.
The power LED will light up and turn green. After 3 seconds, all keypad
LEDs will turn white.
2To turn the unit off, shortly press the power button again.
4.5 Track controls
You can navigate through tracks, pause and play using:
the Escape™ P9 keypad control buttons
the music app of your choice
the Escape™ P9 app
LED appearance Battery status
flashing red for 3 seconds and white
for 0.5 seconds
The battery charge has reached
approximately 20%. The unit is not
connected to a power outlet and
the battery needs to be charged.
solid red The unit is connected to a power
outlet and is charging.
white The battery is fully charged.
rapidly flashing red for 10 seconds Battery error, for example when the
power cable is connected to a
power outlet but no battery has
been installed.
6
4.6 Volume control
You can increase or decrease the volume using:
the Escape™ P9 keypad control buttons
the music app of your choice
the volume buttons on your device (in Bluetooth® mode only)
the Escape™ P9 app
5 Bluetooth® pairing
5.1 Connecting an Android™ and Apple® device
The Escape™ P9 memory can hold up to 8 different Bluetooth® devices. If a
new device is paired after the maximum of 8 has been reached, the new one
will replace the paired device with the oldest connection.
1Press and hold down the power button on the keypad for one second.
The power LED will light up and turn green. After 3 seconds, all keypad
LEDs will turn white.
2To start the Bluetooth® pairing sequence, shortly press the Bluetooth®
button.
The white LED will start flashing blue and white for 2 minutes.
3Go to Settings on your Apple® (iOS®) or Android™ device and turn on
Bluetooth®.
4Select Escape™ P9 xxxx from the device list.
The xxxx represents the last 4 digits of the device name and is a unique
combination that is also part of the serial number. You can find the
complete serial number on the label next to the battery compartment,
located on the bottom of the unit or on the shipping box.
Do not select Escape™ P9 xxxx App on your device if listed. You will
not be able to stream music if you do.
Once the connection has been established, the Bluetooth® symbol on
the Escape™ P9 keypad will be solid blue.
5Adjust the volume and navigate through tracks using your device or
the buttons on the keypad.
9
Unit A will act as the master device.
4Press and hold the Twin button on unit B until you hear a confirmation
tone.
The pairing sequence between unit A and B will start. Both Twin
buttons will start flashing blue and white every 2 seconds. Unit B will
act as the Twin device.
The pairing sequence between unit A and B is successful when the Twin
button LEDs on unit A and B are solid blue. Both units will now play the same
stereo signal.
NOTE: If you accidentally activate the Twin mode, you must switch the P9 off
and on again to end the activation or wait until the Twin mode search function
automatically ends after 2 minutes.
Unit A Unit B
Unit A Unit B
10
Keypad functions in Twin mode
When streaming music from an Apple® or Android™ device using Bluetooth®,
the control buttons will work on both units. Volume up and down is
synchronised and can be controlled on the device and on the Escape™ P9
keypad.
Turning off one of the speakers in Twin mode
The master device will remain active when the twin unit is turned off. Music
will be paused first in Bluetooth® mode. When the master is turned off, the
twin unit will no longer receive an audio signal.
External audio sources connected to the master speaker
Once the Twin mode has been set up, you can connect external audio sources
to the master device, such as MP3 players or a USB flash drive. (For more
details see external audio sources). External sources connected to the master
will also play on the twin unit.
Disabling the Twin mode between devices
Press and hold down the Twin and the volume down button simultaneously for
2-3 seconds on either master or twin speaker until you hear a short
confirmation tone.
The blue LEDs on master and twin unit will turn white, indicating that Twin
mode has been disabled on both units.
Unit A Unit B
or
7
IMPORTANT: If the Escape™ P9 is not listed the first time please turn
Bluetooth® off and on again.
TIP: Learn more about the Escape™ P9 app.
5.2 Clearing the Bluetooth® memory
Press and hold down the Bluetooth® button on the Escape™ P9 keypad for 10
seconds until you hear a short confirmation tone.
All Bluetooth® devices stored in the memory will be erased.
5.3 Disconnecting an Apple® (iOS®) device
1On your device, go to Settings > Bluetooth®.
2In the My Device list, select the Escape™ P9 and tap the information
symbol next to Connected.
3Select either Disconnect or Forget This Device.
The Bluetooth® button on the keypad will start flashing blue and white. The
device is no longer paired with the Escape™ P9.
5.4 Disconnecting an Android™ device
1On your device, go to Settings > Connections.
2Select Bluetooth®.
3Select the Escape™ P9 in the list of paired devices.
8
4Select Unpair.
The Bluetooth® button on the keypad will start flashing blue and white. The
device is no longer paired with the Escape™ P9.
5.5 Bluetooth® Twin mode
Bluetooth® audio streaming has been limited to one speaker for many years.
Now you can connect two Escape™ P9 speakers via Bluetooth® thanks to Twin
mode.
Setting up Bluetooth® Twin mode
Make sure that both units are in close range during setup. The maximum range
(5 to 10 meters) between the two speakers may vary depending on
environmental factors and the presence or absence of shields and obstacles.
During setup, make sure that the Bluetooth® symbol on the Escape™ P9
keypad is not green. No external audio input should be activated (Aux 1, Aux
2 or USB Flash Drive) on any of the two devices.
1Turn on unit A and connect your music device via Bluetooth®.
The Bluetooth® LED on the keypad of unit A needs to be solid blue.
IMPORTANT: Do not stream music during Twin setup.
2Turn on unit B.
All keypad LEDs must be white. If the Bluetooth® LED is blue, unit B is
connected to another audio device than unit A. Disconnect the
Bluetooth® link on this other device (see Disconnecting an Apple® (iOS®)
device and Disconnecting an Android™ device) or reset the Bluetooth®
memory on unit B (see Clearing the Bluetooth® memory). Make sure that
unit A and unit B are in close proximity.
3Press the Twin button on unit A twice within a very short time. The
Twin button on unit A will be flashing blue and white every 2 seconds.
12
The volume controls on the external player and the keypad are no
longer synchronized and the track control buttons will not function.
3For optimum playback quality, set the volume of the external audio
player to approximately 80%.
4Adjust the desired output volume of the Escape™ P9 via the control
buttons on the keypad.
6.3 USB flash drive
The Escape™ P9 can read audio files in MP3 and WMA formats. Files in
DRM (Digital Rights Management) copyright protection or files
downloaded from an online music store cannot be played.
The USB input will not work as a playback input for Apple® devices.
The input is in compliance with USB 2.0 (Full Speed).
The USB flash drive input is not a charging port.
1Lift up the right side of the keypad.
2Plug a USB flash drive into the USB port.
3Adjust the volume and navigate through tracks with the control
buttons of the keypad.
11
6 Connecting external audio sources
You can connect the Escape™ P9 to the following external audio sources:
1Aux 1: universal 3.5mm auxiliary input
2USB flash drive
3Aux 2: universal 3.5mm auxiliary input inside the compartment located
underneath the keypad
6.1 Priority
External audio sources are listed in order of priority. Lower priority audio
sources will be deactivated when an audio input of a higher priority is
activated. When one of the 3 external source inputs is activated, the
Bluetooth® button on the Escape™ P9 keypad will change from solid blue to
green.
IMPORTANT: Please observe all warnings in this section that may void
warranty.
6.2 Aux 1: universal 3.5mm auxiliary input
The 3.5mm aux input has the highest priority.
1Lift up the left side of the keypad.
2Connect any portable music player to the aux input using the 3.5mm
stereo jack cable provided with the unit.
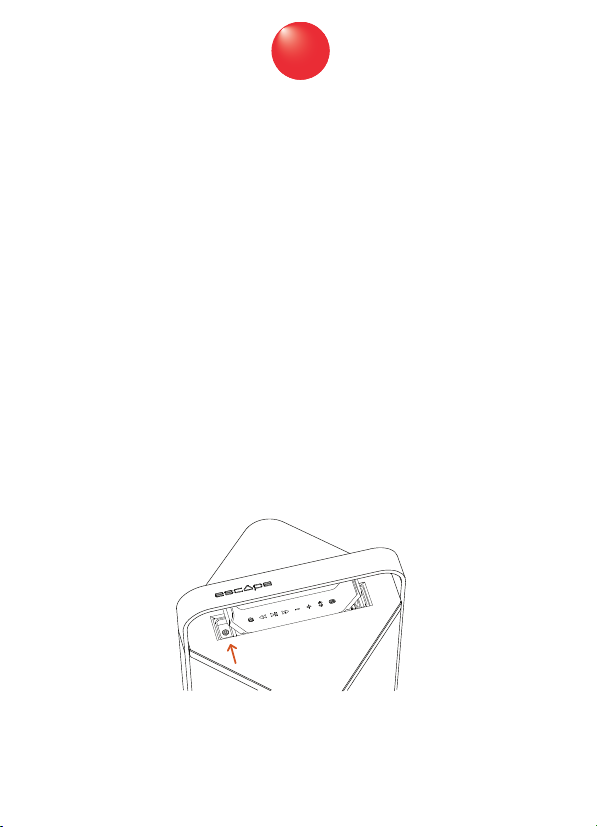

P9 QSG #3 – English (V1.0)
1
Escape™ P9 Quick-start guide
1 Electrical safety advisory
1.1 Important safety information
Make sure that you have read the complete safety information on the
www.escapespeakers.com website before using this product.
Read and keep these instructions.
Do not submerge the unit in water or other liquids. The product is
weather-resistant but not water-resistant. Place the speaker inside if
you are not using it for a long period of time.
Do not install near any heat sources. Do not place open flames, such as
lighted candles, on or near the product.
Do not defeat the safety purpose of the polarized or grounding-type
plug. If the provided plug does not fit into your power outlet, consult
an electrician to replace the obsolete outlet.
Protect the power cord from being walked on or pinched, particularly
at power outlets, convenience receptacles, and the point where they
exit the unit. Do not touch the power cord with wet hands.
Unplug this unit during lightning storms or when you do not use it for
long periods of time.
Polyester and plastic bags can be dangerous. To avoid danger of
suffocation, keep the unit's packaging away from babies and children.
Be careful when placing the Escape™ P9 outdoors and directly
exposed to sunlight. The aluminum handle absorbs and disperses heat.
Make sure to take the necessary precautions to prevent injuries and
dangerous situations.
Only use the built-in charger of the Escape™ P9 to charge the battery.
2
If the battery leaks and the electrolyte gets into your eyes, do not rub
them, instead, thoroughly rinse the eyes with clean running water for
at least 15 minutes, and immediately seek medical attention to avoid
eyes injury.
If the battery gives off an odor, generates heat, becomes discolored or
deformed, or in any way appears abnormal during use, recharging or
storage, immediately remove it from the device and dispose of it.
If the battery's useful life expires, wrap the fully discharged battery in
insulating tape and put the battery in the specialized recycle bin.
2Introduction
Thank you for choosing the Escape™ P9 portable loudspeaker. It will transform
your outdoor space into one of the most popular places in your home. Every
aspect of its design and development has been studied carefully to find better
ways of engineering and to build a product that results in an incredible audio
experience.
3Itemsincluded
Escape™ P9
Country-specific right-angle AC power cord:
– length: 1.5 meters (5 feet)
3.5mm stereo jack cable:
–length: 50cm (20 inch)
4 Getting started
4.1 Keypad control buttons
3
Control button Function
Power
Turn the Escape™ P9 on and off
Previous track
Play the previous song
Play/pause
Start or pause a song
Next track
Play the next song
Volume down
Decrease the volume
Volume up
Increase the volume
Bluetooth®
Connect a device using Bluetooth®
Twin mode
Connect a second Escape™ P9
using Twin mode
4
4.2 Charging the internal battery
A complete charging cycle takes between two and three hours. You can use
the Escape™ P9 during the charging process.
Never leave the unit unattended while charging.
The built-in battery is partially charged in the factory for the purpose of
testing. Before using the Escape™ P9 for the first time, you have to completely
charge the internal battery.
The battery will slowly discharge if:
it is not connected to the AC power
it is not used for several weeks
1Open the protective cover from the AC power socket located at the
bottom of the unit.
2Connect the right-angle AC power cord to the three-prong outlet and
insert the power cord plug into an AC outlet.
The power LED light will be red, indicating that the unit is charging. The
battery is fully charged when the red LED is off.
3Remove the right-angle AC power cord from the three-prong outlet
and close the protective cover.
IMPORTANT: If you place the
device on its side to connect the
AC power cord make sure it is on
a flat, clean surface. Placing the
unit on uneven surfaces or
objects may damage the grill.
1
2
13
6.4 Aux 2: universal 3.5mm auxiliary input inside the compartment
located underneath the keypad
The Escape™ P9 has a weather-proof compartment underneath the keypad
with a 3.5mm auxiliary input and USB power supply output to accommodate
future generation receivers.
1Open the keypad lid from the USB input and press against the
snap-lock mechanism to release the keypad out of the compartment.
2Remove the keypad from the top cover completely. Do not disconnect
the keypad from the wire connector.
3To re-install the keypad, slide it into the locking hook (3) next to the
auxiliary input and gently press the keypad back into the snap-lock (4)
mechanism.
7 Additional features
For additional features and information please check the complete user guide
of the P9 on the www.escapespeakers.com website. (Standby mode, locking
the keypad, anti-theft anchor point, replacing the battery, frequently asked
questions, cleaning instructions and fabric care)
NOTE: To perform a factory reset, turn on the P9 and press the Play/pause
button for 10 seconds until the unit switches off.
1
2
2
3
4
14
8App
Dedicated Escape™ P9 app for iOS® and Android™. Select different audio
sources, adjust the start-up volume, choose between 3 different optimized
DSP and equalizer pre-settings (standard, indoor, outdoor) and 1 custom
setting via a 5-band graphic equalizer to create a responsive curve more
appealing to your personal taste. Thanks to the dual 24-bit DSP processor you
can switch between a direct or wide soundstage. Adjust the balance between
two speakers in Twin mode and lock the keypad control buttons (useful in
professional settings such as bars and restaurants).
The Escape™ P9 App can be downloaded on the Apple App Store or the
Google Play Store. The separate user manual for the app can be downloaded
on the website.
9 Warranty and compliance
9.1 Limited warranty for the unit
The unit is covered by a 1-year limited warranty (*) from the date of invoice
when used in accordance with the Escape™ P9 user manual. The warranty
includes any spare parts and labor required to repair the product. This
warranty does not cover damage caused by abuse, accident, misuse,
negligence, or improper operation or installation, products that have been
modified or products whose identifying number or serial number have been
altered, defaced, or removed. For this warranty to apply, you must use the unit
according to the instructions.
9.2 Limited warranty for the battery
The battery is covered by a 6-month warranty worldwide.
15
9.3 Returning a device for repairs
1Pack the speaker in the original shipping box or a corrugated container
with at least 3 inches / 7.5cm of resilient material to protect the unit
from damage in transit.
NOTE: Escape™ is not responsible for any damage during
transportation.
2Bring the unit and proof of purchase to your retail store, along with a
note explaining the nature of service required.
3If the store of purchase's personnel cannot help you, please send an
defect, proof of purchase and serial number for a Return Merchandise
Authorization number before returning the unit for repair.
4Write the RMA number on the shipping label and ship to: Escape™ -
Ter Heidelaan 50a - 3200 Aarschot - Belgium or an authorized service
center.
Escape™ sells products only through authorized channels to ensure that
customers obtain proper support and service. Any Escape™ product
purchased from an unauthorized dealer or source will not be honored or
repaired under the existing warranty policy. Any sale of products by an
unauthorized source or other manner not authorized by Escape shall void the
warranty on the applicable product. Please check our website for the list of
authorized Escape™ retailers.
NOTE: (*) Escape™’s limited warranty does not modify, affect or substitute the
rights under statutory consumer protection laws that may vary from country
to country.
16
9.4 European Union
Escape bvba hereby declares that this product is in compliance with the
essential requirements and other relevant provisions of Directive 2014/53/EU
and all other applicable EU directive requirements.
9.5 EU WEEE
In accordance with the European Union WEEE (Waste Electrical and Electronic
Equipment) directive effective August 13, 2005, we would like to notify you
that this product may contain regulated materials which upon disposal,
according to the WEEE directive, require special reuse and recycling
processing. When disposing of packaging and other related shipping materials
we encourage you to recycle these items through the normal channels.
Escape™ P9 battery meets the UN38.3 regulations.
Other manuals for P9
2
Table of contents
Other Escape Speakers manuals


