ESD-PROTECT ERGO 400 ST EP0805005 User manual

Bedienungsanleitung /Owners Manual
ANLEITUNG
ESD-PROTECT GmbH
Industriestraße 27 | 56276 Großmaischeid
www.esd-protect.de info@esd-protect.de
Tel. 02689 92870-0 Fax 02689 92870-24 Seite 1
Stand: 07.07.20
6 cm
ESD-Drehstuhl ERGO 400/600 ST
Diese Arbeitsdrehstühle sind das Ergebnis langjähriger
Sitzforschung. Sie haben nur dann den vollen Gewinn,
wenn Sie den Drehstuhl richtig auf Ihre Körperproportionen
einstellen. (Alle Richtungsangaben verstehen sich aus der
Position des Sitzenden.)
These work swivel chairs are the result of many years of seat research.
You can get the full benefit from your chair only if it has been adjusted
correctly to your body size.(All of the directions given are from the
position of the person sitting.)
1. Sitzhöhe / Seat height
Optimale Sitzhöhe: Die Ober- und Unterschenkel bilden zueinander
einen Winkel von mindestens (besser: größer) 90°.
Sitz höher stellen: Sitz entlasten, Hebel nach oben ziehen, in der
gewünschten Sitzhöhe loslassen.
Sitz tiefer stellen: Sitz belasten, Hebel nach unten drücken, in der
gewünschten Sitzhöhe loslassen.
Optimum seat height: The thigh and lower leg together form an angle
of at least (though ideally more than) 90°.
To raise the seat: take your weight off the seat, pull the lever upwards,
adjust the seat to the desired height.
To lower the seat: Put your weight on the seat, pull the lever
downwards, adjust the seat to the desired height.
2. Sitztiefe / Seat depth (Option)
Optimale Sitztiefe: Nutzen Sie zur optimalen Abstützung der
Oberschenkel die, so dass zwischen der Sitzvorderkante und den
Kniekehlen für ungefähr zwei Finger bis zu einer Handbreite Platz ist.
Sitztiefenverstellung: Linken Hebel nach oben drehen, festhalten,
Sitzfläche in die gewünschte Position bewegen.
Zur Arretierung (5fach möglich) den Hebel wieder loslassen.
Automatische Rückführung in die Grundposition: Sitz entlasten, Hebel
nach oben drehen.
Bedienungsanleitung /Owners Manual
ANLEITUNG
ESD-PROTECT GmbH
Industriestraße 27 | 56276 Großmaischeid
www.esd-protect.de info@esd-protect.de
Tel. 02689 92870-0 Fax 02689 92870-24 Seite 2
Stand: 07.07.20
6 cm
Optimum seat depth: In order to achieve optimum support for your
thighs, use the seat-depth adjustment so that there is enough space
for about two fingers up to the width of a hand between the front edge
of the seat and the backs of the knees.
Seat-depth adjustment: Turn the left lever upwards, hold on to it,
move the seat surface into the desired position.
To lock the seat (5 positions possible), let go of the lever again.
To return the seat automatically to its basic position: Take your
weight off the seat, turn the lever upwards.
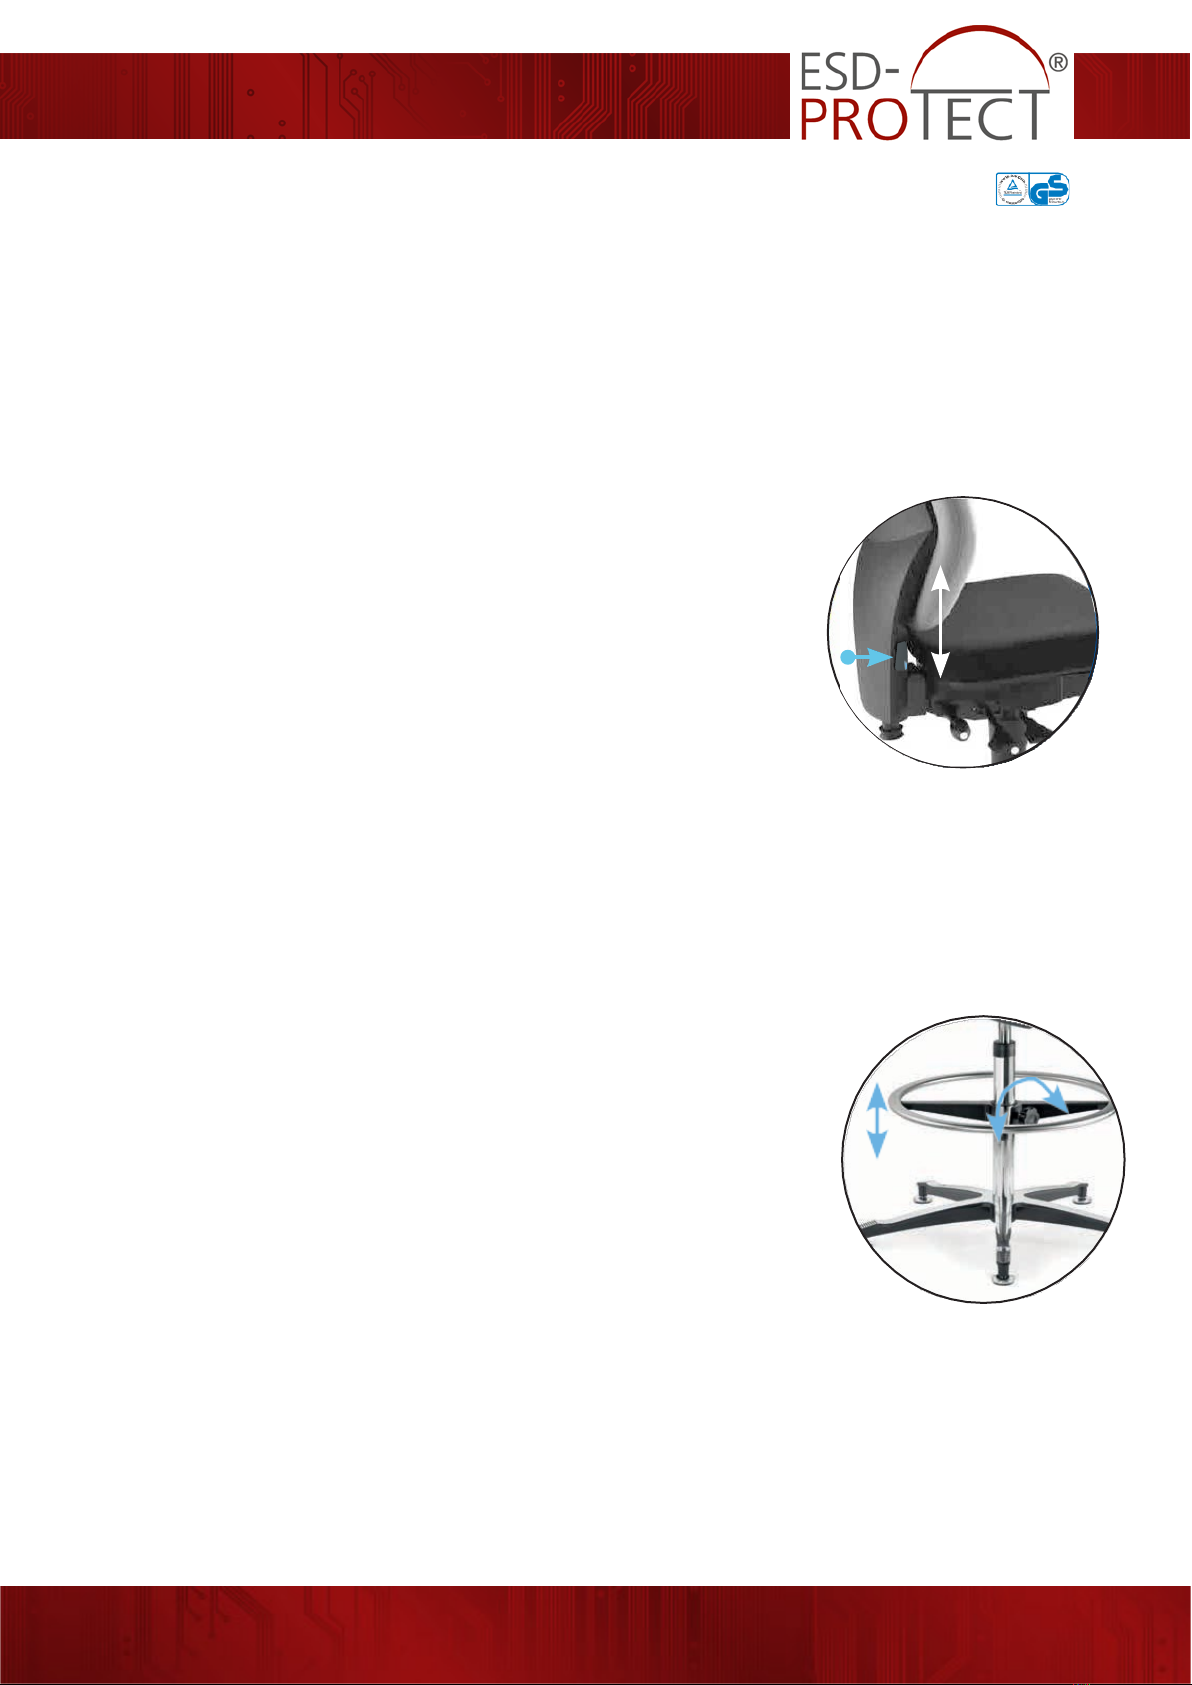
3. Rückenlehnenhöhe / Backrest height
Stellen Sie die Höhe der Rückenlehne so ein, dass die Lumbalstütze
(stärkste Polsterung der Rückenlehne) ungefähr auf Gürtelhöhe
positioniert ist.
Rückenlehne hoch: Taste drücken und mit beiden Händen die
Rückenlehne in die optimale Position hochziehen.
Rückenlehne herunter: Taste drücken und mit beiden Händen die
Rückenlehne in die optimale Position herunterlassen.
Adjust the height of the backrest so that the lumbar support (where the
upholstery of the backrest is thickest) is positioned roughly at the level
of your belt.
To raise the backrest: Depress the button and pull the backrest up into
the optimum position using both hands.
To lower the backrest:Depress the button and lower the backrest into
the optimum position using both hands.
4. Fußring / Foot ring (Option)
Mittels stufenlos höhenverstellbarem Fußring ist ein gefahrloser
Aufstieg auf den Arbeitsstuhl möglich. Die Füße werden auch bei einer
hohen Sitzhöhe abgestützt.
Fußring höher / niedriger stellen: Handrad gegen den Uhrzeiger-sinn
drehen und den Fußring mit beiden Händen in die gewünschte Position
führen. Anschließend im Uhrzeigersinn das Handrad wieder fest
ziehen. Achten Sie auf einen festen Sitz.
An infinitely height-adjustable foot ring makes it possible to climb onto
the work chair safely.
The feet are supported even when the seat height is high.
Raise / lower the foot ring: Turn handwheel in the anticlockwise
direction and use both hands to move it into the position you want.
Then turn the handwheel again by turning it in the clockwise direction.
Make sure it is firmly secured.

Bedienungsanleitung /Owners Manual
ANLEITUNG
ESD-PROTECT GmbH
Industriestraße 27 | 56276 Großmaischeid
www.esd-protect.de info@esd-protect.de
Tel. 02689 92870-0 Fax 02689 92870-24 Seite 3
Stand: 07.07.20
– 3°
0°
– 6°
+
–
5. Synchrontechnik
Wechseln Sie die Oberkörperhaltung möglichst oft, damit sich die
Muskulatur nicht verkrampft = dynamisches Sitzen.
Aktivieren der Synchrontechnik: Hebel nach vorn drehen; Sitzfläche
und Rückenlehne folgen synchron der Körperbewegung = dynamisches
Sitzen.
Arretieren der Synchrontechnik: Hebel nach hinten drehen; Sitz und
Rückenlehne werden stufenlos in beliebiger Position fixiert.
Change your upper-body posture as often as possible
so that your muscles do not become cramped = dynamic seated
posture.
To activate the synchronised mechanism: Turn the cupped handle
towards the front; the seat and backrest follow your body’s movements
in a synchronised manner = dynamic seated posture.
To lock the synchronised mechanism:Turn the cupped handle towards
the back; the seat and back-rest are fixed in any desired position in an
infinitely adjustable manner.
6. Rückenlehnengegendruck / Tension adjustment
Stellen Sie den Gegendruck der Rückenlehne so ein, dass der
Oberkörper aufgerichtet, aber nicht nach vorn gedrückt wird.
Mehr Rückenlehnengegendruck: Handrad im Uhrzeigersinn drehen.
Weniger Rückenlehnengegendruck: Handrad gegen den Uhrzeigersinn
drehen.
Adjust the backrest tension so that the upper body is held upright but is
not pushed forwards.
To increase the backrest tension: Turn the handwheel clockwise.
To decrease the backrest tension: Turn the handwheel anticlockwise.
7. Sitzneigung / Seat tilt
Arbeiten Sie vorwiegend in den vorderen Sitzhaltungen (z.B. am
Bildschirm), nutzen Sie bitte die Sitzneigeverstellung, um Druckstellen
an den Unterseiten der Oberschenkel zu vermeiden.
Stärkere Neigung: Sitz zur Verstellung vollständig entlasten. Hebel
(Grundposition 0°) im Uhrzeigersinn (nach vorn) bis zum 1. Rastpunkt (-
6°) oder zum 2. Rastpunkt (-3°) drehen.
Flachere Neigung: Zur Rückführung in die Grundposition (0°) Hebel
gegen den Uhrzeigersinn (nach hinten) zurückdrehen.

Bedienungsanleitung /Owners Manual
ANLEITUNG
ESD-PROTECT GmbH
Industriestraße 27 | 56276 Großmaischeid
www.esd-protect.de info@esd-protect.de
Tel. 02689 92870-0 Fax 02689 92870-24 Seite 4
Stand: 07.07.20
➌
➊
➋
➊
➋
If you work in predominantly forward postures (e.g. at a monitor),
please use the seat-tilt adjustment in order to avoid pressure points on
the undersides of the thighs.
To increase the seat tilt adustment: Take all your weight off the seat.
Turn the lever (basic position 0°) clockwise (towards the front) to the
1st locking point (-6°) or the 2nd locking point (-3°).
To reduce the seat tilt adustment: To return the seat to the basic
position (0°), turn the lever anticlockwise (towards the rear).
8. 3F-Armlehnen / 3F-Armrests (Option)
Stellen Sie die Breite der Armlehnen so ein, dass die Ellbogen nicht am
Körper anliegen. Die Höhe der Armlehnen ist dann richtig, wenn die
Ellbogen aufliegen und somit die Schulter- und Nackenmuskulatur
entspannt ist.
Höhenverstellbar (10 cm; Taste 1drücken), werkzeuglos
breitenverstellbar (je Seite 3 cm; Exzenterverschluss 2öffnen –
Armlehne in gewünschte Position schieben – Exzenterverschluss
schließen), tiefenverstellbar (4 cm; Pad 3nach vorn oder hinten
führen).
Adjust the width of the armrests so that the elbows are not pressed
against the body. The armrests are at
the correct height when the elbows are resting on them and the
shoulder and neck muscles are relaxed.
Height-adjustable (10 cm; press button), width-adjustable (3 cm per
side) without the use of tools; open
the eccentric closure – push the armrest into the desired position –
close the eccentric closure),
depth-adjustable (4 cm; move the pad forwards or backwards).
9. 2F-Armlehnen / 2F-Armrests (Option)
10 cm höhenverstellbar 1und 3 cm je Seite werkzeuglos
breitenverstellbar 2.
Height-adjustable (10 cm) 1and width-adjustable (3 cm per side)
2without the use of tools.
This manual suits for next models
4
Table of contents
Other ESD-PROTECT Indoor Furnishing manuals


Popular Indoor Furnishing manuals by other brands

Regency
Regency LWMS3015 Assembly instructions

Furniture of America
Furniture of America CM7751C Assembly instructions

Safavieh Furniture
Safavieh Furniture Estella CNS5731 manual

PLACES OF STYLE
PLACES OF STYLE Ovalfuss Assembly instruction

Trasman
Trasman 1138 Bo1 Assembly manual

Costway
Costway JV10856 manual


