Espressif ESP32-LyraT Operator's manual

Read the Docs Template
Documentation
Release
Read the Docs
Jul 01, 2018


Contents
1 Get Started 3
1.1 ESP32-LyraT V4.3 Getting Started Guide ................................ 4
1.2 About ESP-ADF ............................................. 8
1.3 Setup ESP-IDF .............................................. 8
1.4 Get ESP-ADF .............................................. 8
1.5 Setup Path to ESP-ADF ......................................... 9
1.6 Start a Project .............................................. 9
1.7 Connect and Configure .......................................... 9
1.8 Build, Flash and Monitor ......................................... 10
1.9 Update ESP-ADF ............................................ 10
1.10 Related Documents ............................................ 11
2 API Reference 27
2.1 Audio Framework ............................................ 28
2.2 Audio Streams .............................................. 53
2.3 Codecs .................................................. 57
2.4 Peripherals ................................................ 58
2.5 Abstraction Layer ............................................ 62
2.6 Configuration Options .......................................... 65
3 Design Guide 67
3.1 Project Design .............................................. 67
3.2 Design Considerations .......................................... 69
3.3 Software Design ............................................. 72
3.4 Development Boards ........................................... 75
4 Resources 87
5 Copyrights and Licenses 89
5.1 Software Copyrights ........................................... 89
6 About 91
i

ii

Read the Docs Template Documentation, Release
2 Contents

CHAPTER 1
Get Started
This document is intended to help users set up the software environment for the development of audio applications
using hardware based on the ESP32 by Espressif. Through a simple example, we would like to illustrate how to use
ESP-ADF (Espressif Audio Development Framework).
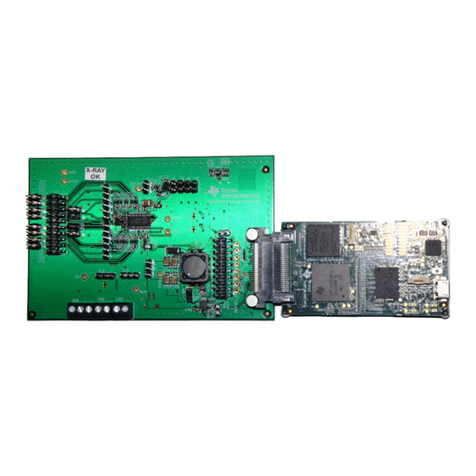
To make the start with ESP-ADF quicker, Espressif designed ESP32 LyraT, a development board intended to build an
audio application with the ESP32.
Fig. 1.1: ESP32 LyraT audio development board
Click the link below to get started with this board.
3

Read the Docs Template Documentation, Release
1.1 ESP32-LyraT V4.3 Getting Started Guide
This guide provides users with functional descriptions, configuration options for ESP32-LyraT V4.3 audio develop-
ment board, as well as how to get started with the ESP32-LyraT board. Check section Other Versions of LyraT, if you
have different version of this board.
The ESP32-LyraT is a hardware platform designed for the dual-core ESP32 audio applications, e.g., Wi-Fi or BT
audio speakers, speech-based remote controllers, smart-home appliances with audio functionality(ies), etc.
1.1.1 What You Need
• 1 × ESP32 LyraT V4.3 board
• 2 x 4-ohm speakers with Dupont female jumper wires or headphones with a 3.5 mm jack
• 2 x Micro-USB 2.0 cables, Type A to Micro B
• 1 × PC loaded with Windows, Linux or Mac OS
If you like to start using this board right now, go directly to section Start Application Development.
Overview
The ESP32-LyraT V4.3 is an audio development board produced by Espressif built around ESP32. It is intended for
audio applications, by providing hardware for audio processing and additional RAM on top of what is already onboard
of the ESP32 chip. The specific hardware includes:
•ESP32-WROVER Module
•Audio Codec Chip
• Dual Microphones on board
•Headphone input
•2 x 3-watt Speaker output
• Dual Auxiliary Input
•MicroSD Card slot (1 line or 4 lines)
•Six buttons (2 physical buttons and 4 touch buttons)
•JTAG header
• Integrated USB-UART Bridge Chip
• Li-ion Battery-Charge Management
The block diagram below presents main components of the ESP32-LyraT and interconnections between components.
Components
The following list and figure describe key components, interfaces and controls of the ESP32-LyraT used in this guide.
This covers just what is needed now. For detailed technical documentation of this board, please refer to ESP32-LyraT
V4.3 Hardware Reference and ESP32 LyraT V4.3 schematic (PDF).
ESP32-WROVER Module The ESP32-WROVER module contains ESP32 chip to provide Wi-Fi / BT connectivity
and data processing power as well as integrates 32 Mbit SPI flash and 32 Mbit PSRAM for flexible data storage.
4 Chapter 1. Get Started

Read the Docs Template Documentation, Release
Fig. 1.2: ESP32-LyraT Block Diagram
Headphone Output Output socket to connect headphones with a 3.5 mm stereo jack.
Note: The socket may be used with mobile phone headsets and is compatible with OMPT standard headsets
only. It does work with CTIA headsets. Please refer to Phone connector (audio) on Wikipedia.
Left Speaker Output Output socket to connect 4 ohm speaker. The pins have a standard 2.54 mm / 0.1” pitch.
Right Speaker Output Output socket to connect 4 ohm speaker. The pins have a standard 2.54 mm / 0.1” pitch.
Boot/Reset Press Keys Boot button: holding down the Boot button and momentarily pressing the Reset button to
initiate the firmware upload mode. Then you can upload firmware through the serial port. Reset button: pressing
this button alone resets the system.
Audio Codec Chip The Audio Codec Chip, ES8388, is a low power stereo audio codec with a headphone amplifier.
It consists of 2-channel ADC, 2-channel DAC, microphone amplifier, headphone amplifier, digital sound effects,
analog mixing and gain functions. It is interfaced with ESP32-WROVER Module over I2S and I2S buses to
provide audio processing in hardware independently from the audio application.
USB-UART Port Functions as the communication interface between a PC and the ESP32 WROVER module.
USB Power Port Provides the power supply for the board.
Standby / Charging LEDs The Standby green LED indicates that power has been applied to the Micro USB Port.
The Charging red LED indicates that a battery connected to the Battery Socket is being charged.
Power Switch Power on/off knob: toggling it to the left powers the board on; toggling it to the right powers the board
off.
Power On LED Red LED indicating that Power On Switch is turned on.
1.1. ESP32-LyraT V4.3 Getting Started Guide 5

Read the Docs Template Documentation, Release
Fig. 1.3: ESP32-LyraT V4.3 Board Layout Overview
6 Chapter 1. Get Started

Read the Docs Template Documentation, Release
1.1.2 Start Application Development
Before powering up the ESP32-LyraT, please make sure that the board has been received in good condition with no
obvious signs of damage.
Initial Setup
Prepare the board for loading of the first sample application:
1. Connect 4-ohm speakers to the Right and Left Speaker Output. Connecting headphones to the Headphone
Output is an option.
2. Plug in the Micro-USB cables to the PC and to both USB ports of the ESP32 LyraT.
3. The Standby LED (green) should turn on. Assuming that a battery is not connected, the Charging LED (red)
will blink every couple of seconds.
4. Toggle left the Power On Switch.
5. The red Power On LED should turn on.
If this is what you see on the LEDs, the board should be ready for application upload. Now prepare the PC by loading
and configuring development tools what is discussed in the next section.
Develop Applications
If the ESP32 LyraT is initially set up and checked, you can proceed with preparation of the development tools. Go to
section Get Started, which will walk you through the following steps:
•Setup ESP-IDF in your PC that provides a common framework to develop applications for the ESP32 in C
language;
•Get ESP-ADF to have the API specific for the audio applications;
•Setup Path to ESP-ADF to make the framework aware of the audio specific API;
•Start a Project that will provide a sample audio application for the ESP32-LyraT board;
•Connect and Configure to prepare the application for loading;
•Build, Flash and Monitor this will finally run the application and play some music.
1.1.3 Summary of Key Changes from LyraT V4.2
• Removed Red LED indicator light.
• Introduced headphone jack insert detection.
• Replaced single Power Amplifier (PA) chip with two separate chips.
• Updated power management design of several circuits: Battery Charging, ESP32, MicorSD, Codec Chip and
PA.
• Updated electrical implementation design of several circuits: UART, Codec Chip, Left and Right Microphones,
AUX Input, Headphone Output, MicroSD, Push Buttons and Automatic Upload.
1.1. ESP32-LyraT V4.3 Getting Started Guide 7

Read the Docs Template Documentation, Release
1.1.4 Other Versions of LyraT
•ESP32-LyraT V4.2 Getting Started Guide
•ESP32-LyraT V4 Getting Started Guide
1.1.5 Related Documents
•ESP32-LyraT V4.3 Hardware Reference
•ESP32 LyraT V4.3 schematic (PDF)
•ESP32 Datasheet (PDF)
•ESP32-WROVER Datasheet (PDF)
If you do not have the ESP32 LyraT board, you can still use ESP-ADF for the ESP32 based audio applications. This
is providing your board has a compatible audio codec chip, or you develop a driver to support communication with
your specific audio codec chip.
1.2 About ESP-ADF
The ESP-ADF is available as a set of components to extend the functionality already delivered by the ESP-IDF
(Espressif IoT Development Framework).
To use ESP-ADF you need set up the ESP-IDF first, and this is described in the next section.
1.3 Setup ESP-IDF
Configure your PC according to ESP32 Documentation.Windows,Linux and Mac OS operating systems are sup-
ported.
You have a choice to compile and upload code to the ESP32 by command line with make or using Eclipse IDE.
Note: We are using ~/esp directory to install the toolchain, ESP-IDF, ESP-ADF and sample applications. You can
use a different directory, but need to adjust respective commands.
To make the installation easier and less prone to errors, use the ~/esp default directory for the installation. Once you
get through ESP-IDF setup and move to the ESP-ADF, you will notice that installation of the ESP-ADF follows the
similar process. This should make it even easier to get up and running with the ESP-ADF.
If this is your first exposure to the ESP32 and ESP-IDF, then it is recommended to get familiar with hello_world and
blink examples first. Once you can build, upload and run these two examples, then you are ready to proceed to the
next section.
1.4 Get ESP-ADF
Having the ESP-IDF to compile, build and upload application for ESP32, you can now move to installing audio specific
API / libraries. They are provided in ESP-ADF repository. To get it, open terminal, navigate to the directory to put the
ESP-ADF, and clone it using git clone command:
8 Chapter 1. Get Started

Read the Docs Template Documentation, Release
cd ~/esp
git clone --recursive https://github.com/espressif/esp-adf.git
ESP-ADF will be downloaded into ~/esp/esp-adf.
Note: Do not miss the --recursive option. If you have already cloned ESP-ADF without this option, run another
command to get all the submodules:
cd ~/esp/esp-adf
git submodule update --init
1.5 Setup Path to ESP-ADF
The toolchain programs access ESP-ADF using ADF_PATH environment variable. This variable should be set up on
your PC, otherwise the projects will not build. The process to set it up is analogous to setting up the IDF_PATH
variable, please see instructions in ESP-IDF documentation under Add IDF_PATH to User Profile.
1.6 Start a Project
After initial preparation you are ready to build the first audio application for the ESP32. The process has already been
described in ESP-IDF documentation. Now we would like to discuss again the key steps and show how the toolchain
is able to access the ESP-ADF components by using the ADF_PATH variable.
Note: ESP-ADF is based on a specific release of the ESP-IDF. You will see this release cloned with ESP-ADF as a
subdirectory, or more specifically as a submodule e.g. esp-idf @ ca3faa61 visible on the GitHub. Just follow
this instruction and the build scripts will automatically reach ESP-IDF from the submodule.
To demonstrate how to build an application, we will use get-started/play_mp3 project from examples directory in the
ADF.
Copy get-started/play_mp3 to ~/esp directory:
cd ~/esp
cp -r $ADF_PATH/examples/get-started/play_mp3 .
You can also find a range of example projects under the examples directory in the ESP-ADF repository. These example
project directories can be copied in the same way as presented above, to begin your own projects.
1.7 Connect and Configure
Connect the audio ESP32 board to the PC, check under what serial port the board is visible and verify if serial
communication works as described ESP-IDF Documentation.
At the terminal window, go to the directory of play_mp3 application and configure it with menuconfig by select-
ing the serial port and upload speed:
1.5. Setup Path to ESP-ADF 9

Read the Docs Template Documentation, Release
cd ~/esp/play_mp3
make menuconfig
Save the configuration.
1.8 Build, Flash and Monitor
Now you can build, upload and check the application. Run:
make flash monitor -j5
This will build the application including ESP-IDF / ESP-ADF components, upload binaries to your ESP32 board and
start the monitor.
...
I (303) PLAY_MP3_FLASH: [ 1 ] Start audio codec chip
I (323) PLAY_MP3_FLASH: [ 2 ] Create audio pipeline, add all elements to pipeline,
˓→and subscribe pipeline event
I (323) PLAY_MP3_FLASH: [2.1] Create mp3 decoder to decode mp3 file and set custom
˓→read callback
I (333) PLAY_MP3_FLASH: [2.2] Create i2s stream to write data to codec chip
I (343) PLAY_MP3_FLASH: [2.3] Register all elements to audio pipeline
I (353) PLAY_MP3_FLASH: [2.4] Link it together [mp3_music_read_cb]-->mp3_decoder-->
˓→i2s_stream-->[codec_chip]
I (363) PLAY_MP3_FLASH: [ 3 ] Setup event listener
I (363) PLAY_MP3_FLASH: [3.1] Listening event from all elements of pipeline
I (373) PLAY_MP3_FLASH: [ 4 ] Start audio_pipeline
W (373) AUDIO_ELEMENT: [mp3] RESUME:Element has not running,state:3,task_run:1
W (393) AUDIO_ELEMENT: [i2s] RESUME:Element has not running,state:3,task_run:1
I (403) PLAY_MP3_FLASH: [ *] Receive music info from mp3 decoder, sample_rates=44100,
˓→bits=16, ch=2
W (433) AUDIO_ELEMENT: [i2s] RESUME:Element has not running,state:3,task_run:1
I (7183) PLAY_MP3_FLASH: [ 5 ] Stop audio_pipeline
W (7183) AUDIO_PIPELINE: There are no listener registered
If there are no issues, besides the above log, you should hear a sound played for about 7 seconds by the speakers or
headphones connected to your audio board. Reset the board to hear it again if required.
Now you are ready to try some other examples, or go right to developing your own applications. Check how the
examples are made aware of location of the ESP-ADF. Open the get-started/play_mp3/Makefile and you should see
PROJECT_NAME := play_mp3
include $(ADF_PATH)/project.mk
The second line contains $ADF_PATH to point the toolchain to the ESP-ADF. You need similar Makefile in your
own applications developed with the ESP-ADF.
1.9 Update ESP-ADF
After some time of using ESP-ADF, you may want to update it to take advantage of new features or bug fixes. The
simplest way to do so is by deleting existing esp-adf folder and cloning it again, which is same as when doing initial
installation described in sections Get ESP-ADF.
10 Chapter 1. Get Started

Read the Docs Template Documentation, Release
Another solution is to update only what has changed. This method is useful if you have a slow connection to the
GitHub. To do the update run the following commands:
cd ~/esp/esp-adf
git pull
git submodule update --init --recursive
The git pull command is fetching and merging changes from ESP-ADF repository on GitHub. Then git
submodule update --init --recursive is updating existing submodules or getting a fresh copy of new
ones. On GitHub the submodules are represented as links to other repositories and require this additional command to
get them onto your PC.
1.10 Related Documents
1.10.1 ESP32-LyraT V4.2 Getting Started Guide
This guide provides users with functional descriptions, configuration options for ESP32-LyraT V4.2 audio develop-
ment board, as well as how to get started with the ESP32-LyraT board.
The ESP32-LyraT development board is a hardware platform designed for the dual-core ESP32 audio applications,
e.g., Wi-Fi or BT audio speakers, speech-based remote controllers, smart-home appliances with audio functional-
ity(ies), etc.
If you like to start using this board right now, go directly to section Start Application Development.
What You Need
• 1 × ESP32 LyraT V4.2 board
• 2 x 4-ohm speakers with Dupont female jumper wires or headphones with a 3.5 mm jack
• 2 x Micro-USB 2.0 cables, Type A to Micro B
• 1 × PC loaded with Windows, Linux or Mac OS
Overview
The ESP32-LyraT V4.2 is an audio development board produced by Espressif built around ESP32. It is intended for
audio applications, by providing hardware for audio processing and additional RAM on top of what is already onboard
of the ESP32 chip. The specific hardware includes:
•ESP32-WROVER Module
•Audio Codec Chip
• Dual Microphones on board
•Headphone input
•2 x 3-watt Speaker output
• Dual Auxiliary Input
•MicroSD Card slot (1 line or 4 lines)
•Six buttons (2 physical buttons and 4 touch buttons)
•JTAG header
1.10. Related Documents 11

Read the Docs Template Documentation, Release
• Integrated USB-UART Bridge Chip
• Li-ion Battery-Charge Management
The block diagram below presents main components of the ESP32-LyraT and interconnections between components.
Fig. 1.4: ESP32-LyraT Block Diagram
Functional Description
The following list and figure describe key components, interfaces and controls of the ESP32-LyraT board.
ESP32-WROVER Module The ESP32-WROVER module contains ESP32 chip to provide Wi-Fi / BT connectivity
and data processing power as well as integrates 32 Mbit SPI flash and 32 Mbit PSRAM for flexible data storage.
Green and Red LEDs Two general purpose LEDs controlled by ESP32-WROVER Module to indicate certain op-
eration states of the audio application using dedicated API.
Function DIP Switch Used to configure function of GPIO12 to GPIO15 pins that are shared between devices, pri-
marily between JTAG Header and MicroSD Card. By default, the MicroSD Card is enabled with all switches
in OFF position. To enable the JTAG Header instead, switches in positions 3, 4, 5 and 6 should be put ON.
If JTAG is not used and MicroSD Card is operated in the one-line mode, then GPIO12 and GPIO13 may be
assigned to other functions. Please refer to ESP32 LyraT V4.2 schematic for more details.
JTAG Header Provides access to the JTAG interface of ESP32-WROVER Module. It may be used for debugging,
application upload, as well as implementing several other functions, e.g., Application Level Tracing. See JTAG
Header / JP7 for pinout details. Before using JTAG signals to the header, Function DIP Switch should be
enabled. Please note that when JTAG is in operation, MicroSD Card cannot be used and should be disconnected
because some of JTAG signals are shared by both devices.
UART Header Serial port: provides access to the serial TX/RX signals between ESP32-WROVER Module and
USB-UART Bridge Chip.
I2C Header Provides access to the I2C interface. Both ESP32-WROVER Module and Audio Codec Chip are
connected to this interface. See I2C Header / JP5 for pinout details.
12 Chapter 1. Get Started

Read the Docs Template Documentation, Release
MicroSD Card The development board supports a MicroSD card in SPI/1-bit/4-bit modes, and can store or play
audio files in the MicroSD card. See MicroSD Card / J5 for pinout details. Note that JTAG cannot be used and
should be disconnected by setting Function DIP Switch when MicroSD Card is in operation, because some of
signals are shared by both devices.
I2S Header Provides access to the I2S interface. Both ESP32-WROVER Module and Audio Codec Chip are
connected to this interface. See I2S Header / JP4 for pinout details.
Left Microphone Onboard microphone connected to IN1 of the Audio Codec Chip.
AUX Input Auxiliary input socket connected to IN2 (left and right channel) of the Audio Codec Chip. Use a 3.5
mm stereo jack to connect to this socket.
Headphone Output Output socket to connect headphones with a 3.5 mm stereo jack.
Fig. 1.5: ESP32-LyraT V4.2 Board Layout
Right Microphone Onboard microphone connected to IN1 of the Audio Codec Chip.
Left Speaker Output Output socket to connect 4 ohm speaker. The pins have a standard 2.54 mm / 0.1” pitch.
Right Speaker Output Output socket to connect 4 ohm speaker. The pins have a standard 2.54 mm / 0.1” pitch.
PA Chip A power amplifier used to amplify stereo audio signal from the Audio Codec Chip for driving two 4-ohm
speakers.
1.10. Related Documents 13

Read the Docs Template Documentation, Release
Boot/Reset Press Keys Boot button: holding down the Boot button and momentarily pressing the Reset button to
initiate the firmware download mode. Then you can download firmware through the serial port. Reset button:
pressing this button alone resets the system.
Touch Pad Buttons Four touch pads labeled Play,Sel,Vol+ and Vol-. They are routed to ESP32-WROVER Module
and intended for development and testing of a UI for audio applications using dedicated API.
Audio Codec Chip The Audio Codec Chip, ES8388, is a low power stereo audio codec with a headphone amplifier.
It consists of 2-channel ADC, 2-channel DAC, microphone amplifier, headphone amplifier, digital sound effects,
analog mixing and gain functions. It is interfaced with ESP32-WROVER Module over I2S and I2S buses to
provide audio processing in hardware independently from the audio application.
EN Header Install a jumper on this header to enable automatic loading of application to the ESP32. Install or remove
jumpers together on both IO0 and EN headers.
IO0 Header Install a jumper on this header to enable automatic loading of application to the ESP32. Install or remove
jumpers together on both IO0 and EN headers.
Function Press Keys Two key labeled Rec and Mode. They are routed to ESP32-WROVER Module and intended
for developing and testing a UI for audio applications using dedicated API.
USB-UART Bridge Chip A single chip USB-UART bridge provides up to 1 Mbps transfers rate.
USB-UART Port Functions as the communication interface between a PC and the ESP32 module.
USB Power Port Provides the power supply for the board.
Standby / Charging LEDs The Standby green LED indicates that power has been applied to the Micro USB Port.
The Charging red LED indicates that a battery connected to the Battery Socket is being charged.
Battery Charger Chip Constant current & constant voltage linear charger for single cell lithium-ion batteries
AP5056. Used for charging of a battery connected to the Battery Socket over the Micro USB Port.
Power On Switch Power on/off knob: toggling it to the left powers the board on; toggling it to the right powers the
board off.
Battery Socket Two pins socket to connect a single cell Li-ion battery.
Power On LED Red LED indicating that Power On Switch is turned on.
Note: The Power On Switch does not affect / disconnect the Li-ion battery charging.
Hardware Setup Options
There are a couple of options to change the hardware configuration of the ESP32-LyraT board. The options are
selectable with the Function DIP Switch.
14 Chapter 1. Get Started

Read the Docs Template Documentation, Release
Enable MicroSD Card in 1-wire Mode
DIP SW Position
1 OFF
2 OFF
3 OFF
4 OFF
5 OFF
6 OFF
7 OFF 1
8 n/a
1. AUX Input detection may be enabled by toggling the DIP SW 7 ON
In this mode:
•JTAG functionality is not available
•Vol- touch button is available for use with the API
Enable MicroSD Card in 4-wire Mode
DIP SW Position
1 ON
2 ON
3 OFF
4 OFF
5 OFF
6 OFF
7 OFF
8 n/a
In this mode:
•JTAG functionality is not available
•Vol- touch button is not available for use with the API
•AUX Input detection from the API is not available
Enable JTAG
DIP SW Position
1 OFF
2 OFF
3 ON
4 ON
5 ON
6 ON
7 ON
8 n/a
1.10. Related Documents 15

Read the Docs Template Documentation, Release
In this mode:
•MicroSD Card functionality is not available, remove the card from the slot
•Vol- touch button is not available for use with the API
•AUX Input detection from the API is not available
Allocation of ESP32 Pins
Several pins / terminals of ESP32 modules are allocated to the on board hardware. Some of them, like GPIO0 or
GPIO2, have multiple functions. Please refer to the tables below or ESP32 LyraT V4.2 schematic for specific details.
Red / Green LEDs
ESP32 Pin LED Color
1 GPIO19 Red LED
2 GPIO22 Green LED
Touch Pads
ESP32 Pin Touch Pad Function
1 GPIO33 Play
2 GPIO32 Set
3 GPIO13 Vol- 1
4 GPIO27 Vol+
1. Vol- function is not available if JTAG is used. It is also not available for the MicroSD Card configured to
operate in 4-wire mode.
MicroSD Card / J5
ESP32 Pin MicroSD Signal
1 MTDI / GPIO12 DATA2
2 MTCK / GPIO13 CD / DATA3
3 MTDO / GPIO15 CMD
4 MTMS / GPIO14 CLK
5 GPIO2 DATA0
6 GPIO4 DATA1
7 GPIO21 CD
16 Chapter 1. Get Started
Table of contents
Other Espressif Motherboard manuals
Espressif
Espressif ESP-WROVER-KIT User manual
Espressif
Espressif ESP32-LyraTD-MSC User manual
Espressif
Espressif ESP32-DevKitC User manual
Espressif
Espressif ESP-EYE V2.1 User manual
Espressif
Espressif ESP32-C3-DevKitM-1 User manual
Espressif
Espressif ESP32 User manual
Espressif
Espressif ESP32-Ethernet-Kit User manual
Espressif
Espressif ESP32-DevKitC V4 User manual

