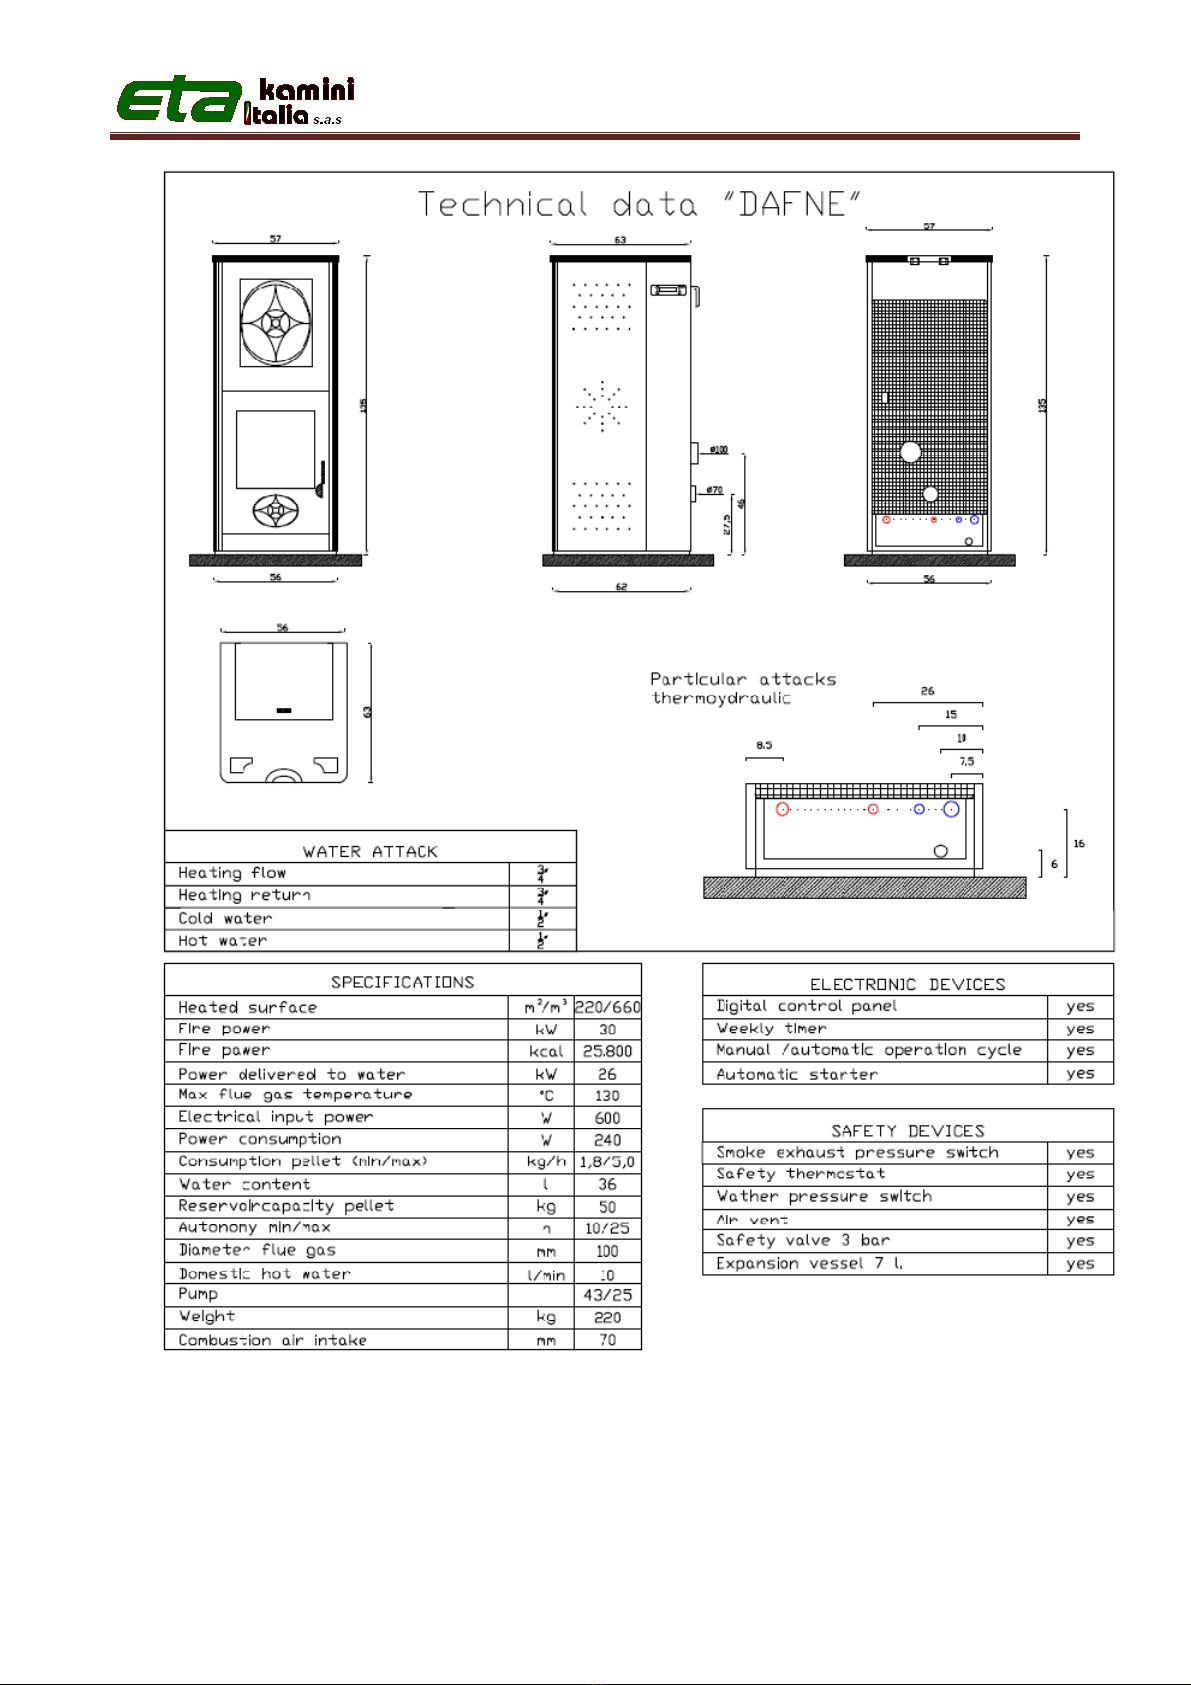
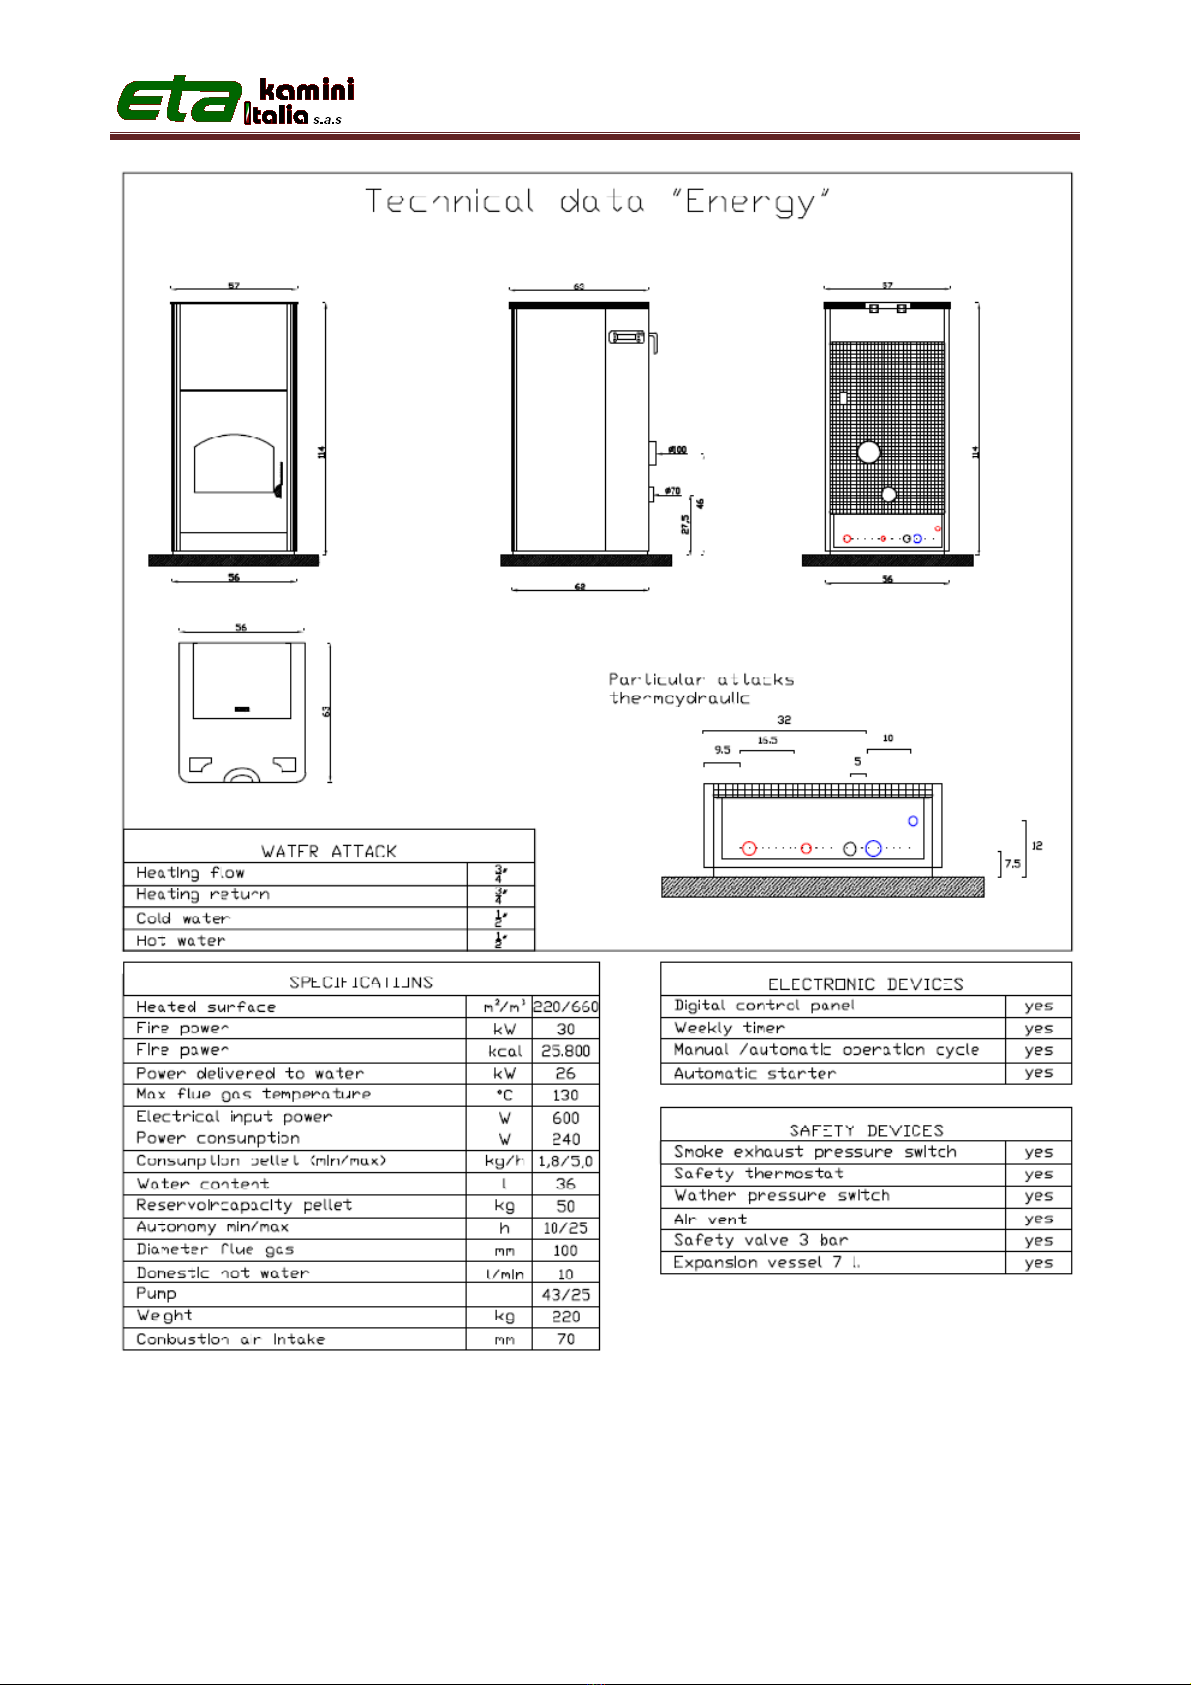
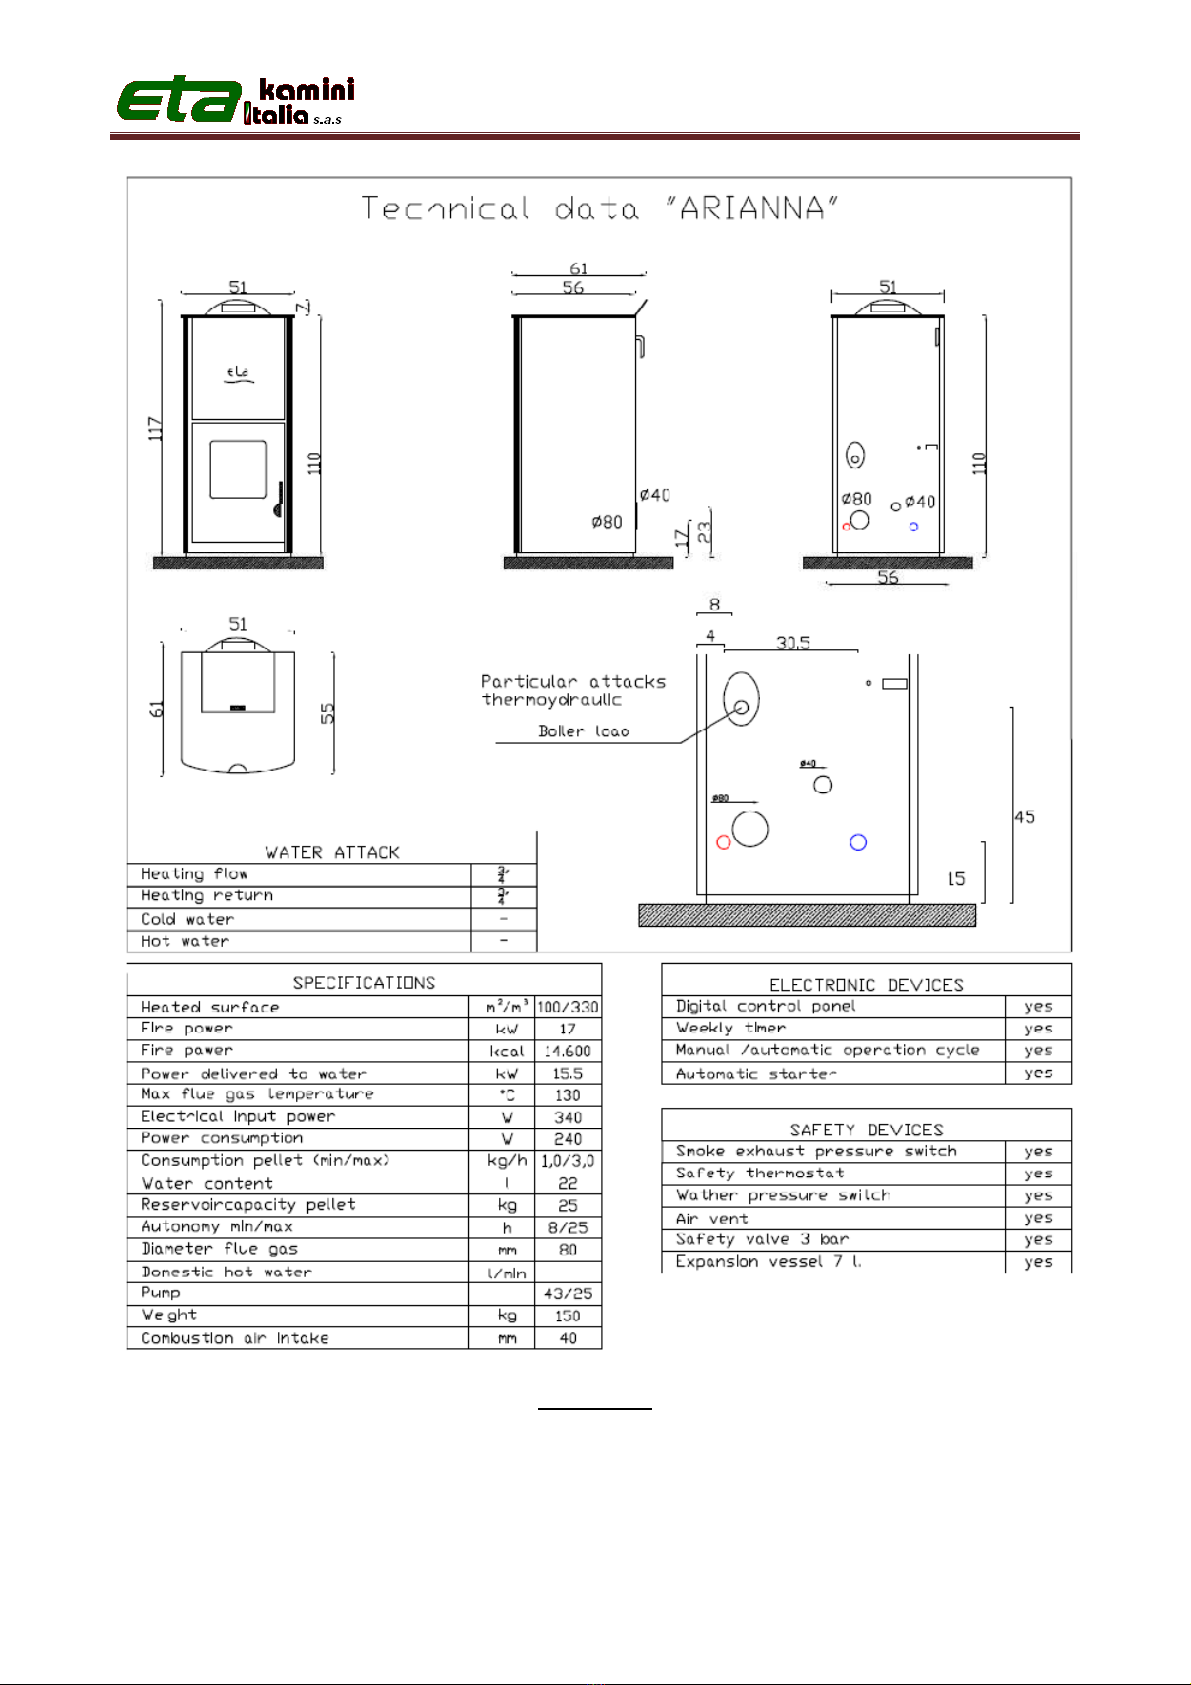
Instruction book/Use/Maintenance/Warranty Dafne/Mini Dafne/Energy/Arianna
10
SAFETY DEVICES
Listed below are the safety devices installed on the stove. Please read this section carefully so as
to control the proper operation and to avoid any failures or malfunctions due to negligence by the
user in order not to encumber or seek to break up the other components of the product.
• WATER TEMPERATURE SENSOR: Check water temperature into system and send to the
checking switchboard, connecting in this way pump operation and power modulation. If
temperature gets high, display send an alarm and stove stops working.
• SAFETY THERMOSTAT WITH MANUAL RESET: Constantly check water temperature into
stove and, in case ich is high than 90°C, it stops screw conveyor and fuel sending.
• SAFETY VALVE 3 bar: It starts when water pressure inside system exceeds operation pressure
(max 1,2 bar), reaching the limit 3 bar, valve setting pressure; valve is open and causing water
outlet. An exhaust pipe is required.
• MANOMETER: Located under fuel tank cap, it allow water pressure checking inside system
(optimal pressure 1,2 bar cold).
• WATER PRESSURE: In case of water deficiency in the stove, or no sufficient pressure, it stops
feed of screw conveyor and fuel sending.
• SMOKE THERMOCOUPLE: Placed on smoke exhaust and it checks their temperature, it
regulates the combustion and, in case of anomaly (too high temperature) alarm 1 is show on
display, stove is blocked.
• SMOKEC PRESSURE SWITCH: Checks regular smokes flow through the fan. If it presents a
depressore , due to chimney obstructions (soot or other), breaks stove
• EXPANSION VESSEL: It absorbs water volume increase due to overheating, it’s located at base
of boiler.
• JOLLY VRNT: ÉIt’s on the upper side of the stove and allow exit of air inside boiler.