Morso SQUIRREL 551 User manual

1
Badger - Gas StovesBadger - Gas Stoves
Badger - Gas Stoves
ModelNo.551-WithOpenFlue
OWNER’S GUIDEOWNER’S GUIDE
OWNER’S GUIDE
THESE APPLIANCES ARE FOR USE WITH NATHESE APPLIANCES ARE FOR USE WITH NA
THESE APPLIANCES ARE FOR USE WITH NATURAL GAS (G20)TURAL GAS (G20)
TURAL GAS (G20)TURAL GAS (G20)
TURAL GAS (G20)
OPEN FLUE STOVE MODEL 551 IS FOR USE WITH PROPOPEN FLUE STOVE MODEL 551 IS FOR USE WITH PROP
OPEN FLUE STOVE MODEL 551 IS FOR USE WITH PROPANE GAS (G31) WHENANE GAS (G31) WHEN
ANE GAS (G31) WHENANE GAS (G31) WHEN
ANE GAS (G31) WHEN
CONVERTED USING KIT NO. 0555111.CONVERTED USING KIT NO. 0555111.
CONVERTED USING KIT NO. 0555111.
BALANCED FLUE STOVE MODEL 552 IS FOR USE WITH PROPBALANCED FLUE STOVE MODEL 552 IS FOR USE WITH PROP
BALANCED FLUE STOVE MODEL 552 IS FOR USE WITH PROPANE GAS (G31) WHENANE GAS (G31) WHEN
ANE GAS (G31) WHENANE GAS (G31) WHEN
ANE GAS (G31) WHEN
CONVERTED USING KIT NO. 0555211.CONVERTED USING KIT NO. 0555211.
CONVERTED USING KIT NO. 0555211.
THESE APPLIANCES ARE SUITTHESE APPLIANCES ARE SUIT
THESE APPLIANCES ARE SUITABLE ONLABLE ONL
ABLE ONLABLE ONL
ABLE ONLY FOR INSTY FOR INST
Y FOR INSTY FOR INST
Y FOR INSTALLAALLA
ALLAALLA
ALLATION IN THE UNITEDTION IN THE UNITED
TION IN THE UNITEDTION IN THE UNITED
TION IN THE UNITED
KINGDOM (GB) AND THE REPUBLIC OF IRELAND (IE).KINGDOM (GB) AND THE REPUBLIC OF IRELAND (IE).
KINGDOM (GB) AND THE REPUBLIC OF IRELAND (IE).
We trust that these instructions give sufficient details to enable this
appliance to be installed and maintained satisfactorily. However, if further
information is required, our Technical Helpline will be pleased to help.
Telephone01788554410(Nationalcallratesapply in theUnitedKingdom).
This guide is intended to help you care for your gas stove. Please read thoroughly before
using your gas stove and keep for future reference.
Manufactured by Morsø JernstøberiManufactured by Morsø Jernstøberi
Manufactured by Morsø Jernstøberi
A/S . DK-7900 Nykøbing MorsA/S . DK-7900 Nykøbing Mors
A/S . DK-7900 Nykøbing Mors
ebsite: wwwebsite: www
ebsite: www.morsoe.com.morsoe.com
.morsoe.com.morsoe.com
.morsoe.com
Distributed byDistributed by
Distributed by Morsø UK, Unit 5, io CenterMorsø UK, Unit 5, io Center
Morsø UK, Unit 5, io CenterMorsø UK, Unit 5, io Center
Morsø UK, Unit 5, io Center, V, V
, V, V
, Valley Drive, Swift Walley Drive, Swift W
alley Drive, Swift Walley Drive, Swift W
alley Drive, Swift Walleyalley
alleyalley
alley,,
,,
,
RugbyRugby
RugbyRugby
Rugby, W, W
, W, W
, Warks, CV21 1TWarks, CV21 1TW
arks, CV21 1TWarks, CV21 1TW
arks, CV21 1TW - www- www
- www- www
- www.morsouk.com.morsouk.com
.morsouk.com.morsouk.com
.morsouk.com
INSTINST
INSTINST
INSTALLERALLER
ALLERALLER
ALLER: Please leave this guide with the owner: Please leave this guide with the owner
: Please leave this guide with the owner: Please leave this guide with the owner
: Please leave this guide with the owner


2
C u s t o m e r C a r eC u s t o m e r C a r e
C u s t o m e r C a r e
Thank you for choosingThank you for choosing
Thank you for choosing morsømorsø
morsømorsø
morsø..
..
.
All morsø appliances are designed to meet the most stringent quality, per-
formance and safety requirements to provide our customers with many years
trouble-freeservice.
Yourownerguideaimstoimproveyourunderstandingandappreciationofyour
gas fire by providing simple and informative instructions to ensure that you
benefit from the excellent performance and features it has to offer.
LIST OF CONTENTSLIST OF CONTENTS
LIST OF CONTENTS
HeadingHeading
HeadingHeading
Heading PagePage
PagePage
Page
SAFETYSAFETY
SAFETYSAFETY
SAFETY 3
OPERAOPERA
OPERAOPERA
OPERATING YOUR STOVETING YOUR STOVE
TING YOUR STOVETING YOUR STOVE
TING YOUR STOVE 6
The Flame Sensing & Flue Blockage Safety System 6
To Light The Pilot 6
To Light the Main Burner 6
To Turn Off the Main Burner Only 7
To Turn Off the Main Burner and Pilot 7
CLEANING YOUR STOVECLEANING YOUR STOVE
CLEANING YOUR STOVE 8
Cast Iron Surfaces 8
Opening the Door 8
The Glass Window 8
FITTING THE CERAMIC FUEL EFFECT ANDFITTING THE CERAMIC FUEL EFFECT AND
FITTING THE CERAMIC FUEL EFFECT AND
BURNER COMPBURNER COMP
BURNER COMPARAR
ARAR
ARTMENT WTMENT W
TMENT WTMENT W
TMENT WALLSALLS
ALLSALLS
ALLS 9
MAINTENANCE AND SERVICINGMAINTENANCE AND SERVICING
MAINTENANCE AND SERVICING 12

3
SAFETYSAFETY
SAFETYSAFETY
SAFETY
IF YOU SMELL GASIF YOU SMELL GAS
IF YOU SMELL GAS
DON’T SMOKEDON’T SMOKE
DON’T SMOKE
EXTINGUISH ALL NAKED FLAMESEXTINGUISH ALL NAKED FLAMES
EXTINGUISH ALL NAKED FLAMES
DON’T TURN ELECTRICAL SWITCHES ON OR OFFDON’T TURN ELECTRICAL SWITCHES ON OR OFF
DON’T TURN ELECTRICAL SWITCHES ON OR OFF
TURN OFF THE GAS SUPPLTURN OFF THE GAS SUPPL
TURN OFF THE GAS SUPPLY AY A
Y AY A
Y AT THE METERT THE METER
T THE METERT THE METER
T THE METER
OPEN DOORS AND WINDOWS TO GET RID OF THE GASOPEN DOORS AND WINDOWS TO GET RID OF THE GAS
OPEN DOORS AND WINDOWS TO GET RID OF THE GAS
IMMEDIAIMMEDIA
IMMEDIAIMMEDIA
IMMEDIATELTEL
TELTEL
TELY CALL THE GAS EMERGENCY SERY CALL THE GAS EMERGENCY SER
Y CALL THE GAS EMERGENCY SERY CALL THE GAS EMERGENCY SER
Y CALL THE GAS EMERGENCY SERVICE - SEE YOURVICE - SEE YOUR
VICE - SEE YOURVICE - SEE YOUR
VICE - SEE YOUR
LOCAL TELEPHONE DIRECTORYLOCAL TELEPHONE DIRECTORY
LOCAL TELEPHONE DIRECTORY
DoDo
DoDo
Do have the gas stove installed by a competent person. In the United
Kingdom, installation must be in accordance with the latest edition of the
GasSafety (installation & use)Regulations.In the Republic ofIreland,instal-
lation must be in accordance with all national and local regulations in force.
DoDo
DoDo
Do have the chimney swept prior to installation if it was previously used for
solid fuel.
DoDo
DoDo
Dohavethegasstoveinstalledinaccordancewiththeinstallationinstructions.
Onnoaccountmustthestovestandoncarpetsorothercombustiblematerials.
Thestovemuststandonanon-combustiblehearthsurface.Thehearthmaterial
must be at least 400mm wide x 420mm deep x 12mm thick.
DoDo
DoDo
Do provide the minimum clearances shown in figure 1.
Figure 1Figure 1
Figure 1Figure 1
Figure 1

4
DoDo
DoDo
Doensurethatthe flueterminalon theoutside wall(Balancedflue model552)
is kept free from all obstructions and blockages.
DoDo
DoDo
Do always use a fireguard complying with BS 8423 for the protection of
young
children, the elderly or infirm.The cast iron top, front, rear and sides of this
stove are considered to be working surfaces and so will become very hot
when in use. Always take care when using this appliance. Such a guard is
alsorecommended for the protectionofpet animals.
DoDo
DoDo
Dowaitthreeminutes beforeattemptingto relightif thegasstove isswitched
offor theflamesareextinguishedfor anyreason.(Yourgas stoveis fittedwith
a safety device that will automatically shut off the gas supply to the gas
stove, if for any reason , the flame goes out)
DoDo
DoDo
Do get advice about the suitability of any wall covering near your gas stove.
Soft wall coverings (e.g. embossed vinyl, etc.) which have a raised pattern
areeasilyaffectedbyheat.Theymay,therefore,scorchorbecomediscoloured
when close to a heating appliance. Please bear this in mind whenever you
areconsideringredecorating.
Don’tDon’t
Don’tDon’t
Don’thang clothing, towels or any other fabrics over the gas stove.
Don’tDon’t
Don’tDon’t
Don’tput morelooseceramic coals on thegasstove than the numbergiven
inthisguide oruse anyceramic coalsotherthan thoseauthorised forthis gas
stove.Incorrect combustioncould result.
Don’tDon’t
Don’tDon’t
Don’tput paper or other materials into your gas stove.
Don’tDon’t
Don’tDon’t
Don’t use the gas stove with damaged base ceramics.
Don’tDon’t
Don’tDon’t
Don’tplace any combustible material (rugs,carpet,plastic tiles, etc.) on the
hearth
Don’tDon’t
Don’tDon’t
Don’tattempt to cleanor service the gas stove until ithas been switched off
and allowed to cool completely.
Don’tDon’t
Don’tDon’t
Don’tuse this stove with the door open or with the glass panel damaged or
removed. The door should always be secured with the locking screw (See
“Cleaning your stove”). If the window is damaged or will not close securely
the fire must be turned off and not used until the window is changed or
correctedby a competent service engineer.
Don’Don’
Don’Don’
Don’tt
tt
t leavethe stoveon ifthehouse isleftunoccupied fora longperiod.We
recommend that the stove is turned fully off.
IMPORIMPOR
IMPORIMPOR
IMPORTT
TT
TANTANT
ANTANT
ANT: WITH THE EXCEPTION OF SER: WITH THE EXCEPTION OF SER
: WITH THE EXCEPTION OF SER: WITH THE EXCEPTION OF SER
: WITH THE EXCEPTION OF SERVICING, THIS STOVE MUSTVICING, THIS STOVE MUST
VICING, THIS STOVE MUSTVICING, THIS STOVE MUST
VICING, THIS STOVE MUST
NOT BE OPERANOT BE OPERA
NOT BE OPERATED WITH THE DOOR OPEN. PLEASE ENSURE THETED WITH THE DOOR OPEN. PLEASE ENSURE THE
TED WITH THE DOOR OPEN. PLEASE ENSURE THETED WITH THE DOOR OPEN. PLEASE ENSURE THE
TED WITH THE DOOR OPEN. PLEASE ENSURE THE
OWNER IS FULLOWNER IS FULL
OWNER IS FULLY AY A
Y AY A
Y AWEAR OF THISWEAR OF THIS
WEAR OF THISWEAR OF THIS
WEAR OF THIS

5
PLEASE NOTEPLEASE NOTE
PLEASE NOTE
When operating your stove for the first time, some vapours may be given
off which may cause a slight odour and could possibly set off any smoke
alarms in the immediate vicinity. These vapours are quite normal with new
appliances. They are totally harmless and will disappear after a few hours
use.
This fire is supplied with ceramic “coals” to simulate a real coal fire. After
some use, the firebox walls and coals may change colour. This is quite nor-
mal.
OPERAOPERA
OPERAOPERA
OPERATING YOUR STOVETING YOUR STOVE
TING YOUR STOVETING YOUR STOVE
TING YOUR STOVE
The Flame Sensing & Flue Blockage Safety System.The Flame Sensing & Flue Blockage Safety System.
The Flame Sensing & Flue Blockage Safety System.
For your safety, this appliance is fitted with a flue blockage safety device that
will shut down the appliance in the event of abnormal flue conditions.
This device is NOT a substitute for an independently mounted CarbonThis device is NOT a substitute for an independently mounted Carbon
This device is NOT a substitute for an independently mounted Carbon
Monoxide detectorMonoxide detector
Monoxide detector
..
..
.
Thedevice will also automaticallyshutoff the gas supplytothe fire if thepilot
flame goes out for any reason. If the device starts to shut off the gasIf the device starts to shut off the gas
If the device starts to shut off the gasIf the device starts to shut off the gas
If the device starts to shut off the gas
frfr
frfr
frequentlyequently
equentlyequently
equently, get expert advice., get expert advice.
, get expert advice., get expert advice.
, get expert advice.
Thesystemincorporates aprobethat sensesthat theheatfrom thepilotflame
iscorrect. If this probe is cool,thedevice will prevent any gas flowunless the
control knob is kept depressed at the PILOT/IGN position. If, for any reason,
the flames go out when the fire is hot or if the fire is turned off when hot,
always wait at least three minutes before attempting to relightwait at least three minutes before attempting to relight
wait at least three minutes before attempting to relightwait at least three minutes before attempting to relight
wait at least three minutes before attempting to relight.
Always make sure that the window is securely closed before lighting.Always make sure that the window is securely closed before lighting.
Always make sure that the window is securely closed before lighting.
TT
TT
To Light The Piloto Light The Pilot
o Light The Piloto Light The Pilot
o Light The Pilot
•Push in the right control knob (the pilot lighting knob) and, while keeping it
depressed,turnanticlockwisethroughthe ignitionposition marked and
up to the pilot position marked . The spark should light the pilot. The
pilotflame can beseenby looking throughthegap between thecoalsnear
the front left corner of the fire bed – See figure3.
• When the pilot has lit, keep the right hand control knob depressed for a
few seconds to prevent the flame supervision device from shutting off
the gas supply while its probe warms up, as explained above, then re-
lease it.
• If the pilot does not remain alight turn the knob back to the off position
marked •. Wait a few seconds and repeat the lighting sequence.

6
TT
TT
To light the Main Buro light the Main Bur
o light the Main Buro light the Main Bur
o light the Main Burnerner
nerner
ner
• Partiallydepresstheright controlknobandturn tothemain burnerposition
marked . The main burner should now light.
• Theleft-hand knob is for burner flame adjustment. Turning it
anticlockwiseshould graduallyincrease the flameheight and heatoutput.
Turningclockwise reducestheflame height andheatoutput.
• Theburnerflameconteol doesnothaveto bere-setevery timethefireis lit.
Once set, it can be left at that position allowing you to use the right hand
control only to ignite the burner at the set flame height.
TT
TT
To To T
o To T
o Turur
urur
urn Ofn Of
n Ofn Of
n Off the Main Burf the Main Bur
f the Main Burf the Main Bur
f the Main Burner Onlyner Only
ner Onlyner Only
ner Only
• Turn the right hand control knob to the pilot position marked .
TT
TT
To To T
o To T
o Turur
urur
urn Ofn Of
n Ofn Of
n Off the Main Burf the Main Bur
f the Main Burf the Main Bur
f the Main Burner and Pilotner and Pilot
ner and Pilotner and Pilot
ner and Pilot
• Turn the right hand control knob to the pilot position marked . Push
the knob in at this position and turn to the off position marked •.
Figure 2Figure 2
Figure 2Figure 2
Figure 2
Figure 3Figure 3
Figure 3Figure 3
Figure 3

7
CLEANING YOUR STOVECLEANING YOUR STOVE
CLEANING YOUR STOVE
Turn the stove off and allow it to cool before attempting any cleaning. Note
that it will retain heat for some time after it has been turned off.
Cast Iron SurfacesCast Iron Surfaces
Cast Iron Surfaces
Regular dusting with a dry cloth is all that should normally be necessary.
Any light stains should be removed with a damp cloth. Make sure that the
stove surfaces are completely dry before lighting.
If the paint needs retouching, allow the stove to cool completely. Brush any
areasneeding attention with a wire brush (Not enamelled surfaces). Clean
off any loose matter. Touch up with MORSØ high temperature stove paint.
Apply the paint sparingly. Two light coats are better than one thick coat.
Figure 4Figure 4
Figure 4Figure 4
Figure 4
Opening the DoorOpening the Door
Opening the Door
The door is secured with a locking screw. Remove the screw. See figure 4.
Always secure the door with the locking screw to prevent inadvertentAlways secure the door with the locking screw to prevent inadvertent
Always secure the door with the locking screw to prevent inadvertent
opening and consequent injury or damage while the stove is in use.opening and consequent injury or damage while the stove is in use.
opening and consequent injury or damage while the stove is in use.
The Glass WindowThe Glass Window
The Glass Window
Anystains on theglass can beremoved with anon-abrasivecleaner such as
a ceramic hob cleaner. Never use abrasive cleaners.Never use abrasive cleaners.
Never use abrasive cleaners.Never use abrasive cleaners.
Never use abrasive cleaners. Clean the window
carefully in accordance with the instructions supplied with the cleaner.

8
FITTING THE CERAMIC FUEL EFFECTFITTING THE CERAMIC FUEL EFFECT
FITTING THE CERAMIC FUEL EFFECT
ANDAND
ANDAND
AND
BURNER COMPBURNER COMP
BURNER COMPARAR
ARAR
ARTMENT WTMENT W
TMENT WTMENT W
TMENT WALLSALLS
ALLSALLS
ALLS
Ceramic fuel effect and Burner compartment WallsCeramic fuel effect and Burner compartment Walls
Ceramic fuel effect and Burner compartment Walls
• This product uses fuel effect pieces and burner compartment rear wall
containing Refractory Ceramic Fibres (RCF), which are man-made vitreous
silicate fibres. Excessive exposure to this material may cause irritation to
eyes, skin and respiratory tract. Consequently, it is important to take care
when handling these articles to ensure that the release of dust is kept to a
minimum.
•Light coatingsof sootwill usually beburnt offduring the normaloperation of
the fire.
•Shouldanysootaccumulation becomeexcessive, thefuel effectpieces and
walls should be removed from the fire for cleaning.
• Cleaning should be carried out in a well ventilated area or in the open air by
gently brushing with the pieces held away from your face so that you avoid
inhalingthe dust.
• We suggest that you remove the coals in the reverse order to that shown in
thissectionoftheguide.Whenremovingthefueleffectandburnercompartment
walls it is important that the front grate is removed before the fuel effect pie-
ces. To do this hold the front grate firmly and lift.
1. Place the rear ceramic wall against the back of the firebox.
2. The rear ceramic wall must be located onto the ledges at the back of the
rearbase ceramic (Seefigure5).Toachieve this,hold therearceramic wall
againstthe rear ofthe firebox atits uppermost position.Whilstholding the
rear ceramic wall in this position locate the rear ceramic base coal into
position (See figure 5). The rear wall can now be released. Ensure that the
rear ceramic wall sits on the ledge at the back of the rear base coal.
Figure 5Figure 5
Figure 5Figure 5
Figure 5

9
3. Fit the left hand side wall against the left hand side of the firebox. Locate
thebottom ofthe sidewall into thechannel alongthe bottom ofthe firebox
(Seefigure 6). Supplied withthestove are two ceramicretainingbrackets.
One for each side of the firebox. Hold the ceramic side wall against the
steel firebox plate and slide the long leg of a retaining bracket behind the
steel firebox plate. Push down to hold the ceramic side wall in place.
4.Fit the righthand side wallagainst the righthandside of thefirebox. Locate
thebottomof thesidewall intothe channelalongthe bottomofthefirebox.
Holdthe ceramicside wallagainst thesteel fireboxplate andslide thelong
legof aretaining bracket behindthe steel fireboxplate. Push downto hold
the ceramic side wall in place.
5.On thefront ofthe burnerthere isa bracketfor supportingthefront ceramic
base.At therear of thefront ceramic baseis a recess.Fit thefrontceramic
basepiecelocatingtherecessontotheforwardprojectingpartoftheburner
bracket(See figure 7).
Figure 7Figure 7
Figure 7Figure 7
Figure 7
Figure 6Figure 6
Figure 6Figure 6
Figure 6

10
Figure 8Figure 8
Figure 8Figure 8
Figure 8 Figure 9Figure 9
Figure 9Figure 9
Figure 9
Figure 10Figure 10
Figure 10Figure 10
Figure 10 Figure 11Figure 11
Figure 11Figure 11
Figure 11
There are seven overlay coals. There are three ceramic coals identified with
the number’1’. Two identified with the number ‘2’ and two identified with the
number‘3’.
6. Locate one of the ceramic coals identified with a number ‘1’ as in figure 8.
7. Locate the two ceramic coals identified with a number ‘2’ as in figure 9.
8. Locate the remaining two ceramic coals identified with a number ‘1’ as in
figure10.
9. Locate the two ceramic coals identified with a number ‘3’ as in figure 11.
10. Close and secure the door by refitting the locking screw.

11
MAINTENANCE & SERVICINGMAINTENANCE & SERVICING
MAINTENANCE & SERVICING
Regular maintenanceRegular maintenance
Regular maintenance
Inordertoachieveandmaintainhighlevelsofpersonalsafetyandperformance
efficiency, it is essential that the flue is kept clear of any form of obstruction.
IntheUnitedKingdomitisthelawthatalandlordmusthaveanygasappliance,
flueand pipeworkwhich issituated in atenant’spremiseschecked forsafety
at least every twelve months by a competent person (In the U.K., a CORGI
registeredinstaller).
We recommend that all gas appliances and their flues, wherever situated,
are checked annually.
ServicingServicing
ServicingServicing
Servicing
• If you require further assistance or any advice about gas in general, our
service department
will be pleased to help, please telephone
(+44)1788554415.
• If you wish to replace any of the owner replaceable parts listed below,
please contact your dealer or the Morso UK service department for your
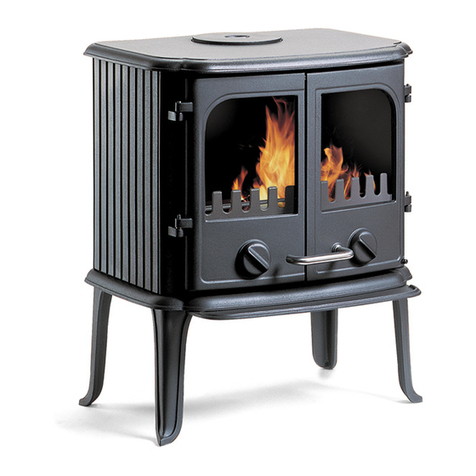
neareststockistoftheseparts.Whenorderingpleasequotethepartnumber
shownbelow.
DescriptionDescription
Description Part No.Part No.
Part No.Part No.
Part No.
Complete set of ceramic coals 5110528
Rear base coal piece 51110532
Front base coal piece 5110531
Bag of 7 top coal pieces 5110533
Complete set of ceramic walls 0572519
Ceramicrear wall only 0572529
Ceramic right side wall 0572539
Ceramic left side wall 0572549
Allenkey for window opening 0572559
Whenfitting replacement parts, followtheinstructions contained in this
guide.
It is important that only apprIt is important that only appr
It is important that only approved parts aroved parts ar
oved parts aroved parts ar
oved parts are used for maximum safetye used for maximum safety
e used for maximum safetye used for maximum safety
e used for maximum safety..
..
.

12
72311000.20.04.03.MorsøJernstøberiA/S%96 6919 00
Other manuals for SQUIRREL 551
2
Table of contents
Other Morso Stove manuals

Morso
Morso S11-40 User manual

Morso
Morso 1410 User manual

Morso
Morso 2B Classic User manual

Morso
Morso 5660 Standard Insert User manual

Morso
Morso DB15 User manual

Morso
Morso 3410 User manual

Morso
Morso 2B Standard User manual

Morso
Morso Panther User manual

Morso
Morso S10 User manual

Morso
Morso 1412 User manual
Popular Stove manuals by other brands

Navigator
Navigator HALIBUT Installation and operating instructions

ADURO
ADURO 15SK Limestone user manual

Volcano
Volcano II owner's manual

Napoleon
Napoleon GDS26P-1 Installation and operation manual

Pacific energy
Pacific energy Fusion Installation and operating instructions

lifelong
lifelong LLGS303 user manual