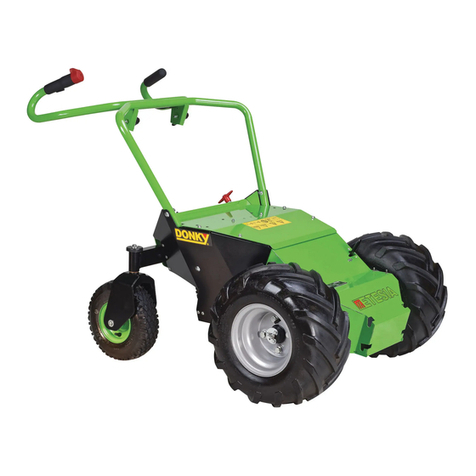
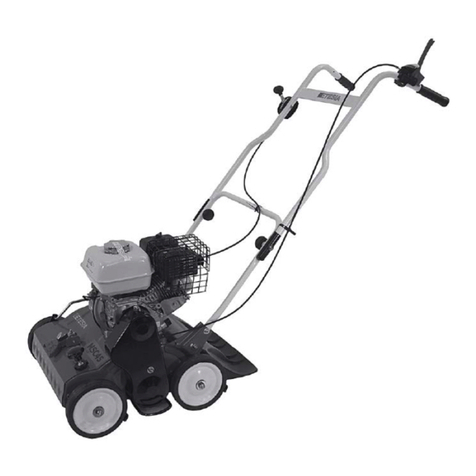
Etesia MBR50 Product information sheet

MBR50
GB Original user manual Please read carefully before using your machine

CONTENTS
1• Foreword ................................................................................................................................................................................................ 3
2• Your safety and that of others ................................................................................................................................................................ 4
3• Content upon delivery............................................................................................................................................................................ 5
4• Description and marking........................................................................................................................................................................ 6
5• Assembly................................................................................................................................................................................................ 7
6• Putting into service .............................................................................................................................................................................. 11
7• Maintenance and servicing .................................................................................................................................................................. 15
8• Maintenance plan ................................................................................................................................................................................. 21
9• Breakdowns and remedies ................................................................................................................................................................... 22
10• Transport .............................................................................................................................................................................................. 23
11• Technical specifications ....................................................................................................................................................................... 23
12• Warranty............................................................................................................................................................................................... 24

a
b
c
d
e
f
3
1•1 WARNING AND SYMBOLS
Read the engine manufacturer’s instructions for use.
DANGER! Designates an imminent hazard. If this indication is ignored, danger of death or risk of serious injuries.
WARNING! Designates a possibly dangerous situation. If this indication is ignored, danger of death or risk of serious injuries.
CAUTION! Designates a possibly dangerous situation. If this indication is ignored, risk of light injuries.
IMPORTANT! Designates recommendations for use and other useful information.
a - WARNING DANGER !
b - Before using, please read and follow the safety and maintenance instructions of the instruction booklet.
c - Keep a safe distance away from the brushes during operation.
d - Stop the engine, disconnect the spark plug before proceeding any services on the machine.
e - Risk of projected objects.
f - Avoid the presence of third persons in the danger zone.
THANK YOU!
You are now the proud owner of an Etesia weed-brush!
This extremely reliable and tough machine has been specially
designed to give many years of service.
In order to prolong the life of your weed-brush and keep it in
excellent working order, read this manual carefully and always follow
the safety recommendations and maintenance instructions.
The whole point of the instructions manual is to help you familiarise
yourself with the machine, get used to the various ways it can be used
in accordance with its envisaged use and so as to avoid risks.
Store this booklet in a safe place for any later need. This weed-brush
is solely aimed at the weed removal of hard surfaces. Any other use
outside weed removal is strictly forbidden.
ETESIA has a policy of continuously improving the quality of its
products, therefore your weed-brush might show slight differences
compared with the description in the present booklet. Your ETESIA
dealer is in possession of the most recent technical specifications. Do
not hesitate to contact him.
In accordance with article L.111-3 of the consumer code, ETESIA
undertakes to supply your dealership with spare parts, original or
compatible, indispensable for the use of your product over a period of
5 years, as from the date of the invoice issued by our company.
BEFORE USING YOUR WEED-BRUSH
• Prior to use, check that safety labels are present on the machine as
indicated in the manual. If any safety labels are missing, inform your
dealer immediately.
• The weed-brush is required by law to carry them.
• Before using your weed-brush, make sure that you are completely
familiar with the controls and operating instructions so that you are
able to stop the machine quickly.
• Before working, always clear the lawn of stones, pieces of wood
or metal, wire, bones, plastic, branches and other debris liable to be
thrown out by the weed-brush. Low branches liable to cause injury to
the user should also be removed.
• Before each use, make sure that the brush strands and the handlebar
lock are in good condition and tightened up.
•
Loose clothing and short trousers should not be worn when using
the weed-brush. Always wear stout and closed shoes. Never use the
weed-brush barefoot or wearing sandals.
Beware of long hair and do
not wear jewellery (including rings)! There is a danger of injury by
getting caught up or drawn in.
Wear ear defenders.
1• FOREWORD

4
2• YOUR SAFETY AND THAT OF OTHERS
• Always follow these instructions when using your weed-brush.
• The machine is solely intended for the removal of weed growth
on paved, concrete and/or tarmac surfaces outdoors. Any other
or additional form of use is considered non-compliant with the
intended use. For example, the machine must not be used to
sweep animal feed. Twisted knot brushes can come loose and be
consumed by animals, causing harm to them. The manufacturer/
supplier shall not be held liable for any damage or loss suffered
as a result. The risk is borne solely by the user. Intended use also
includes complying with the operating instructions and adhering
to the inspection and maintenance conditions.
The machine may only be operated with twisted knot brushes that
have been approved by the manufacture
• Children under the age of 16 years, and people not familiar with the
weed-brush must not be allowed to use the machine.
• Never let a person who has not read the instruction booklet take
charge of the weed-brush.
• WARNING: Prolonged exposure to noise can be dangerous to
health. The symptoms are progressive: tinnitus, temporary hearing
loss, then progressive deafness. Use personal protection against
noise. Limit the intensity and duration of exposure. Avoid mowing
close to other sources of sound. Allow for rest periods.
• WARNING: Excessive exposure to vibration can affect the cir-
culation or the nervous system. The symptoms appear mainly in the
ngers, the hands or the wrists. These symptoms may include loss
of sensation, pain, muscle weakness, change in colour of the skin,
disagreeable tingling... Consult a doctor in case of appearance of
symptoms that may be triggered by vibrations.
• This weed-brush is not intended to be used by people (including
children) with reduced physical, sensory or mental abilities, or by
people lacking experience or knowledge, unless they are under su-
pervision or have received instruction beforehand as to how to use
the machine from a person responsible for their safety. Keep children
away from the weed-brush.
• Never drive your weed-brush too close to embankments or ditches,
on soft ground, or where there is a risk of overturning.
• Never operate the machine when feeling tired or unwell, or after
consuming alcohol or taking medicine.
• The user is responsible for ensuring the safety of others within the
area where the weed-brush is being used. Whilst working, take care
to avoid injury to others caused by ying stones and other objects.
Keep all third parties at a minimum distance of 10 m.
• Keep a safe distance from people and animals when the engine is
running. Do not start the machine if there are any around you.
• Never remove warning labels or safety instructions.
• The weed-brush must have its safety aps. Frequently check that the
safety aps show no signs of wear or deterioration. Never use the
weed-brush if the protection is defective.
• Never put your hand, nor foot under the protectors.
• Keep your hands and your legs clear of rotating or moving parts.
• Protect the face and the eyes when working under trees.
• Before replacing the brushes or modifying the work height (optional
swivel wheel), stop the engine or disengage the brush and await its
immobilisation.
• Avoid obstacles which could damage the brush.
• After striking a foreign object or if the machine starts to vibrate ab-
normally stop the motor, disconnect the spark plug cover and inspect
the weed-brush for any damage. Have any repairs made before res-
tarting and using the weed-brush.
•
Operate the weed-brush only in broad daylight or with good arti-
cial lighting.
• Do not
weed
during thunderstorms.
• Respect the minimum safety distance given by the handlebars. When
using the weed-brush on slopes, it is necessary to be particularly
careful and to exercise a great deal of caution when changing direc-
tion.
Never mow up or down the slope, always mow across.
• Never run, but move forward slowly, taking care with your steps,
particularly on a slope.
• Be very careful if you reverse the weed-brush or pull it back towards
yourself.
• Do not change the motor speed regulation settings.
•
WARNING : NEVER ALLOW THE ENGINE TO RUN IN
CONFINED AREAS. EXHAUST GASES CONTAIN CARBON
MONOXIDE, WHICH IS ODOURLESS AND CAN KILL.
• Never leave the engine running unsupervised.
• Stop the engine for any maintenance on the weed-brush.
•
The safety lever never has to be locked in working position.
• If the
weed-brush
has to be lifted or transported, stop the engine and
remove the spark plug cap.
• Should you displace the weed-brush outside the work zone, stop the
engine or disengage the brush.
• Be sure also to comply with any legal requirements relating to the use
of machines with thermal engines.
• These precautions are indispensable for your safety. The recommen-
dations given are not exhaustive however. Use your weed-brush ju-
diciously at all times.
• By loading and unloading of the machine it is recommended to use
ramps or to ask help for the loading operation.
MAINTENANCE AND STORAGE
• Always maintain the machine and accessories in perfect working
condition.
• Replace worn or damaged parts for greater safety.
• Cleaning or servicing the weed-brush should not be started before
having stopped the engine and disconnected the spark plug.
• Always use petrol that you have bought recently. Old petrol leave gum
deposits in the carburettor, causes leaks and makes starting the engine
difficult. Only buy the amount of fuel you need for one month’s use
and keep it in a clean jerrican set aside for this purpose.
•
WARNING: fuel is highly ammable.
• NEVER STORE, POUR OR USE PETROL NEAR A NAKED
FLAME or near devices such as stoves, water-heaters with pilot
lights or any other device liable to produce sparks.
• Always ll in the fuel tank outside a building in an open space and do
not smoke during this operation.
• Add fuel before starting the engine.
• Never remove the fuel cap whilst the engine is running or hot.
Allow the engine to cool for few minutes before lling.
• Ensure that the fuel tank and fuel can caps are replaced correctly.
• Do not attempt to start the engine when any petrol has been spilt,
when you can smell petrol or when other explosive conditions are
present. Remove the weed-brush from the spillage area and avoid
causing any source of ignition until the petrol vapour’s have dis-
persed.
• Do not carry the weed-brush with petrol in the tank or with the feed
tap open.
•
Do not modify the regulator springs, rods or other parts to increase
the engine speed. Operate the engine at the recommended speed.
• Do not check the spark by removing the spark plug. Use an approved
checking system.

5
3• CONTENT UPON DELIVERY
1) Product packaging
3)
Recycle the packaging material
2)
Delivery is in a carton containing:
• Weed brush
•
the user manual
• the engine manual
• Do not pull the starter with the spark plug removed.
• Do not knock the engine wheel with a hammer or hard object.
Otherwise, the wheel may break during operation. Have all major
servicing operations performed by an authorized ETESIA repairer
who has the appropriate tools.
• Do not use the engine without the silencer. Check the silencer regu-
larly and have it replaced if its is damaged or leaking.
• Do not touch the exhaust pipe, cylinder or ns when hot. Otherwise,
you may get burnt.
• Clean regularly the exhaust, the engine and the periphery of the fuel
tank in order to avoid accumulation of ammable materials (grass,
leaves, grease excess, etc).
• Do not start the engine when the air lter or air lter cover is removed.
• To prevent the engine from starting accidentally, remove the spark
plug cap during servicing operations.
• Clean the cylinder ns and regulator mechanism of any dirt, grass
residues and other materials which could alter the engine speed.
• Pull the starter cord slowly till you feel resistance. Then pull it ener-
getically to prevent recoiling and hurting your hand or arm.
• Check the fuel piping and connections for cracks and leaks and have
them changed if necessary.
• The replacement brushes should only be mounted on the machines
for which they are designed and this in accordance with the indica-
tions given.
• The use of counterfeit parts or poor maintenance can alter the perfor-
mance of your product, or present a danger to you and other people.
Use only original parts and follow the maintenance schedule.
RESPONSABILITY
• In the event of any use not in accordance with the relevant instruction
booklet, ETESIA can accept no liability.
• You must not make any modifications to the weed-brush without the
prior approval of ETESIA.
•
Any modification not authorized by ETESIA could render the ma-
chine dangerous and lead to serious injury during use. ETESIA shall
accept no responsibility if these instructions are not followed.
IDENTIFICATION OF THE WEED-BRUSH
• The serial number off your weed-brush is on the identication label
on your machine.
• The serial number is on the identication label on your weed-brush.
Always give this number to your dealer for all servicing on your
weed-brush.
•
You will only be ready to use this weed-brush after you read the
safety instructions. Read completely this manual for the using and
the servicing of the weed-brush.
2• YOUR SAFETY AND THAT OF OTHERS
ACCESSORIES IN OPTION AND SPARE PARTS
MBR50
MBR50R
Support wheel
53538
Steel bristles
53960
Plastic bristles
BEWARE! The
plastic brushes are
only to be used in
combination with the
support wheel.

15
6
1
2
3
4
12
13
10
14
8
9
7
11
Ø = 10 m
5
5
6
4• DESCRIPTION AND MARKING
1. Danger area
2. Handlebar, height-adjustable
3. Starter
4. Brushes
5. Manufacturer name
6. CE marking
7. Serial number
8. Engine rated power
9. Engine manufacturer
10. Machine designation
11. Manufacturer’s address
12. Engage/disengage brush drive lever
13. Throttle lever
14. Weight
15. Year of manufacture

12
4 x M6
4 x 6,4 - 16 - 1,6
7
IMPORTANT! Do not ll with oil or petrol yet. Before doing this, familiarise yourself with the whole machine, the assembly
procedure and the tools and parts required.
Position the handlebar.
Place the handlebar on the pipe brackets.
Place the pipe brackets onto the bolts.
Preassemble the handlebar with the washer
and lock nut.
Only tighten the nuts to the point that the
handlebar can still move without dropping
on its own.
5• ASSEMBLY

1 x M6 x 65
1 x 6,4 - 12 - 16,6
1 x M6
8
5• ASSEMBLY
Undo the star grip.
Adjust the handle according to your height.
Secure the handlebar using the star grip.
Assemble the throttle lever.
Position the throttle cable.
Insert the hex bolt with washer.
Attach the washer.
Screw down the nut.

9
5• ASSEMBLY
Tighten the screws.
Install the clutch lever.
Undo the hex socket bolt.
IMPORTANT:
Push the lateral safety button so that the
pressure spring does not trip.
Keep the lateral safety button pushed in.

10
Position both halves of the lever on the han-
dlebar pipe so that they can be connected to
each other.
Connect the two halves of the lever.
IMPORTANT !
Check the lateral safety button is func-
tioning! Tighten the hex socket bolt.
Correctly installed clutch lever.
5• ASSEMBLY

11
6• PUTTING INTO SERVICE
6•3 ADJUSTING THE HEIGHT OF THE HANDLEBAR
WARNING ! Protect the machine against involuntary starting; disconnect the spark plug cap.
CAUTION: Make sure that the star grip is securely tightened.
DANGER ! In the event of loose clothing being worn, one of the handles to the handlebar could get caught in the sleeves. This
could prevent the release of the brush (blocking of the clutch lever). Wear suitable clothing. It can evenutally be useful to lower the
height of the handlebars.
6•1
BASIC SAFETY INSTRUCTIONS FOR
NORMAL OPERATION
• All use outside that envisaged and described in the user notice can
prove to be dangerous ;
•
Before starting work, familiarise yourself with the site conditions.
These conditions include, e.g., obstacles in the working and circu-
lating area, the ground resistance and protection required between
the working area and public passages.
• Take the necessary measures so that the machine works completely
safely.
•
Only start the machine when all safety and protection devices are
in place and functional.
•
Inspect the machine each time before use to detect any damage
and defects visible from the exterior!
The case arising, do not use
the machine and contact the dealer.
• In the case of abnormal operation, stop the machine and remove
the spark plug cap. Get the machine serviced alongside your
dealer.
• Only start the machine by placing yourself behind the handlebars.
•
Before starting the machine, ensure that nobody can be endangered
by starting.
•
Always drive at a sufficient distance from verges and slopes!
•
Avoid working in any way that may affect the stability of the
machine!
• Do not use the weed-brush in reverse ; keep the brush on the
ground ; especially downhill.
• Upon leaving the machine, always secure it against accidentally
rolling away and unauthorised use.
6•2
OPERATING THE MACHINE IN WINTER
Check if the air lter is dry at regular intervals. If the lter is damp
because of condensation, allow it to dry overnight. Otherwise, there
is a chance that the air lter will freeze and the engine will not start.
Before operating the throttle, spray a lubricant on the control lever
and linkage of the engine.
DANGER! Never spray lubricant on the engine while it
is hot. This could cause a re. Follow the instructions on
the spray can.
CAUTION: Switch off the engine and allow it to cool
down.
Move the engine control lever in the two extreme positions, so that the gas
cable on the engine and on the control lever are lubricated.
This prevents
frozen condensation obstructing the mechanics.
It is also recommended
that all machine cables are lubricated.
In the case of the weed-brush being used for snow removal, at the end of
the work, kindly clear the snow from the machine with a brush.
IMPORTANT: Store the machine in a room protected
from frost. Prevent the machine freezing. This could lead to
damage, if a part is blocked by frost.
Use of the lubricating spray is only intended for use in the
winter (accumulation of dust in summer).
1)
Undo the star grip and select the required
position.
2) Several available settings.
3)
You can fold the handlebar all the way
forward and therefore reduce the amount
of space required by the machine for stor-
age purposes.

12
6• PUTTING INTO SERVICE
6•4 BRISTLE PRESSURE
IMPORTANT: If you are using a badly worn brush or working on cobblestones, lower the brush by an additional washer.
Please note: Excessive brush pressure impairs cleaning effectiveness because the bristles will be too bent. Reduce the pressure on
the brushes after each use. Raise the brush.
6•5 BRUSH DRIVE
DANGER ! In the event of loose clothing being worn, one of the handles to the handlebar could get caught in the sleeves. This
could prevent the release of the brush (blocking of the clutch lever). Wear suitable clothing. It can evenutally be useful to lower the
height of the handlebars.
WARNING: Ensure that no persons or property are located in the danger zone, as otherwise this could result in injury or material
damage.
CAUTION: The handlebar must be rmly secured at the required height.
1) The height adjustment of the swivel wheel allows
the brush pressure to be adjusted.
2) Adjusting the height of the bristles. The height is
adjusted by rearranging the washers.
3)
Remove the linchpin. Set the required height. 4) Reinsert the linchpin.
1)
The clutch lever for the sweeper brush drive is lo-
cated on the handlebar.
2) Release the clutch lever by pressing the safety button.

13
6•6 STEERABLE FREEWHEEL MBR50
WARNING ! Protect the machine against involuntary starting; disconnect the spark plug cap.
The weed brush is tted with a steerable freewheel. This makes it easier to turn the weed brush.
6•7 STARTING/STOPPING THE MOTOR (QUICK GUIDE)
Read the engine manufacturer’s instructions for use.
DANGER! Never allow the engine to run in enclosed or narrow spaces. The exhaust gases contain toxic carbon monoxide. Make
sure the brushes are disengaged. The handlebar must be securely locked at the required height.
IMPORTANT! Before starting the engine, check the oil level. For transport-related reasons, the casing of your weed-brush does
not contain oil. Never run an engine without oil even for short periods of time. Before starting the engine, fill the oil sump to the
recommended level.
1. STARTING THE ENGINE
DANGER ! Never engage the brush whilst pulling on the start handle.
6• PUTTING INTO SERVICE
3) Lower the clutch lever.
4) By operating the clutch lever, you trigger the brush
training.
1) Switch to a free-wheel conguration: Insert the linch-
pin through the axle only.
2) Remove the free wheel conguration: Insert the linch-
pin through the axle and the hub (e.g. for sweeping on
inclines)
1) Move the throttle regula-
tion lever to the choke po-
sition
2) Open the fuel valve (to the
left of the engine in the travel
direction) as indicated on the
photo.
3) Pull the start handle. Stay behind the
handle and out of the danger zone.

14
2. CONTROLLING THE ENGINE SPEED
IMPORTANT! When the engine is hot, the throttle lever must be moved from the choke position. The choke must not be used
when the engine is hot or when the air temperature is high.
3. STOPPING THE ENGINE
6•8 SUPPORT ROLLER (ACCESSORY)
WARNING ! Protect the machine against involuntary starting; disconnect the spark plug cap.
6•9 LATERAL PROTECTIVE COVER MBR50
WARNING! Before lifting the lateral protection, protect the machine against involuntary starting; disconnect the spark plug cap.
6• PUTTING INTO SERVICE
Slow = Move the throttle regulation lever to
Fast = Move the throttle regulation lever to
1) Place the engine speed le-
ver on 0.
2) Close the fuel valve (to the left of
the engine in the travel position)
as indicated on the photo.
Parts included
View of the lateral protective cover

15
6• PUTTING INTO SERVICE
If the lateral protective cover is swung up, the weed
brush can be used right up against walls (e.g. of build-
ings, kerbs).
7• MAINTENANCE AND SERVICING
7•1
BASIC SAFETY RECOMMENDATIONS
DANGER! Clean the implement regularly, particularly in
the exhaust and engine area. Otherwise, there is an increased
risk of re.
• Carry out the adjustment, maintenance and inspection operations in
the service manual at the intervals given, and follow the information
on replacing parts/equipment. Only qualied personnel can carry out
these works. See the maintenance plan.
• For all maintenance operations, inspections, repairs, settings and ve-
rication of safety devices, respect those starting, stopping and safety
procedures in accordance with the instructions manual.
• If the machine has been completely stopped for maintenance or re-
pair work, it must be protected against accidental starting:
- disconnect the spark plug cap.
• When carrying out maintenance and renovation work the machine
must be placed on at ground that can support it and stop it rolling
or overturning.
• Individual parts and large assemblies to be replaced must be slung
cautiously by hoists and made secure.
•
Only use appropriate hoists in perfect technical condition and sus-
pension methods with a sufciently large load capacity. Do not lean
or work on suspended loads!
• Do not use machine parts as climbing aids.
•
Keep all handles free from dirt, snow and ice.
• Clean the machine and especially the connectors and screws and re-
move traces of oil, fuel and cleaning products before starting main-
tenance or repair! Do not use aggressive maintenance products!
Use lint-free cloths!
• Before cleaning the machine with water or steam jet (high pressure
cleaner) or when using other cleaning products, close all openings
and protect them for safety or functional reasons from penetrating
water, steam or other cleaning products. This risk particularly ap-
plies to the electrical parts and other parts carrying a voltage. When
cleaning has nished, remove the protective material!
• When cleaning is nished, inspect the fuel hose and ensure that
there are no leaks, that the connections have not come loose and
that there is no rubbing or other damage! Repair any defects im-
mediately!
•
If it becomes necessary to remove safety devices for assembly,
maintenance or troubleshooting, they must be re-tted and checked
when maintenance and repair work has nished.
• Make sure that consumables and spare parts are disposed of safely
and in an environmentally friendly way!
•
The electrical equipment of a machine must be checked and ins-
pected regularly. Defects such as loosened connections or damages
cables must be remedied immediately.

16
7•2 FUEL
Read the engine manufacturer’s instructions for use.
DANGER! Switch off the engine and allow to cool. The machine must be protected against accidental starting. Under certain
conditions, petrol is highly ammable and explosive. Only ll the petrol tank in a properly aired area and when the engine is cold and
switched off. When lling with petrol and in places where fuel is stored, do not smoke and keep away all naked ames or sparks. Do
not allow the tank to overow. There must be no fuel in the ller neck. After lling up, ensure that the tank cap is securely closed. Do
not spill fuel when lling up. Vapours from spilt petrol or fuel can catch re. If petrol is spilled, it is essential to ensure that the place
is completely dried before starting the engine and that petrol vapour has evaporated. Avoid any repeated or prolonged contact with the
skin and breathing the vapour. KEEP PETROL OUT OF REACH OF CHILDREN.
IMPORTANT! Use car petrol. Never use mixtures of oil and petrol or dirty petrol.
7•3 OIL LEVEL CHECK
Read the engine manufacturer’s instructions for use.
WARNING! Switch off the engine and allow to cool. Protect the machine against involuntary starting; disconnect the spark plug cap.
IMPORTANT! If the engine runs with an insufcient quantity of oil, this can cause serious damage. Only oils recommended by the
manufacturer should be used.
7• MAINTENANCE AND SERVICING
•
Use internal combustion engines only in well ventilated areas! The
exhaust gases contain toxic carbon monoxide.
• ATTENTION ! Fire risk or explosion during welding, oxycutting
or grinding.
• Before doing any welding, oxycutting or grinding, remove dust and
ammable materials from the machine or its surroundings and make
sure there is sufcient aeration (explosion risk)!
•
Regularly check all the pipes, hoses and screw connectors for leaks
and damage visible from the outside!
Remedy defects immediately! Oil projections can cause injury or re.
•
Comply with the safety regulations in force for the product when
handling oils, greases or other chemicals!
• Pay attention when handling parts or hot oil (risk of burning) !
IMPORTANT!
Remember to:
• eliminate any oil or fuel leaks
•
check that screws and nuts are secure and tighten if necessary
• check that parts can move freely and lubricate if necessary
Fuel and oil tank on the Honda engine Hold the can as shown in the illustration. Only
pour a small quantity at a time and check the l-
ling level.
Fuel tank
Dipstick

5 cm
17
7• WARTUNG UND PFLEGE
7•4 REPLACING THE TWISTED KNOT BRUSHES
WARNING! Switch off the engine and allow to cool. Protect the machine against involuntary starting; disconnect the spark plug cap.
IMPORTANT: The bristles must be at least 5 cm long. The bristles must be replaced if they have been worn beyond this point.
7• MAINTENANCE AND SERVICING
1) Fuel and oil tank on the Honda engine 2) Honda engine dipstick.
-
Remove the oil ller cap and wipe the dipstick
clean.
- Insert the dipstick into the oil ller nozzle but do
not screw it in. The oil should come up to the top
marking.
- If the oil level is too low, top up the tank with the
recommended oil until the top marking on the dip-
stick is reached.
Tip the machine backwards.
CAUTION! Wear gloves.
Undo the star grip.
Remove any bristles that require replacing. Worn bristles. The bristles must be at least 5 cm long. The
bristles must be replaced if they have been worn beyond
this point.
Fuel tank
Upper level
Dipstick

18
7• WARTUNG UND PFLEGE7• MAINTENANCE AND SERVICING
Mount the new bristles between the upper and lower
plate.
Gently push the upper and lower plate apart so that
the bristles are held on the opposite side.
Mount all 10 bristles between the upper and lower
plate.
If the brushes are moving, slightly loosen the star grip,
readjust the position of the nearby brushes, tighten the
star grip. Make sure the brushes are inserted as shown in
the photos.
Correctly mounted bristles.
Incorrectly mounted brist-
les.
CAUTION! Pay attention to the stop.
After briefly using the machine, check that the brushes
are seated correctly again. Retighten the star grip if
required.

19
7•5 CLEANING THE IMPLEMENT
You should clean the weed brush regularly to keep it in good condition.
Remove any loose dirt and dust with a soft brush.
IMPORTANT! Under no circumstances should you use chemical or aggressive cleaning products. Plastic or painted surfaces will
be permanently damaged. Use only cleaning and maintenance products that are easily biodegradeable. In that way you will be pro-
tecting the environment and helping to keep groundwater clean! Cleaning the machine with high pressure cleaners, steam jet cleaners
and similar appliances can permanently damage certain parts such as ball bearings, seals, engine parts, plastic parts, etc.! Furthermore,
water may enter the engine. Therefore make sure there is a sufcient distance between the cleaner nozzle and the parts at risk. The
water temperature must not exceed 50°C. Also, follow the engine user manual!
7•6 SETTING AND ADJUSTING CONTROL CABLES
WARNING! Switch off the engine and allow to cool. Protect the machine against involuntary starting; disconnect the spark plug cap.
IMPORTANT ! After the machine has been running for several hours, it may be necessary to adjust the control cables. If the control
cable settings course is not adequate, please get in touch with your specialist dealer.
CLUTCH CABLE SETTINGS
If the adjustment is still not correct, please repeat steps 1 to 3.
7• MAINTENANCE AND SERVICING
1)
Remove the screws of the bottom plate and take off the
latter.
2)
Loosen the nuts. Readjust the cable.
3)
Then rmly retighten the nuts. Check the adjustment you
have made by operating the clutch lever.
4) Check the position of the V Belt tool.

20
7•7 AIR FILTER CLEANING
To clean the air lter, please observe the information provided by the engine manufacturer (engine manufacturer operating instructions).
7•8 LONG STOP
PREPARATION
• Carefully clean the machine and in particular the underneath of the housing.
• Clean the air filter.
• Empty the petrol tank and turn the engine over until all the fuel still in the pipes and the carburettor is used.
This operation must be carried out outdoors (in the open air).
• Whilst the engine is still hot, empty the oil from the oil sump and ll up again with new oil of the right viscosity.
• Remove the spark plug and pour about 15 ml of engine oil into the cylinder. Pull gently on the starter until you feel a compression : the valves
are then closed and protected against corrosion.
• Store the weed-brush in a clean, dry place, on planks or a sheet of metal.
STARTING UP AGAIN
• Unscrew the spark plug, clean it with petrol and leave it to dry.
• Pull several times on the starter to eliminate the excess oil in the cylinder.
• Put back the dry spark plug.
• Check the oil level. Fill up with fuel.
• Start the engine.
Of course you may leave this seasonal maintenance work to your ETESIA dealer if you wish. He will check that your weed-brush is in good
condition...so that it starts first go the following spring.
7• MAINTENANCE AND SERVICING
Table of contents
Other Etesia Lawn And Garden Equipment manuals
Popular Lawn And Garden Equipment manuals by other brands

Sunforce
Sunforce SOLAR user manual

GARDEN OF EDEN
GARDEN OF EDEN 55627 user manual

Goizper Group
Goizper Group MATABI POLMINOR instruction manual

Rain Bird
Rain Bird 11000 Series Operation & maintenance manual

Cub Cadet
Cub Cadet BB 230 brochure

EXTOL PREMIUM
EXTOL PREMIUM 8891590 Translation of the original user manual

Vertex
Vertex 1/3 HP Maintenance instructions

GHE
GHE AeroFlo 80 manual

Land Pride
Land Pride Post Hole Diggers HD25 Operator's manual

Yazoo/Kees
Yazoo/Kees Z9 Commercial Collection System Z9A Operator's & parts manual

Premier designs
Premier designs WindGarden 26829 Assembly instructions

Snapper
Snapper 1691351 installation instructions