ETI 822-700 User manual
Vacuum Sealer
Operating Instructions
Product code:
822-700

IMPORTANT POINTS FOR YOUR SAFETY
Please read and fully understand all instructions and warnings prior to using this
machine. Your safety is very important!
1. Read the instructions carefully.
2. Do not operate the appliance with a damaged power cord or plug.
3. Do not use the appliance on a wet or hot surface, or near a heat source.
4. Always use the appliance on a level surface.
5. Do not immerse any part of the appliance, power cord, or plug into water or any
other liquid.
6. To disconnect, unplug the power cord from the electrical outlet. Do not
disconnect by pulling on the cord. Always unplug the appliance before cleaning
and when not in use.
7. Do not operate the appliance if it malfunctions or in any way damaged. If the
cord or the machine is damaged, please return it to the manufacturer for proper
service, replacement, or repair.
8. The appliance is not for heavy commercial use. If sealing more than 20 bags
continuously, wait at least 25 minutes before resuming use of your appliance.
9. Keep the upper lid of the appliance unlocked when not in use.
Do not attempt to service this product. Service should only be performed by an authorized
service technician.
START ENJOYING THE BENEFITS OF YOUR VACUUM SEALER SYSTEM
Thank you for purchasing this vacuum sealer.
With this new vacuum sealer, just close the lid by pressing down on both sides. When the
lid is locked in place, press the vacuum button and let the vacuum sealer do the rest! The
machine will continue to vacuum out air before sealing the bag. Release the lid by pressing
the buttons on both sides of the machine and your items are now vacuum fresh!
Your new vacuum sealer system includes the following:
•Vacuum Sealer
• User Manual (English)
KEY FEATURES OF YOUR NEW VACUUM SEALER:
• Digital touch panel
•Pulse button, ideal for packaging soft foods
•Separate vacuum mode for dry and moist foods
•Works with vacuum canister
•Unique bag cutter design
•Sealing width: MAX. 30cm
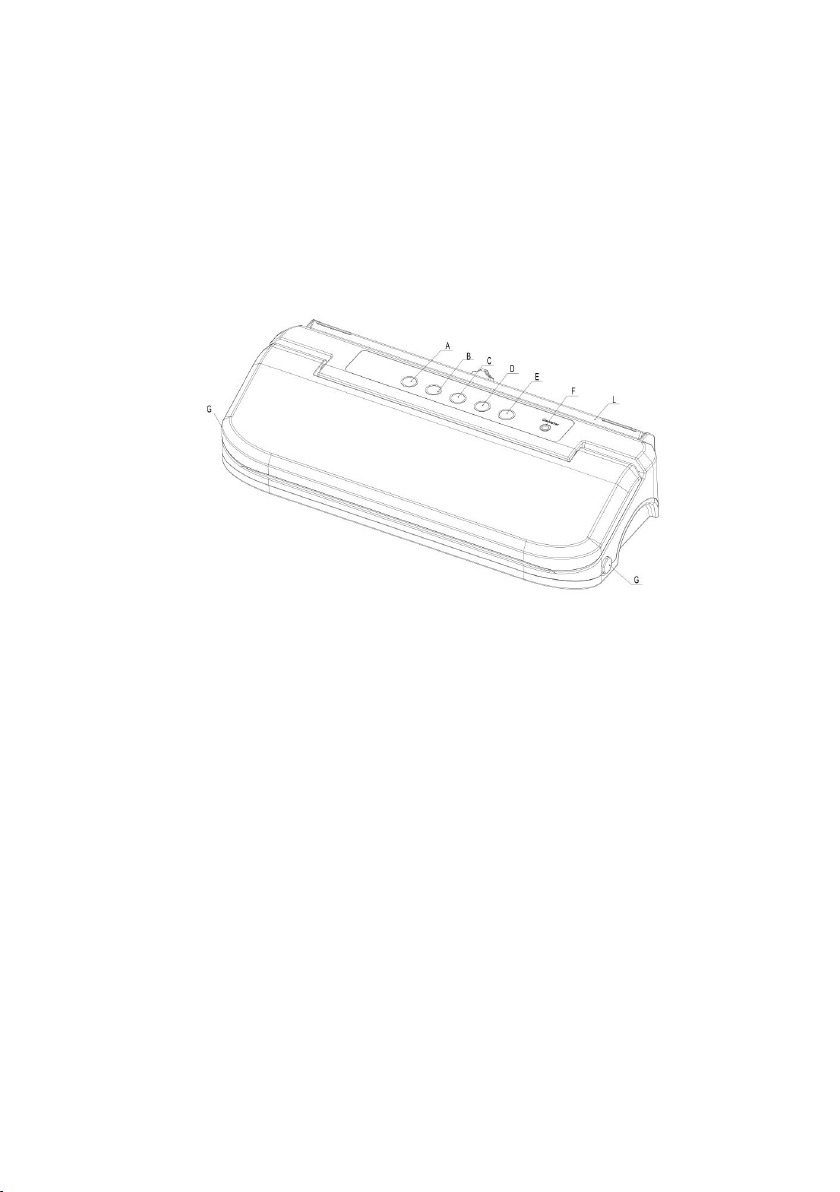
MAIN PARTS OF YOUR NEW VACUUM SEALER
A. Dry
Touch this button to vacuum and seal dry food.
B. Moist
Touch this button to vacuum and seal moist food. This function works for 30 seconds
at a time to prevent the machine from heating up.
C. Seal Only / Cancel
1. Touch to create a seal (without vacuum).
2. Touch to immediately stop the current process (cancel function).
D. Pulse
Touch this button to start the vacuum pump, release the button and it stops.
E. Canister / On & Off
1. Touch to make a vacuum in a canister.
2. Touch and hold the Canister button to lock the digital control panel and once again
to unlock it.
F. Port for Vacuuming Canister
Insert one end of the accessory hose into this port, put the other end onto canister port,
and then touch the Canister button to make the canister vacuum fresh.
G. Release Button
Press to open lid after sealing process is completed.

H. Rubber Sealing Strip
I. Sealing Gaskets (up and down)
J. Vacuum Chamber
K. Sealing Wire / Heater
L. Cutter
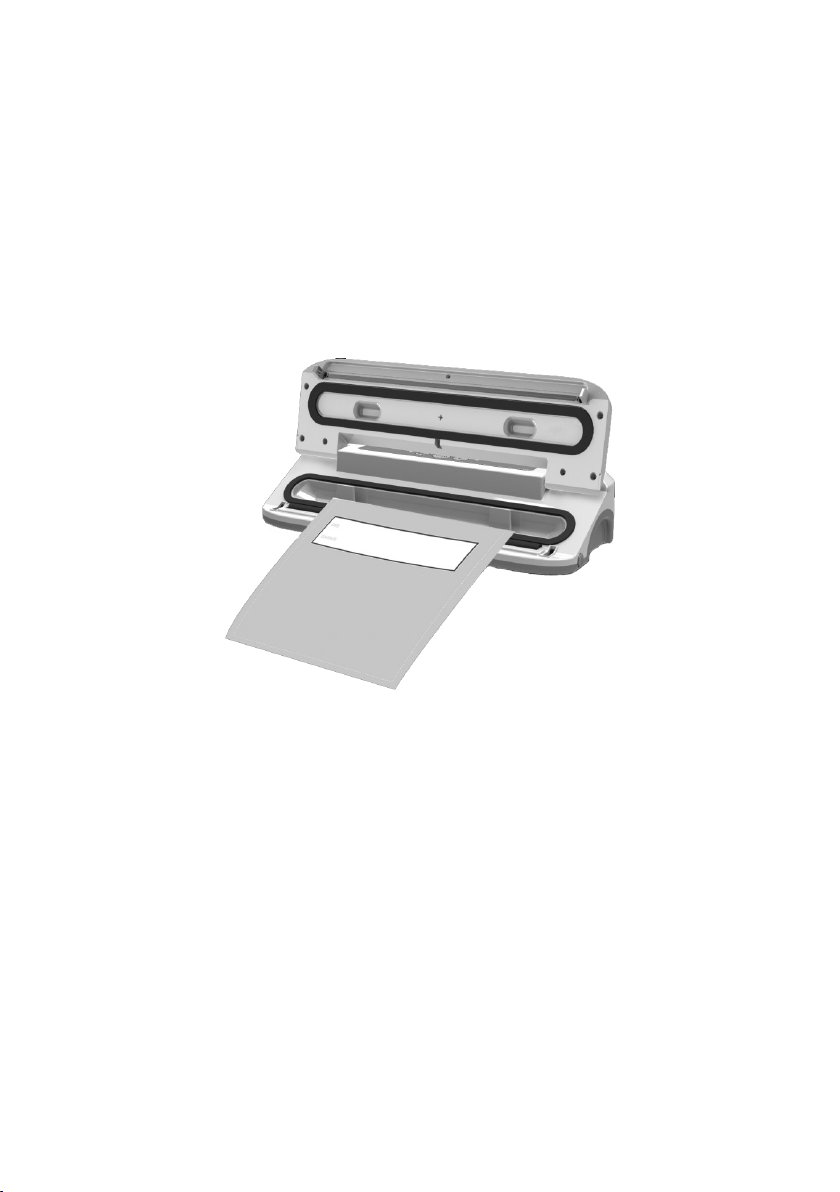
HOW TO USE THE BAG CUTTER
In the back of the appliance is the bag cutter. This accessory easily lets you get an even and
neat cut. Frayed, lopsided, or crooked edges could prevent the generation of a vacuum and
interfere with the sealing process.
1. Open the cutter bar. To do this, push the black handles at both sides of the cutter
bar to the rear of the appliance.
2. Insert the bag between cutter bar and the base of the appliance. Then press the
cutter bar in place again, until it clicks shut.
3. Push the slider of the cutting bar to the opposite end of the cutter bar.
4. Pull the bag out from under the cutter bar.
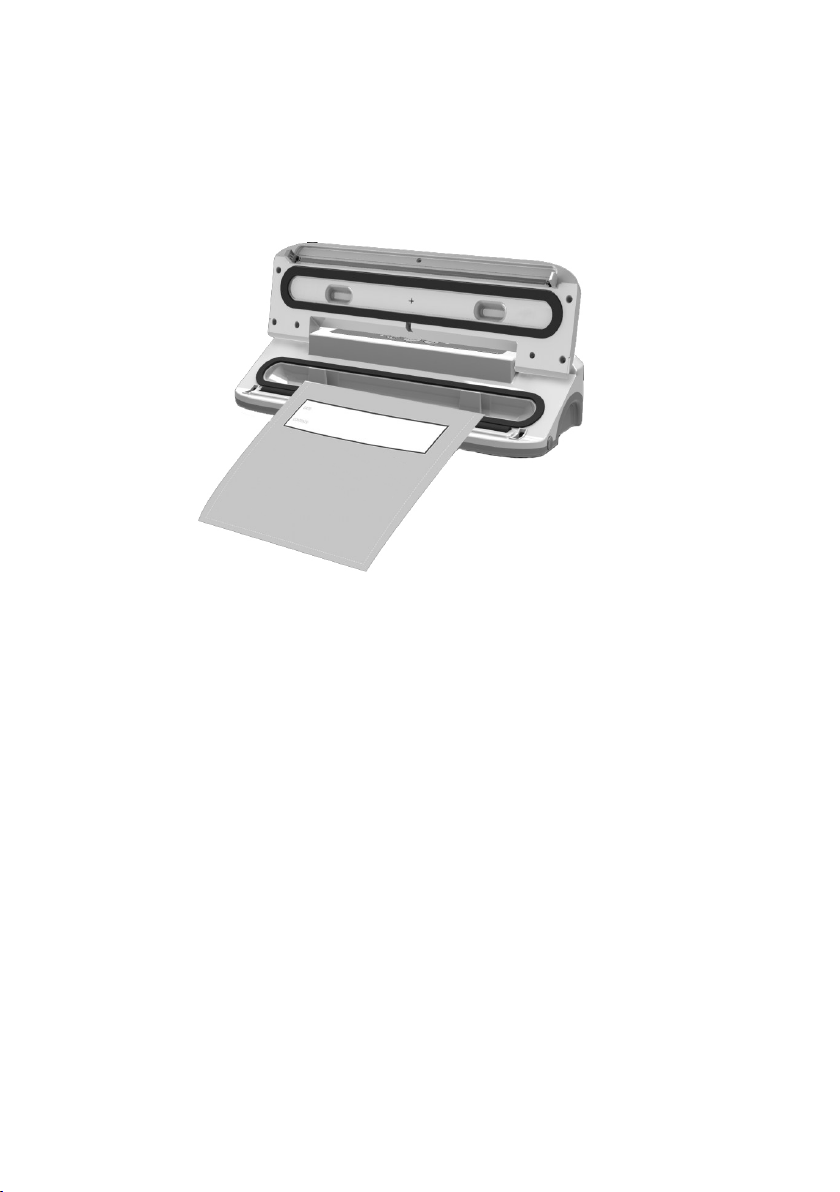
HOW TO MAKE CUSTOM SIZED BAGS
1. Pull enough bag material to hold the item being vacuum packaged, plus 50mm. With
the cutter, cut the desired bag length from bag roll. Make sure to cut it in a straight
line. Plug in the power cord.
2. Open lid. Place one end of cut bag onto sealing strip, don’t worry if you accidentally
place any material onto the gasket area.
3. Closethelidbytouchingdownrmlyonbothsides,checktomakesurethatthelid
will not open. If you hear a “click” on each side, then you have successfully locked the
lid in place.
NOTE: The sealing strip will NOT work properly unless you lock the lid. Make sure that
the lid has been locked on both sides for proper sealing.
4. Now that the lid has been locked, touch the ‘SEAL ONLY’ button to create a custom
sized bag. The indicator light illuminates during the seal process.
5. Once completed the indicator light will turn off. Press the release buttons on both
sides of the machine, it is now safe to take out the newly created bag.
6. The custom sized bag is now ready for vacuum sealing.
CAUTION: Make sure you give the appliance time to cool down. Wait at least 20 seconds
between seals. Under very heavy usage, the appliance will shut off automatically to prevent
overheating. If it does, wait 20 minutes to allow appliance to cool off.
HOW TO VACUUM SEAL WITH THE VACUUM BAGS
1. Place the item(s) to be sealed into the pre-cut or custom-sized bag. Leave at least
50mm between the contents and the top of the bag to allow for bag contraction.
2. Open the lid and place the open end of the bag down into the vacuum channel.
3. Closethelidrmlybypressingdownrmlyonbothsides,checktomakesure
that the lid will not open. If you hear a “click” on each side, then you have
successfully locked the lid in place.
4. To begin the vacuum process, touch the ‘DRY OR MOIST’ button depending on what
food is being sealed. The unit will continue to vacuum and then seal once air has
been removed.
5. Once the seal indicator light has turned off, press the release buttons on both sides
of the machine to release the bag.
HOW TO USE THE VACUUM SEALER WITH A CANISTER
NOTE:Canisterisnotincluded.Accessoryhosemaynottallcanisterlids.
1. Wipe canister cover and canister base, ensuring they are clean and dry.
2. Place food into the canister and leave at least one inch of space between food
and cover.
3. Place cover onto the canister and insert one end of accessory hose into the port
ontheappliance.Puttheotherendontothecanisterport,pressingdownrmly
toensureatightt.
4. Close the lid by pressing down on both sides. If you hear a “click” on each side,
then you have successfully locked the lid in place.
5. To begin the vacuum process, touch the ‘CANISTER’ button. The unit will continue
to vacuum and then seal once air has been removed.
6. Once the indicator light has turned off, it is safe to remove the accessory hose
from the appliance and canister.
CARE & CLEANING
1. Always unplug the unit before cleaning.
2. Do not immerse in water.
3. Do not use abrasives to clean the unit.
4. Wipe the outer surface with a soft, damp cloth and soap.
5. To clean the inside of the unit, wipe away any food or liquid with a paper towel.
6. Dry all parts thoroughly before you plug in and operate the unit again.
7. Vacuum chamber may trap liquids that were drawn from the bag. Use a mild dish
washing soap and a warm, damp cloth to wipe away any liquids left behind
from the vacuum chamber. Dry thoroughly.
TROUBLESHOOTING
Nothing happens when I press the ’’VACUUM & SEAL’’ button:
Make sure the power cord is correctly plugged into the electrical outlet.
• Make sure the power cord is not damaged in any way.
• Make sure the electrical outlet is operative by plugging in another appliance. If it’s
not, please check the circuit breakers or fuses in your home.
• Make sure the bag is positioned correctly down in the vacuum chamber.
• Press down on both sides of the lid and make sure it is locked in place.
• Wait for 25 minutes to allow appliance to cool off, and then try using again.

Air is not vacuumed from the bag:
• Check that there are no gaps, folds, wrinkles, or holes in the pre-sealed bags.
• Check for loose, worn, or cracked upper and lower sealing gaskets.
• Foods with high liquid contents may prevent the bag from sealing properly.
Cut the bag open and wipe the top inside of bag and reseal.
• Check to see if the bag is properly inserted into the vacuum chamber.
• Make sure you’ve placed the bag correctly. When making a bag from a roll,
make sure the end of the cut piece is on the sealing strip.
Bag melts:
• The sealing strip may have been too hot during the sealing process. Allow the unit to
cool for 20 seconds between uses. If the bag continues to melt, allow the unit to cool
with the lid in the upright position for 25 minutes before using.
Air has seeped back into the vacuumed bag:
• Check the seal of the bag. There may be a hole or wrinkle that is allowing air to
re-enter the bag. Carefully cut the bag open and re-seal it, or use a new bag.
• Make sure there is no moisture or liquid from the food present within the bag seal.
You may need to cut open the bag and re-seal it, or use a new bag.
Partially freeze foods with excess liquids prior to vacuum sealing.
• Make sure there are no food items with sharp edges that may have punctured the
bag.Ifyoundapuncturehole,sealtheiteminanewbag.
• Make sure no liquids were drawn to the sealing strip area.
• Check for loose, worn or cracked upper and lower sealing gaskets.
• Moisture of foods with high liquid content will prevent the bag from sealing
properly. Cut the bag open and wipe the top inside of bag and reseal.
Bag will not seal:
• Check that there aren’t any gaps, folds, wrinkles, or holes in pre-sealed edges.
• Moisture of foods with high liquid content will prevent the bag from sealing
properly. Cut bag open and wipe the top inside of bag and reseal.
• Make sure you’ve placed the bag correctly. When making a bag from a roll,
make sure the end of the cut piece is on the sealing strip.
• Make sure you’ve given the appliance time to cool down. Wait 20 seconds
between seals.
SERVICE INSTRUCTIONS
1. Do NOT attempt to repair or adjust any electrical or mechanical functions on this
unit. Doing so will void the warranty.
2. If you have any questions or comments regarding the unit’s operation or believe
any repair is necessary, please contact our sales department.

Supplied by
Electronic Temperature Instruments Ltd
Worthing · West Sussex · BN14 8HQ
01903 202151 · sales@etiltd.com · etiltd.com 30.07.19
Table of contents
Other ETI Kitchen Appliance manuals


