ZONEGUARD+ OWNER’S MANUAL
10
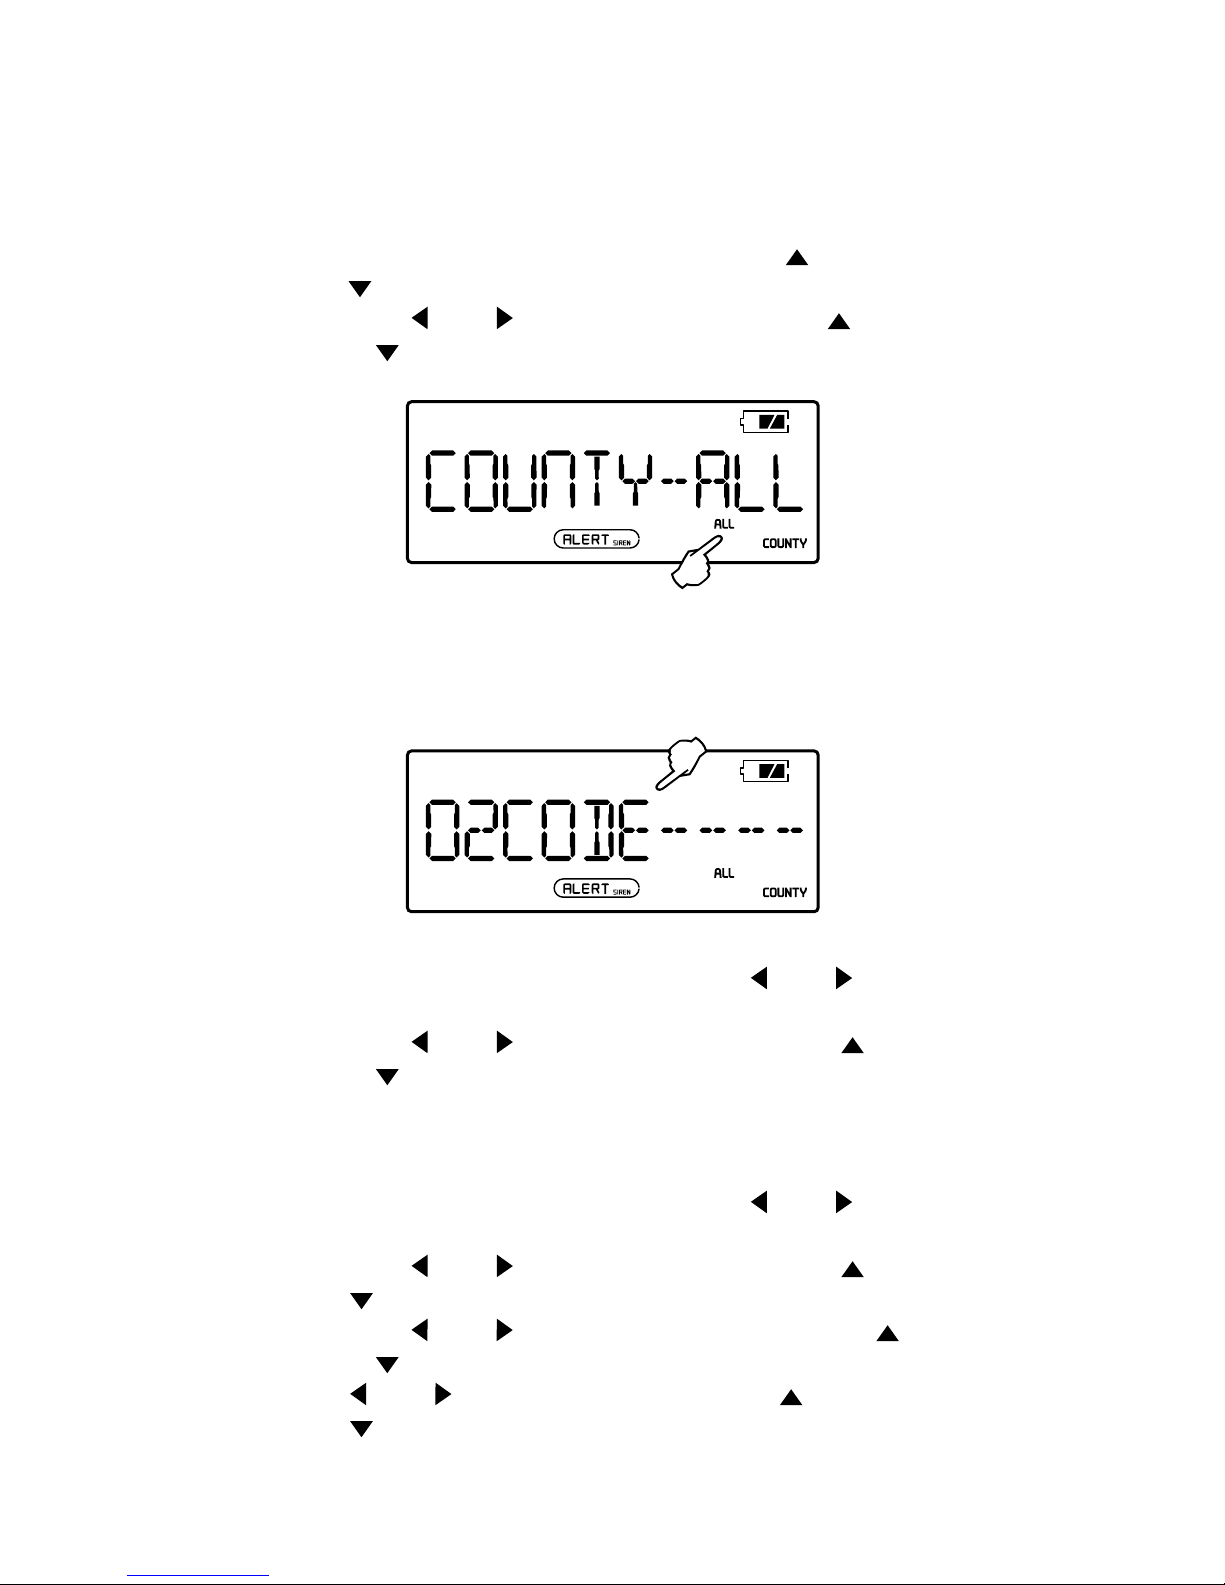
SELECT YOUR COUNTY
ZoneGuard+ lets you choose which alerts to receive—
SINGLE for one area; MULTIPLE for up to 25 areas; ALL for
everywhere…or in case you don’t know your code.
1. With radio OFF, press <MENU>, then press < > or
< > to select <COUNTY – ALL /SINGL/MULTI> mode.
2. Press < > or < >, when mode ashes, press < >
or < > to select.
ENTER YOUR CODE
Just a word of warning, you’ll need to work kind of fast on
the instructions below. Sometimes the display will return to
the main menu and you’ll have to start from the beginning.
For a SINGLE code:
1. With selected mode still ashing, press < > or < >
to begin.
2. Press < > or < > to set rst code digit. Press < >
or < > to adjust. Repeat for all other digits.
3. Press <MENU> twice to conrm and exit.
For MULTIPLE codes:
1. With selected mode still ashing, press < > or < > to
make “01” ash. This is your rst county/province code.
2. Press < > or < > to set rst code digit. Press < > or
< > to adjust. Repeat for all other digits.
3. Press < > or < > to return to ashing “01”, press < >
or < > to adjust to next county/province code. Press
< > or < > to set rst code digit. Press < > or
< > to adjust. Repeat for all other digits. Repeat for all
county/ province codes.
4. Press <MENU> twice to conrm and exit.