8SETTING ALARM ON/OFF
TO TURN ALARM 1 ON:
With the radio turned off, keeping the ALARM button (9) pressed, set
the correct wake up hour and minutes with the HOUR (3) and
MINUTE (4). They can be pressed with quick, short presses to advance
slowly or they can be kept pressed rapidly. When finished, release the
ALARM button and this will cause the loudspeaker symbol appears in
the display.
If you want to deactivate the alarm, press the ALARM button (9)
again and the loudspeaker symbol will disappear from the display.
When the activated alarm turns the radio on, it can be turned off by
pressing the ALARM button (9) again. The Power button (7) cannot be
used for this purpose.
While the radio is playing in alarm mode and without any manual
interruption to deactivate the alarm, it will turn off automatically after
60 minutes.
TO TURN ALARM 1 OFF:
Press ALARM button (10) until the display shows both OFF and
symbol. Press MODE button (9) until it returns to normal month
and date display.
TO TURN ALARM 2 ON:
Press ALARM button (12) until the display shows both the alarm time
and symbol. Press MODE button (9) until it returns to normal month
and date display.
TO TURN ALARM 2 OFF:
Press ALARM button (12) until the display shows both OFF and
symbol. Press MODE button (9) until it returns to normal month and
date display.
ESP 2000 OPERATION MANUAL
9
7SETTING ALARM TIME
(REMARK: please make sure the 'e' ONIOFF switch is in
'OFF' position to set alarm time or operate the alarm function)
TO SET ALARM TIME:
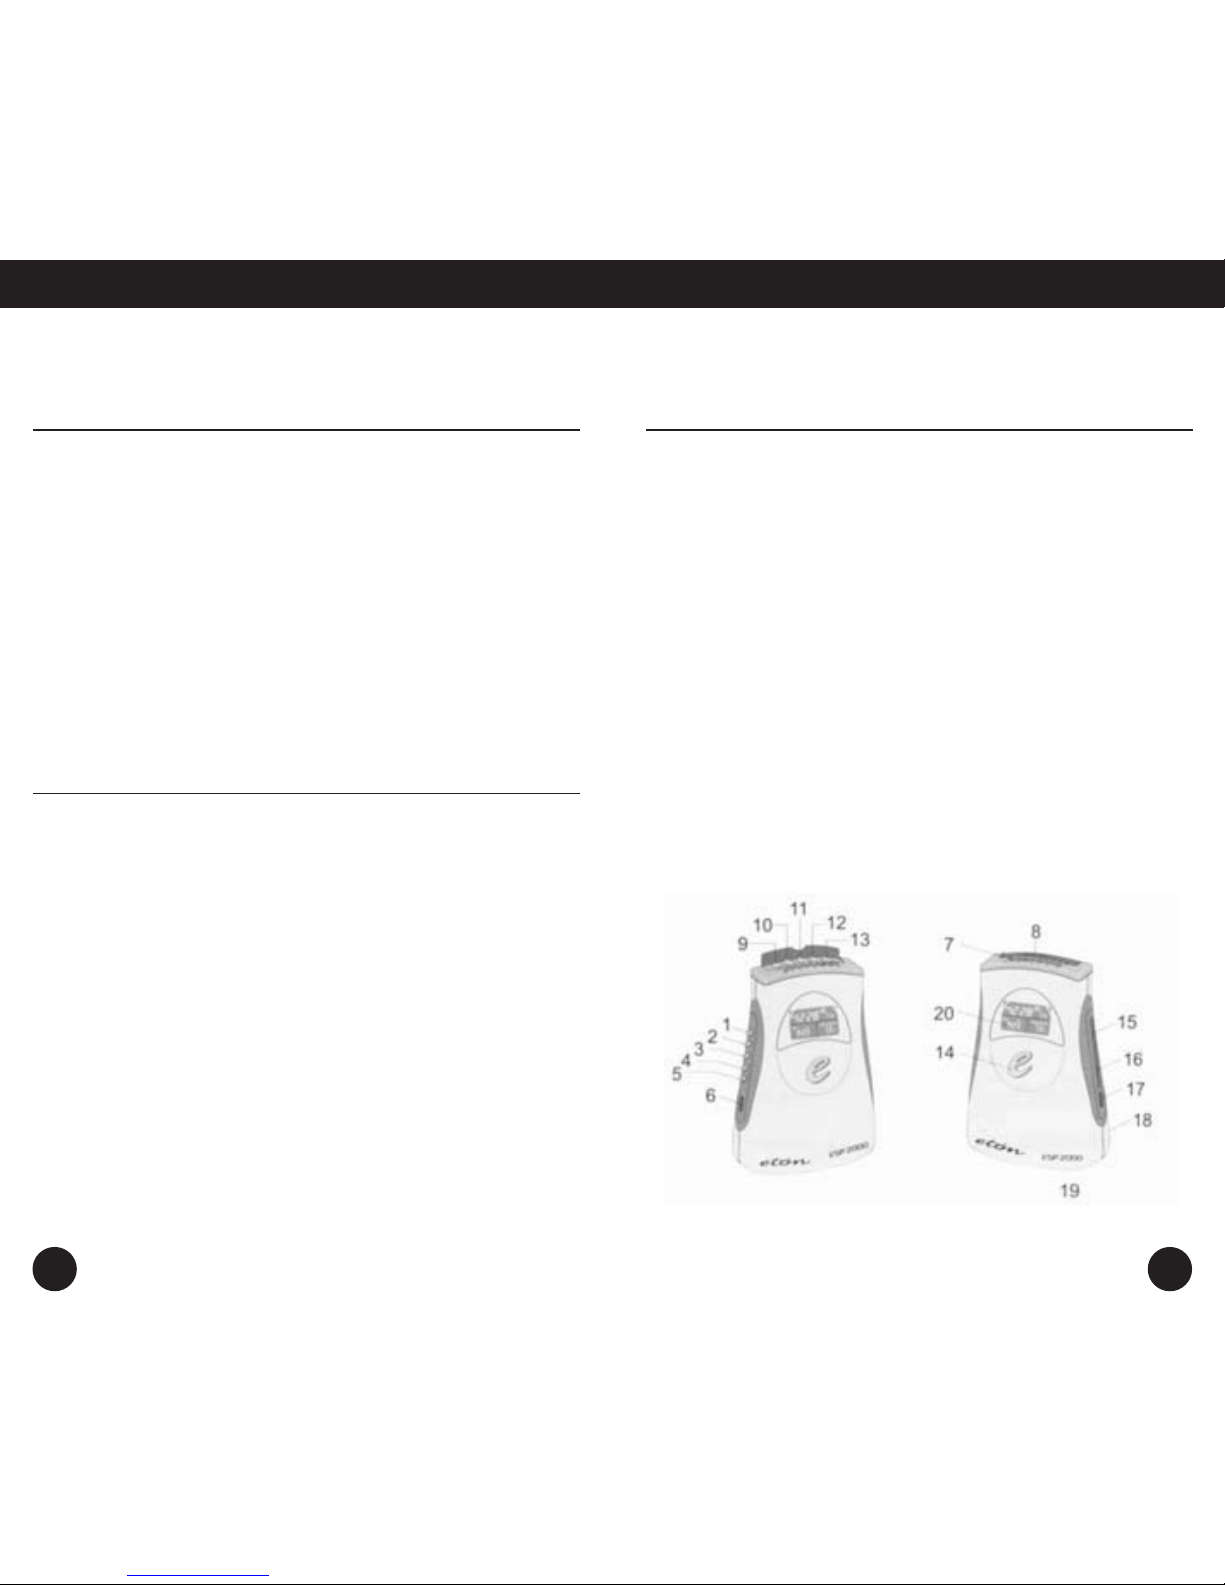
Hold SET button (13) for two seconds to enter set mode, press
SET button (13) twice to show the symbol and flash the alarm
hour digits, then press UP (10) or DOWN (12) button to set alarm l hour.
- Press MODE button (9) once to flash the alarm minute digits,
then press UP (10) or DOWN (12) button to set alarm l minutes
- Press MODE button (9) once again to finish alarm l setting
(all digits steady) or press SET button (13) to continue
alarm 2 setting
TO SET ALARM 2 TIME:
- Hold SET button (13) for two seconds to enter set mode, press
SET button (13) three times to show the symbol and flash the
alarm hour digits, then press UP (10) or DOWN (12) button to
set alarm 2 hour.
- Press MODE button (9) once to flash the alarm minute digits,
then press UP (10) or DOWN (12) button to set alarm 2 minute.
- Press MODE button (9) once again to finish alarm 2 setting (all
digits steady) or press SET button (13) to continue zone setting.
Setting Alarm ON/OFF
To turn alarm l ON: Press ALARM button (10) until the display
shows both the alarm time and symbol. Press MODE button (9)
until it returns to normal month and date display.
8