®
www.etsnord.com
2
®
RDM-34-0921
Installation, use and maintenance manual
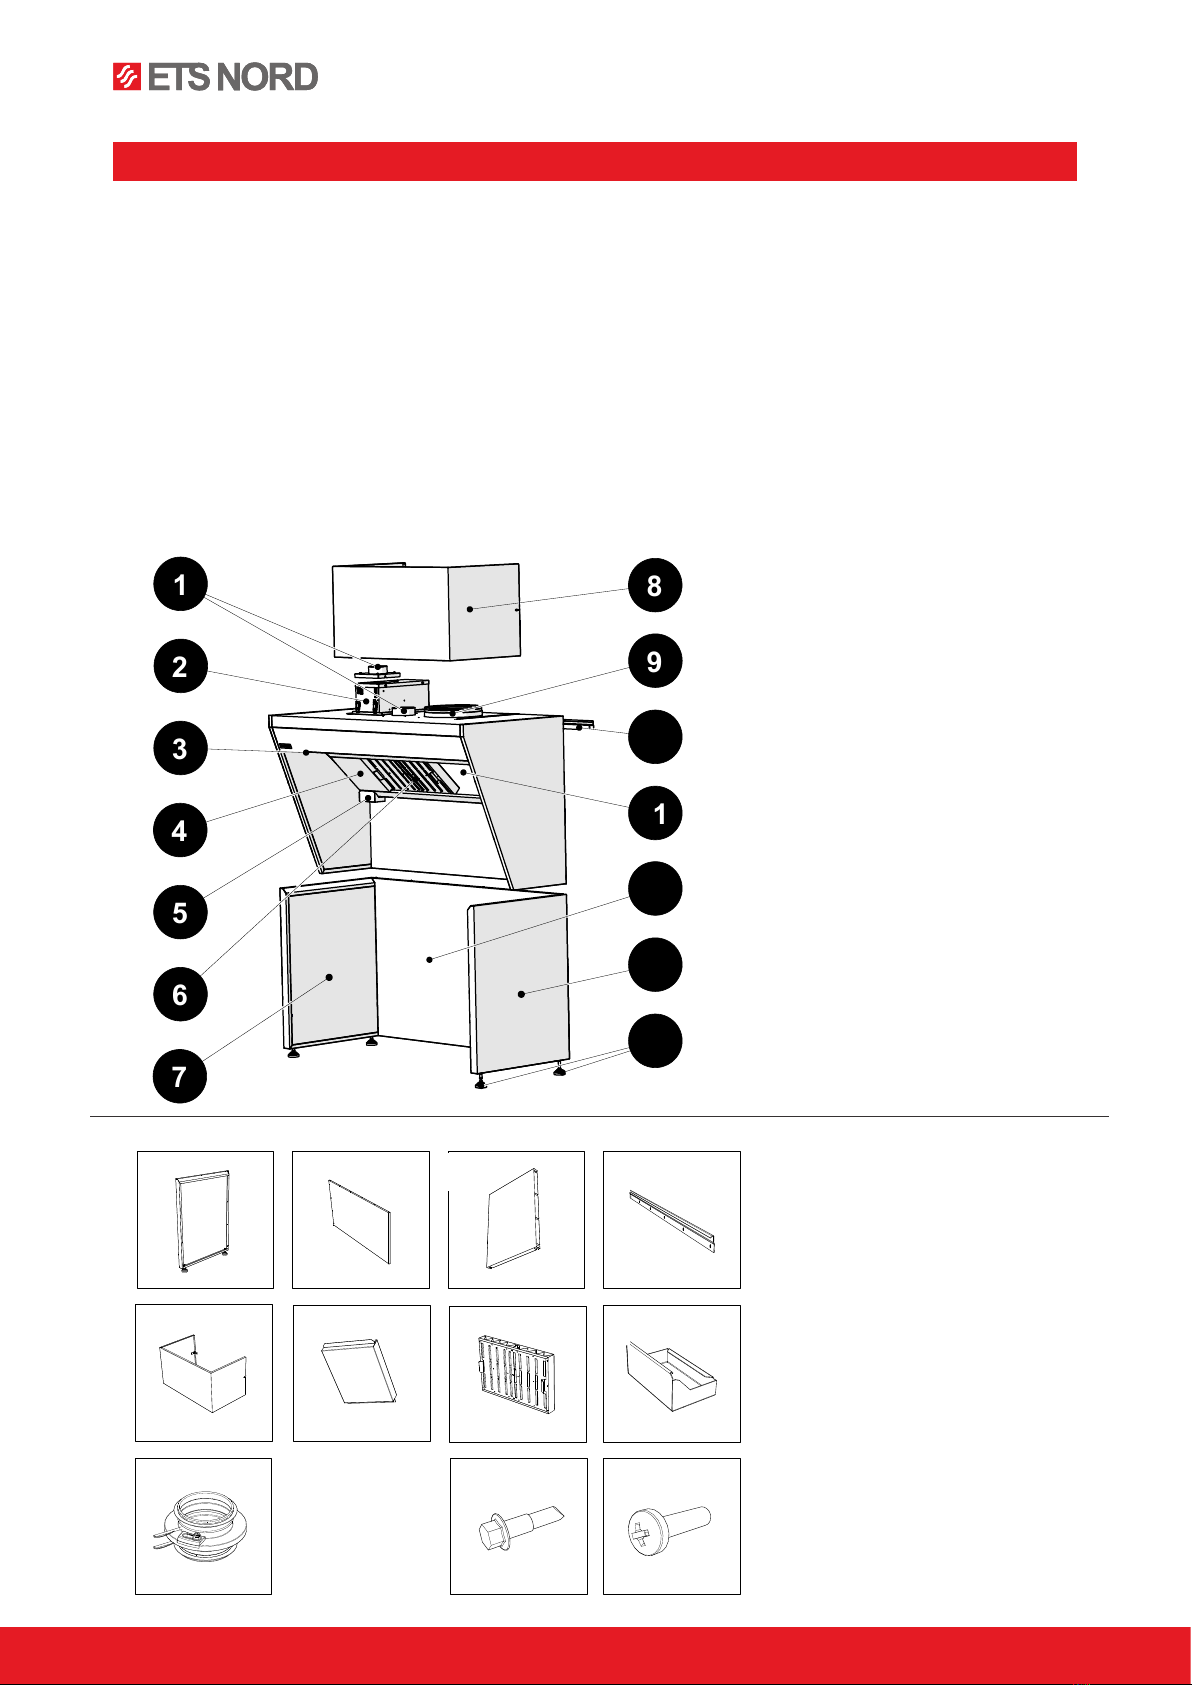
In the kit:
A- Canopy frame side
B- Canopy frame back
C- Canopy frame interior wall
D- Suspension prole
E- Cover plate
F- Blind plate for grease lter rail
G- HFK grease lter
H- Grease collection container
I- KRI regulation damper
J- M5 self drilling screws
K- M5x20mm bolt
7
5
4
12
3
6
11
2
13
1
10
9
8
14
(F)
(H)
(G)
(C)
(E)
(D)
(B)
(A)
1- Supply air connection
2- Ozonator
3- “AirGrip” air nozzle system
4- Blind plate for grease filter rail
5- Grease collection container
6- HFK grease filter (500mm)
7- Canopy frame interior wall
8- Cover plate
9- Exhaust air connection
10- Suspension profile
11- Exhaust air adjustment plate
12- Canopy frame back wall
13- Canopy frame side
14- Adjustable feet
A
A B
EG
D
C
FH
JK
I
M5x20mm screw
M5 self-drilling screw
1. A Frame installation canopy type HG2.......................................................................................................4
1. B Wall installation canopy type HG1...........................................................................................................5
2. Installing the ozonator ...............................................................................................................................6
3. Installing supply air adjusting damper.........................................................................................................6
4. Installing cover plate ..................................................................................................................................7
5. Installing HFK grease filters, blind plates and grease collection container.................................................7
6. Measuring and adjusting exhaust airflow....................................................................................................7
7. Luminaire connection .................................................................................................................................8
8. Replacing the luminaires .............................................................................................................................8
9. Kitchen canopy maintenance......................................................................................................................8


