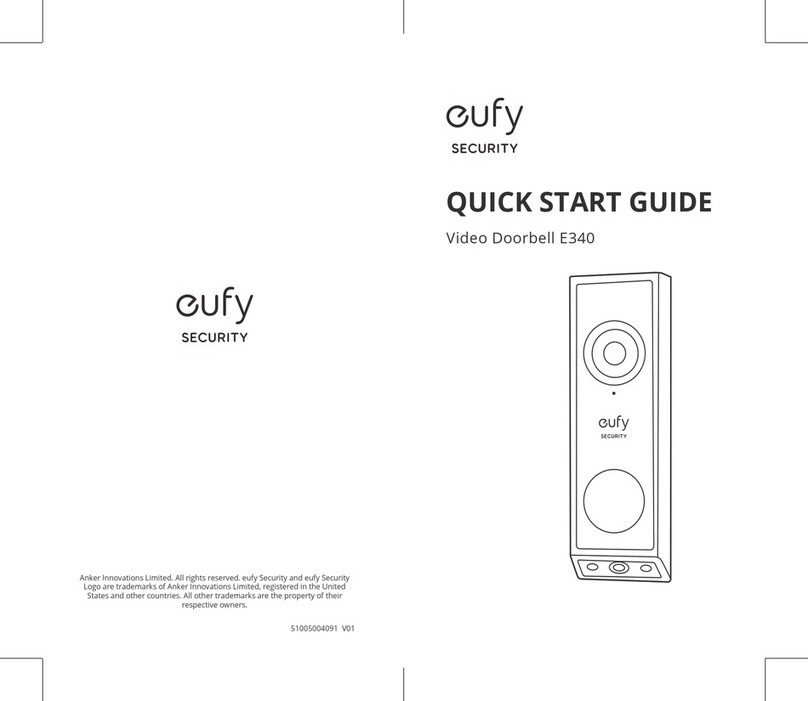
eufy Security E340 User manual

QUICK START GUIDE
Video Doorbell E340
Anker Innovations Limited. All rights reserved. eufy Security and eufy Security
Logo are trademarks of Anker Innovations Limited, registered in the United
States and other countries. All other trademarks are the property of their
respective owners.
Model:T8214
5100500XXXX V01
KURZANLEITUNG
GUÍA DE INICIO RÁPIDO
GUIDE DE DÉMARRAGE RAPIDE
GUIDA RAPIDA
SNELSTARTGIDS
GUIA DE INÍCIO RÁPIDO

EN 01
English 01
Deutsch 20
Español 39
Français 58
Italiano 77
Nederlands 96
Portuguese 115
134
AT A GLANCE
Front View
⑥
⑤
⑦⑧
①
②
③
④
⑨
①LED Light
②Motion Sensor
③Primary Camera Lens
④Microphone
⑤Ambient Light Sensor
⑥LED Ring / Doorbell Button
⑦LED Light
⑧Secondary Camera Lens
⑨Speaker

EN 0302 EN
HOW THE SYSTEM WORKS
Works Independently
This video doorbell can work independently once it is
connected to your home wireless router. Additionally, you
have a variety of options to receive notifications and hear a
ring when someone presses your video doorbell.
• Use a traditional doorbell chime (if you have one).
• Use a eufy Security doorbell chime (sold separately).
• Use an Amazon Alexa Echo Show device.
Works with eufy Security HomeBase
(Optional)
The video doorbell detects motion at your porch and lets
you to answer the door anytime, anywhere. You can store
video clips in the built-in storage of your eufy Security
HomeBase 2 or S380 HomeBase (sold separately). When
someone rings the doorbell, people in the house will be
notified.
HomeBase
Rear View
⑤
①
②
③
④
SYNC
①Detaching Mechanism
②Power Terminals for Existing Doorbell
Wires (Optional)
③SYNC Button
Press to turn on the doorbell.
Press and hold for 2 seconds until you hear a beep to
set up the doorbell. (Optional)
Press quickly 5 times within 3 seconds to turn off the
doorbell.
④Battery Compartment
⑤QR Code (Scan to add the doorbell in the app)

EN 0504 EN
SETTING UP THE SYSTEM
1. Download and install the eufy Security app, then sign in
or create an account.
2. Follow the in-app instructions to add the video doorbell.
CHARGING THE BATTERY
PACK
1. Remove the pre-installed battery pack from the battery
compartment.
0~100%
2. Fully charge the rechargeable battery pack before
installation.
3. Place the battery pack into the battery compartment.
0~100%

EN 0706 EN
DOORBELL MOUNTING
(Battery Powered)
Choose a Location
1. Take the video doorbell to your front door and check the
live view in the app. Choose a location where you can see
the desired field of view. Consider the following factors:
• Check if you can reuse the existing holes and anchors in
the wall or door frame.
• If you want to place the doorbell near a side wall, make
sure the wall isn't in the field of view. Otherwise, the IR
light will be reflected and the night vision will be blurred.
• If you are drilling the mounting holes for the first time, the
recommended height is 48" (1.2m) above the ground.
• To adjust the angle, use the 15º mounting wedge as a
supplementary mounting bracket.
15°
1.76m(5’9”)
1.2m (48")
0.3m
(12")
1m
(40")
DETERMING THE POWER
OPTION
Option 1: Battery Powered
If you don't have existing doorbell wiring at your front door,
use the included battery. You are free to determine the
location of the doorbell, and the mounting will be easy and
quick.
When the battery is low, you will need to recharge it. Battery
life varies with use. If you choose this option, please skip to
DOORBELL MOUNTING (Battery Powered).
Option 2: Wire Powered
If you have existing and working doorbell wires at your
front door, the video doorbell will be constantly powered
by these wires. So there's no need to detach and recharge
after installation.
The mounting position is limited. If you choose this option,
please skip to DOORBELL MOUNTING (Wire Powered).

EN 0908 EN
Mount the Bracket
Use the provided screws to secure the mounting bracket on
the wall.
Without 15º
Mounting Wedge
Mounting
Bracket
Mounting
Bracket
Wooden Wall
Mounting
Bracket
Mounting
Bracket
Mounting
Wedge
Mounting
Wedge
With 15°
Mounting Wedge
Hard Wall
Without 15º
Mounting Wedge
With 15°
Mounting Wedge
15°
1.76m(5’9”)
1.2m (48")
0.3m
(12")
1m
(40")
2. Place the screw hole positioning card against the wall
to mark the location. If mounting on a hard wall (brick,
concrete, or stucco), use a 15/64" (5.95mm) drill bit to drill 2
holes through the screw hole positioning card.
What you need: Phillips-Head Screwdriver; Power Drill
(15/64" Drill Bit)

EN 1110 EN
DOORBELL MOUNTING
(Wire Powered)
Check the Doorbell Wires
1. Ring the existing doorbell to check if it is working. If
it doesn't ring, your doorbell wires may be defective.
Power on the doorbell by the built-in battery or consult an
electrician to repair the wires.
2. Shut off the power at the circuit breaker. Turn the lights
on and off to make sure the electricity in your home is
properly shut off.
OFF
OFF
Always be careful when handling wires. If you're not comfortable
installing it yourself, have a qualified electrician to do it.
Install the Doorbell
Align the doorbell with the bottom of the mounting bracket,
then press the top of the doorbell into place until it clicks.
Recharging the Battery
1. Insert the detaching pin into the pin hole on the top of
the doorbell, then lift the top for removal.
2. Repeat steps in "CHARGING THE BATTERY PACK".
You can purchase an extra battery pack for quick replacement.

EN 1312 EN
Choose a Location
1. Take the video doorbell to your front door and check the
live view in the app. Choose a location where you can see
the desired field of view. Consider the following factors:
• Check if you can reuse the existing holes and anchors in
the wall or door frame.
• If you want to place the doorbell near a side wall, make
sure the wall isn't in the field of view. Otherwise, the IR
light will be reflected and the night vision will be blurred.
• If you are drilling the mounting holes for the first time, the
recommended height is 48" (1.2m) above the ground.
• To adjust the angle, use the 15º mounting wedge as a
supplementary mounting bracket.
1.76m(5’9”)
1.2m (48")
0.3m
(12")
1m
(40")
Detach the Existing Doorbell Button
If you already have existing doorbell wiring:
1. Remove the existing doorbell button with a Phillips-head
screwdriver (not provided).
2. Pull the two wires out carefully when removing the
existing doorbell. Straighten the wire ends if necessary.

EN 1514 EN
Mount the Bracket
Use the provided screws to secure the mounting bracket on
the wall.
Without 15º
Mounting Wedge
Mounting
Bracket
Mounting
Bracket
Wooden Wall
Mounting
Bracket
Mounting
Bracket
Mounting
Wedge
Mounting
Wedge
With 15°
Mounting Wedge
Hard Wall
Without 15º
Mounting Wedge
With 15°
Mounting Wedge
15°
1.76m(5’9”)
1.2m (48")
0.3m
(12")
1m
(40")
2. Place the screw hole positioning card against the wall
to mark the location. If mounting on a hard wall (brick,
concrete, or stucco), use a 15/64" (5.95mm) drill bit to drill 2
holes through the screw hole positioning card.
What you need: Phillips-Head Screwdriver; Power Drill
(15/64" Drill Bit)

EN 1716 EN
Install the Doorbell
Align the doorbell with the bottom of the mounting bracket,
then press the top of the doorbell into place until it clicks.
Restore Power
Switch the main circuit breaker back to ON. You're all set!
OFF
OFF
Connect the Wires to the Doorbell
Connect the wires to the terminals on the back of the
doorbell, then tighten the terminal screws. Wire can be
connected to any terminal.
SYNC
SYNC
To prevent short-circuiting, make sure the wires are not
touching each other after connecting them to the terminals.
If the wires are too short, use the extension wires and wire
nuts to make them longer. Use electrical wiring tape instead
if there is no more space on the wall for wire nuts.

EN 1918 EN
NOTICE
Declaration of Conformity
This product complies with the radio interference requirements of
the European Community.
Hereby, Anker Innovations Limited declares that this device is in compliance
with the essential requirements and other relevant provisions of Directive
2014/53/EU. For the declaration of conformity, visit the Web site:
https://uk.eufylife.com/.
This product complies with the radio interference requirements of
the United Kingdom.
This product complies with the radio interference requirements of the
United Kingdom.
Hereby, Anker Innovations Limited declares that this product is in
compliance with Radio Equipment Regulations 2017(SI2017/1206). The full
text of the UK declaration of conformity is available at the following internet
address: https://uk.eufylife.com.
Your product is designed and manufactured with high-
quality materials and components, which can be recycled
and reused.
This symbol means the product must not be discarded as
household waste and should be delivered to an appropriate
collection facility for recycling. Proper disposal and recycling
help protect natural resources, human health, and the
environment. For more information on the disposal and
recycling of this product, contact your local municipality,
disposal service, or the shop where you bought this product.
RF exposure information:
The Maximum Permissible Exposure (MPE) level has been calculated based
on a distance of d=20 cm between the device and the human body. To
maintain compliance with RF exposure requirements, use product that
maintains a 20cm distance between the device and the human body.
Frequency bands and power as below:
Function Bands Operation Frequency Max. Power
Wi-Fi for T8214 2.4GHz 2412-2472MHz 18.89 dBm
The following importer is the responsible party (contract for EU matters):
Anker Innovations Deutschland GmbH I Georg-Muche-Strasse 3, 80807
Munich, Germany
The following importer is the responsible party (contract for UK matters):
Anker Technology (UK) Limited I GNR8, 49 Clarendon Road,
Watford,Hertfordshire, WD17 1HP, United Kingdom
SAFETY
• The suitable temperature for devices and accessories is -20°C to 50°C (Charging
temperature is 0°C to 40°C).
• Unless specifically indicated that it is safe to do so in the user guide or
instruction manual, do not use this device in an environment that exceeds the
recommended low or high temperature.
• Unless specifically indicated that it is safe to do so in the user guide or
instruction manual, avoid exposing your device to direct sunshine or
excessively wet environments.
• It is recommended to supply the device in an environment with a temperature
that ranges from 5°C to 25°C.
• When supplying power, place the device in an environment that has a normal
room temperature and good ventilation.
CAUTION!
THERE IS A RISK OF EXPLOSION IF AN INCORRECT BATTERY TYPE IS USED.
DISPOSE OF USED BATTERIES ACCORDING TO THEIR INSTRUCTIONS.
Warning:
• Replacing a battery with an incorrect type may bypass safeguards
and create danger;
• Disposal of a battery in a fire or other source of significant heat, or
by crushing, or cutting, may result in an explosion as well as leakage
of flammable liquids and gases;
• Leaving a battery in an extremely hot environment may result in an
explosion as well as leakage of flammable liquids and gases;
• A battery subjected to extremely low air pressure may result in an
explosion as well as leakage of flammable liquids and gases.

DE 2120 DE
AUF EINEN BLICK
Vorderansicht
⑥
⑤
⑦⑧
①
②
③
④
⑨
①LED-Licht
②Bewegungssensor
③Primäres Kameraobjektiv
④Mikrofon
⑤Umgebungslichtsensor
⑥LED-Klingel/Klingeltaste
⑦LED-Licht
⑧Sekundäres Kameraobjektiv
⑨Lautsprecher
Rückseite
⑤
①
②
③
④
SYNC
①Lösemechanismus
②Stromklemmen für vorhandene
Türklingelkabel (optional)
③SYNC-Taste
Drücken Sie, um die Türklingel einzuschalten.
Drücken und halten Sie 2 Sekunden lang, bis Sie einen
Piepton hören, um die Türklingel einzurichten.(optional)
Drücken Sie innerhalb von 3 Sekunden 5 Mal schnell,
um die Türklingel auszuschalten.
④Akkufach
⑤QR-Code (Scannen Sie, um die Türklingel in
der App hinzuzufügen)

DE 2322 DE
FUNKTIONSWEISE DES
SYSTEMS
Arbeitet unabhängig
Diese Video-Türklingel kann unabhängig arbeiten, sobald
sie mit Ihrem drahtlosen Heimrouter verbunden ist.
Zusätzlich haben Sie eine Vielzahl von Optionen, um
Benachrichtigungen zu erhalten und einen Klingelton zu
hören, wenn jemand Ihre Videotürklingel betätigt.
• Verwenden Sie eine traditionelle Türklingel (falls
vorhanden).
• Verwenden Sie einen eufy Security-Türklingelton (separat
erhältlich).
• Verwenden Sie ein Amazon Alexa Echo Show Gerät.
Funktioniert mit eufy Security
HomeBase (optional)
Die Videotürklingel erkennt Bewegungen an Ihrer Veranda
und ermöglicht es Ihnen, jederzeit und überall die Tür zu
öffnen. Sie können Videoclips im integrierten Speicher Ihres
eufy Security HomeBase 2 oder S380 HomeBase (separat
erhältlich) speichern. Sobald jemand die Türklingel betätigt,
werden die Personen im Haus darauf aufmerksam gemacht.
HomeBase
AUFLADEN DES
BATTERIEPACKS
1. Entfernen Sie den vorinstallierten Batteriepack aus dem
Batteriefach.
0~100%
2. Laden Sie den wiederaufladbaren Batteriepack vollständig
auf, bevor Sie ihn installieren.
3. Place the battery pack into the battery compartment.
0~100%

DE 2524 DE
EINRICHTEN DES SYSTEMS
1. Laden Sie die eufy Security App herunter und installieren
Sie sie, dann melden Sie sich an oder erstellen Sie ein
Konto.
2. Befolgen Sie die Anweisungen in der App, um die
Videotürklingel hinzuzufügen.
BESTIMMUNG DER
STROMVERSORGUNGSOPTION
Option 1: Batteriebetrieben
Wenn Sie keine vorhandene Türklingel-Verkabelung an Ihrer
Haustür haben, verwenden Sie die mitgelieferte Batterie.
Sie sind frei, den Standort der Türklingel zu bestimmen, und
die Montage wird einfach und schnell sein.
Wenn die Batterie leer ist, müssen Sie sie aufladen.
Die Batterielaufzeit variiert je nach Verwendung.
Wenn Sie diese Option wählen, gehen Sie bitte zur
TÜRGLOCKENMONTAGE (Batteriebetrieben) über.
Option 2: Drahtbetrieben
Wenn Sie bereits vorhandene und funktionierende
Türklingeldrähte an Ihrer Haustür haben, wird die
Videotürklingel ständig von diesen Drähten mit Strom
versorgt. Also gibt es nach der Installation keine
Notwendigkeit, es abzutrennen und aufzuladen.
Die Montageposition ist begrenzt. Wenn Sie diese Option
wählen, gehen Sie bitte zur TÜRKLINGELMONTAGE
(Drahtbetrieben) über.

DE 2726 DE
TÜRKLINGELMONTAGE
(Batteriebetrieben)
Wählen Sie einen Standort
1. Nehmen Sie die Videotürklingel mit zur Haustür und
überprüfen Sie die Live-Ansicht in der App. Wählen Sie
einen Standort, an dem Sie das gewünschte Sichtfeld sehen
können. Berücksichtigen Sie dabei folgende Faktoren:
• Überprüfen Sie, ob Sie die vorhandenen Löcher und Anker
in der Wand oder Türzarge wiederverwenden können.
• Wenn Sie die Türklingel in der Nähe einer Seitenwand
platzieren möchten, stellen Sie sicher, dass die Wand nicht
im Sichtfeld liegt. Andernfalls wird das IR-Licht reflektiert
und die Nachtsicht wird verschwommen sein.
• Wenn Sie die Montagelöcher zum ersten Mal bohren,
beträgt die empfohlene Höhe 48" (1,2 m) über dem
Boden.
• Um den Winkel anzupassen, verwenden Sie die 15º
Montagewinkeleinheit als zusätzliche Montagehalterung.
15°
1.76m(5’9”)
1.2m (48")
0.3m
(12")
1m
(40")
15°
1.76m(5’9”)
1.2m (48")
0.3m
(12")
1m
(40")
2. Platzieren Sie die Schraubenloch-Positionierungskarte
gegen die Wand, um die Position zu markieren. Wenn Sie
an einer harten Wand (Ziegel, Beton oder Stuck) montieren,
verwenden Sie einen 15/64" (5,95 mm) Bohrer, um 2 Löcher
durch die Schraubenloch-Positionierungskarte zu bohren.
Was Sie brauchen: Phillips-Schraubendreher;
Bohrmaschine (15/64" Bohrer)

DE 2928 DE
Befestigen Sie die Halterung
Verwenden Sie die mitgelieferten Schrauben, um die
Montagehalterung an der Wand zu befestigen.
Ohne Montagewinkel
von 15º
MONTAGE DER
halterung
MONTAGE DER
halterung
Holzwand
MONTAGE DER
halterung
MONTAGE DER
halterung
MONTAGE DER
Winkel
MONTAGE DER
Winkel
Mit 15°
Montagewinkel
Harte Wand
Ohne Montagewinkel
von 15º
Mit 15°
Montagewinkel
Installieren Sie die Türklingel
Richten Sie die Türklingel mit der Unterseite der
Montagehalterung aus und drücken Sie dann die Oberseite
der Türklingel an ihren Platz, bis sie einrastet.
Aufladen des Akkus
1. Führen Sie den Absteckstift in das Stiftloch oben auf
der Türklingel ein und heben Sie dann die Oberseite zum
Entfernen an.
2. Wiederholen Sie die Schritte in "BATTERIEPACK
AUFLADEN".
Sie können ein zusätzliches Batteriepack für schnellen
Austausch erwerben.

DE 3130 DE
TÜRKLINGELBEFESTIGUNG
(Drahtbetrieben)
Überprüfen Sie die Türklingeldrähte
1. Betätigen Sie die vorhandene Türklingel, um zu
überprüfen, ob sie funktioniert. Wenn es nicht klingelt,
können Ihre Türklingeldrähte defekt sein. Schalten Sie
das Türklingelgerät mit der eingebauten Batterie ein
oder konsultieren Sie einen Elektriker, um die Drähte zu
reparieren.
2. Schalten Sie die Stromversorgung am Sicherungskasten
ab. Schalten Sie die Lichter ein und aus, um sicherzustellen,
dass die Elektrizität in Ihrem Zuhause ordnungsgemäß
ausgeschaltet ist.
OFF
OFF
Seien Sie bei der Handhabung von Kabeln immer vorsichtig.
Wenn Sie sich nicht wohl dabei fühlen, es selbst zu installieren,
lassen Sie es von einem qualifizierten Elektriker tun.
Lösen Sie die vorhandene
Türklingel-Taste ab
Wenn Sie bereits über eine Türklingelverkabelung verfügen:
1. Bauen Sie die vorhandene Klingeltaste mit einem
Kreuzschlitzschraubendreher (nicht im Lieferumfang
enthalten) aus.
2. Ziehen Sie die beiden Drähte vorsichtig heraus, wenn Sie
die bestehende Türklingel entfernen. Begradigen Sie die
Drahtenden bei Bedarf.

DE 3332 DE
Wählen Sie einen Standort
1. Nehmen Sie die Videotürklingel mit zur Haustür und
überprüfen Sie die Live-Ansicht in der App. Wählen Sie
einen Standort, an dem Sie das gewünschte Sichtfeld sehen
können. Berücksichtigen Sie dabei folgende Faktoren:
• Überprüfen Sie, ob Sie die vorhandenen Löcher und Anker
in der Wand oder Türzarge wiederverwenden können.
• Wenn Sie die Türklingel in der Nähe einer Seitenwand
platzieren möchten, stellen Sie sicher, dass die Wand nicht
im Sichtfeld liegt. Andernfalls wird das IR-Licht reflektiert
und die Nachtsicht wird verschwommen sein.
• Wenn Sie die Montagelöcher zum ersten Mal bohren,
beträgt die empfohlene Höhe 48" (1,2 m) über dem
Boden.
• Um den Winkel anzupassen, verwenden Sie die 15º
Montagewinkeleinheit als zusätzliche Montagehalterung.
1.76m(5’9”)
1.2m (48")
0.3m
(12")
1m
(40")
15°
1.76m(5’9”)
1.2m (48")
0.3m
(12")
1m
(40")
2. Platzieren Sie die Schraubenloch-Positionierungskarte
gegen die Wand, um die Position zu markieren. Wenn Sie
an einer harten Wand (Ziegel, Beton oder Stuck) montieren,
verwenden Sie einen 15/64" (5,95 mm) Bohrer, um 2 Löcher
durch die Schraubenloch-Positionierungskarte zu bohren.
Was Sie brauchen: Phillips-Schraubendreher;
Bohrmaschine (15/64" Bohrer)

DE 3534 DE
Befestigen Sie die Halterung
Verwenden Sie die mitgelieferten Schrauben, um die
Montagehalterung an der Wand zu befestigen.
Ohne Montagewinkel
von 15º
MONTAGE DER
halterung
MONTAGE DER
halterung
Holzwand
MONTAGE DER
halterung
MONTAGE DER
halterung
MONTAGE DER
Winkel
MONTAGE DER
Winkel
Mit 15°
Montagewinkel
Harte Wand
Ohne Montagewinkel
von 15º
Mit 15°
Montagewinkel
Verbinden Sie die Drähte mit der
Türklingel
Verbinden Sie die Drähte mit den Anschlüssen auf
der Rückseite der Türklingel und ziehen Sie dann die
Anschlussschrauben fest. Draht kann an jeden Anschluss
angeschlossen werden.
SYNC
SYNC
Um Kurzschlüsse zu vermeiden, stellen Sie sicher, dass
die Drähte nach dem Anschließen an die Klemmen nicht
miteinander in Berührung kommen.
Wenn die Drähte zu kurz sind, verwenden Sie
Verlängerungsdrähte und Drahtmuttern, um sie zu
verlängern. Sollte auf der Wand kein Platz für Kabelverbinder
sein, verwenden Sie stattdessen Isolierband.

DE 3736 DE
Installieren Sie die Türklingel
Richten Sie die Türklingel mit der Unterseite der
Montagehalterung aus und drücken Sie dann die Oberseite
der Türklingel an ihren Platz, bis sie einrastet.
Strom wiederherstellen
Schalten Sie den Hauptstromkreis wieder auf EIN. Sie sind
startklar!
OFF
OFF
SICHERHEIT
• Die geeignete Temperatur für Geräte und Zubehör beträgt -20 °C bis 50 °C
(Ladetemperatur beträgt 0° C bis 40° C).
• Sofern in der Bedienungsanleitung oder im Handbuch nicht ausdrücklich
angegeben wird, nicht in einer Umgebung verwenden, die die empfohlene
niedrige oder hohe Temperatur überschreitet.
• Sofern in der Bedienungsanleitung oder im Handbuch nicht ausdrücklich
angegeben wird, dass es sicher ist, vermeiden Sie es, Ihr Gerät direktem
Sonnenlicht oder übermäßig feuchten Umgebungen auszusetzen.
• Es wird empfohlen, das Gerät in einer Umgebung mit einer Temperatur
zwischen 5 °C und 25 °C zu betreiben.
• Wenn das Gerät mit Strom versorgt wird, stellen Sie es an einem Ort auf, an
dem eine normale Raumtemperatur und eine gute Belüftung herrscht.
VORSICHT!
ES BESTEHT EXPLOSIONSGEFAHR, WENN EIN FALSCHER BATTERIETYP
VERWENDET WIRD.
ENTSORGEN SIE GEBRAUCHTE BATTERIEN GEMÄSS IHRER ANLEITUNG.
Warnung:
• Wird eine Batterie durch einen falschen Typ ersetzt, können
Sicherheitsvorkehrungen umgangen werden und Gefahren
entstehen;
• Die Entsorgung einer Batterie in einem Feuer oder einer anderen
Quelle großer Hitze oder durch Zerdrücken oder Zerschneiden
kann zu einer Explosion sowie zum Auslaufen von brennbaren
Flüssigkeiten und Gasen führen;
• Wenn Sie eine Batterie in einer extrem heißen Umgebung
aufbewahren, kann es zu einer Explosion sowie zum Auslaufen von
brennbaren Flüssigkeiten und Gasen kommen;
• Bei einer Batterie, die einem extrem niedrigen Luftdruck ausgesetzt
ist, besteht Explosionsgefahr sowie die Gefahr des Austretens von
brennbaren Flüssigkeiten und Gasen.
Other manuals for E340
3
Table of contents
Languages:
Other eufy Security Intercom System manuals
Popular Intercom System manuals by other brands
Aiphone
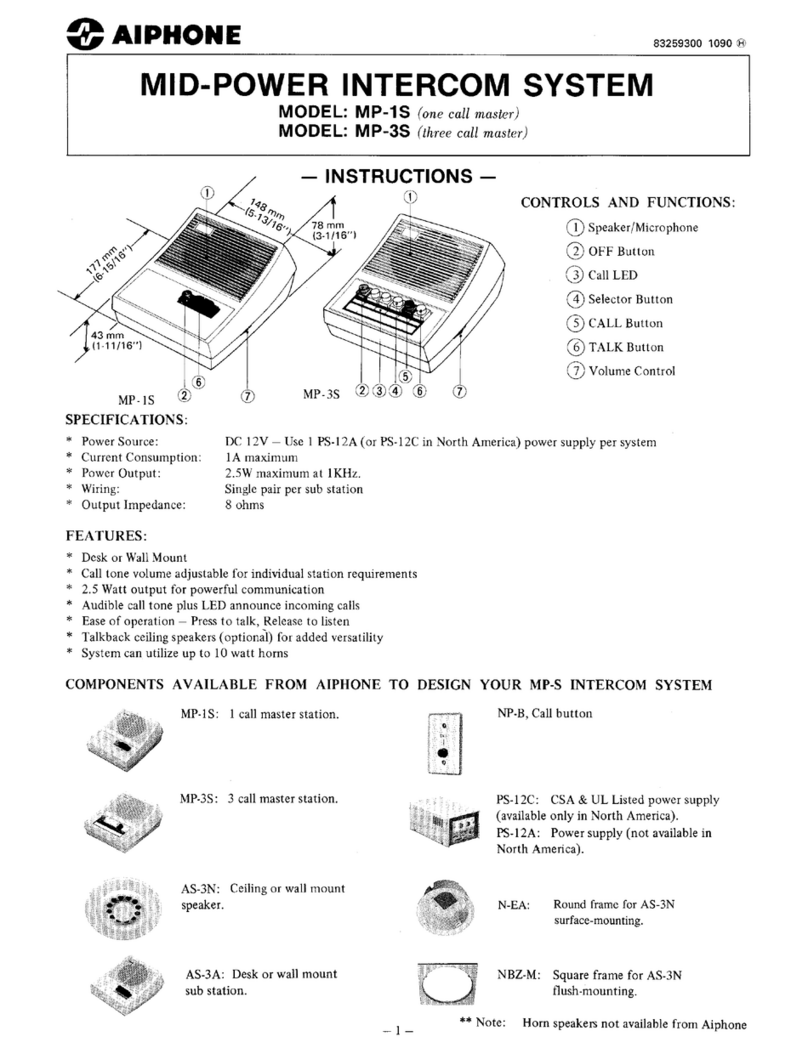
Aiphone MID-POWER MP-1S instructions
Commend
Commend C-WS201VICA quick start guide
GVS
GVS H Series user manual
PROLYNX
PROLYNX PL-VDIO-05 quick start guide
Northern Airborne Technology
Northern Airborne Technology InterMUSIC AA83-100 Installation and operation manual
Midland
Midland BTX1 PRO S Instruction guide
