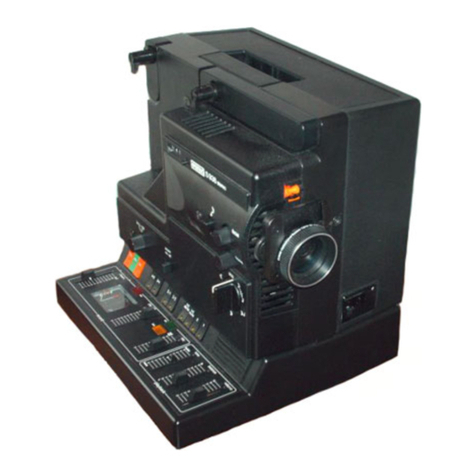
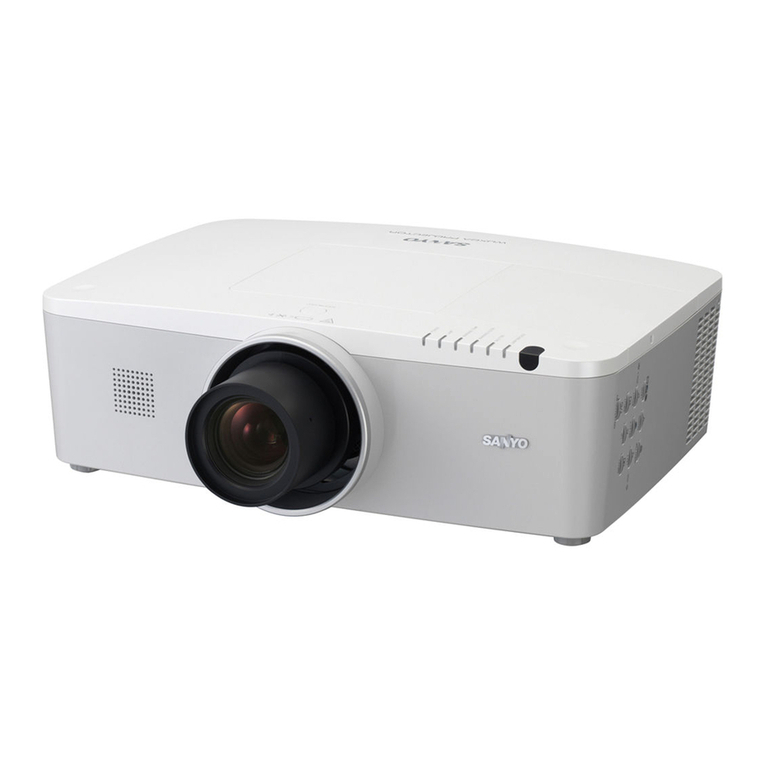
Eumig Automatic P8 User manual


eUumid
Pê
automatic

CONTENTS
If
is
always
a
great
event.
Ee
EE
Ee
N
Ee se eN
ee
6
Before
connecting
your
projector
ta
the
mains
ss
7
Automatic
threading
of
the
film
.
.
ii EE
EE EE EE
SE
Es EE
N
Ee
10
Threading
by
hand
.
.
isi
Ek
EER
FEE HER
WEN
WEE
WEN
EES
Gee
ge
TE
Projéelior!
ew
EER VEN
REK
;
EE
EER
HER
RE
HOE
Ed WO
EVER,
BEE WER EES
13
Visible
reverse
projeelien
.
.
sie
Es Ee
Eg
EE
Ke
ei oa WE
EGE
BEK EER
14
Es
AE
N
N
DE
EE
T4
Rewiridig
Gie
EE
EE
ls
HER
GR
GEE
WE
WER
WE
NEG
ORE
SR
GER WEE
HE
15
Care
and
maintenance
of
the
P
BAUTOMATIC
. .
ie
Es
ER
GE
Ee
de
ei
Té
The
Birthplace
of
the
EUMIG
P 8
AUTOMATIC
.
.
ie
Ee
ESE
EG
Ke
18


Feed
spool
Lever
for
still
projectien
Screw
for
nutomatic
threader
Film
rollers
Take-up
spool
Lever
for
opening
film
gate
and
rewind
Coated
zoom
lens
EUPRO-ZOOM
f
1.3,
15—25
mm.
Framing
control
On-off
switch
Forward-reverse
switch
Speed
control
Tilting
adjustment

Lamp
house
Feed
spool
arm
Take-up
spool
arm
Carryina
handle
Locking
serew
Voltage
selector
Knob
for
manual
operation
of
projector
mechanism
Mains
connection
Socket
for
table
lamp
Earth
sorket

lt is
always
a
great
event
for
you,
your
family
and
your
guests
when
you
show
your
films
and
bring
He
happy
past
back
ta
life
on
the
screen.
You
are
now
fhe
fortumate
owner
of
a
EUMIG
P B
AUTOMATIC,
the
ideal
projector
for
the
job,
as
it
has
everything
necessary
for
the
perfect
proiection
of
your
valuable
films,
and
possesses
many
eX-
cellent
features.
The
EUMIG
P 8
AUTOMATIC
has
a
special
automatic
threading
mechanism.
Threading
Hhe
film
in
the
projector
is
therefore
completely
trouble-free,
necessitating
only
a
few
simple
mavements.
The
EUMIG
P
8
AUTOMATIC
uses
a
low-voltage
lamp
and
gives
exceedingly
bright
illumination
—
in
the
same
way
os
a car
headlamp.
EUMIG
was
the
first
firm
to
use
this
principle
in
8
mm.
projectors
and
it
has
proved
its
value
a.
thousand
times
over,
The
EUMIG
P
8
AUTOMATIC
is
eguipped
with
a
spe-
cially
designed
optical
system,
which,
in
combina-
tion
with
the
superior
all-caated
zoom
lens
EUPRO-
ZOOM
$
13,
15—?25
mm,
transmits
exctraordinarily
large
and
vividly
brilliant
pictures.
With
this
lens,
the
size
of
He
sereen
picture
can
be
changed
at
will.
Thanks
to
its
high-preeisien
film
transport
medha-
nism,
the
EUMIG
P 8
AUTOMATIC
gives
outstand-
ing
freedom
from
flicdker
and
maximum
protection
for
your
films.
In
spite
of
its
small
size,
the
EUMIG
P B
AUTO-
MATIC
can
take
400
#t.
spools
without
having
to
be
mounted
on a
special
base.
The
EUMIG
P 8
AUTOMATIC
is
simple
and
almost
fool-proof
in
operation.
Even
if
the
controls
are
wrongly
actuated,
it
is
almost
impossible
to
damage
the
proiector,
but
we
would
ask
you
to
read
the
follawing
instructions
carefully
all
the
same.
Yaur
EUMIG
P
8
AUTOMATIC
will
repay
this
study
with
trouble-free
running.

Fig.
4
Fig.
3
Before
connecting
your
projector
to
the
mains
please
refer
to
your
electricity
meter
to
check
up
on
your
mains
supply.
The
EUMIG
P B
AUTOMATIC
will
operate
only
on
10—220
volt
(T10—240
volt)
A.C.
(50—&0
eydles).
The
voltage
selector
A
(Fig.
4)
above
the
mains
socket
is
nor
mally
set
to
220
volts.
If
you
da
not
have
220
volt
current,
vou
must
adjust
the
voltage
selector
by
turning
if
until
the
correct
voltage
is
opposite
the
white
dot.
Before
you
raset
the
vol-
tage
selector,
vou
must
disconnect
the
mains
lead.
Now
swing
out
he
two
spool
arms
(Fig.5)
—
the
drive
belts
al-
ways
remain
in
position.
You
tan
now
connect
the
P
B
AUTOMATIC
to
the
mains
by
inserting
the
female
plug
of
the
mains
lead
supplied
inte
socket
B
(Fig.4|.
Please
notice
the
connection
for
room
lighting
(C,
Fig.
4).
We
suggest
that
you
tonmmert
a
table
lamp
or
small
standard
lamp
to
sorket
€.
The
lamp
gees
out
automatically
when
the
projector
is
switched
on
and
comes
on
again
when
the projector
is
switdhed
off.

FT
Fig.
$
Set
the
speed
control
A
(Fig.
8)
at
its
middle
position.
Switch
on
the
metor
and
proiectien
lamp
by
means
of
switch
B.
Switch
C
operates
the
forward-reverse
mechanism.
There
is
more
about
fhis
on
Page
14 "Reverse
proiee-
ton”.
Your
P B
AUTOMATIC
has
a
sperially
developped
illumination
system
working
on
the
law
voltage
prin-
ciple
which guarantees
high
image
brillianey
and
maximum
lamp
life.
The
projection
lamp
used
is
a 12
volt
lamp
with
a
4-
pin
bayonet
tap.
The
average
life
of
the
lamp
is
stated
by
the
manufacturers
ta
be
25
hours.

To
replace
the
lamp,
open
the
lamp
house
as
shown
in
Fig.
7,
turn
the
lamp
slightly,
and
pull
it
out.
CAUTION:
The
lamp
will
be
hof
after
projiection!
Insert
the
new
lamp
by
pressing
down
slightly
and
turning
in
a
clockwise
diree-
tion.
Replace
the
lid
of
fhe
lamp
house
(Fig.
B).
It
is
not
necessary
to
centre
Hhe
projection
lamp, as
these
special
lamps
are
pre-centred,
that
is,
the
position
of
the
light
point
in
relation
to
the
cap
has
already
been
set
with
great
accuracy
by
Hhe
makers.
The
two
serew
feet
D
(Fig.
é)
are
for
tiling
the
projeetor.
In
order
to
comply
wifh
regulations
in
various
countries
regarding
the
earthing
of
electrical
appliances,
the
P 8
AUTOMATIC
is
provided
with
an
earth
sodel
(Page
5,
Fig.
3.
Fig.
7
Fig.
B

Fig.%
Fin.
10
Automatic
threading
of
the
film
Having
trained
your
P
8
AUTOMATIC
on
the
screen
and
set
the
projector
to
the
correct
height,
you tan
proceed
to
thread
the
film.
An
error-free
functioning
of
the
automatic
fhreader
is
only
then
guaranteed
when
the
film
end
has
been
properly
prepared,
that
is,
trimmed
in
the
correct
way.
Fig.
9
shows
how
the
correctly
trimmed
film
end
should
look
like.
Take
goed
care
that
the
perforatien
A
is
not
damaged
by
the
trimming.
NOTE:
For
the
preservation
of
yeur
valuable
film
we
recommend
the
splicing
on
of
a long
leader.
As, for
a
perfect
functioning
of
the
automatic
Hhreader
it is
essential
to
have
an
absolutely
straight
end
to
the
film,
creased
or
half-tarn
film
ends
must
be
cut
off
or
made
perfectly
smooth.
After
having
put
the
feed
spool
on
the
front
arm
—
with
the
per-
foratfions
on
the
right,
laaking
towards
the
sereen
from
behind
the
projector
—
set
lever
€
on
point
D
and
the
speed
control
to
its
middle
position.
Switdh
on
fhe
projecter
by
means
of switch
E
(switch
F
must
be
set
to
"forward"
and
the
lever
for
still
projection
should
NOT
be
on
“still
projecfien”,
sea
Fig.
10).
With
the
meter
running,
he
end
of
the
film
is
slid
between
the
stamped
rib
and
the
feed
sprocket.
From
this
moment
onward,
the
automatic
threader
takes
charge
of
all
further
film
manipulation.
In
case
if
was
for-
goten
to
set
lever
C
to
the
correct
pasitian
and
fhe
film
has
al-
ready
engaged
in
Hhe
automatic
threader,
all
that
is
necessary
is
to
switch
fo
“reverse”
(see
“Reverse
projection"”
on
Page
14).
The
film
then
disengages
from
the
automatic
mechanism.
After
having
set
lever
C
to
point
D,
the
film
may
be
re-inserted
in
Hhe
automatic
thraader,
10

11
NOTE:
Films
Hhat
have
just
come
back
from
pro-
cessing
will
usually
wind
off
as
shown
in
Sketch
|
on
their
first
run
through
the
projector.
In
this
par-
ticular
case,
reverse
prajection,
described
on
page
14,
is
impossible
as
the
film
would
not
be
wound
on
to
the
take-up
spool.
Only
when
the
film
has
been
run
through
ance
normally
and
sub-
seguently
rewound
will
it
come
off the
spool
in
suck
a
way
[see
Sketch
|I)
that
reverse
projectien
is
possible,
After
!he
film
has
run
through
the
take-up
spracket
turn
the
lever
C
fully
to
the
leff
(Fig.
T1).
This
lacks
the
film
transport
and
frees
the
laops
which
have
been
formed
by
the
autamatic
threader.
After
the
film
has
finally
passed
under
the
film
rollers
and
a
sufficient
length
has
come
out
at
the
ofher
end,
the
motor
must
be
switched
off.
The
end
of
the
film
can
now
be
attached
to
the
take-up
spool.
Here
we
should
like
to
mention
the
handy
EUMIG
400
H.
spools.
As
vou
will
ses
from
Fig.
12,
spring
tongues
are
aftached
to
the
cores,
and
by
this
simple
means
the
film
is
held
firm.
Fig.

Threading
by
hand
The
P B
AUTOMATIC
can
olso
be
fhreaded
by hand.
This
may
be
necessary
when
it
is
desired
to
project
a
piece
of
film
somewhere
in
the
middle
of
the
spool.
For
this
purpose,
first
unscrew
the
automatic
threader
[see
Fig.
2,
Page
d,
for
position
of
this
serew),
next
unwind
a
sufficient
length
of
film,
open
the
gate
by
turning
lever
A
down-
wards
(see
Fig.
13),
thread
the
film
and
close
the
gate
by
moving
the
lever
back,
Do
not
put
fhe
gate-opening
lever
completely
over
to
the
right
—
this
would
switch
on
the
rewind
mechanism.
After
the
loop has
been
shaped
by
following
fhe
line
indicated
on
the
side
of
He
projector,
the
film
is
led
past
the
feed
sprocket.
Pull
gently
as
indicated
in
Fig.
14,
and
the
perforations
will
be
engaged
by
the
teeth
of
ihe
feed
sprocket,
Lead
the
film
past
the
take-up
sprodket
in
he
same
woy
(see
Fig,
15),
Then
lead
the
film
under
the
guide
rolls
and
fix
to
the
spool
on
the
take-up
arm
—
if
it
is
the
beginning
of
the
film
which
is
being
fhreaded.
At
the
rear
of
the
proiector
is
the
knob
tor
manual
operation
of
the
proiectar
mechanism.
(Fig.
20,
Page
14).
This
feature
enables
you
to
ensure
before
showing
your
film
te
an
audience
that
fhe
claw
is
transporting
the
film
correctly.
12

13
Projection
The
P 8
AUTOMATIC
is
now
ready
for
proieetion.
Switch
on by
means
of
switch
E,
as
deseribed
in
"Autematie
threading ef
the
film”
en Page
10.
The
table
lamp
connarted
to
the
projiecter
will
immediately
go
out.
First
determine
the
desired
sereen
picture
size
by
holding
the
lens
by
its
front
rim
and
pulling
it
in
or
out,
hen
focus
by
rofating
the
lens
to
the
right
or
left.
Picture
size
and
focus
are,
of
course,
also
adjustable
during
projection.
Adijust
the
running
speed
if
necessary
with
the
speed
control
A
(Fig.
16)
until
all
fliker
disappears.
NOTE:
During
the
short
time
taken
by
the
aufa-
matic threading
of
the
film,
the
projector
noise
is
slightly
louder
than
during
the actual
projerfion.
In
order
to
proteet
the
film,
a
special
geld-glass
heat
ubsorbing
filter
is
autematically
interposed
between
the
lamp
and
the
film
when
the
projecter
is
switched
on,
remaining
in
position
until
the
nor-
mal
speed
has
been
reached.
This
filter
is
also
inter-
posed
as
soon
as
the
speed
drops
to
belaw
10
fra-
mes
per
second,
If
parts
of
two
frames
are
shown
on
the
screen,
turn
knob
B
until
this
Fault
disappears.
widih
of
picture
im
feet
Fig,
IT
O 3 6 2
seraan
distance
in
feet
2
TS

Fig.
14
Fig.
IS
Fig.
2
If
you
are
expecting
guests,
if
is
advisable
to
have
a
trial
run
to
make
any
necessary
adjustments
far
picture
size,
focus,
speed
and
framing.
Then
all
you
have
to
do
is
to
switch
on
the
projiector.
Af
the
end
of
he
performance
vou
just
switch
off
the
projiector,
and
the
table
lamp
will
automatically
come
on
again.
Fig.
17
shows
the
relationship
between
picture
size
and
screen
distance
when
using
tha
focal
lengths
range
of
the
EUPRO-ZOOM
(15—25
mm.).
Visible
reverse
proiection
The
P
B
AUTOMATIC
also
permits
reverse
projection.
To
switch
over
From
forward
to
reverse,
simply
move
switch
A
(Fig.
18).
There
is
no
need
to
switch
off
the
projecter
beforehand.
During
the
short
time
the
film
slows
down,
stops,
ond
begins
to
run
backwards,
a
shutter
automatically
cuts
off
the
light
to
protect
the
film
from
damage.
This
moves
out
of
the
optical
path
again
once
the
film
has
reached
the
reauired
running
speed,
After
switdhing
from
forward
to
reverse
proiection
or
vice
versa,
it
may
be
necessary
to
reediust
the
framing.
Still
projection
Still
proiection
sarves
far
observing
individual
frames
of a
film.
In
fhis
case,
pull
back
switch
B
as
shown
in
Fig.
19.
This
outomatically
introduces
Hhe
special
goldglass
heat
filter
into
the
optical
system,
noticeable
by
the
drop
in
the
pro-
jected
image
brilliance.
On
switching
to
still
projection,
the
rotafing
projector
shutter
may
eccasionally
stop
in
front
of
the
film
gate
and
so
obscure
the
pic-
ture.
In
that
case,
turn
knob
C
(Fig.
ZO)
at
the
rear
of
the projector
until
the
reguired
frame
appears
on
the
screen.
This
knob
also
serves
to
move
Ihe
film
farward
or
back,
frame
by
frame,
For
selecting
any
particular
single
frame.
14

Fig,
21
Fig.
22
Rewinding
is
a
very
simple
and
speedy
operation
with
the
EUMIG
P
8
AUTOMATIC
as
the
projector
has
power
rewind.
You
will
find
this
a
great
blessing
with
the
large
400
ft.
reels.
When
the
trailer
has
compleiely
run
through, lead
the
film
directly
from
the
take-up
to
fhe
feed
spool
and
fix
it
to
the
latter.
Then
turn
lever
D
as
far
Forward
as
it
will
ga,
which
couples
the
rewind
mechanism,
and
the
film
will
be
rewound
auickly.
When
rewinding
is
almost
complete,
it is
advisable
to
reduce
the
speed
by
means
af
the
motor
speed
control.
For
rewinding,
switch
A
must
be
set to
“Forward",
Should
vyau
have
set
it
to
"Reverse"
by
mistake
and
switched
on
the
rewind
mechanism,
the
projectar
matar
will
run,
but
the
take-
up
spool
will
not
revolve,
If
you
desire
to
rewind
before
the
whole
af
the
film
has
been
projecled,
take
off
the
automatic
threader,
open
the
film
gate,
gently
remove
the
film
therefrom,
ond
disengage
from
the
feed
and
take-up
sprorkets
by
pressing
the
spots
marked
"x”,
Only
fhen
is
it
possible
to
proceed
with
rewind-
ing
as
described
above,

Care
and
maintenance
of
the
P 8
AUTOMATIC
Keep
the
projiector
scrupulously
clean,
especially
fhose
parts
that
come
inta
contact
with
fhe
film.
First
unserew
the
automatic
#hreader.
To
facilitate
cleaning
the
gate,
the
lens
mount
can
be
swung
out
to
the
right
by
turning
the
gate-opening
lever
after
having
disconnected
the
mains
lead.
Both
Hhe
gate
and
the
interdwangeable
lens
must
be
cleaned
from
time
to
time,
with
a
soft
cdlath
or
brush.
Any
dirt
or
film
dust
should
be
removed
from
the
gate
with
a
wooden
skewer
or
some
such
object.
Please
do
nat use
any
metal
object
for
this
purpose
—
it
would
scratch
the
gate
ond
thus
damage
your
films,
The
proiector
has
life-lang
lubrication
and
it
reguires
no
attention
whatsoever
in this
respect.
If
necessary,
the
motor
carbons
can
easily
be
removed
for
cleaning.
Simply
loosen
fhe
seraw
of
the
lawer
carbon
on
the
base
of
the
prajector
with
a
coin.
In
order
ta
re-
move
the
upper
carbon,
loosen
first
the
locking
sErew
(Fig.
3,
page
5)
and
open
the
side
wall
of
the
prajectar
If
vou
should
have
pecasion
to
replace
one
of
the
wire
drive
belis
A
or
B,
first
of
all
put the
gofe-opening
lever
as
far
aver
to
the
right
as
it
will
ge,
as
if
vou
were
going
ta
rewind.
To
replace
the
drive
belt
C;
first
set
the
still
projection
lever
to
“Still”,
You
can
now
fit
the
belt,
putting
it
first
over
he
upper
and
then
over
the
lower
roller.
16

Supplied
with
your
EUMIG
P
8
AUTOMATIC
A.
EUPRO-ZOOM
f
1.3,
15—28
mm.
lens
B.
Automatic
Threader
C.
Projection
Lamp
D.
One
ELMIG
400
H.
wire
spoel
E.
$
Film
stops
F,
Mains
Lead

Td
The
Birthplace
of
the
EUMIG
P 8
AUTOMATIC
The Vienna
Works
Part
of
the
Kirchdarf
Works,
Upper
Austria
18
Other manuals for Automatic P8
1
Table of contents
Other Eumig Projector manuals
