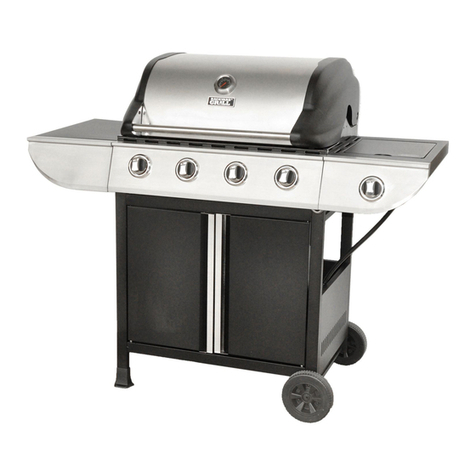
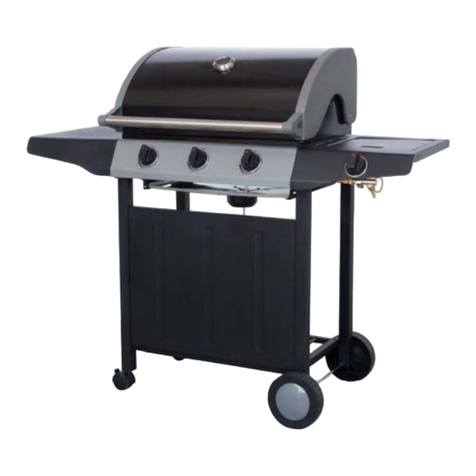
EURO EA120BTSX User manual

User Manual and
Installation Instructions
Model:
::
: EA120BTSX Model:
::
:EA120BIS
Model:
::
: EA90BTSX Model:
::
:EA90BIS

2
For Outdoor use only.
Read the instructions carefully and be sure your barbecue is properly installed, assembled and cared for.
Failure to follow these instructions may result in serious bodily injury and/or property damage.
Please retain the manual for future reference.
These BB s are configured for use with Propane Gas, however are also approved for use with Natural Gas. If
you prefer to connect the BB to Natural Gas, the BB needs to be configured for Natural Gas. Converting
this BB to Natural Gas must only be done by an authorized person and with a Natural Gas conversion kit
supplied by Eurostyle. Please contact Eurostyle to purchase a Natural Gas Conversion kit.
Remove any transit protection before using.
Please
DO NOT use the two solid hot platestogether.
NOTE TO INSTALLER: TEST OPERATION OF THE APPLICANCE AND INSTRUCT THE USER BEFORE LEAVING.
Service & Spare parts
Your applianc should b s rvic d annually by a comp t nt authoris d p rson
For s rving or spar parts or Natural Gas conv rsion kit, pl as contact
Eurostyl Group trading as Euro Applianc s
S rvic lin : (08) 81651012
Fax: (08) 8165 1018
Email: admin@ urostyl group.com.au

3
USE
OUTDOORS
ONLY
This appliance shall only be used in an above ground open-air situation with natural ventilation, without stagnant areas,
where gas leakage and products of combustion are rapidly dispersed by wind and natural convection.
Any outdoor enclosure or alfresco area in which the appliance is used shall comply with one of the following:
l
An enclosure with walls on all sides, but at least one permanent opening at ground level and no overhead cover. See
Figure .
l
Within a partial enclosure that includes an overhead cover and no more than two walls. See Figure 2 & 3.
l
Within a partial enclosure that includes an overhead cover and more than two walls, the following shall apply:
- At least 25% of the total wall area is completely open; and
- At least 30% of the remaining wall area is open and unrestricted. See Figure 4 & 5.
l
In the case of balconies, at least 20% of the total of the side, back and front wall areas shall be and remain open and
unrestricted.
The following diagrams provide a diagrammatic representation of outdoor areas. Rectangular areas have been used in these
figures - the same principles apply to any other shaped area
Figure 1 - Enclosure with walls on all sides but Figure 2 - Partial Enclosure with overhead cover and
no overhead cover no more than two walls
Figure 3 - Partial Enclosure with overhead cover and Figure 4 - Open side at least 25% o total wall area.
no more than two walls 30 % or more in total o the remaining wall area is
open and unrestricted.
Figure 5 - Open side at least 25% o total wall area. 30 percent
or more
in total o the remaining wall area is open and
unrestricted

4
DO
* Us spann r to tight n all gas fittings
* Ch ck all gas hos and lin conn ction for
damag , cuts or cracks ach tim for using
th applianc .
* Always l ak t st with soapy wat r
*Ch ck main burn rs, sid burn rs and
infrar d r ar burn r r gularly for spid r w bs
and ins ct n sts as th s may int rf r with
th prop r op ration of th burn rs and must
b r mov d b for using th burn rs.
* Us th applianc outdoors only
* Acc ssibl parts mayb v ry hot. Always
K p childr n away from th applianc
*Hav th gas cylind r fill d by an authoriz d
gas suppli r
* Always w ar prot ctiv glov s wh n
handling hot compon nt
* Clos th gas cylind r valv aft r ach us
* Cl an th gr as tray r gularly.
* USE grill at l ast 915mm from any
combustibl , wall or surfac .
* “Burning off” th barb cu aft r v ry us
(for approx 15 minut s) will k p xc ssiv
food r sidu to a minimum.
* Turn off th gas supply at th cylind r in th
v nt of gas l ak.
Do not do
* Do not l an ov r applianc wh n lighting
* Do not stor combustibl mat rials, gasolin ,
flammabl liquids or vapors within vicinity
of barb cu
* Do not us applianc with any cov r on
* Do not us plastic or glass ut nsils on th
Barb cu
* Do not us th applianc in strong winds
* Do not dismantl control valv s
* Do not t st for gas l aks with a nak d flam
* Do not stor spar gas cylind rs in th
cabin t
* Do not lay th gas cylind r down ( always
k p upright)
* Do not us applianc indoors
* Do not modify th construction of th
applianc or th siz of any burn r, inj ctor
orific or any oth r compon nts
* Do not mov th applianc during us
* Do not obstruct any v ntilation of th
applianc
* Do not allow th fl xibl gas supply hos or
any l ctrical cord to com in contact with any
h at d surfac of th applianc
* Do not us charcoal or any oth r solid fu l in
this applianc
* Do not disconn ct any gas fittings whil th
applianc is in us
* Do not us a rusty or d nt d gas cylind r
with a damag d gas valv
* Do not fill th gas cylind r b yond 80%
capacity
* Do not us th infrar d r ar burn r at th
sam tim as oth r burn rs

5
Gas Cylinder Information
Gas Cylind r Saf ty Information
• This applianc is d sign d to b us d with a gas cylind r not xc ding 9KG.
• Th gas cylind r supply valv must b turn d off wh n th applianc is not in us .
• Gas cylind rs must b stor d outdoors, out of r ach of childr n and must not b stor d in a building, garag or any
oth r nclos d ar a.
• Th gas cylind r us d must incorporat a saf ty collar to prot ct th valv ass mbly.
* N v r stor a spar cylind r und r th barb cu sh lv s or insid th troll y housing. Any
LPG cylind r not attach d to th BBQ for us should b stor d outdoors and w ll away from this applianc .
Important:
• Wh n disconn cting and r moving th gas cylind r for th purpos of r filling, always obs rv th following
proc dur .
• Ensur that all gas control valv s on th applianc and th gas cylind r ar turn d off b for disconn cting th
r gulator from th cylind r.
• Do not smok or us a nak d flam n ar th applianc or gas cylind r whil disconn cting th gas lin b tw n th
applianc and gas cylind r.
• R mov th gas cylind r from th nclosur b for disconn cting th r gulator from th applianc .
• Tight n all conn ctions b for placing th gas cylind r back in its nclosur .
• Th gas l ak t sting proc dur should b conduct d v ry tim th gas cylind r is r fill d and r conn ct d to th
applianc b for using th applianc .
R gulator Conn ction
1. Ch ck that all control knobs ar in th ‘Off’ position.
2. Mak sur th cylind r valv is off.
3. R mov th prot ctiv cap from th cylind r if pr s nt.
4. L ak t st th conn ction with a soapy wat r solution.
Gas L ak T st Proc dur
N v r us a nak d flam to ch ck for gas l aks. Always us th following proc dur to ch ck for gas l aks.
1. In a small contain r, mix up a solution of wat r and d t rg nt or soap. Mix th solution w ll.
2. Mak sur that th gas supply valv on th gas cylind r is turn d on.
3. Mak sur that th gas control valv s on th applianc ar all turn d off.
4. Using a brush or spray bottl apply th solution to th gas lin and ach join in th gas lin .
5. Bubbling of th solution will indicat that th r is a l ak pr s nt.
6. R -tight n or r -s al any joints that ar l aking.
7. If a l ak p rsists th n contact your distributor or th manufactur r for assistanc .

6
LIGHTING YOUR BARBECUE
This barb cu is d sign d for us outdoors, k p away from any flammabl mat rials.
It is important that th r ar no overhead obstructions and that th r is a minimum distanc of 915mm from th sid or
r ar of th applianc . Do not us th BBQ und r ov rh ad combustibl mat rials.
It is important that th v ntilation op nings of th cylind r compartm nt ar not obstruct d.
Th barb cu must b us d on a l v l, stabl , non-flammabl surfac .
Th applianc should b prot ct d from dir ct draughts and shall b position d or prot ct d against dir ct p n tration by
any trickling wat r ( .g. rain). Parts s al d by th manufactur r or his ag nt must not b alt r d by th us r.
No modifications should b mad to any part of this barb cu and r pairs and maint nanc should only b carri d out by
an authoriz d p rson.
DO NOT l t childr n op rat or play n ar grill.
DO NOT us charcoal or c ramic briqu ts in a gas grill
DO NOT light or us th sid burn r with th lid in th clos d position.
DO NOT att mpt to light burn r with lid clos d. A build-up of non-ignit d gas insid a clos d grill is hazardous
Th sid burn r is d sign d for pot/pan with diam t r 60-260mm. Sid burn r lid can not b
us d as work tabl , do not put anything on th sid burn r lid.
Lighting Instruction:
1. Read instructions before lighting.
2. Open the lid and make sure all the knobs are on the OFF( ) position.
3.
Conn ct th r gulator to gas cylind r and th hos to barb cu .
Turn the gas supply ON” at the cylinder. Check with
the use of soapy water for any gas leakage between the bottle and the regulator.
4.
Push down th control knob and k p pr ssing whilst turning anti-clockwis to HIGH ( ) position whilst also pr ssing
th ignition button (a clicking sound is h ard), this will light th burn r.
5. If th burn r still do s not light, turn th control knob to OFF
( )
wait 5 minut s and r p at st p 4. If th burn rs do
not stay alight , r p at st ps 4 and 5.
6. Adjust th h at by turning th knob to th High ( )/Low ( ) position.

7
7. To turn th barb cu ‘OFF’ turn th cylind r valv to th ‘OFF’ position and th n turn all
of th control knobs on th applianc clockwis to th OFF
( )
position.
For Infrared rear burner
Push down th control knob and k p pr ssing whilst turning anti-clockwis to HIGH ( ) position and also pr ssing th
ignition button (a clicking sound is h ard). Aft r th infrar d r ar burn r is lit, k p pushing down th control knob and hold
for 5 s conds. It may tak a littl whil for th gas to flow to th infrar d burn r b
ecause it is some distance away from
the gas valve.
For Match- Lighting:
1. Follow above instruction step 1-3.
2. For Main burn r, plac th match into match lighting stick
and light th match, th n put into lighting hol on right
sid of th barb cu ; For burn rs far away from right sid
of th barb cu , tak th cooking grat out and plac th
match n ar th main burn r ports;
For side burner, place the lit match on the holes of the
side burner head,
For infrared rear burner, place the lit match on the
surface of ceramic panels
3. Push down and turn the knob anticlockwise to HIGH( ) position. Thus the burner could be lit. If the burner does
not light, turn off the gas tap and wait for 5 minutes then repeat this step 2-3.
B for cooking for th first tim , op rat th barb cu for about 15 minut s with th lid clos d and th gas turn d on
HIGH(
)
. This will “h at cl an” th int rnal parts and dissipat odor from th paint d finish. Th color of cooking ar a
may slightly discolour. This is normal and it is th natur of mat rial.
While igniting main burner and infrared rear burner, please make sure the lid for main burner is in open position
While igniting side burner, please make sure the lid for side burner is in open position
Battery Replacement:
Unscrew the battery cap and plastic nut on the igniter
at the front of the control panel. Replace the battery
and refit the cap.

8
CLEANING AND CARE
All cl aning and maint nanc should b carri d out wh n th barb cu is cool and with th fu l supply turn d OFF at th
gas cylind r.
DO NOT mistak brown or black accumulation of gr as and smok for paint. Surfac s of th gas grills & hotplat s ar not
paint d. Apply a strong solution of d t rg nt and wat r or us a grill cl an r with scrubbing brush on insid s of
grill lid and bottom. Rins and allow to compl t ly air dry.
DO NOT apply a caustic grill / ov n cl an r to any paint d surfac s.
DO NOT us abrasiv or flammabl cl an rs, as it will damag th parts of th product and may start a fir .
Plastic parts: wash with warm soapy wat r and wip dry.
Porcelain surfaces: b caus of glass-lik composition, most r sidu can b wip d away with backing soda / wat r solution
or sp cially formulat d cl an r. Us nonabrasiv sourcing powd r for stubborn stains.
Painted surfaces: wash with mild d t rg nt or nonabrasiv cl an r and warm soapy wat r. Wip dry with a soft
nonabrasiv cloth.
Stainless steel surfaces: Stainl ss st l will surfac rust if not maintain d w ll. To maintain your grill’s high quality
app aranc , wash with mild d t rg nt and warm soapy wat r and wip dry with a soft nonabrasiv cloth aft r ach us .
Us stainl ss st l prot ction liquid lik WD-40 on th surfac to avoid rust.
Coo ing grid:
Use a mild soapy water solution. Non-abrasive scourer can be used on stubborn stains then rinse with
water.
Abnormal Operation:
Any of th following ar consid r d to b abnormal op ration and may r quir s rvic
Y llow tipping of th y llow flam
Sooting up of grills plat s
Burn rs not igniting prop rly
Burn rs failing to r main alight
Burn r xtinguish d by troll y doors
Gas valv s, which ar difficult to turn

9
Technical Information
Mod l No.: EA120BTSX/
CB6-SBG001-BU
EA120BIS/
CB6-BG001(B)
T st Point Pr ssur : 2.75KPA 2.75KPA
Total Nominal
Gas Consumption:
96.1 MJ/h
81.1 MJ/h
Gas Typ : Propan Propan
Nominal gas consumption:
Main Burn rs: 11.6 MJ/h x 6
Sid Burn r: 15MJ/h
Back Burn r: 11.5MJ/h
Main Burn rs: 11.6 MJ/h x 6
Back Burn r: 11.5MJ/h
Inj ctor Siz :
Main Burn rs: 0.98mm
Sid Burn r: 1.13mm
Back Burn r: 1.00mm
Main Burn rs: 0.98mm
Back Burn r: 1.00mm
Mod l No.: EA90BTSX/
CB4-SBG001-BU
EA90BIS/
CB4-BG001(B)
T st Point Pr ssur : 2.75KPA 2.75KPA
Total Nominal
Gas Consumption:
72.9 MJ/h
57.9MJ/h
Gas Typ : Propan Propan
Nominal gas consumption:
Main Burn rs: 11.6 MJ/h x 4
Sid Burn r: 15MJ/h
Back Burn r: 11.5MJ/h
Main Burn rs: 11.6 MJ/h x 4
Back Burn r: 11.5MJ/h
Inj ctor Siz :
Main Burn rs: 0.98mm
Sid Burn r: 1.13mm
Back Burn r: 1.00mm
Main Burn rs: 0.98mm
Back Burn r: 1.00mm
AGA Approval No.: AGA 7142 G
For Us outdoors and in w ll v ntilat d ar as
Warning: Acc ssibl parts may b v ry hot, k p young childr n away.
Clos th valv of th gas cylind r or th r gulator aft r us .
Th us of this applianc in nclos d ar as can b dang rous and is prohibit d
For storag and cylind r xchang , disconn ct th cylind r only. Do not disconn ct hos from th
applianc .
Always maintain 915mm minimum cl aranc to combustibl mat rials at th r ar and sid s of
th BBQ. Do not us this BBQ und r ov rh ad combustibl surfac s.
Conv rsion to natural gas only to b don by authoriz d p rson.
The minimum cylinder size for use with this appliance is 7kgs
The thread type of this appliance is G1/4B.

10
Exploded View
Model No. : EA120BTSX

11
Exploded View
Model No. : EA120BIS

12
Exploded View
Model No. : EA90BTSX

13
Exploded View
Model No. : EA90BIS

14
ASSEMBLY STEPS
Tools re uired:
1.
Attach left side table as shown in the diagrams below.
. On ach sid of th BBQ th r ar 2 pr ass mbl d scr ws; Loos n th m to 4mm of thr ad showing.
. Hang th sid tabl onto th s loos scr ws on ach sid
. Ass mbl 3pcs of M6X15 scr ws in 2 low r hol s.
. Tight n all scr ws.

15
2.
Conn ct sid burn r
1) Tak out sid burn r grid
2) Loos n th scr ws which s cur th sid burn r with Philips h ad scr wdriv r and tak it out.
3) Ass mbl th sid valv , m anwhil put th knob s at on front pan l and tight n th two scr ws tog th r
with knob s at and sid valv .

16
4) Put back side burner and tighten the screws, meanwhile put the side burner inlet into side
valve injector.

17
5) Connect the side burner ignitor.
6) Put back side burner
grid.
3.
Attach left side table as shown in the diagrams below
1) Assemble the table and front panel with 3pcs of M6X10 and M6
2) Attach left side table
. On each side of the BB there are 2 preassembled screws; Loosen them to 4mm of thread
showing.
. Hang the side table onto these loose screws on each side
. Assemble 3pcs of M6X15 screws in lower holes.
. Tighten all screws.

18
4.
..
.
Fit flame diffusers as shown in diagram below.
5.
..
.
Fit cooking grids and plate as shown below
Please
DO NOT use two hot plate together.

19
6.
..
.
Fit warming rack as shown below
.
7.
..
.
Unscrew cap and place AA Battery into place with the (+) end facing outwards. Screw cap back on. Upon
pressing the ignition button, you will hear a clicking noise if it has been installed correctly.
AA battery is not provided

20
For Outdoor Built-in BBQ
EA120BIS & EA90BIS
1. Ass mbl th sid brack t
2.
Fit flame diffusers as shown in diagram below.
This manual suits for next models
3
Table of contents

