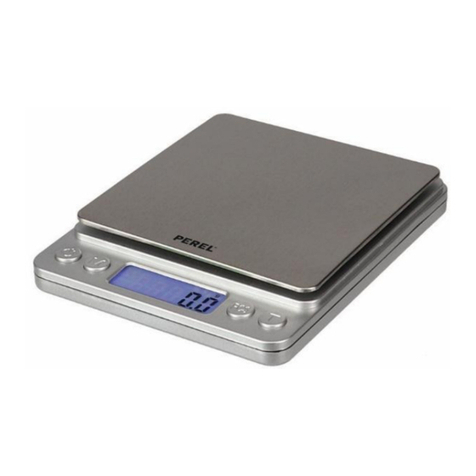
Eurobil SUN ECO VGA User manual

SERVICE MANUAL
SERVICE MANUALSERVICE MANUAL
SERVICE MANUAL
Desk-type electronic balance
model SUN ECO V A

S
Se
er
rv
vi
ic
ce
e
m
ma
an
nu
ua
al
l
o
of
f
d
de
es
sk
k-
-t
ty
yp
pe
e
b
ba
al
la
an
nc
ce
es
s
m
mo
od
de
el
l
S
SU
UN
N
E
EC
CO
O
V
V
A
A
EUROBIL s.r.l. Rev. 0 Page 2 of 40
SERVICE MANUAL
SERVICE MANUALSERVICE MANUAL
SERVICE MANUAL
Desk-type electronic balance
model SUN ECO V A
0 1
st
FEB 2007 Issue
No. of REV.
No. of REV.No. of REV.
No. of REV.
DATE
DATEDATE
DATE
REASON OF REVISION
REASON OF REVISIONREASON OF REVISION
REASON OF REVISION

S
Se
er
rv
vi
ic
ce
e
m
ma
an
nu
ua
al
l
o
of
f
d
de
es
sk
k-
-t
ty
yp
pe
e
b
ba
al
la
an
nc
ce
es
s
m
mo
od
de
el
l
S
SU
UN
N
E
EC
CO
O
V
V
A
A
EUROBIL s.r.l. Rev. 0 Page 3 of 40
Dear Sirs,
Congratulations for buying an electronic balance by EUROBIL!
The hardware/software design and the production of balances are wholly carried out in our
workshops and they comply with the quality control certified by the Central Metric Office
of Varese - Notified body Italy No. 0291 - certificate No. I-VA-003.
This balance is a wholly electronic instrument; having passed all the laboratory tests, it will
comply with
. the Council directive 90/384/EEC – non automatic weighing instruments
. the Council directive 89/336/EEC – electromagnetic compatibility
. the Council directive 73/23/EEC – low voltage
The strict production procedures and the severe testing stated by the protocol of certified
quality ensure the reliability of this instrument in time and the keeping of its precision
metrological characteristics.
The performance has been designed and realized to supply the best support of your
business combining easy use and sophisticated functions.
This service manual is an easy and complete guidebook for the operator: it will enable
him/her to exploit all the balance functions in the best way getting working speed and
analysis of the main factors of management.
A perfect knowledge of balance programming will enable to customize its use optimizing it
with respect to the needs of your company and of your customers.
Please read this manual carefully before setting the balance at work because any illegitimate
use could provoke damages to the instrument and to the operator.
The
local
EUROBIL
EUROBILEUROBIL
EUROBIL
after-sales service and your dealer are at your disposal.
ood work!

S
Se
er
rv
vi
ic
ce
e
m
ma
an
nu
ua
al
l
o
of
f
d
de
es
sk
k-
-t
ty
yp
pe
e
b
ba
al
la
an
nc
ce
es
s
m
mo
od
de
el
l
S
SU
UN
N
E
EC
CO
O
V
V
A
A
EUROBIL s.r.l. Rev. 0 Page 4 of 40
CONTENTS
CONTENTSCONTENTS
CONTENTS
1
11
1ENERAL CONSIDERATIO
ENERAL CONSIDERATIOENERAL CONSIDERATIO
ENERAL CONSIDERATIONS
NSNS
NS ......................................................................................7
1.1
1.11.1
1.1 SAFETY
SAFETYSAFETY
SAFETY ....................................................................................................................................7
1.2
1.21.2
1.2 METROLO Y
METROLO Y METROLO Y
METROLO Y -
--
-–
––
– CHECKS
CHECKS CHECKS
CHECKS -
--
- CALIBRATION
CALIBRATION CALIBRATION
CALIBRATION......................................................................7
1.2.1 TECHNICAL DATA............................................................................................................7
1.2.2 CALIBRATION................................................................................................................8
1.3
1.31.3
1.3 UARANTEE
UARANTEEUARANTEE
UARANTEE ..........................................................................................................................8
2
22
2INSTALLATION
INSTALLATIONINSTALLATION
INSTALLATION.............................................................................................................8
2.1
2.12.1
2.1 CHOOSIN THE PLACE OF INSTALL
CHOOSIN THE PLACE OF INSTALLCHOOSIN THE PLACE OF INSTALL
CHOOSIN THE PLACE OF INSTALLATION
ATIONATION
ATION ...................................................................9
3
33
3DEVICES OF THE BALAN
DEVICES OF THE BALANDEVICES OF THE BALAN
DEVICES OF THE BALANCE
CECE
CE..........................................................................................9
3.1
3.13.1
3.1 DISPLAYS
DISPLAYSDISPLAYS
DISPLAYS.................................................................................................................................9
3.1.1 MAIN DISPLAY FOR CUSTOMERS .................................................................................9
3.1.2 MAIN DISPLAY FOR THE OPERATOR ......................................................................9
3.2
3.23.2
3.2 LI HT INDICATIONS FOR THE OPERATOR
LI HT INDICATIONS FOR THE OPERATORLI HT INDICATIONS FOR THE OPERATOR
LI HT INDICATIONS FOR THE OPERATOR...................................................................9
3.3
3.33.3
3.3 KEYPAD
KEYPADKEYPAD
KEYPAD.................................................................................................................................10
3.3.1 69-KEY KEYPAD...........................................................................................................10
3.3.2 FUNCTIONS OF KEYS - OPERATIONAL AND FUNCTIONAL BLOCK...............11
3.4
3.43.4
3.4 PRINTER
PRINTERPRINTER
PRINTER................................................................................................................................12
3.4.1 LOADIN THE ROLL OF NORMAL THERMAL PAPER ........................................12
3.4.2 INSERTIN A ROLL OF ADHESIVE THERMAL PAPER OR LABELS....................12
3.4.3 MAINTENANCE OF THE PRINTER AND PRECAUTIONS....................................13
4
44
4USE OF THE INSTRUMEN
USE OF THE INSTRUMENUSE OF THE INSTRUMEN
USE OF THE INSTRUMENT
TT
T........................................................................................13
4.1
4.14.1
4.1 SALE BY WEI HT
SALE BY WEI HTSALE BY WEI HT
SALE BY WEI HT ................................................................................................................13
4.2
4.24.2
4.2 MANUAL SETTIN OF THE UNIT PRICE
MANUAL SETTIN OF THE UNIT PRICEMANUAL SETTIN OF THE UNIT PRICE
MANUAL SETTIN OF THE UNIT PRICE .......................................................................13
4.3
4.34.3
4.3 PRO RAMMED UNIT PRICE (PLU)
PRO RAMMED UNIT PRICE (PLU)PRO RAMMED UNIT PRICE (PLU)
PRO RAMMED UNIT PRICE (PLU).................................................................................13
4.4
4.44.4
4.4 SALE BY PACKA E
SALE BY PACKA ESALE BY PACKA E
SALE BY PACKA E...............................................................................................................14
4.5
4.54.5
4.5 CONNECTION WITH THE SCANNER OR WITH THE
CONNECTION WITH THE SCANNER OR WITH THE CONNECTION WITH THE SCANNER OR WITH THE
CONNECTION WITH THE SCANNER OR WITH THE OPTICAL PEN
OPTICAL PENOPTICAL PEN
OPTICAL PEN ......................14
4.6
4.64.6
4.6 WRITE
WRITEWRITE
WRITE-
--
-OFF OF THE OPERATION
OFF OF THE OPERATIONOFF OF THE OPERATION
OFF OF THE OPERATION...................................................................................14
4.7
4.74.7
4.7 TARE
TARETARE
TARE......................................................................................................................................14

S
Se
er
rv
vi
ic
ce
e
m
ma
an
nu
ua
al
l
o
of
f
d
de
es
sk
k-
-t
ty
yp
pe
e
b
ba
al
la
an
nc
ce
es
s
m
mo
od
de
el
l
S
SU
UN
N
E
EC
CO
O
V
V
A
A
EUROBIL s.r.l. Rev. 0 Page 5 of 40
4.8
4.84.8
4.8 SEMIAUTOMATIC TARE
SEMIAUTOMATIC TARESEMIAUTOMATIC TARE
SEMIAUTOMATIC TARE....................................................................................................15
4.9
4.94.9
4.9 PRE
PREPRE
PRE-
--
-FIXED TARE
FIXED TAREFIXED TARE
FIXED TARE..................................................................................................................15
4.10
4.104.10
4.10 TARE SET MANUALLY
TARE SET MANUALLYTARE SET MANUALLY
TARE SET MANUALLY........................................................................................................15
4.11
4.114.11
4.11 TARE ASSOCIATED WITH PLU
TARE ASSOCIATED WITH PLUTARE ASSOCIATED WITH PLU
TARE ASSOCIATED WITH PLU .........................................................................................15
5
55
5OPERATIONS ON THE SL
OPERATIONS ON THE SLOPERATIONS ON THE SL
OPERATIONS ON THE SLIP
IPIP
IP .......................................................................................16
5.1
5.15.1
5.1 PRINTIN THE SLIP FOR CUSTOMER
PRINTIN THE SLIP FOR CUSTOMERPRINTIN THE SLIP FOR CUSTOMER
PRINTIN THE SLIP FOR CUSTOMER............................................................................16
5.2
5.25.2
5.2 REOPENIN THE LAST SLIP CLOSED
REOPENIN THE LAST SLIP CLOSEDREOPENIN THE LAST SLIP CLOSED
REOPENIN THE LAST SLIP CLOSED ..............................................................................16
5.3
5.35.3
5.3 INSERTIN THE CUSTOMER NUMBER
INSERTIN THE CUSTOMER NUMBERINSERTIN THE CUSTOMER NUMBER
INSERTIN THE CUSTOMER NUMBER .........................................................................16
5.3.1 CUSTOMER TOTAL ....................................................................................................16
5.3.2 RESETTIN CUSTOMER TOTAL...............................................................................17
5.4
5.45.4
5.4 OPERATIONS ON AN INDIVIDUAL ARTICLE
OPERATIONS ON AN INDIVIDUAL ARTICLEOPERATIONS ON AN INDIVIDUAL ARTICLE
OPERATIONS ON AN INDIVIDUAL ARTICLE................................................................17
5.5
5.55.5
5.5 LABELLIN OPERATIONS
LABELLIN OPERATIONSLABELLIN OPERATIONS
LABELLIN OPERATIONS..................................................................................................17
5.5.1 NUMBER OF LABELS / LOT NUMBER.....................................................................18
5.5.2 PARTIAL TOTAL OF LABELS......................................................................................18
6
66
6MENU (TOTALS
MENU (TOTALS MENU (TOTALS
MENU (TOTALS -
--
-PRO RAMMIN
PRO RAMMIN PRO RAMMIN
PRO RAMMIN -
--
- CONFI URATION…..)
CONFI URATION…..) CONFI URATION…..)
CONFI URATION…..) ..................................19
6.1
6.16.1
6.1 TOTALS
TOTALSTOTALS
TOTALS .................................................................................................................................19
6.1.1 ENERAL ( ENERAL TOTAL).....................................................................................19
6.1.2 OPERATORS (TOTAL OF OPERATORS)..................................................................19
6.1.3 PLU (TOTAL PLU)........................................................................................................20
6.1.4 PLU ROUPS (TOTAL OF PLU ROUPS) ...............................................................20
6.2
6.26.2
6.2 PRO RAMMIN DATA BASE
PRO RAMMIN DATA BASEPRO RAMMIN DATA BASE
PRO RAMMIN DATA BASE...........................................................................................20
6.2.1 PLU.................................................................................................................................20
6.2.2 PLU ROUPS (PRO RAMMIN NAMIN PLU ROUPS) .................................21
6.2.3 TRACEABILITY (PRO RAMMIN THE TRACEABILITY LIST)..............................21
6.2.4 IN REDIENTS (PRO RAMMIN THE LIST OF IN REDIENTS).........................22
6.2.5 CUSTOMERS ................................................................................................................22
6.3
6.36.3
6.3 OPERATIN
OPERATINOPERATIN
OPERATIN MODE
MODE MODE
MODE............................................................................................................22
6.3.1 EURO -–LIRAS (SELECTIN THE CURRENCY) ......................................................23
6.3.2 PRINTIN MODE........................................................................................................23
6.3.3 PLU RETRIEVIN MODE ...........................................................................................24
6.4
6.46.4
6.4 CONFI URATION
CONFI URATIONCONFI URATION
CONFI URATION..............................................................................................................24
6.4.1 PASSWORD MENU .....................................................................................................25
6.4.2 NETWORK - LAN (CONFI URIN THE LOCAL AREA NETWORK) .................25
6.4.3 SLIP HEADIN .............................................................................................................26
6.4.4 OPERATORS.................................................................................................................26
6.4.5 BAR CODE....................................................................................................................27
6.4.6 DATE - TIME.................................................................................................................28

S
Se
er
rv
vi
ic
ce
e
m
ma
an
nu
ua
al
l
o
of
f
d
de
es
sk
k-
-t
ty
yp
pe
e
b
ba
al
la
an
nc
ce
es
s
m
mo
od
de
el
l
S
SU
UN
N
E
EC
CO
O
V
V
A
A
EUROBIL s.r.l. Rev. 0 Page 6 of 40
6.4.7 VAT RATES ...................................................................................................................28
6.4.8 DESCRIBIN THE TRACEABILITY.............................................................................28
6.4.9 DESCRIPTION OF IN REDIENTS .............................................................................28
6.4.10 DESCRIBIN THE PRODUCTION DATE.................................................................28
6.4.11 DESCRIBIN THE PACKA IN DATE.....................................................................28
6.4.12 DESCRIBIN THE EXPIRY DATE...............................................................................28
6.4.13 CASH RE ISTER...........................................................................................................29
6.4.14 MODEM........................................................................................................................29
6.5
6.56.5
6.5 CONTROLS
CONTROLSCONTROLS
CONTROLS...........................................................................................................................29
6.5.1 RESET USER MEMORY ...............................................................................................29
6.5.2 TECHNICAL SERVICE..................................................................................................29
6.5.3 KEYPAD BUZZER .........................................................................................................29
6.5.4 PAPER FEED..................................................................................................................30
6.5.5 PRINTIN SPEED.........................................................................................................30
6.5.6 PRINTIN INTENSITY................................................................................................30
6.5.7 REWINDER ...................................................................................................................30
6.5.8 CALIBRATIN LABELS ................................................................................................30
6.5.9 PAPER SENSOR ............................................................................................................30
6.6
6.66.6
6.6 REPORT
REPORTREPORT
REPORT.................................................................................................................................30
6.7
6.76.7
6.7 TRANSMISSIONS
TRANSMISSIONSTRANSMISSIONS
TRANSMISSIONS .................................................................................................................30
6.7.1 TRANSM. CONFI . (TRANSMITTIN THE CONFI URATION) .......................31
6.7.2 TRANSM. PLU (TRANSMITTIN PLU)..................................................................31
6.7.3 TRANSM. TRACEAB. (TRANSMITTIN TRACEABILITY) .....................................31
6.7.4 TRANSM. IN RED. (TRANSMITTIN IN REDIENTS).........................................31
7
77
7SERIES CONNECTIONS
SERIES CONNECTIONSSERIES CONNECTIONS
SERIES CONNECTIONS...............................................................................................31
8
88
8APPENDIX
APPENDIXAPPENDIX
APPENDIX...................................................................................................................32
8.1
8.18.1
8.1 DIA RAM OF SERIES CONNECTION RS232 (COM1
DIA RAM OF SERIES CONNECTION RS232 (COM1 DIA RAM OF SERIES CONNECTION RS232 (COM1
DIA RAM OF SERIES CONNECTION RS232 (COM1 –
––
– COM2)
COM2) COM2)
COM2) .................................32
8.2
8.28.2
8.2 DIA RAM OF LAN CONNECTION (LAN
DIA RAM OF LAN CONNECTION (LANDIA RAM OF LAN CONNECTION (LAN
DIA RAM OF LAN CONNECTION (LAN-
--
-IN L
IN LIN L
IN LAN
ANAN
AN-
--
-OUT)
OUT)OUT)
OUT)............................................33
8.3
8.38.3
8.3 DIA RAM FOR THE CONNECTION OF THE EXTERNAL BATTERY 12/24 V
DIA RAM FOR THE CONNECTION OF THE EXTERNAL BATTERY 12/24 VDIA RAM FOR THE CONNECTION OF THE EXTERNAL BATTERY 12/24 V
DIA RAM FOR THE CONNECTION OF THE EXTERNAL BATTERY 12/24 V..........33
8.4
8.48.4
8.4 TABLE CHARACTERS NUMERICAL KEYS
TABLE CHARACTERS NUMERICAL KEYSTABLE CHARACTERS NUMERICAL KEYS
TABLE CHARACTERS NUMERICAL KEYS......................................................................34
8.5
8.58.5
8.5 EXAMPLES OF SLIPS
EXAMPLES OF SLIPSEXAMPLES OF SLIPS
EXAMPLES OF SLIPS ............................................................................................................35
8.5.1 SLIP OF TRANSACTIONS ...........................................................................................35
8.5.2 SLIP OF ENERAL TOTAL..........................................................................................35
8.5.3 SLIP OF TOTAL OF OPERATORS..............................................................................36
8.5.4 SLIP OF PLU TOTAL....................................................................................................37
8.5.5 EXAMPLE OF LABEL....................................................................................................37
8.5.6 TABLE OF ELETRONIC CALIBRATION FOR PLACES.............................................38

S
Se
er
rv
vi
ic
ce
e
m
ma
an
nu
ua
al
l
o
of
f
d
de
es
sk
k-
-t
ty
yp
pe
e
b
ba
al
la
an
nc
ce
es
s
m
mo
od
de
el
l
S
SU
UN
N
E
EC
CO
O
V
V
A
A
EUROBIL s.r.l. Rev. 0 Page 7 of 40
1
11
1ENERAL CONSIDERATIONS
ENERAL CONSIDERATIONSENERAL CONSIDERATIONS
ENERAL CONSIDERATIONS
Before installing the balance check whether it is provided with the legal or factory seal.
EUROBIL declines any metric and legal responsibility if this seal is missing or tampered.
1.1
1.11.1
1.1 SAFETY
SAFETYSAFETY
SAFETY
Only skilful and authorized personnel can install and repair the instrument; before carrying
out any operation inside it, disconnect from the mains and turn the main switch off.
All the precautions and the intervention methodologies are explained in detail in the technical
manual.
EUROBIL declines any responsibility for damages suffered by the operator or due to
malfunction of the instrument, if the mains line is not earthed or the earthing system is not
very good.
1.2
1.21.2
1.2 METROLO Y
METROLO Y METROLO Y
METROLO Y -
--
-–
––
– CHECKS
CHECKS CHECKS
CHECKS -
--
- CALIBRATION
CALIBRATION CALIBRATION
CALIBRATION
1.2.1
1.2.11.2.1
1.2.1 TECHNICAL DATA
TECHNICAL DATATECHNICAL DATA
TECHNICAL DATA
OPERATIN CONDITIONS
Temperature: from -10°C to +40°C
Power supply: 28 V DC 2.2 Ah
Optional
OptionalOptional
Optional power supply 12/24 V DC (extended operating range from 12 to 24 V)
Absorption: 40 W (max)
2 internal lead batteries of 12 V 2.2 Ah (duration of approximately 6/8 hours,
according to the number of slips and to the degree of efficiency of the cells)
Non automatic EUROBIL balances are approved for the calculation of price by EC according
to the standards EN45501 and therefore they can be used for the direct sale to the public.
The metrological characteristics and the main technical parameters are indicated in the sealing
plate.
These balances must be connected with preferential electrical lines and the installation must be
earthed very well.
The immunity to electric noises must comply with the standards IEC801-4
The immunity to radiated electromagnetic noises must comply with the standards IEC 1000-4-
3.
The immunity to electrostatic discharges must comply with the standards IEC 801-2.
Operating temperature: -10 to +40°C – Storage temperature: -20 to +60°C
Relative humidity: 85% max.
Avoid to espose the balance to the sunlight and to insert it into cold stores (dew effect).

S
Se
er
rv
vi
ic
ce
e
m
ma
an
nu
ua
al
l
o
of
f
d
de
es
sk
k-
-t
ty
yp
pe
e
b
ba
al
la
an
nc
ce
es
s
m
mo
od
de
el
l
S
SU
UN
N
E
EC
CO
O
V
V
A
A
EUROBIL s.r.l. Rev. 0 Page 8 of 40
1.2.2
1.2.21.2.2
1.2.2 CALIBRATION
CALIBRATIONCALIBRATION
CALIBRATION
Balances are calibrated:
-at the end of the production, with the values of calibration complying with the gravity
acceleration of the place of production
-on the place of installation (place of use) where the instrument must be adjusted
definitively.
1.3
1.31.3
1.3
UARANTEE
UARANTEEUARANTEE
UARANTEE
Balances can be used only by personnel duly trained by authorized engineers.
The damages provoked to the instrument for illegitimate uses are not covered by guarantee.
The period of guarantee is 12 months starting from the date of installation.
The manufacturer’s guarantee is ensured in factory for balances returned carriage-free.
All the parts that are detected as faulty are replaced without charge, during the period of
guarantee.
This guarantee does not cover:
•the load cell
•the thermal head of the printer (consumable)
•the emergency batteries.
Furthermore this guarantee does not cover any fault provoked by illegitimate or inadequate
use of the instrument, by tampering, nor the electric faults provoked by wrong voltages.
This guarantee is not valid any more if the balance is repaired by engineers not authorized by
EUROBIL.
2
22
2INSTALLATION
INSTALLATIONINSTALLATION
INSTALLATION
ENERAL INFORMATION
a) position the balance on the work top and adjust the spirit level
b) connect the mains (preferential line) checking that there is a good earthing
c) switch the balance on with empty pan
d) wait that the balance carries out the programmed tests automatically
check of the stability of the loading pan and visualization of:
-zero
zerozero
zero on the displays of weight, tare, price and total, after the tests have been
completed regularly
-symbol “
symbol “symbol “
symbol “-------
--------------
-------”,
”,”,
”, when no load is laid on the pan
-symbol “
symbol “symbol “
symbol “-------
--------------
-------”,
”,”,
”, when the pan is loaded with an excessive weight
e) reset the memory to erase any data item and programming previously stored (this
operation must be carried out by authorized technical personnel).

S
Se
er
rv
vi
ic
ce
e
m
ma
an
nu
ua
al
l
o
of
f
d
de
es
sk
k-
-t
ty
yp
pe
e
b
ba
al
la
an
nc
ce
es
s
m
mo
od
de
el
l
S
SU
UN
N
E
EC
CO
O
V
V
A
A
EUROBIL s.r.l. Rev. 0 Page 9 of 40
2.1
2.12.1
2.1 CHOOSIN THE PLACE OF INSTALLATION
CHOOSIN THE PLACE OF INSTALLATION CHOOSIN THE PLACE OF INSTALLATION
CHOOSIN THE PLACE OF INSTALLATION
When installing the balance on the place of its use, according to the rules in force, choose the
place of operation of the instrument definitively.
This procedure must be carried out by skilful and authorized personnel.
If the procedure is not completed, the display of weight goes on blinking.
3
33
3DEVICES OF THE BALANCE
DEVICES OF THE BALANCEDEVICES OF THE BALANCE
DEVICES OF THE BALANCE
3.1
3.13.1
3.1 DISPLAYS
DISPLAYSDISPLAYS
DISPLAYS
3.1.1
3.1.13.1.1
3.1.1 MAIN DISPLAY FOR CUSTOMERS
MAIN DISPLAY FOR CUSTOMERS MAIN DISPLAY FOR CUSTOMERS
MAIN DISPLAY FOR CUSTOMERS
This unique display will show the data concerning tare, unit price and amount.
3.1.2
3.1.23.1.2
3.1.2
MAIN DISPLAY FOR THE OPERATOR
MAIN DISPLAY FOR THE OPERATORMAIN DISPLAY FOR THE OPERATOR
MAIN DISPLAY FOR THE OPERATOR
This unique display will show the data concerning the tare, the unit price, the amount, the
description of PLU and the partial totals of active operators.
3.2
3.23.2
3.2
LI HT INDICATIONS FOR THE OPERATOR
LI HT INDICATIONS FOR THE OPERATORLI HT INDICATIONS FOR THE OPERATOR
LI HT INDICATIONS FOR THE OPERATOR
Eight warning lights inform the operator of the following situations:
ICON
ICONICON
ICON
LI HTED ICON
LI HTED ICONLI HTED ICON
LI HTED ICON
ICON OUT
ICON OUTICON OUT
ICON OUT
NET A tare value is active (the displayed
weight is NET)
No tare value is active
PT A pre-fixed tare value is active No pre-fixed tare value is active
->T<- A tare value has been set No tare value has been set
->€<- A unit price has been fixed No unit price has been fixed
BAT The balance is battery-operated The balance is powered by the mains
->0<- It indicates that the detected weight is
exactly at zero.
It indicates that the balance is not in the
condition of zero weight.
C1 It indicates that the weighing device is
enabled in the first interval.
It indicates that the weighing device is not
enabled in the first interval.
C2 It indicates that the weighing device is
enabled in the second interval.
It indicates that the weighing device is not
enabled in the second interval.
LAN Balance networked with other balances Balance NOT networked

S
Se
er
rv
vi
ic
ce
e
m
ma
an
nu
ua
al
l
o
of
f
d
de
es
sk
k-
-t
ty
yp
pe
e
b
ba
al
la
an
nc
ce
es
s
m
mo
od
de
el
l
S
SU
UN
N
E
EC
CO
O
V
V
A
A
EUROBIL s.r.l. Rev. 0 Page 10 of 40
3.3
3.33.3
3.3 KEYPAD
KEYPADKEYPAD
KEYPAD
3.3.1
3.3.13.3.1
3.3.1 69
6969
69-
--
-KEY KEYPAD
KEY KEYPADKEY KEYPAD
KEY KEYPAD
The main keypad is divided into two blocks; each block consists of 32 keys:
- right block - for functional operations and digital setting
- left block – enabling of functions (F1…F5) – insertion of alphabetic characters, direct retrieval
of PLU, retrieval of programmed tare values.
Functions are attributed to the keys F1…F5 dynamically: that is, some specific functions are
assigned to the keys according to the operational setting of the balance. However these
functions are described by proper abbreviations available over the keys and generated by the
display.

S
Se
er
rv
vi
ic
ce
e
m
ma
an
nu
ua
al
l
o
of
f
d
de
es
sk
k-
-t
ty
yp
pe
e
b
ba
al
la
an
nc
ce
es
s
m
mo
od
de
el
l
S
SU
UN
N
E
EC
CO
O
V
V
A
A
EUROBIL s.r.l. Rev. 0 Page 11 of 40
3.3.2
3.3.23.3.2
3.3.2 FUNCTIONS OF KEYS
FUNCTIONS OF KEYS FUNCTIONS OF KEYS
FUNCTIONS OF KEYS -
--
-
OPERATIONAL AND FUN
OPERATIONAL AND FUNOPERATIONAL AND FUN
OPERATIONAL AND FUNCTIONAL BLOCK
CTIONAL BLOCKCTIONAL BLOCK
CTIONAL BLOCK
KEY
KEYKEY
KEY
FUNCTION
FUNCTIONFUNCTION
FUNCTION
/ - - Setting prices, PLU, etc…
Erasing data
Selecting the set PLU
Enabling the write-off
In case of text programming it
will switch upper-case /
lower-case
- enabling total of operators
- In label mode it will print
partial total
- paper feed
- goods with positive packaging
- Discount / goods with negative
packaging
It multiplies the number of
positive or negative packaging
In label mode it will set the
number of labels / lot number
- it stores price, tare
- it controls the semi-automatic
tare
- it confirms the pre-fixed tare
Setting customer number
…
Operator keys
Percent key (used in discount
function)
Access to the setting of pre-fixed
tare
Access to the MENU
It increases the display contrast
It reduces the display contrast
It inverts the (positive/ negative)
display mode
It starts the function of slip
reopening
…
Direct retrieval of PLU

S
Se
er
rv
vi
ic
ce
e
m
ma
an
nu
ua
al
l
o
of
f
d
de
es
sk
k-
-t
ty
yp
pe
e
b
ba
al
la
an
nc
ce
es
s
m
mo
od
de
el
l
S
SU
UN
N
E
EC
CO
O
V
V
A
A
EUROBIL s.r.l. Rev. 0 Page 12 of 40
3.4
3.43.4
3.4 PRINTER
PRINTERPRINTER
PRINTER
The printer is of thermal type at high speed and it is accessible through the proper door in the
fore part. The width of paper rolls will be of 60 mm; whereas the maximum allowable
diameter is of 70 mm.
Labels have a fixed width of 60 mm.
The length of a label depends on the lay-out chosen by the operator and normally it ranges
from 36 mm to 83 mm (max.).
3.4.1
3.4.13.4.1
3.4.1 LOADIN THE ROLL OF NORMAL THERMAL PAPER
LOADIN THE ROLL OF NORMAL THERMAL PAPERLOADIN THE ROLL OF NORMAL THERMAL PAPER
LOADIN THE ROLL OF NORMAL THERMAL PAPER
When the paper roll ends, an automatic device excludes the printer and sets the balance for
the only display.
Insert the roll of normal thermal paper as indicated here below:
1. remove the door
2. unhook the head pulling the blue lever available at the right of the printer, in the
upper part
3. pull the printer towards yourself (the printer rotates and gives access to the
compartment housing the paper roll)
4. position the new roll in the proper compartment
5. cut the paper leaving slightly overlooking on the left
6. insert the paper into the proper raiser available at approximately half the supporting
plate of the printer
7. position the printer again in working position
8. hook the head again pressing the blue lever in the upper part, close the door
9. press the key of paper feed “↑” to reset the printer
3.4.2
3.4.23.4.2
3.4.2 INSERTIN
INSERTININSERTIN
INSERTIN
A ROLL OF ADHESIVE THERMAL PAPER OR LABELS
A ROLL OF ADHESIVE THERMAL PAPER OR LABELS A ROLL OF ADHESIVE THERMAL PAPER OR LABELS
A ROLL OF ADHESIVE THERMAL PAPER OR LABELS
Insert the roll of adesive thermal paper or labels as indicated here below:
1. remove the door
2. unhook the head pulling the blue lever available at the right of the printer, in the
upper part
3. pull the printer towards yourself (the printer rotates and gives access to the
compartment housing the paper roll)
4. position the new roll in the proper compartment
5. remove some labels or 10 cm of paer, in case of adesive paper, from the support
6. cut the support leaving slightly overlooking on the left
7. insert the paper into the proper raiser available at approximately half the supporting
plate of the printer
8. position the printer again in working position
9. hook the head again pressing the blue lever in the upper part, close the door
10. press the key of paper feed “↑” to reset the printer
11. insert the support in the slot available in the upper part of the paper cutter
12. insert the end of the support in the slot available on the pin of the rewinder; at last,
close the door

S
Se
er
rv
vi
ic
ce
e
m
ma
an
nu
ua
al
l
o
of
f
d
de
es
sk
k-
-t
ty
yp
pe
e
b
ba
al
la
an
nc
ce
es
s
m
mo
od
de
el
l
S
SU
UN
N
E
EC
CO
O
V
V
A
A
EUROBIL s.r.l. Rev. 0 Page 13 of 40
3.4.3
3.4.33.4.3
3.4.3 MAINTENANCE OF THE PRINTER AND PRECAUTIONS
MAINTENANCE OF THE PRINTER AND PRECAUTIONS MAINTENANCE OF THE PRINTER AND PRECAUTIONS
MAINTENANCE OF THE PRINTER AND PRECAUTIONS
Clean the head often (at least every 15 days)
Run a piece of paper soaked with ethyl alcohol between roll and head; then wipe with dry
paper.
Any label or any piece of paper jammed in the roller can be removed only after the head or
the whole printer has been disassembled.
NEVER USE KNIVES NOR SHARP TOOLS NEAR THE HEAD
NEVER USE KNIVES NOR SHARP TOOLS NEAR THE HEADNEVER USE KNIVES NOR SHARP TOOLS NEAR THE HEAD
NEVER USE KNIVES NOR SHARP TOOLS NEAR THE HEAD
Replace the roll immediately after the red stripe of roll end has appeared.
Never arrive at the end of the roll because some trace of glue very harmful for the head could
have been left in this zone.
4
44
4USE OF THE INSTRUMENT
USE OF THE INSTRUMENTUSE OF THE INSTRUMENT
USE OF THE INSTRUMENT
After switching the balance on and checking the correct result of the switching-on tests, start
the operations of sale.
4.1
4.14.1
4.1 SALE
SALESALE
SALE BY WEI HT
BY WEI HT BY WEI HT
BY WEI HT
Laying the goods on the pan will indicate the corresponding weight value on the proper
display.
Weighing operations are valid only if they are carried out within the measuring range going
from the minimum (Min) weighing to the maximum (Max) weighing.
4.2
4.24.2
4.2 MANUAL SETTIN OF THE UNIT PRICE
MANUAL SETTIN OF THE UNIT PRICEMANUAL SETTIN OF THE UNIT PRICE
MANUAL SETTIN OF THE UNIT PRICE
The unit price per kilo can be set from the numerical keypad on condition that the PLU
retrieving mode is manual (refer to the menu OPERATIN MODE and to the submenu PLU
RETRIEVIN MODE). As soon as the condition of stable pan is reached, the amount is shown
on the proper display.
The set price can be erased:
-manually: press the key “C”
-automatically: remove the goods from the pan after the weighing has been stored.
The set price can be blocked with the key “Fix” to carry out several weighing operations with
the same price.
When a price is blocked, the warning light ->€<- is on.
Pressing the key “C” will erase the fixed price.
4.3
4.34.3
4.3 PRO RAMMED UNIT PRICE (PLU)
PRO RAMMED UNIT PRICE (PLU)PRO RAMMED UNIT PRICE (PLU)
PRO RAMMED UNIT PRICE (PLU)
Prices can be stored previously thus enabling a fast retrieval without errors.
Refer to the programming procedure in the menu PRO RAMMIN DATA BASE and in the
sub-menu PLU.
A programmed piece can be retrieved:
a)
with the key of direct retrieval corresponding to the retrieved PLU
Operating mode: a PLU is associated with each key.
Pressing the key will retrieve the PLU
b) with the number of the article and the key “PLU”

S
Se
er
rv
vi
ic
ce
e
m
ma
an
nu
ua
al
l
o
of
f
d
de
es
sk
k-
-t
ty
yp
pe
e
b
ba
al
la
an
nc
ce
es
s
m
mo
od
de
el
l
S
SU
UN
N
E
EC
CO
O
V
V
A
A
EUROBIL s.r.l. Rev. 0 Page 14 of 40
4.4
4.44.4
4.4 SALE
SALESALE
SALE BY PACKA E
BY PACKA E BY PACKA E
BY PACKA E
The goods sold by package can be added to the slip:
•by manual setting: press the key “+” and set the price of the package (when more pieces
of the same artiche are sold, after setting the price of the package, press the key “x” and
set the number of packages)
•by retrieval of the PLU if it has been stored with PIECE typology
•by a bar code reader such as scanner, optical pen, etc… (refer to the section 6.2.1)
After storing the transaction, the balance is configured again for the weight sale, unless the
balance is set in PRINTIN MOXDE = INDIVIDUAL ARTICLE and the key FIX has been
pressed after the key “+”;
in this case, the same transaction can be stored several times and a slip can be issued for each
transaction.
4.5
4.54.5
4.5 CONNECTION WITH THE SCANNER OR WITH THE
CONNECTION WITH THE SCANNER OR WITH THE CONNECTION WITH THE SCANNER OR WITH THE
CONNECTION WITH THE SCANNER OR WITH THE
OPTICAL PEN
OPTICAL PEN OPTICAL PEN
OPTICAL PEN
Any type of scanner or bar code reader can be connected with the interface RS232 of the
balance.
If a scanner supplied by the factory is used, it is sufficient to connect the connector. If another
type of scanner is used, programme the reader following the indications of its service
handbook and the “Plug and Play Programming” procedures and fixing the data indicated
here below:
- Interface RS232: 9600 baud, no parity, 8 bits, 1 stop bit, without flow control
-Enable the type of bar code (for instance, EAN)
-Programme the code with prefix 02, and the code with suffix 0D
The 13-digit bar code can be programmed in the second line of PLU description (see PLU data
base) with the keypad, or it can be read by the scanner.
When another article must be added in the slip, read the code with the scanner:
-If all the operators have been enabled, after reading the code, press the key “#op”
of the concerned operator.
4.6
4.64.6
4.6 WRITE
WRITEWRITE
WRITE-
--
-OFF
OFFOFF
OFF OF THE OPERATION
OF THE OPERATION OF THE OPERATION
OF THE OPERATION
If the writing-off function has been enabled, all the operations can be annulled with the
following procedure:
•Press the keys “St” and “#op” in sequence - the last operation will be displayed
•Using the keys F3 and F4 run the stored operations
•Press the key F2 to write-off the displayed operation
•Press the key F5 to quit the writing-off function
4.7
4.74.7
4.7 TARE
TARETARE
TARE
There are various typologies of use of the tare device:
•Semiautomatic tare - used when the value of tare is not known
•Pre-fixed tare - used when the value of tare is known
Note: – the value of tare is subtracted from the whole weighing range

S
Se
er
rv
vi
ic
ce
e
m
ma
an
nu
ua
al
l
o
of
f
d
de
es
sk
k-
-t
ty
yp
pe
e
b
ba
al
la
an
nc
ce
es
s
m
mo
od
de
el
l
S
SU
UN
N
E
EC
CO
O
V
V
A
A
EUROBIL s.r.l. Rev. 0 Page 15 of 40
4.8
4.84.8
4.8
SEMIAUTOMATIC TARE
SEMIAUTOMATIC TARE SEMIAUTOMATIC TARE
SEMIAUTOMATIC TARE
a) lay the empty case on the pan and press the key -T-; as soon as the pan is stable, the value
of tare is detected
b) the value of tare is shown on the tare display and the LED “NET” is on.
After a value of semiautomatic tare has been acquired:
c) the tare value can be blocked with the key “Fix” (the symbol ->T<- is on); pressing the
key “Fix” again will release this value
d) other values of semiautomatic tare can be detected in sequence on condition that the tare
value is rising
e) the tare value cannot be reduced
f) a PLU can be retrieved, but any associated tare value will be ignored.
Pressing the key - T- (with empty pan) or unloading the pan after the transaction has been
recorded, will cancel the semiautomatic tare.
4.9
4.94.9
4.9 PRE
PREPRE
PRE-
--
-FIXED TAR
FIXED TARFIXED TAR
FIXED TARE
EE
E
The known tare value can be loaded:
•manually
•with the retrieval of the associated PLU.
Inserting a value of pre-fixed tare will turn the symbols “NET” and Pt” on at the same time.
The minimum tare value must be consistent with the division of the balance.
4.10
4.104.10
4.10
TARE SET MANUALLY
TARE SET MANUALLY TARE SET MANUALLY
TARE SET MANUALLY
a) Check that the value of semiautomatic tare is zero
b) Press the key “PT”
c) type the known tare value on the numeric keypad
d) Press the key “PT”
Pressing the key “-T-”, with gross weight equal to zero, or unloading the pan after the
transaction has been recorded, will cancel the manual tare.
4.11
4.114.11
4.11
TARE ASSOCIATED WITH PLU
TARE ASSOCIATED WITH PLUTARE ASSOCIATED WITH PLU
TARE ASSOCIATED WITH PLU
a) Check that the tare value is equal to zero
b) Retrieve a PLU with associated tare – the tare value is acquired as pre-fixed tare
Note: if a value of pre-fixed or manual tare is already available, a PLU can be retrieved, but
any assoiciated tare will be ignored.
The associated tare will be erased (together with the PLU):
- because the transaction has already been implemented
-with the key “-T-” when the gross weight is equal to zero
-when a PLU is replaced by another PLU
-when the PLU is erased with the key “C”
-when the gross weight is lower than zero

S
Se
er
rv
vi
ic
ce
e
m
ma
an
nu
ua
al
l
o
of
f
d
de
es
sk
k-
-t
ty
yp
pe
e
b
ba
al
la
an
nc
ce
es
s
m
mo
od
de
el
l
S
SU
UN
N
E
EC
CO
O
V
V
A
A
EUROBIL s.r.l. Rev. 0 Page 16 of 40
5
55
5OPERATIONS ON THE
OPERATIONS ON THE OPERATIONS ON THE
OPERATIONS ON THE SLIP
SLIPSLIP
SLIP
In this operating mode the balance issues some slips with multiple operations that are stored in
the 8 (16) memories of the operators with the keys V1…V8.
5.1
5.15.1
5.1 PRINTIN THE
PRINTIN THE PRINTIN THE
PRINTIN THE SLIP
SLIPSLIP
SLIP FOR CUSTOMER
FOR CUSTOMER FOR CUSTOMER
FOR CUSTOMER
Pressing the keys of total “*” and of the operator V1…V8 in sequence will require the printing
of the slip.
Pressing the keys “*” and V1…V8 again before opening another slip will print a copy of the
slip.
5.2
5.25.2
5.2 REOPENIN THE LAST
REOPENIN THE LAST REOPENIN THE LAST
REOPENIN THE LAST SLIP
SLIPSLIP
SLIP CLOSED
CLOSED CLOSED
CLOSED
Each operator can reopen the last slip closed and printed to add new transactions or to write-
off one or more of those already implemented.
•Press the keys F5 and “#op” in sequence (check the correct reopening of the slip by
reading the total of the reopened slip on the alphanumeric display)
•Other transactions can be added through the normal operation
•A transaction can be cancelled with the procedure explained at the section 4.6.
The slip can be reopened in any balance, in the systems of networked balances.
5.3
5.35.3
5.3 INSERTIN THE CUSTOMER NUMBER
INSERTIN THE CUSTOMER NUMBERINSERTIN THE CUSTOMER NUMBER
INSERTIN THE CUSTOMER NUMBER
When enabled, this function (refer to the
menu DATA BASE submenu CUSTOMERS 6.2.5
)
enables to associate a customer number with the transactions carried out by the operator: this
enables a posteriori to obtain the detailed printing of the goods sold to that customer.
If the function of customer management is enabled, before serving the customer (opening of a
new slip) the operator will press the key CLI and retrieve the CUSTOMER. However, if this
operation is not carried out, the balance will automatically require to insert the customer
number.
The insertion is carried out according to the following modes:
SET THE CUSTOMER NUMBER (THE DESCRIPTION WILL BE DISPLAYED AT THE SAME
TIME)
PRESS HIS/HER OWN OPERATOR KEY.
IF NO CUSTOMER HAS TO BE ASSOCIATED, PRESS IMMEDIATELY HIS/HER OWN
OPERATOR KEY
5.3.1
5.3.15.3.1
5.3.1 CUSTOMER TOTAL
CUSTOMER TOTALCUSTOMER TOTAL
CUSTOMER TOTAL
Pressing the key CLI, selecting the customer number and pressing the function key “PRINT”
will lead to print the customer total . The printed total slip enlists all the operations of sale
carried out for that customer, arranged by date.

S
Se
er
rv
vi
ic
ce
e
m
ma
an
nu
ua
al
l
o
of
f
d
de
es
sk
k-
-t
ty
yp
pe
e
b
ba
al
la
an
nc
ce
es
s
m
mo
od
de
el
l
S
SU
UN
N
E
EC
CO
O
V
V
A
A
EUROBIL s.r.l. Rev. 0 Page 17 of 40
5.3.2
5.3.25.3.2
5.3.2 RESETTIN CUSTOMER TOTAL
RESETTIN CUSTOMER TOTAL RESETTIN CUSTOMER TOTAL
RESETTIN CUSTOMER TOTAL
Pressing the key CLI, selecting the customer number and pressing the function key “RESET”
will lead to reset and print the customer total. Confirm by pressing the function key
“PRINT”. The printed total slip enlists all the operations of sale carried out for that customer,
arranged by date.
5.4
5.45.4
5.4 OPERATIONS ON AN INDIVIDUAL ARTICLE
OPERATIONS ON AN INDIVIDUAL ARTICLE OPERATIONS ON AN INDIVIDUAL ARTICLE
OPERATIONS ON AN INDIVIDUAL ARTICLE
In this operating mode the balance enables the automatic printing of a slip. Use a continuous
rolls of normal or adesive paper (if the balance is provided with rewinder for the support).
•Enable the function MODE OF PRINTIN SLIP OF INDIVIDUAL ARTICLE in the menu
“OPERATIN MODE” and submenu “PRINTIN MODE”.
•Choose the printing parameters indicated here below.
Available options:
• LO O*
Enabling the printing of a graphic logo*.
• SLIP HEADIN
This parameter enables/disables the printing of the slip heading (business name, address,
etc…).
•DESCRIPTION OF PLU
This parameter enables the printing of the description of PLU.
•PRINTIN BAR CODE ON TRANSACTION SLIP
This parameter enables the printing of the bar code on the slip of the operation.
• TOTAL SLIP
A slip with the total of all the operations carried out, can be printed at the end of the
operations; if only one PLU has been used, this slip will also indicate the name of the
labelled product.
• PRINTIN BAR CODE ON THE TOTAL SLIP - This parameter enables the printing of the
bar code on the total slip.
5.5
5.55.5
5.5 LABELLIN OPERATIONS
LABELLIN OPERATIONSLABELLIN OPERATIONS
LABELLIN OPERATIONS
In this mode the balance enables the automatic or manual printing of a label for each
operation carried out.
The balance must be prepared mechanically (rewinder) and the optical sensor of label
detection must be enabled.
•Enable the function of LABEL PRINTIN MODE (refer to the menu “OPERATIN MODE
and to the submenu “PRINTIN MODE”.)
Available options:
• STARTIN STEPS
Set the distance of print start of the label itself, by typing a number from 0 to 999
• LO O*
Enabling the printing of a graphic logo*.

S
Se
er
rv
vi
ic
ce
e
m
ma
an
nu
ua
al
l
o
of
f
d
de
es
sk
k-
-t
ty
yp
pe
e
b
ba
al
la
an
nc
ce
es
s
m
mo
od
de
el
l
S
SU
UN
N
E
EC
CO
O
V
V
A
A
EUROBIL s.r.l. Rev. 0 Page 18 of 40
N
NN
Note:
ote:ote:
ote:
*
**
* the slip logo is a graphic image printed onto the slip heading. This image must have a monochromatic
Bitmap (BMP) format of 192 pixels x 192 pixels of height (max). The realization of this image is up to the
user’s needs and imagination: using the familiar graphic tools available in the rifest operating systems, he/she
can plot a logo with the characteristics described above, at his/her own will. The file with this logo will be sent
to the balance through the configuration software CONFBIL supplied by Eurobil.
•SLIP HEADIN
It enables (or it does not enable) the printing of the heading
•DATE - TIME
It enables (or it does not enable) the printing of date and time.
•DECRIPTION OF PLU
It enables (or it does not enable) the printing of the description of PLU.
•IN REDIENTS
It enables (or it does not enable) the printing of the ingredients.
•DATE OF PRODUCTION
It enables (or it does not enable) the printing of the date of production.
•DATE OF PACKA IN
It enables (or it does not enable) the printing of the date of packaging.
•EXPIRY DATE
It enables (or it does not enable) the printing of the expiry date.
•BAR CODE
It enables (or it does not enable) the printing of the bar code.
• ROLL OF LABEL / CONTINUOUS PAPER
It is used to select whether the printing must be carried out on labels or on a roll of
continuous paper
• MANUAL / AUTOMATIC PRINTIN
It is used to select the manual or automatic printing.
5.5.1
5.5.15.5.1
5.5.1 NUMBER OF LABELS /
NUMBER OF LABELS / NUMBER OF LABELS /
NUMBER OF LABELS / LOT
LOTLOT
LOT NUMBER
NUMBER NUMBER
NUMBER
Pressing the key X in this printing mode will lead to insert the:
•NUMBER OF LABELS
•LOT NUMBER
If different from zero, the
NUMBER OF LABELS
enables to define the number that must be
produced. Once reached the number of labels set, the balance displays “NUMBER OF
LABELS REACHED” and disables the printing. Reset the operation by printing the partial total
with the key *.
The
LOT NUMBER
enables to define the number of the production lot and it is a simple
indication appearing on the label.
5.5.2
5.5.25.5.2
5.5.2 PARTIAL TOTAL OF LABELS
PARTIAL TOTAL OF LABELSPARTIAL TOTAL OF LABELS
PARTIAL TOTAL OF LABELS
Pressing the key * will lead to the PARTIAL TOTAL of the prints carried out with the retrieved PLU. The
partial total is printed and reset automatically.

S
Se
er
rv
vi
ic
ce
e
m
ma
an
nu
ua
al
l
o
of
f
d
de
es
sk
k-
-t
ty
yp
pe
e
b
ba
al
la
an
nc
ce
es
s
m
mo
od
de
el
l
S
SU
UN
N
E
EC
CO
O
V
V
A
A
EUROBIL s.r.l. Rev. 0 Page 19 of 40
6
66
6
MENU
MENUMENU
MENU
(
( (
(
TOTALS
TOTALS TOTALS
TOTALS -
--
-PRO RAMMIN
PRO RAMMIN PRO RAMMIN
PRO RAMMIN -
--
-
CONFI URATION….
CONFI URATION….CONFI URATION….
CONFI URATION…..)
.).)
.)
Pressing the key “MENU” corresponding to the function MENU, in the weighing mode, will
open the following drop-down menu:
TOTALS
PROGR. DATA BASE
OPERATING MODE
CONFIGURATION
CONTROLS
REPORT
TRANSMISSIONS
If a password has been programmed, the access to the menu will depend on the setting of
this password.
Select the item with the function keys “Up” and “Down” and press the function key “Enter”
to enter one of the submenus.
6.1
6.16.1
6.1
TOTALS
TOTALSTOTALS
TOTALS
The submenu TOTALS show the following items:
GENERAL
OPERATORS
PLU
PLU GROUPS
6.1.1
6.1.16.1.1
6.1.1 ENERAL ( ENERAL TOTAL)
ENERAL ( ENERAL TOTAL) ENERAL ( ENERAL TOTAL)
ENERAL ( ENERAL TOTAL)
Entering this item of the submenu will offer the possibility of printing
printingprinting
printing the following data:
TOTAL OF AMOUNTS
TOTAL OF TRANSFERS
TOTAL OF DISCOUNTS
TOTAL OF CREDITS
TOTAL OF WEI HT
TOTAL OF CUSTOMERS
TOTAL OF CASH
PRESS THE FUNCTION KEY “PRINT” TO PRINT THE TOTAL
PRESS THE FUNCTION KEY “RESET” TO PRINT AND RESET THE TOTAL
6.1.2
6.1.26.1.2
6.1.2 OPERATORS (TOTAL OF OPERATORS)
OPERATORS (TOTAL OF OPERATORS)OPERATORS (TOTAL OF OPERATORS)
OPERATORS (TOTAL OF OPERATORS)
Entering this item of the submenu will offer the possibility of printing
printingprinting
printing the following data for
every operator:
NUMBER OF OPERATOR
NAME OF OPERATOR
TOTALE OF OPERATOR AMOUNT
PRESS THE FUNCTION KEY “PRINT” TO PRINT THE TOTAL

S
Se
er
rv
vi
ic
ce
e
m
ma
an
nu
ua
al
l
o
of
f
d
de
es
sk
k-
-t
ty
yp
pe
e
b
ba
al
la
an
nc
ce
es
s
m
mo
od
de
el
l
S
SU
UN
N
E
EC
CO
O
V
V
A
A
EUROBIL s.r.l. Rev. 0 Page 20 of 40
6.1.3
6.1.36.1.3
6.1.3 PLU (TOTAL PLU)
PLU (TOTAL PLU)PLU (TOTAL PLU)
PLU (TOTAL PLU)
Entering this item of submenu will offer the possibility of printing the total of the handled
PLU.
PRESS THE FUNCTION KEY “PRINT” TO PRINT THE TOTAL
6.1.4
6.1.46.1.4
6.1.4 PLU ROUPS (TOTAL OF PLU ROUPS)
PLU ROUPS (TOTAL OF PLU ROUPS)PLU ROUPS (TOTAL OF PLU ROUPS)
PLU ROUPS (TOTAL OF PLU ROUPS)
Entering this item of submenu will offer the possibility of printing the total of the PLU
ROUPS.
PRESS THE FUNCTION KEY “PRINT” TO PRINT THE TOTAL
6.2
6.26.2
6.2
PRO RAMMIN
PRO RAMMIN PRO RAMMIN
PRO RAMMIN DAT
DATDAT
DATA BASE
A BASEA BASE
A BASE
PLU
PLU GROUPS
TRACEABILITY
INGREDIENTS
CUSTOMERS
6.2.1
6.2.16.2.1
6.2.1 PLU
PLUPLU
PLU
Entering this item of the submenu will display the following data:
PLU NUMBER
Set the number of PLU having to be programmed (1…3000)
CODE
set the code EAN 13 - EAN 8 of the PLU
DESCRIPTION 1
set the first line of description (20 characters max.)
DESCRIPTION 2
set the second line of description (20 characters max.)
PRICE
Set the price of PLU.
TARE
Set the tare associated with the PLU
TYPE
Select the type of sale of PLU (WEI HT, PIECE, WEI HT MOD. and PIECE MOD.) with
the keys F3 F4
ROUP
set the number of the product group of the PLU under examination
VAT
Set the VAT rate (refer to VAT programming) that must be applied to the PLU for the
calculation of the parcelling out
EXPIRY
Set the number of days for determining the expiry date.
IN REDIENTS
Set the number of the two lists of ingredients.
TRACEABILITY
Set the number of traceability (1..10)
Table of contents
Other Eurobil Scale manuals

