EuroGames MINICAR Manual

Via degli scavi, 41 - 47122 Forlì (ITALY)
Tel. +39 0543 796665 Fax. +39 0543 722727
OPERATION AND MAINTENANCE HANDBOOK
“MINICAR”
Translation of the original instructions
©
EUROGAMES S.r.l. - Ed. 02-2014 - All rights reserved
No part of this document can be reproduced or transmitted to third parties by any means or in any form (either electronic or mechanical,
including photocopying, recording or data saving) for purposes other than the personal use without prior written authorization of EuroGames
S.r.l.


Eurogames Srl – Operation and maintenance handbook – Mini Car
3
INDEX
1.
SCOPE OF THE MANUAL ............................................................................................................... 4
2.
GENERAL SAFETY PRECAUTIONS .................................................................................................. 5
3.
DESCRIPTION OF THE MACHINE ................................................................................................... 6
4.
SERIES AND MODELS.................................................................................................................... 6
5.
TECHNICAL FEATURES .................................................................................................................. 6
6.
MANUFACTURER ......................................................................................................................... 7
7.
COMPLIANCE WITH NORMS AND DIRECTIVES .............................................................................. 7
8.
IDENTIFICATION PLATE ................................................................................................................ 7
9.
FUNCTIONING.............................................................................................................................. 8
1 .
STOP SETTING ........................................................................................................................ 12
11.
CHARGING THE BATTERY ........................................................................................................ 13
12.
TESTING ................................................................................................................................. 14
13.
USE ........................................................................................................................................ 14
14.
EG 9 TIMER ........................................................................................................................... 16
15.
REMOTE CONTROLLER EG 9TEL2 ............................................................................................ 22
16.
REMOTE CONTROLLER EG 9TEL .............................................................................................. 23
17.
BATTERY CHARGER ................................................................................................................. 25
18.
MAINTENANCE ....................................................................................................................... 27
19.
CLEANING .............................................................................................................................. 28
2 .
SHELTERING ........................................................................................................................... 28
21.
CHANGING THE TIRES ............................................................................................................. 28
22.
TROUBLESHOOTING ............................................................................................................... 29
23.
SPARE PARTS .......................................................................................................................... 3
24.
WARRANTY ............................................................................................................................ 3
Eurogames Srl – Operation and maintenance handbook – Mini Car
4
EuroGames thanks you for the preference given to its products.
EuroGames pays the greatest attention to the demands of its worldwide customers and offers them an
unquestionable competence and a year-long experience.
1. SCOPE OF THE MANUAL
This manual is an integral part of the machine, and supplies any and all information for a correct use and
maintenance of the EuroGames S.r.l. Automatic Cars of the “MINICAR” series. The compliance with
these instructions grants the machine a regular running and a long life.
It is important to follow the herein instructions since EuroGames S.r.l. disclaims any responsibility for
damages to persons or things resulting directly or indirectly from the non-compliance with these
instructions, from an improper use of the machine, from inexperience, carelessness or negligence.
The same also applies to when the machine is transferred to third parties either for sale, loan, free loan,
etc.
In drawing up this handbook, three different reminders marked with the following symbols have been
adopted:
CAUTION
Draws the attention to situations or problems which, if not avoided, can result in injury.
ATTENTION
Draws the attention to situations or troubles concerning the machine efficiency which, however,
do not involve personal safety.
IMPORTANT
Draws the attention to important general messages which affect neither safety nor the machine
efficiency.
If, after the reading, you are unsure about anything, contact EuroGames who will assure you a prompt
and careful assistance to get the best performance and highest efficiency from your machine.

Eurogames Srl – Operation and maintenance handbook – Mini Car
5
2. GENERAL SAFETY PRECAUTIONS
This section provides a summary of the general safety precautions which will be introduced in the
following chapters wherever necessary:
•Thoroughly read and understand the operating instructions before turning the machine on.
•Do not carry out any operation with wet hands.
•Before connecting the cables for the battery recharge, check for damages.
•For their functions, dimensions and characteristics, the Automatic Games of the “Minicar” series must
not be allowed to children under 3 years. They must be used only under strict supervision of an adult -
either the manager or any other people able to carry out such duty, who will be the sole responsible.
•It is forbidden to let more than one child per time get in the “Minicar”.
•The two-seater models can only be used by adults who are responsible for themselves and the child
they accompany.
•Do not add extensions to the battery recharge cable. If really necessary, always use type-approved
extensions. When using wound extensions, always unwind them completely before use to prevent
overheating.
•Make sure that no children or unauthorized people approach the machine during the battery recharge.
•Do not cover the machine when functioning; the machine should be used in sheltered and well ventilated
places.
•Do not attempt to open, repair or modify the machine or its components, if not expressly authorized by
Eurogames.
•Do not dip the machine in water to clean it.
•When using the machine, you should always be assisted by a skillful person aware of its functioning and
maintenance and of the safety precautions related to the use of the machine.
All automatic games of the “Minicar” series are delivered with battery charger, which is integral part of,
and with the Operation and Maintenance Handbook to enable you a correct installation and proper
use.
In pursuing a policy of constant improvement, the company reserves the right to modify structure,
functions and reliability of its products without undertaking to give prior notice. For this reason, any
information of this manual could not match the technical features of the product itself completely.
EuroGames S.r.l. does not incur in any obligation as far as updating are concerned which will be
included in future printings of this manual.
ATTENTION
Before installing the “Minicar” and its battery charger, thoroughly read the instructions and
remarks of this manual.

Eurogames Srl – Operation and maintenance handbook – Mini Car
6
3. DESCRIPTION OF THE MACHINE
The Automatic Games of the “Minicar” series manufactured by EuroGames S.r.l. reproduce well known
car and motorbike models inspired to sports or cinematographic events in reduced scale of suitable
dimensions.
Therefore, the Automatic Games of EuroGames S.r.l. develop a play, socialization, amusement, physical
and psychic formation function of the child and an incitement for the development of its psychological
maturity. They rouse and develop the child’s imagination and contribute to strengthen the child’s
confidence in its physical and intellectual capacity, to reinforce its spirit of competition, and to increase its
ability and physical and psychological reflexes.
Playing with the models of the “Minicar” series by EuroGames S.r.l. offers the child unforgettable
moments of healthy, happy, carefree and magic emotion and makes it experience a sensation of
pleasant amusement thanks to their motion, contact, the charm offered by the sounds, noise and colored
light effects, the presence of other play-mates, and the atmosphere of the place.
4. SERIES AND MODELS
The automatic games of the “Minicar” series are manufactured in the following models:
•FORMULA 1 V-MAX, FORMULA 1 V-P, FARM TRACTOR, RABBIT CAB, RALLY, X3, SPORT, MOTO
SPORTING, MOTO SUPERBIKE, MOTO GP, MOTO POLICE, MOTO TRIKE, MINI GO KART TWIN,
MINI GO KART, TWIN SPACE, EUROQUAD, BUGGY, MOTO CHOPPER, MINI OFF ROAD, FLINT
MOBILE, OFF ROAD.
5. TECHNICAL FEATURES
The Automatic Games for children of the
“Minicar”
series have been conceived, designed, projected and
manufactured by
EuroGames
S.r.l. according to the most advanced technologies and using strong
structures of steel protected by a nicely designed shock-preventing body and covered with fiberglass
which insulate and protect them against any accidental or occasional tampering. The electronic card with
power unit is located on the metal frame, inside the body. The
“Minicar”
is equipped with a D.C., battery-
fed electric motor which is solidly secured to the frame
.
Functions are controlled by the electronic card
consisting of a power unit and a microprocessor. The
EuroGames
S.r.l. Automatic Games are practical
and have been designed and manufactured to offer high performance
. The safety and stability of the
“Minicar” series Automatic Games are assured by the centre of gravity located in central position close
to the ground.
The delivery package contains the Automatic Game and the Operation and Maintenance
handbook
.
TECHNICAL DATA
FORMULA 1 V-MAX
FORMULA 1 V-P
FARM TRACTOR
RABBIT CAB
RALLY
X3
SPORT
MOTO SPORTING
MOTO SUPERBIKE
MOTO GP
MOTO POLICE
MOTO TRIKE
MINI GO KART TWIN
MINI GO KART
TWIN SPACE
EUROQUAD
BUGGY
MOTO CHOPPER
MINI OFF ROAD
FLINT MOBILE
OFF ROAD
Height
(cm)
56
56
66
60
54
54
54
75
75
73
73
75
67
68
68
55
72
75
54
130
75
Width (cm) 145
145
137
153
125
130
130
145
143
145
130
148
142
138
142
142
140
148
70
90
90
Length
(cm)
73
73
79
80
68
70
70
76
76
79
76
76
77
77
77
77
82
76
120
138
145
Weight *
(kg)
61
61
71
71
58
58
58
68
73
78
68
73
64
65
60
70
75
73
54
73
73
(*) Weight of the machine without battery.
Eurogames Srl – Operation and maintenance handbook – Mini Car
7
ADJUSTABLE PARAMETERS
•sound and noise volume
•race time: 30 to 990 sec;
•adjustable speed from 0 to 8 km/h standard, or from 0 to 4 km/h conforming to the country safety
regulations.
•customized coins.
CHARACTERISTIC PARAMETERS
•electric power supply by 12V 75/80Ah battery;
•autonomy: 3/4 hours approx.;
•5 and 12 volt auxiliary circuits;
•protection appliances: IP 53 for the 12 volt and the 5 volt components
•storage conditions: temperature: -20°C to +50°C, relative humidity: 30% to 95%;
•running conditions: temperature: +5°C to +40°C, relative humidity: 40% to 90%.
•pneumatic pressure. 2 bars.
•Load capacity 1 seat model: 90 Kg
•Load capacity 2 seats model: 130 Kg
6. MANUFACTURER
The “Minicar” series Automatic Games are manufactured by:
EuroGames S.r.l.
Via Degli Scavi, 41 tel +39 0543 796665
47122 FORLÌ / ITALY fax +39 0543 722727
7. COMPLIANCE WITH NORMS AND DIRECTIVES
The Automatic Games “
Minicar
” series comply with EMC regulations provided for in directive
2004/108/EC and directive 2006/95/EC.
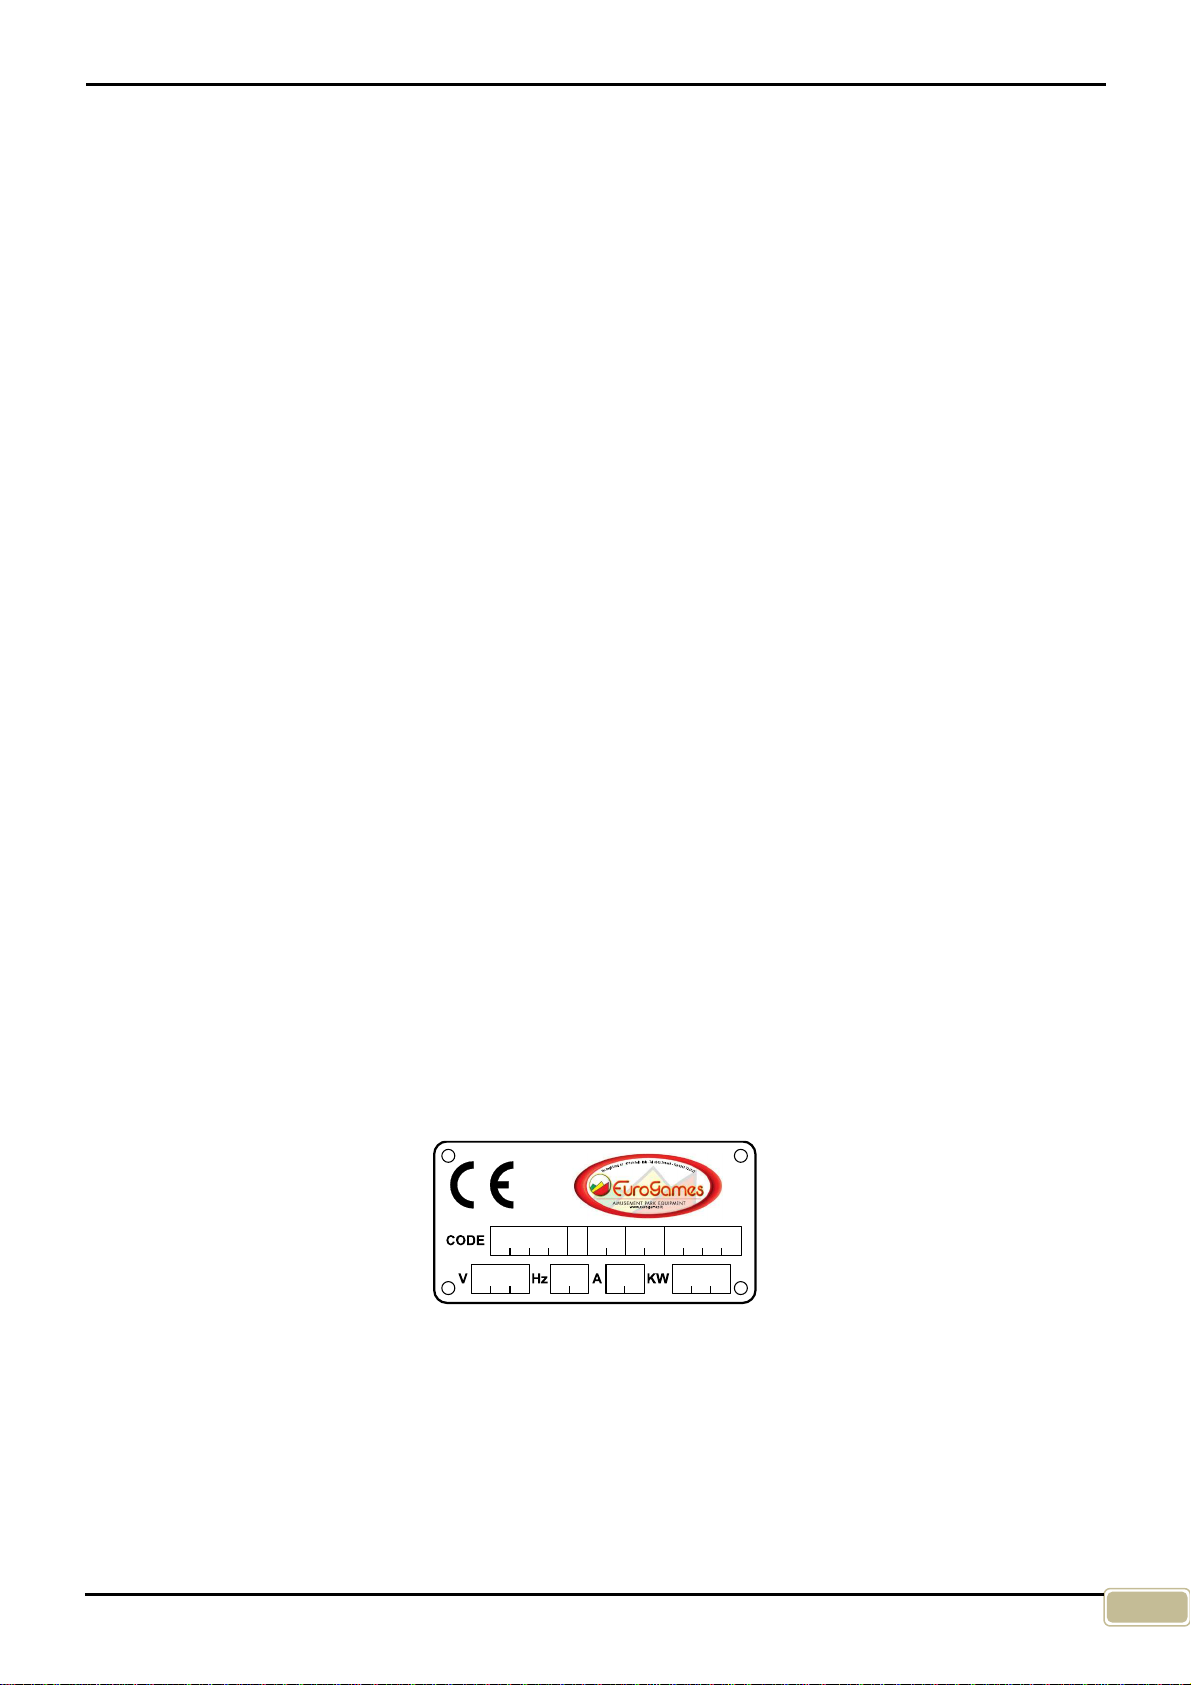
8. IDENTIFICATION PLATE
The identification plate, located in a visible position on the body, gives the Manufacturer’s identification
data and the characteristic technical data: code, power supply type, absorbed power. These elements
are necessary when asking the Manufacturer technical assistance or spare parts.
Eurogames Srl – Operation and maintenance handbook – Mini Car
8
9. FUNCTIONING
The Automatic Games of the “Minicar” series have been designed to be used in public places like
game-halls, commercial centers, amusement parks, fun-fairs and public gardens with specific tracks for
these vehicles.
CAUTION
•The Automatic Games of the “Minicar” series have not been conceived to comply with the road
traffic regulations. Therefore, any and all uses outside the specific tracks is expressly forbidden.
•The electric components of the “Minicar” series Automatic Games are suitably protected against
humidity. However, they must not be dip in water, they must be protected against rain, water jets
and must not remain in contact with wet bodies. The power supply nominal voltage does not
exceed 12 volts D.C.
•The components of the “Minicar” series Automatic Games in contact with electric current are
well insulated and mechanically protected. The internal harness voltage and that supplied to the
coin-box is 12V d.c. However, as for all appliances with electric components, it is compulsory to
comply with the instructions of this manual and to adopt the normal precautions for preventing
electric shocks when using the game.
ATTENTION
•The Automatic Games of the “Minicar” series must be used only on specific tracks with level
ground suitable for the race of mini vehicles, delimited and protected by a guard having specific
safety and manufacture characteristics.
•The track must be realized on a level and solid ground having at least 250 km/sqm capacity, and
should be surrounded by a wide operation and parking area. This place should be delimited by a
colored, visible and indelible stripe.
•The surface within such area should be antiskid to prevent the children from being injured.
ATTENTION
Do not raise the “Minicar” by holding its body: it could get damaged. Seize it from the frame.
ATTENTION
The condition of the track, the “Minicar” series Automatic Game and the battery charger must be
checked at least every 15 days and after any long inactivity period.

Eurogames Srl – Operation and maintenance handbook – Mini Car
9
Preliminary operations
Before starting the machine, carefully follow the steps below:
Mounting and connecting the battery
To access the battery compartment, open the machine cover by unlocking the lock and pressing the
unlock pushbutton. The pictures (Fig.1, Fig.2, Fig.3) show the different position of the opening lock.
Fig. 1 Fig. 2
Fig. 3
ATTENTION
Do not carry out this operation with wet hands and always take the necessary precautions to
prevent electric shocks.
ATTENTION
•If the “Minicar” is delivered with the battery charged, it must be used within 5-6 days; after that
time, the battery must be recharged regularly to avoid damage (see “battery recharge”).
•If the battery is “dry”, buy the specific liquid at a specialized centre, then proceed as follows:
- pour in the liquid in the battery up to the maximum level,
- wait 3-4 hours, then charge the battery with the battery charger supplied,
- charge the battery for at least 8-10 hours before use.
•If the “Minicar” is supplied without battery, address to a specialized centre for the purchase. The
new battery must have the following dimensions: (LxPxH) 27,5x17x19.
Eurogames Srl – Operation and maintenance handbook – Mini Car
10
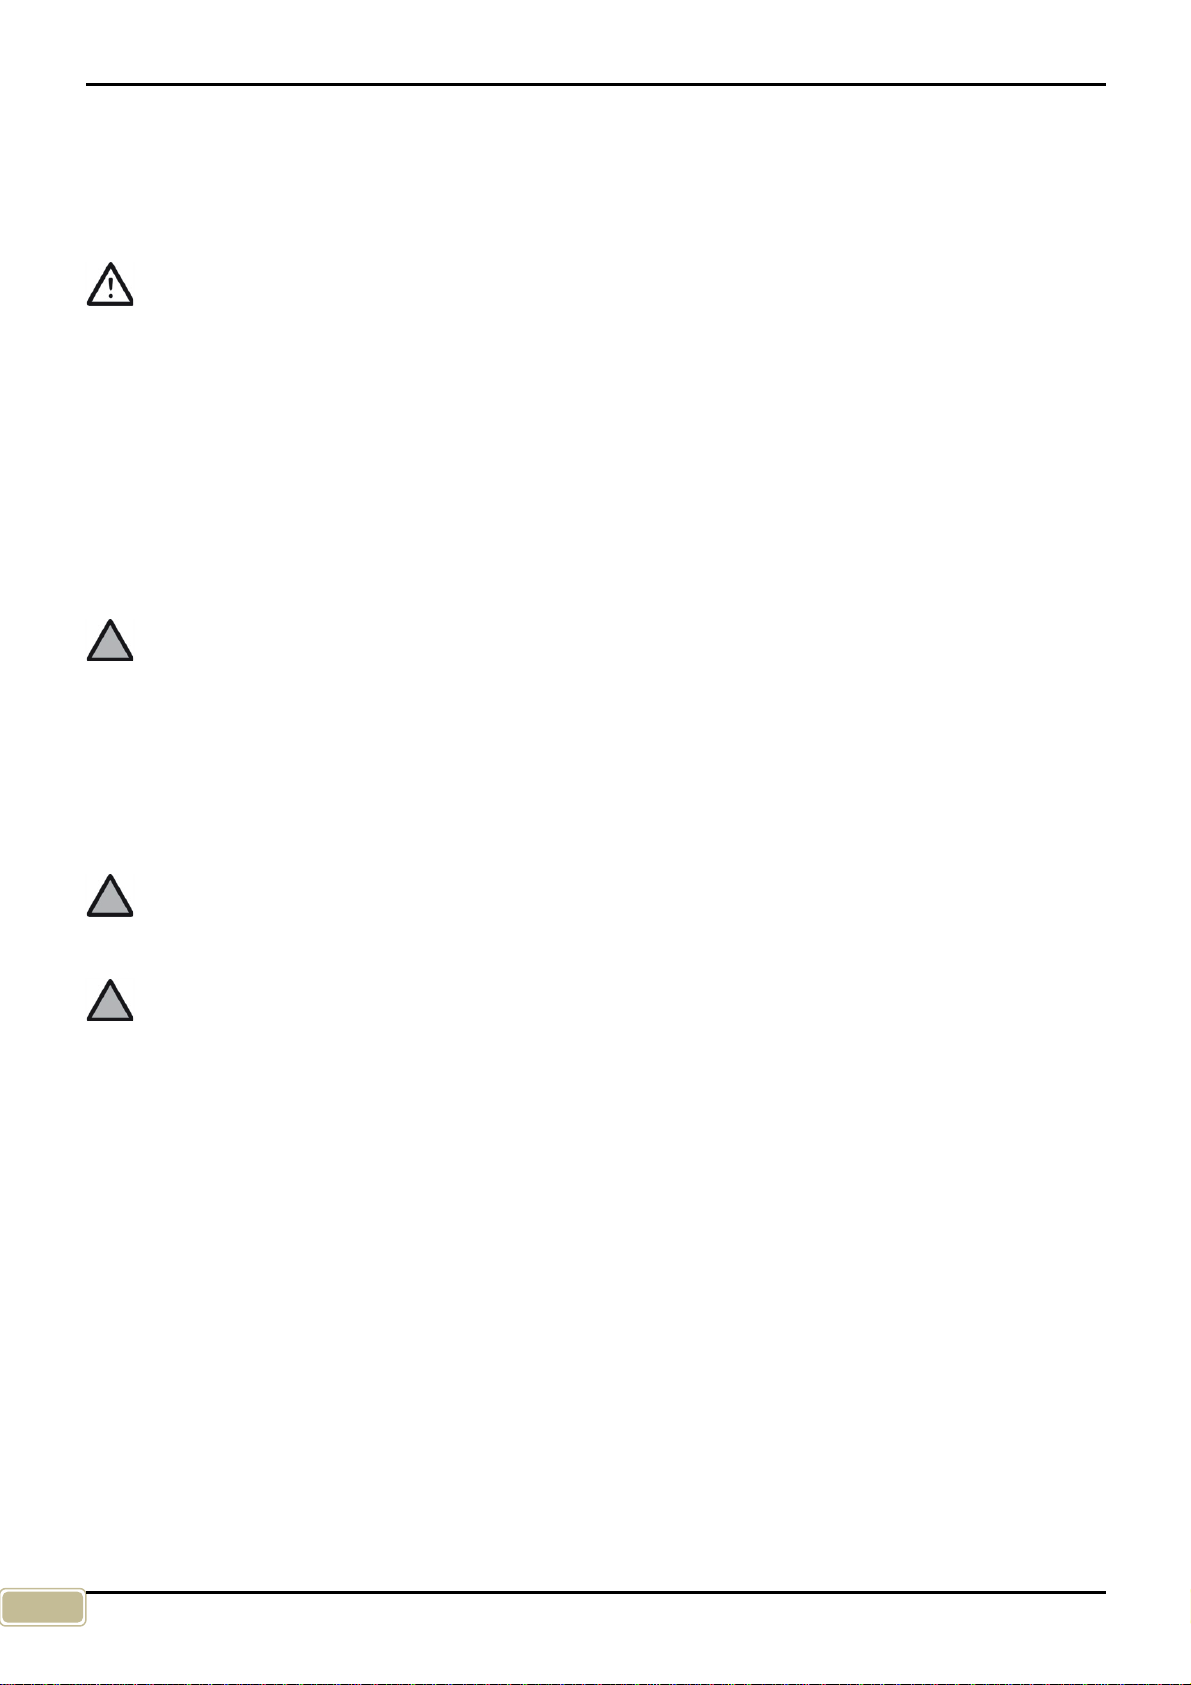
1. Place the battery in its housing as shown in fig. 4.
ATTENTION
On models with direct drive, you can also install 100/120A batteries by removing the spacer (A).
2. Connect the positive terminal marked with + (plus) to the positive (+) terminal on the battery using
the red or brown booster cable;
3. Connect the negative terminal marked with - (minus) to the negative (-) terminal on the battery using
the black booster cable.
Fig. 4
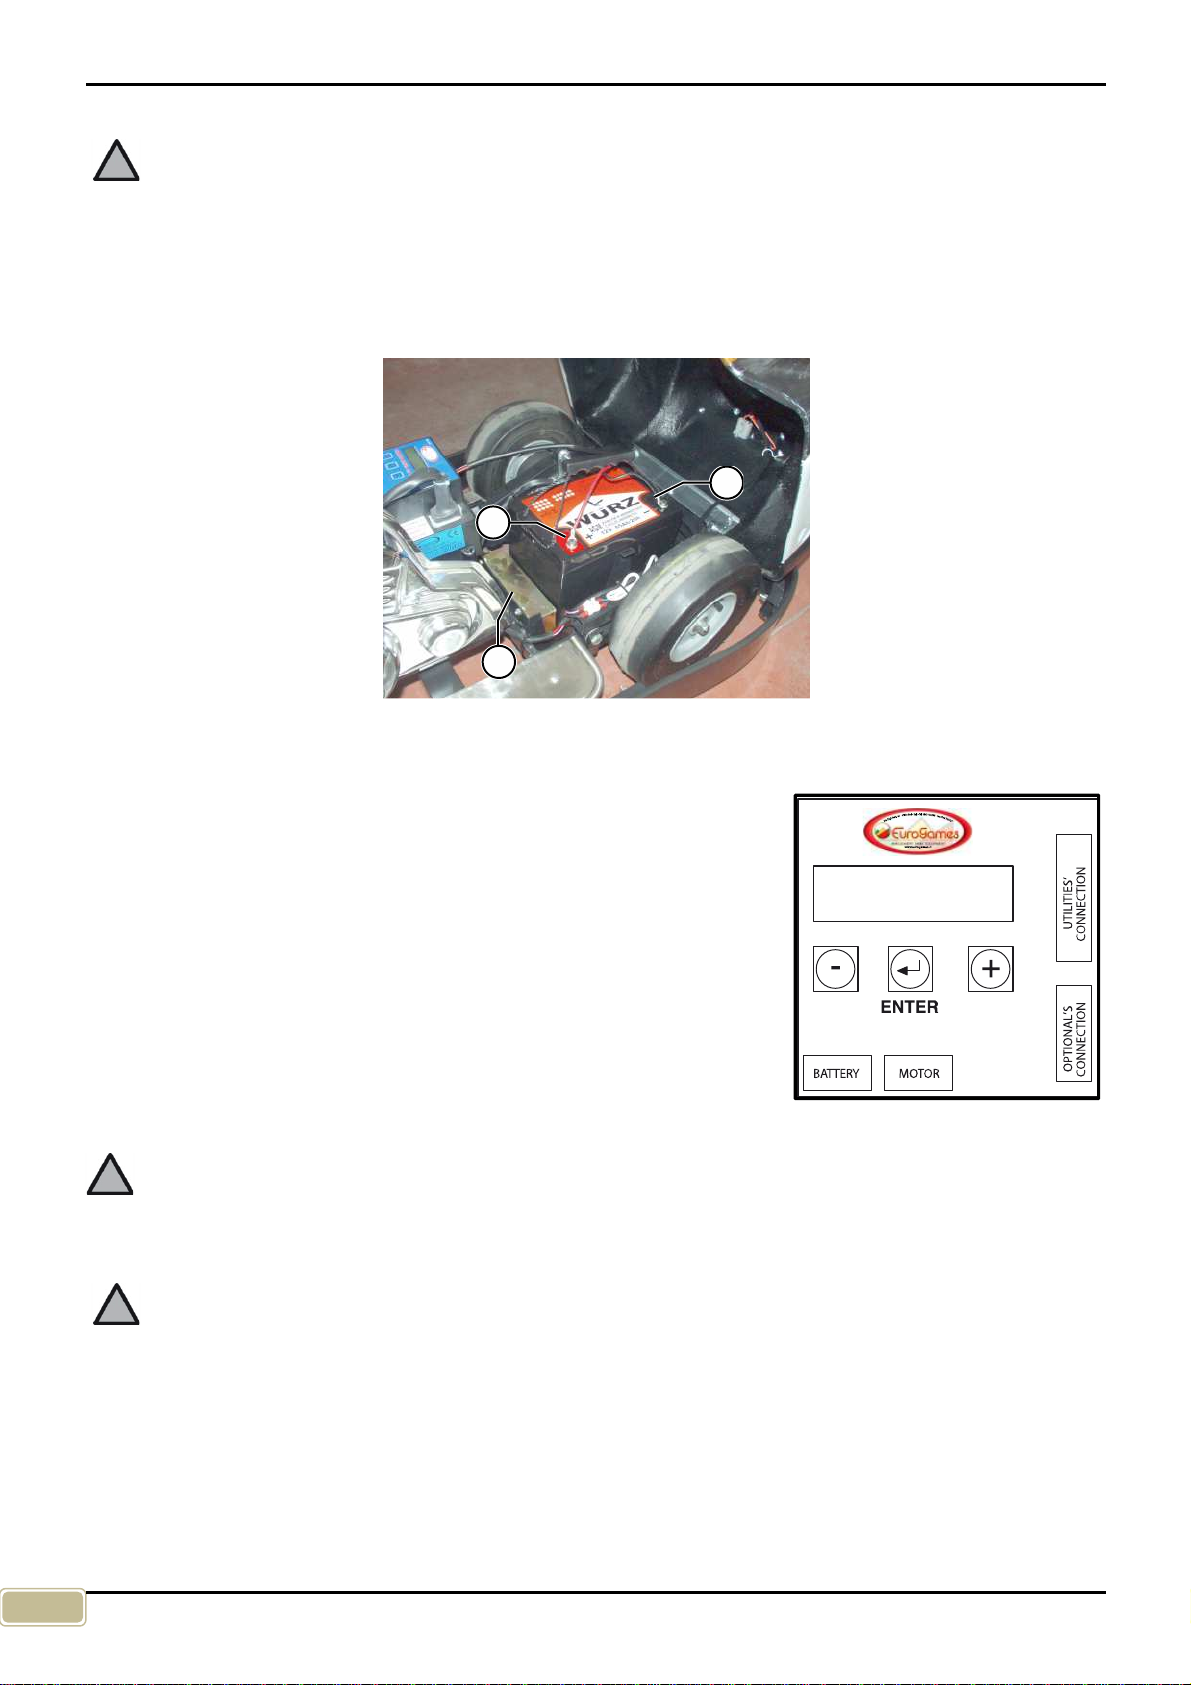
Setting the game time
You can set the race time by programming the digital adjustment timer.
The adjustment field is between 30 and 990 seconds.
Setting the game volume
You can set the game volume by programming the
digital timer.
Setting the game speed
Set the speed adjustment, in relation to the track dimensions and other
particular needs, by programming the digital adjustment timer. The
adjustment field is between 0 and 100%.
ATTENTION: If the timer includes the remote controller receiver the use of the START
button on remote controller may be needed to start the Mini Car. See the chapter “Digital Timer”
for further information.
ATTENTION: For any further information on the machine functions programming, see
chapter “Digital timer”.
A
-
+
Eurogames Srl – Operation and maintenance handbook – Mini Car
11
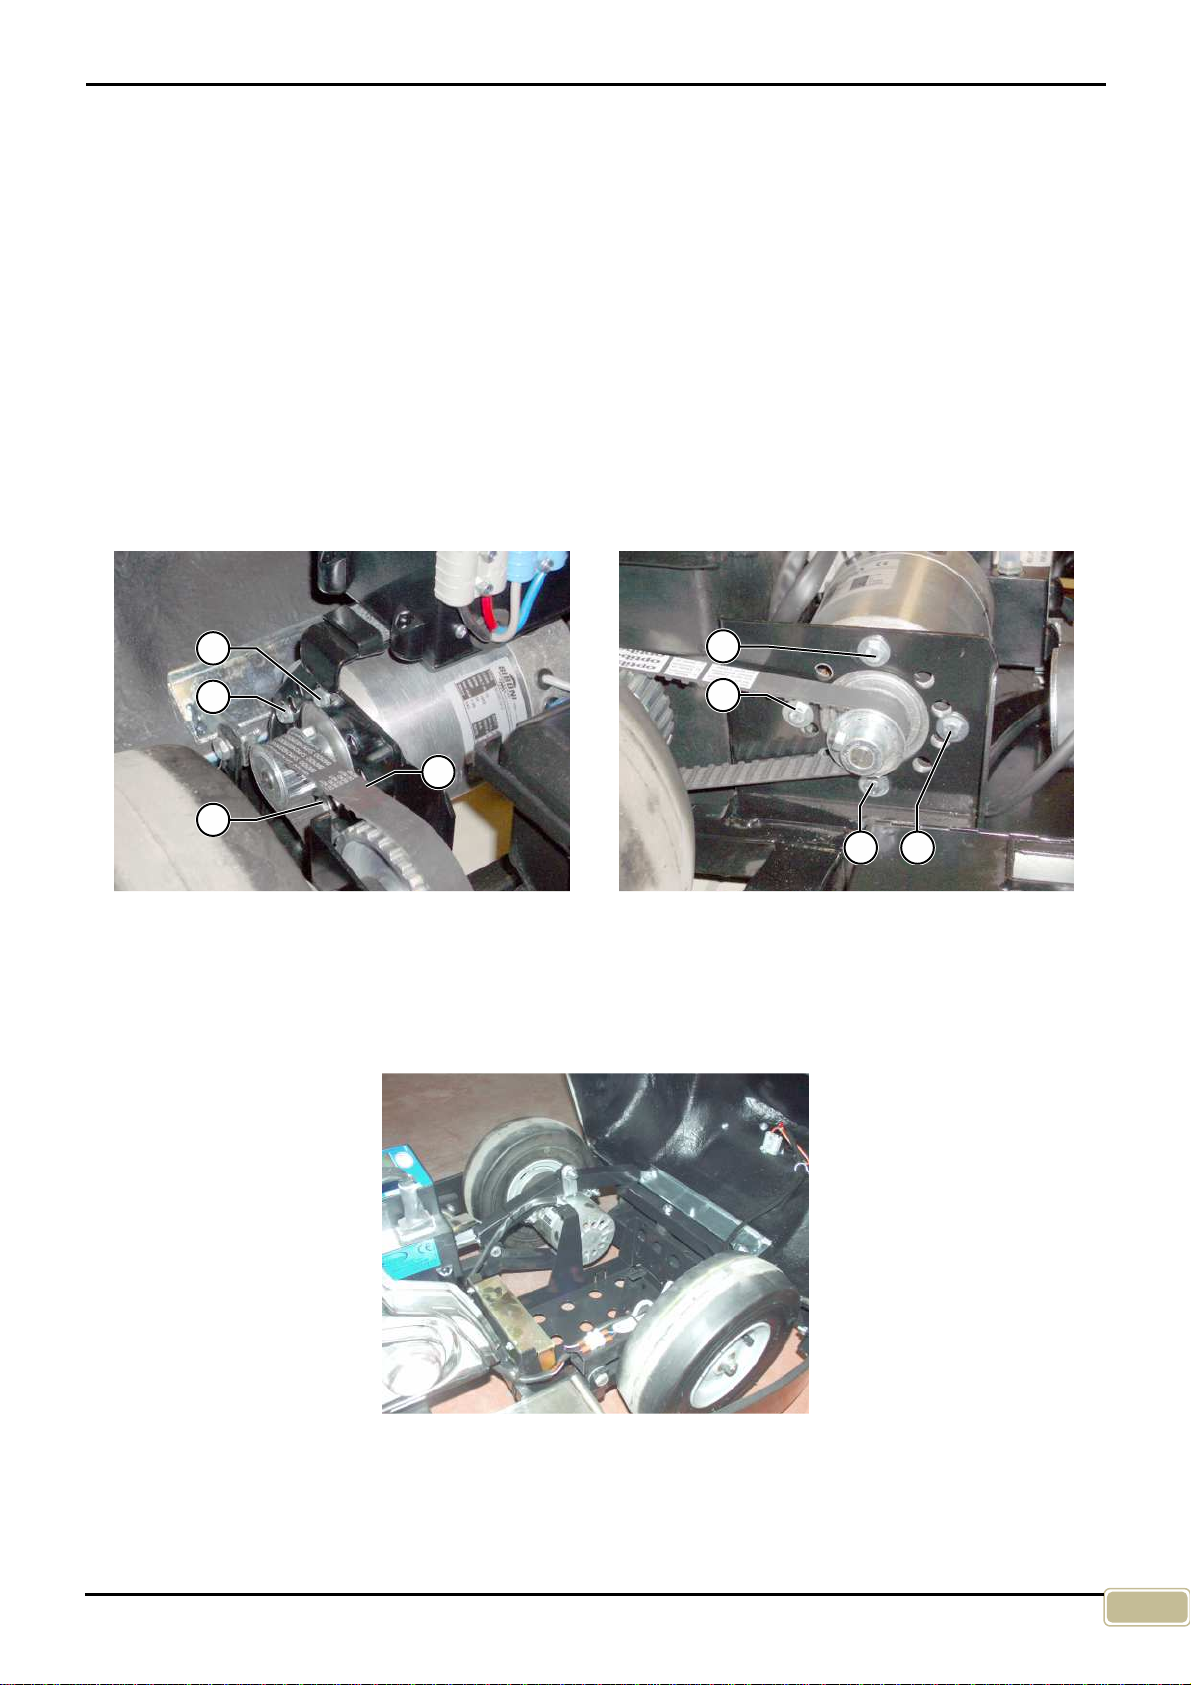
“Minicar” with belt drive
Adjusting the drive belts
The adjustment of drive belt Ais essential for a proper transmission of the motion to the vehicle wheels.
Every single model is fitted with an own adjustment system (see figures below) and the drive belt Acan
be tensioned as needed by operating the bolts which assure the connection between motor body and
wheel axle.
MINI MOTO models
Loosen bolts 1-2-3 (fig. 6) and move the motor until the belt is properly tensioned. Re-tighten bolts 1-2-3.
MINI CAR models
Loosen bolts 8-9-10-11 (fig. 7) and move the motor until the belt is properly tensioned. Re-tighten bolts
8-9-10-11
.
Fig. 6 Fig. 7
“Minicar” with direct drive
The “Minicar” models with direct drive (Fig. 8) do not need any adjustment.
Fig. 8
a
1
3
2
11
9
10
8
Eurogames Srl – Operation and maintenance handbook – Mini Car
12
10. STOP SETTING
The “Minicar” series Automatic Game can stop its race in a desired point of the track (for instance, in
the parking area). To adjust the car stopping:
1. Place the magnetic strip (delivered by EuroGames S.r.l. upon Customer’s demand) on the track in
correspondence of the desired stopping point (Fig. 9).
Fig. 9
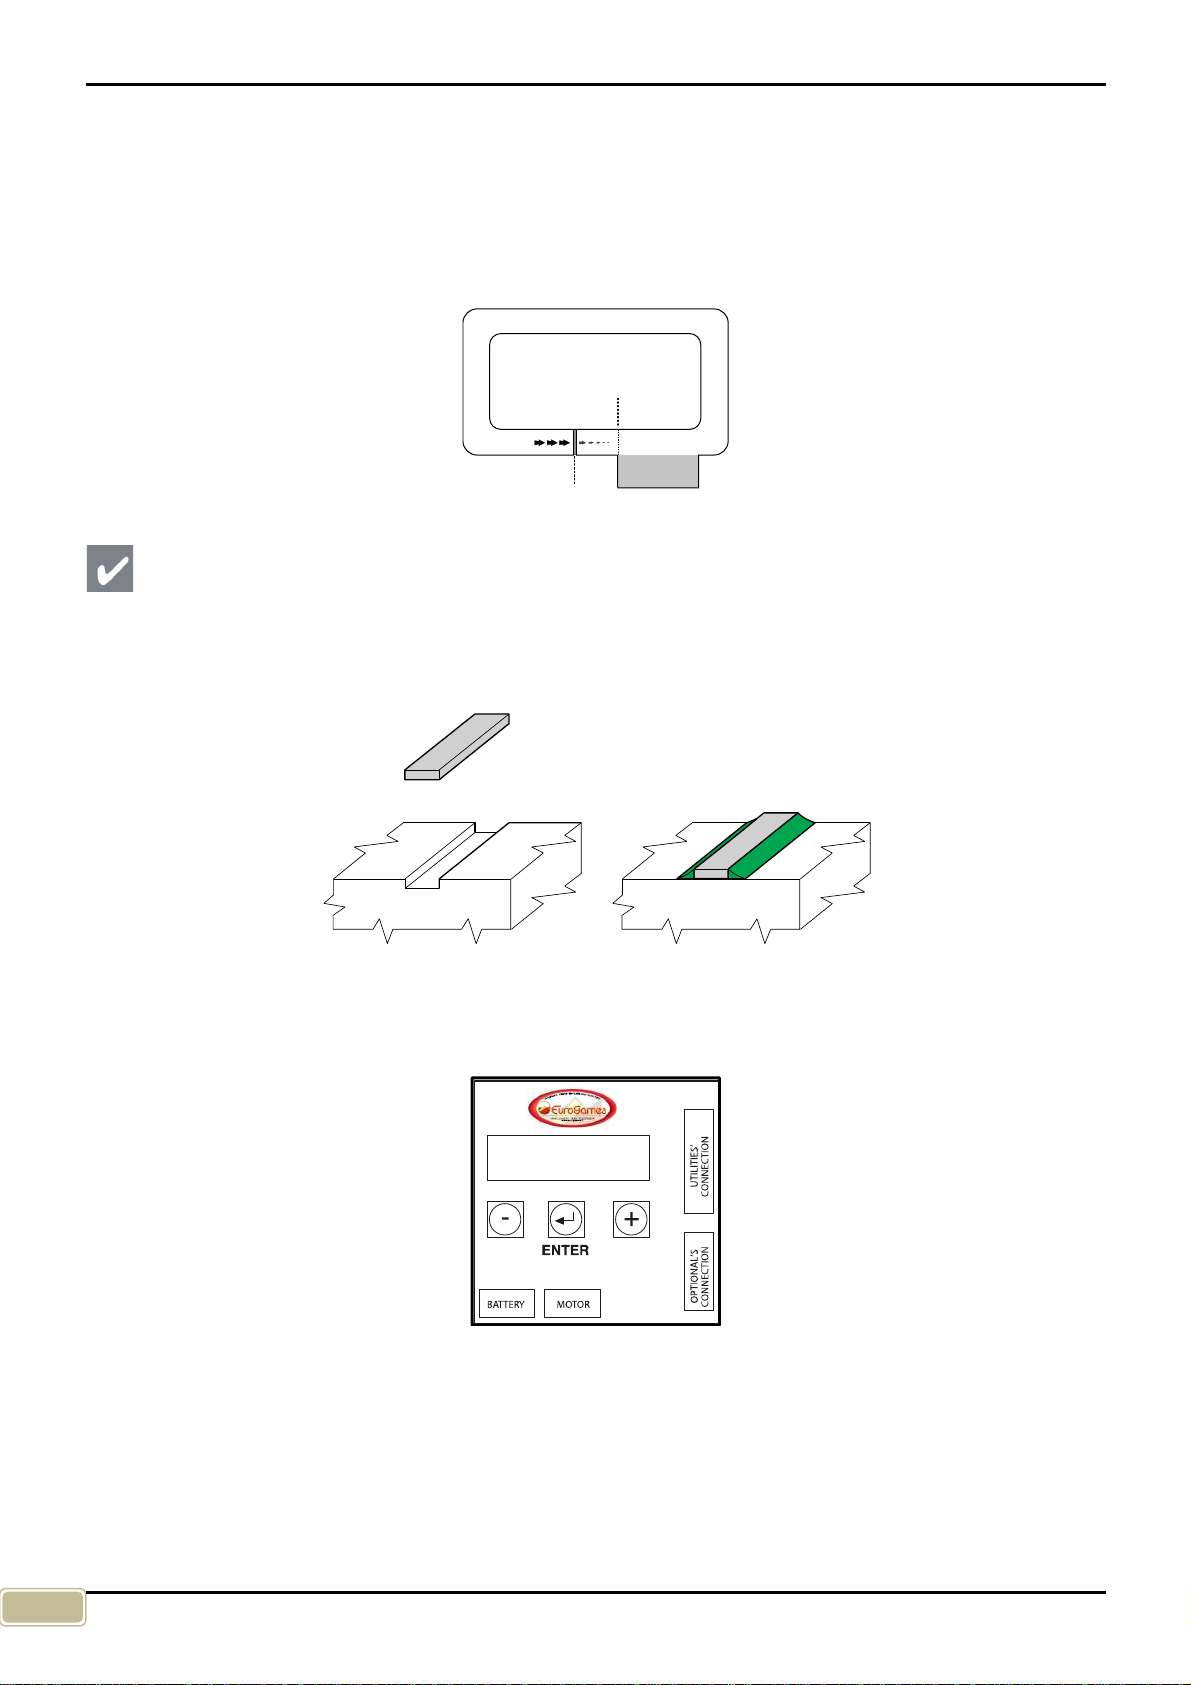
IMPORTANT
For the positioning of the magnetic strip on the ground, prepare a small trench with the same dimensions
and fix it with silicone or liquid cement (fig. 10); if it is not possible to dig the ground, place the strip on
the ground and create two side access guides (fig. 11).
Fig. 10 Fig. 11
2. Setup the control Timer Box to enable the magnetic band sensor. (Fig.12).
Fig. 12
When the game is over, and the vehicle passes over the magnetic strip, a magnetic sensor D(Fig.13)
located under the body stops it within the approximately two meters needed to consume the inertia
acquired. The stopping distance can be adjusted by programming the digital timer. If, at the end of the
game time, the vehicle does not stop this could be for two reasons:
•the gap between the magnetic sensor and the magnetic strip is to wide;
•the magnetic sensor is damaged.
PARKING AREA
VEICLE STOP
MAGNETIC STRIPE
ON THE AREA

Eurogames Srl – Operation and maintenance handbook – Mini Car
13
Adjustment of the magnetic sensor position (Fig.13)
It can happens that, bumping against other objects, the magnetic sensor moves and increases the
distance from the ground thus not activating itself when crossing the magnetic strip. adjust the sensor as
follows:
1. Being the vehicle very heavy raise it using a gantry.
2. Loosen the nut F and the screw E.
3. Adjust correctly the level of the magnetic sensor D (about 1 cm from the ground).
4. Tighten the screw Eand the nut Fin order to fix them in position.
Changing of the magnetic sensor position (Fig.13-14)
If the magnetic sensor is damaged, it is necessary change it as
follows:
1. Disconnect the wiring G.
2. Loosen the nut F and the screw E.
3. Remove the magnetic sensor D.
4. Insert the new magnetic sensor D, connect the wiring G,
and adjust its level as suggested before.
Fig.13 Fig.14
11. CHARGING THE BATTERY
Charge the battery before using the “Minicar” the first time and every time the vehicle looses power to
avoid damage. To charge the battery, connect the battery charger using the cable provided to the battery
power socket fitted on all models of the “Minicar” series (Fig.15). For further details, please refer to the
specific chapter “BATTERY CHARGER”. If necessary, the battery charger can be connected directly to
the battery (fig. 15b).
Fig. 15a Fig. 15b
G
D
F
E
F
E

Eurogames Srl – Operation and maintenance handbook – Mini Car
14
12. TESTING
For the production, tests, controls and inspections of its Automatic Games, EuroGames S.r.l. adopts the
criteria established by the international standards ISO 9000 for Quality Systems. Before delivering the
“Minicar” for use, it is however necessary to check for 3 (three) times its correct functioning by idling,
inserting a coin each time.
13. USE
ATTENTION function (also see Par.2 “General safety precautions”).
•For their functions, dimensions and characteristics, the Automatic Games of the “Minicar” series
must not be allowed to children under 3 years. They must be used only under strict supervision
of an adult - either the manager or any other people able to carry out such duty, who will be the
sole responsible.
•It is forbidden to let more than one child per time get in the “Minicar”.
•The two-seater models can only be used by adults who are responsible for themselves and the
child they accompany.
•On models with a seat belt, before inserting the token in the slot, make sure the child is seated
properly on the “Minicar” and has the seat belt fastened.
•The child must never be barefoot when using the “Minicar”.
•Do not allow children to get in or off when using the “Minicar”.
•Do not leave the child unattended on the “Minicar” after the race.
•Do not leave children alone close to the “Minicar”, whether standing still or running, or to the
track.
•When the “Minicar” time is over, the child must be taken outside the track.
•Even though the Automatic Games of the “Minicar” series by EuroGames S.r.l. have been
designed and manufactured to run under heavier load conditions than those prescribed, and
have been tested under such conditions, their use is forbidden to adults.
•Make sure the above precautions are adopted and intervene with decision if companions and/or
children do not respect them. Always take into due account the typical unexpected behavior of
children of this age.
Eurogames Srl – Operation and maintenance handbook – Mini Car
15
1. Make sure the child is correctly putting the feet on the footboard when he is sitting on the driving
seat.
2. Fasten the safety belt and check the child is holding tightly the wheel.
ATTENTION
If the “Security function” is activated when a child unfastens the belt while the “Minicars”
are working, all the “Minicars” on the ring will automatically stop.
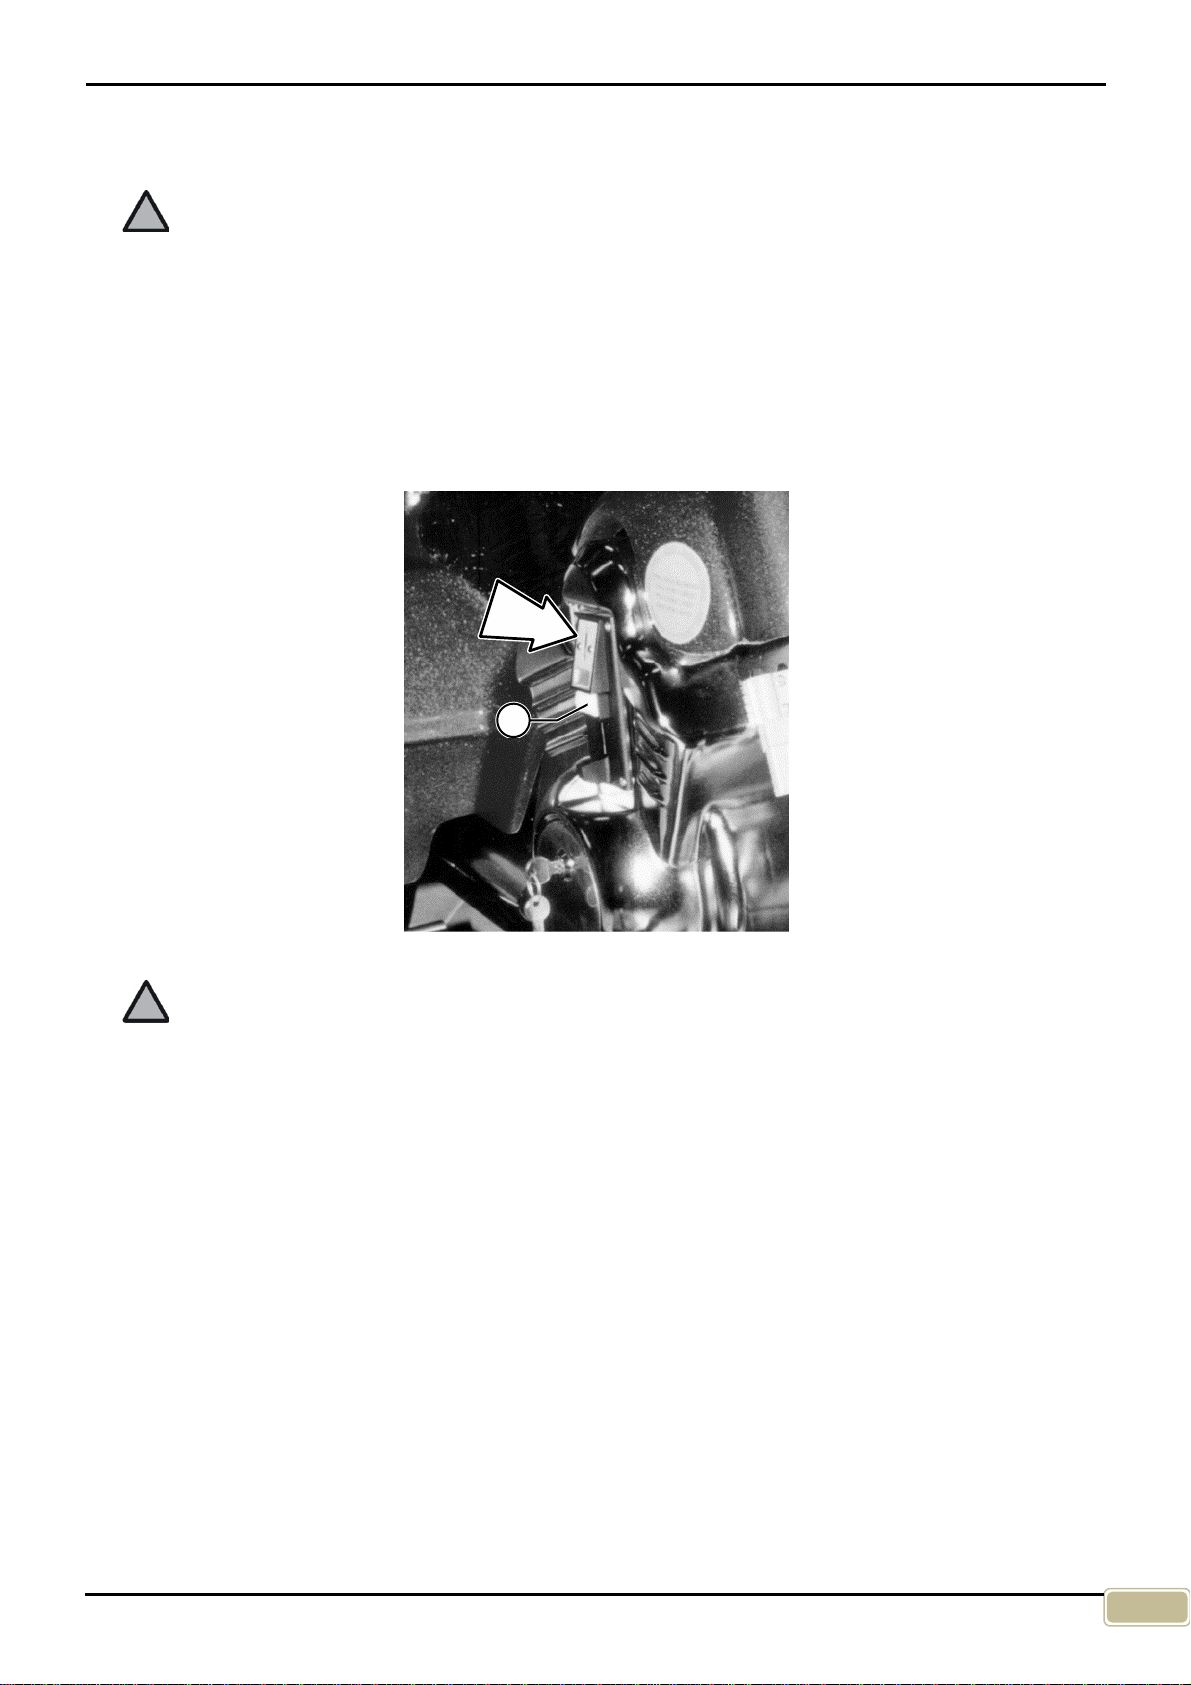
3. Insert a coin in the slot shown by the arrow in Fig.16, and wait the visual signal of machine ready
(lighting of the orange light on the front of the vehicle);
4. if the light does not turn on, push the white button Pplaced under the coin slot to eject the inserted
coin and repeat step - 1- above;
5. when the machine signals it is ready, the child must only press the gas pedal on the board front part
on the right-hand with its foot and the “Minicar” starts moving step by step;
Fig. 16
ATTENTION
All Automatic Games of the “Minicar” series are equipped with an automatic system of speed
gradual variation (EuroGames S.r.l. exclusive) which prevents sudden accelerations.
6. keep the “Minicar” driving child in sight and, if necessary, call the manager or the staff for help;
7. when the car starts moving, noise starts and lights turn on; they will stop automatically at the end of
the preset time when the “Minicar” stops;
8. after the race, wait until the manager or the staff drives the “Minicar” to the parking area, then help
the child to get off and take it outside the track.
P

Eurogames Srl – Operation and maintenance handbook – Mini Car
16
14. EG09 TIMER
The timer device displays the current remaining game time and the percentage of battery charge. If you
press any of the three selection buttons (-, ENTER, +) it turns on the display light.
To modify any configuration parameter you can press the “+” or “-“ button until you see the parameter in
the display. To modify its value you have to press the “ENTER” button once and then you can use the
“+” or “-“ button. To confirm the new value you can press “ENTER” button again to return to the list of
available configuration parameters.
To enter the “Protected Menu” and modify its configuration parameters you must be in the first “Main
Menu” parameter (“time=000s Bat99%”). You have to keep pressed “ENTER” button for at least 5
seconds. The activation of the “Protected Menu” is shown as “< Protect Menu > message.
To modify the configuration parameters you can use the same procedure explained for the “Main Menu”.
To exit the “Protected Menu” you have to select the last list item (“ENTER for EXIT”) and press the
“ENTER” button.
The modified parameters are immediately saved in the internal memory. It is suggested to remove the
power from the timer device after parameters changes before use it for normal operation again.
If no button is pressed for about 1 minute, the display returns to the first general parameter and exits
from the menu.
Radio Module
If the “RXTX” radio module for the remote control is mounted inside the timer device the
“RemoteSTART” parameter (inside the “Protected Menu”) selects the remote control function. If this
parameter is set to “On” the start of the game depends on the remote control “Start” button. If this
parameter is set to “Off” the game starts on coin insertion and the remote control can be used for
emergency “STOP/START” functions.
RemoteSTART=On On The timer device will wait the remote control START
command to start the game.
Eurogames Srl – Operation and maintenance handbook – Mini Car
17
“Main Menu” parameters
The parameters included in the main menu are the following: (some are not modifiable)
Time=000s Bat85% Time to end of game and battery charge level.
P.Counter=000000:00
Partial coins counter. The 2 digits to the right of the “:” symbol
show the number
of tokens accumulated if the number of Game-Coins was not reached.
To reset the coins counter the previous option (Time, Bat) must be on screen. Press the “+” button for at
least 5 seconds. The following message will be shown.
ResetCounter=No
To reset the counter press “Enter” button and select YES with the “+”
button. The counter will be reset to 0.
Volume=10
Sound effects volume. It can be set from 1 to 30.
Game-Coins=01
Number of coins for a game. If it is set to 0 there is no need of coins to start the
game. To enable this free game function the FREE COINS option on protected
menu must be set to ON.
Game-Time=90s Game time (seconds).
Return=00s Time (s
econds) before end of the game for lamp blinking. If the product is a
Bumper Boat a “return to base” audio message will be played till the end of
time.
Speed=70% Maximum speed of the motor.
Acceleration=070
Acceleration speed. Bigger number means
faster acceleration. For bumper cars
using joysticks, this parameter sets motor speed response to joysticks position.
Deceleration=060
Valid only if “Auto
-
Brake” option is ‘ON’ or if using Joysticks. Deceleration motor
speed (brake). Bigger number means stronger brake. For bumper cars using
joysticks, this parameter sets motor speed response to joysticks position.
RemoteControl=01 Identification number for remote control (1 –
32). This number allows you to set
parameters in the control box and START/STOP the game from a remote
control unit. Every car must have its own unique number otherwise the
programming of a single machine will fail.
RemoteSTART=Off For this parameter explanation look at the “Radio Module” chapter.
Language=ENGLISH Language selection for audio messages:
ITALIAN , ENGLISH , FRENCH , GERMAN , SPANISH , GREEKE, PORTOG
Bat=12.3v T=026° Real time input voltage and internal temperature values (read only)
I1=000A Real time motor current value (read only).

Eurogames Srl – Operation and maintenance handbook – Mini Car
18
Protected Menu” parameters
The parameters included in the protected menu are the following: (some are not modifiable)
T.Counter=000000 Total coins counter. This counter cannot be reset (read only).
Effect=CAR
This parameter selects the sound effect group type. This parameter depends on
sound module memory programming.
Coin-Mode=AC P Coin mode:
NORM: to start the game the number of coins-match
requested must be
inserted. Coin inserted during game play will be lost but counted by the
counters.
ACC: to start the game the number of coins-
match requested must be inserted.
Every coin inserted during game play will increase game time.
AC P: to start the game the number of coins-
match requested must be inserted.
Coins inserted during game play are valid only if the requested coins for 1 extra
game are reached.
FreeCoins(0)=Off This option enable the free play when “Coins” parameter is set to 0
W-Coin Count=No
If ‘YES’: when START is issued from the remote control, the coins counter will
increment as for normal coin insertion.
Low-Battery=On
This option enable the “LOW BATTERY” message when the game is over and
the battery voltage is low. The message is repeated every 7 seconds.
Auto
-Brake=On If “OFF”: motor will not brake when accelerator pedal is released.
if “ON”: motor will brake following “Deceleration” parameter.
End-Brake=On If “ON”: after game time is finished and after
“EndBrakeDelay”, motor brake for 3
seconds.
ATTENTION!
This parameter must be ON if you wish to use the motor brake
when the STOP button is pressed on the remote control.
EndBrakeDelay=0s Delay (seconds) after the game end to motor brake.
TelBrakeDelay=0s Delay (seconds) after remote control STOP command to motor brake.
Stop Lamp=Flash
When the timer is in STOP, we can choose whether or not to make the light
flash.

Eurogames Srl – Operation and maintenance handbook – Mini Car
19
J1.15=Emergency
This parameter selects the function of the J1.15 Timer input.
“Emergency”: When the input is activated, the timer stops.
To be used with the
emergency button.
“FreeCoins”:
When the input is activated, the timer operates as if the game
coin was inserted. When this input is disabled, the timer stops. To be
used with
a key that enables the “FreeCoins” function.
“Security+”: Used for operation with seat belts with active protection.
The seat
belt sensor stops the motor if the belt is unfastened.
If the radio module is
mounted, all of the cars on the track with a radio module stop.
All of the seat
belts must be fastened and the “START” button pressed from the remote control
in order to restart.
Max Speed=100% Maximum speed. This parameter defines the “Speed” parameter scale.
End-Sensor=Off If “OFF”: game ends when time is over.
If “ON”: game ends after time is over and after cars runs on magnetic strip. For
this function the magnetic strip must be mounted in the track. In any case, if the
sensor doesn’t detect the magnetic strip, the game ends automaticall
y after
“EndSensTime” seconds.
EndSensTime=250s
Maximum allowed playing seconds after game is over when car doesn’t reach
magnetic strip.
Switch= - - - - - - - - -
GLHRKCSEF Input status. Every input shown its own letter.
G=COIN, L=LOW, H=HIGH , R=RETRO, K=CLOCHE,
C=CLACSON, S=SENSOR , E=EMERGENCY, F=TURN LIGHT
Note: In the “Bumper Boat” product the pedal status is inverted.
Software V3.8 MC Software version (read only).
Other functions
- If no buttons are pressed for at least 60 seconds the screen returns to the main menu first item.
- During the over current alarm condition the display shown the “MotorHighCurrent” message. An
alarm sound like an horn is emitted and the game lamp is flashing. The alarm will reset automatically
after about 4 seconds.
- If the cooling fin temperature exceeds the set maximum, a “High Temperature” alarm appears, the
race ends and the motors stop. You must wait for the automatic alarm reset in order to be able to
start other races.
- When the game is over if the battery voltage is low a “LOW BATTERY” message is emitted every 7
seconds.
- If more than one coin is needed to start the game after the first coin is inserted the lamp starts to
blink and a sound message is played. The message depends on the language parameter selected.

Eurogames Srl – Operation and maintenance handbook – Mini Car
20
CONNECTORS DESCRIPTION
PIN
J1
-
DECRIPTION
PIN
J2
-
DECRIPTION
J1.1 DO NOT USE J2.1 Turn Lamp output 12/24v
J1.2 Ground J2.2 Pot. 1 input
J1.3 Speaker output J2.3 Reverse direction input
J1.4 NPN auxiliary output, 1A max. J2.4 Joystick input
J1.5 LOW pedal input J2.5 Horn input
J1.6 COIN input J2.6 DO NOT USE
J1.7 Auxiliary 12/24V output (do not use) J2.7 Pot. 1 input
J1.8 Magnetic sensor input J2.8 5V output for Pot. Controls
J1.9 HIGH pedal input J2.9 DO NOT USE
J1.10 Lamp output 12/24v
J1.11 Ground
J1.12 12/24v output, 1A max.
J1.13
DO NOT USE
J1.14 DO NOT USE
J1.15 Emergency input / FreeCoins / Security+
J2
J1
Table of contents
Popular Toy manuals by other brands


Fisher-Price
Fisher-Price BOUNCE & SPIN ZEBRA K0317 quick start guide

Mega Bloks
Mega Bloks World Of WarCraft 91046 manual

CHAOS
CHAOS Nitro Pro 600 instruction manual

GREAT PLANES
GREAT PLANES Spirit GPMA0530 Instruction book

Vollmer
Vollmer 47743 Mounting instruction

advanced scale models
advanced scale models P-61 Black Widow Assembly instructions

Fisher-Price
Fisher-Price X4156 instructions

Hasbro
Hasbro Marvel Gamerverse Legends Future Fight The... manual

Oregon Scientific
Oregon Scientific 18026 instruction manual

RC-Easy
RC-Easy Mini BLADE Micro-Blade manual

Mountain Models
Mountain Models ParkJet Build manual

Little Tikes
Little Tikes Retro Oven manual