manuals.online logo
Brands
  1. Home
  2. •
  3. Brands
  4. •
  5. Fisher-Price
  6. •
  7. Toy
  8. •
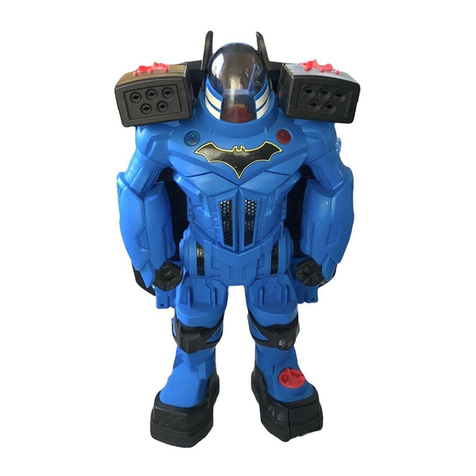
  9. Fisher-Price X4156 User manual

Fisher-Price X4156 User manual

1
X4156
fisher-price.com
Press the button on the light rack for siren lights
and sounds.
Appuyer sur le bouton de la rampe lumineuse
pour activer des lumières et des sons de sirène.
Pulsar el botón de la sirena para activar luces
y sonidos de sirena.
Den Knopf auf der Lichterleiste drücken, um
Sirenenlichter und -geräusche zu aktivieren.
Premere il tasto sulla barra delle luci per attivare
le luci e i suoni della sirena.
Naciśnij przycisk, aby włączyć lampy
ostrzegawcze i dźwięki syreny.
Druk op knop van lichtbalk voor sirenelichten
en -geluid.
Pressiona o botão da sirene para ativar
as luzes e os sons.
Tryck på knappen på mellan lamporna på taket
så aktiveras ljus och ljud
Paina hälytysvaloja, niin ne syttyvät ja sireeni
alkaa soida.
• Keep these instructions for future reference as they
contain important information.
• Conserver ce mode d’emploi pour s’y référer
en cas de besoin car il contient des
informations importantes.
• Guardar estas instrucciones para futura referencia,
ya que contienen información de importancia
acerca del juguete.
• Diese Anleitung bitte für Rückfragen und weitere
spätere Verwendung aufbewahren. Sie enthält
wichtige Informationen.
• Conservare queste istruzioni per un riferimento
futuro. Contengono importanti informazioni.
• Zachowaj tę instrukcję, ponieważ zawiera ona
ważne informacje.
• Bewaar deze gebruiksaanwijzing; kan later nog
van pas komen.
• Guardar estas instruções para referência futura
pois contêm informação importante.
• Spara de här anvisningarna eftersom de innehåller
viktig information.
• Säilytä käyttöohje vastaisen varalle, sillä siinä on
tärkeää tietoa.
2
• Adult assembly required.
• Required tool: Phillips screwdriver (not included).
• Requires three AAA batteries (included)
for operation.
• Batteries included are for demonstration
purposes only.
• Wipe the toy with a clean, damp cloth. Do not
immerse. This toy has no consumer serviceable
parts. Do not take apart.
• Assemblage par un adulte requis.
• Outil requis : un tournevis cruciforme (non fourni).
• Fonctionne avec trois piles AAA (incluses).
• Les piles incluses sont prévues uniquement pour la
démonstration du jouet.
• Nettoyer le jouet avec un chiffon propre et
humide. Ne pas immerger. Il n'existe pas de pièces
de rechange pour ce jouet. Ne pas le démonter.
• Requiere montaje por parte de un adulto.
• Para el montaje del juguete se necesita un
destornillador de estrella (no incluido).
• Funciona con tres pilas AAA, incluidas.
• Las pilas que incorpora el juguete son solo
a efectos de demostración. Recomendamos
sustituirlas por pilas alcalinas nuevas al adquirir
el juguete.
• Limpiar el juguete con un paño húmedo.
No sumergirlo. Este juguete no posee piezas
recambiables, por lo que no debe desmontarse
bajo ningún concepto.
• Zusammenbau durch einen
Erwachsenen erforderlich.
• Erforderliches Werkzeug: Kreuzschlitzschraubenzieher
(nicht enthalten).
• Drei Batterien AAA erforderlich (enthalten).
• Die enthaltenen Batterien dienen ausschließlich
Vorführzwecken im Geschäft. Ihre Lebensdauer kann
daher beeinträchtigt sein.
• Das Produkt mit einem sauberen, angefeuchteten
Tuch abwischen. Das Produkt nicht in Wasser
tauchen. Für dieses Produkt gibt es keine
Ersatzteile. Das Produkt nicht auseinandernehmen.
• Il giocattolo deve essere montato da un adulto.
• Attrezzo richiesto: Cacciavite a stella (non incluso).
• Richiede 3 pile formato mini stilo AAA (incluse)
per l'attivazione.
• Le pile incluse servono solo per la dimostrazione.
• Passa il giocattolo con un panno umido pulito. Non
immergere in acqua. Il giocattolo non è dotato di
parti di ricambio. Non smontare.
• Wymaga złożenia przez osobę dorosłą.
• Wymagane narzędzie: śrubokręt krzyżakowy
(nie znajduje się w zestawie).
• Do pracy wymaga trzech baterii typu AAA
(baterie znajdują się w zestawie).
• Baterie dołączone do zestawu służą wyłącznie do
celów demonstracyjnych.
• Przecieraj zabawkę czystą, wilgotną ściereczką.
Nie zanurzaj zabawki w wodzie. Ta zabawka nie
zawiera części, które mogą być naprawiane przez
użytkownika. Nie rozbieraj na części.
• Moet door volwassene in elkaar worden gezet.
• Benodigd gereedschap: kruiskopschroevendraaier
(niet inbegrepen).
• Werkt op drie AAA batterijen (inbegrepen).
• De bijgeleverde batterijen zijn alleen bedoeld om
te laten zien hoe het speelgoed werkt.
• Niet in water onderdompelen. Dit speelgoed heeft
geen onderdelen die onderhoud vergen. Niet uit
elkaar halen.
• Requer montagem por parte de um adulto.
• Ferramenta necessária: Chave de fendas Phillips
(não incluída).
• Funciona com 3 pilhas AAA (incluídas).
• As pilhas incluídas destinam-se apenas a efeitos
de demonstração.
• Limpar com um pano limpo e humedecido. Não
mergulhar o brinquedo. Este brinquedo não tem
peças de substituição. Não o desmontar.
• Kräver vuxenhjälp vid montering.
• Följande verktyg behövs: stjärnskruvmejsel
(ingår ej).
• 3 AAA-batterier (ingår) krävs.
• Batterierna som ingår är endast för demonstration.
• Torka av leksaken med en ren, fuktig trasa. Sänk
inte ned produkten i vatten. Konsumenten kan
inte reparera några delar av leksaken. Ta inte
isär produkten.
• Kokoamiseen tarvitaan aikuista.
• Tarvittava työkalu: ristipäämeisseli
(ei mukana pakkauksessa).
• Käyttöön tarvitaan 3 AAA-paristoa
(mukana pakkauksessa).
• Pakkauksessa olevat paristot on tarkoitettu vain
kokeilua varten.
• Pyyhi lelu puhtaalla, kostealla pyyhkeellä. Älä
upota veteen. Tuotteessa ei ole itse kunnostettavia
osia. Älä pura sitä osiin.
3
• For best performance and longer battery life,
we recommend replacing the batteries that came
with this toy with three, new AAA (LR03)
alkaline batteries.
• Locate the battery compartment door. Loosen
the screw in the battery compartment door with
a Phillips screwdriver. Remove the batteries and
properly dispose of them.
• Insert three AAA (LR03) alkaline batteries.
• Replace the battery compartment door and
tighten the screw. Do not over-tighten.
• When sounds/lights from this product become
faint or stop, it’s time for an adult to change
the batteries.
• If this product begins to operate erratically, you
may need to reset the electronics. Slide the power
switch off and back on.
• Slide the power switch ON or OFF .
• Pour un meilleur résultat et une plus grande durée
des piles, il est conseillé de remplacer les piles
fournies avec le jouet par trois piles alcalines
AAA (LR03) neuves.
• Repérer le couvercle du compartiment des piles.
Dévisser la vis du couvercle du compartiment des
piles avec un tournevis cruciforme. Retirer les piles
et les jeter dans un conteneur réservé à cet usage.
• Insérer trois piles alcalines AAA (LR03).
• Replacer le couvercle du compartiment des piles et
serrer la vis. Ne pas trop serrer.
• Lorsque les sons/lumières du produit faiblissent ou
s’arrêtent, il est temps pour un adulte de changer
les piles.
• Si ce produit ne fonctionne pas correctement,
il peut être nécessaire de réinitialiser le système
électronique. Glisser le bouton de mise en marche
sur arrêt, puis de nouveau sur marche.
• Glisser l’interrupteur sur MARCHE ou ARRÊT .
1,5V x 2
AAA (LR03)
• Al adquirir el juguete, recomendamos sustituir
las pilas incluidas por tres pilas alcalinas
AAA/LR03 nuevas.
• Localizar la tapa del compartimento de las pilas.
Desatornillar la tapa del compartimento de las
pilas con un destornillador de estrella y abrirla.
Retirar las pilas gastadas del juguete y desecharlas
en un contenedor de reciclaje de pilas.
• Introducir tres pilas alcalinas AAA/LR03 en
el compartimento.
• Volver a tapar el compartimento de las pilas
y atornillar la tapa, sin apretarla en exceso.
• Si los sonidos o las luces se activan débilmente
o dejan de funcionar, un adulto deberá sustituir las
pilas gastadas.
• Si el juguete deja de funcionar correctamente,
recomendamos apagarlo y volver a encenderlo
para reiniciarlo.
• Poner el interruptor en la posición de
ENCENDIDO o APAGADO .
• Für optimale Leistung und längere Lebensdauer
empfehlen wir, die Batterien, die diesem Produkt
beigefügt sind, nach dem Kauf durch drei neue
Alkali-Batterien AAA (LR03) zu ersetzen.
• Die Batteriefachabdeckung befindet sich am
Spielzeug. Die in der Batteriefachabdeckung
befindliche Schraube mit einem
Kreuzschlitzschraubenzieher lösen. Die
Batterien herausnehmen und sicher und
vorschriftsgemäß entsorgen.
• Drei Alkali-Batterien AAA (LR03) einlegen.
• Die Batteriefachabdeckung wieder einsetzen, und
die Schraube festziehen. Die Schraube nicht zu fest
anziehen, damit sie nicht überdreht.
• Werden die Geräusche/Lichter schwächer oder
funktionieren nicht mehr, müssen die Batterien
von einem Erwachsenen ausgetauscht werden.
• Die Elektronik zurücksetzen, wenn das Produkt
nicht mehr richtig funktioniert. Das Produkt
aus- und wieder einschalten.
• Den Ein-/Ausschalter auf EIN oder
AUS stellen.
• Per un funzionamento ottimale e per una
maggiore durata, sostituire le pile fornite con il
giocattolo con tre pile alcaline nuove formato
mini stilo AAA (LR03).
• Localizzare lo sportello dello scomparto pile.
Allentare la vite dello sportello con un cacciavite
a stella. Estrarre le pile ed eliminarle con la
dovuta cautela.
4
• Inserire tre pile alcaline formato mini stilo
AAA (LR03).
• Rimettere lo sportello e stringere la vite. Non forzare.
• Un adulto deve sostituire le pile nel caso in cui i suoni
o le luci dovessero affievolirsi o interrompersi.
• Se il prodotto non dovesse funzionare
correttamente, potrebbe essere necessario
resettare l'unità elettronica. Spostare la leva di
attivazione su off e poi di nuovo su on.
• Spostare la leva di attivazione su ON o OFF .
• W celu zapewnienia jak najlepszego działania
zabawki i jak najdłuższego okresu zabawy
zalecamy wymianę baterii dostarczonych wraz
z zabawką na trzy nowe baterie alkaliczne typu
AAA (LR03).
• Znajdź pokrywę przedziału na baterie. Odkręć
wkręt w pokrywie przedziału na baterie za pomocą
wkrętaka krzyżakowego. Wyjmij baterie i wyrzuć je
do odpowiednio oznaczonego pojemnika.
• Włóż trzy baterie alkaliczne typu AAA (LR03).
• Załóż pokrywę przedziału na baterie i dokręć
wkręt. Nie przykręcaj zbyt mocno.
• Kiedy dźwięki lub światła zabawki słabną lub
ustaną, osoba dorosła powinna wymienić baterie.
• Jeśli produkt zaczyna działać nierówno, może być
konieczne zresetowanie układów elektronicznych.
W tym celu wyłącz i włącz zabawkę
przełącznikiem zasilania.
• Przesuń przełącznik zasilania do pozycji WŁ.
lub WYŁ. .
• Voor de beste prestaties adviseren wij de
bijgeleverde batterijen te vervangen door drie
nieuwe AAA (LR03) alkalinebatterijen.
• De batterijen zitten in de batterijhouder. Draai met
een kruiskopschroevendraaier de schroef in het
batterijklepje los. Verwijder de batterijen en lever
ze in als KCA.
• Plaats drie AAA (LR03) alkalinebatterijen.
• Zet het batterijklepje weer op z'n plaats en draai
de schroef vast. Niet te strak vastdraaien.
• Als de geluidjes/lichtjes zwakker worden of
helemaal niet meer werken, moet een volwassene
de batterijen vervangen.
• Dit speelgoed kan worden schoongeveegd met
een schone, vochtige doek.
• Als dit product niet goed meer werkt, moet
u de elektronica resetten. Zet de aan/uit-knop
even uit en weer aan.
• Zet de aan/uit-knop op AAN of op UIT .
• Para um melhor funcionamento e maior duração
das pilhas, recomendamos que as pilhas incluídas
no brinquedo sejam substituídas por 3 pilhas
novas AAA (LR03) alcalinas.
• Localizar o compartimento de pilhas.
Desaparafusar a tampa com uma chave de fendas
Phillips. Retirar as pilhas e colocá-las em recipiente
apropriado para reciclagem de pilhas.
• Instalar 3 pilhas AAA (LR03) alcalinas.
• Voltar a colocar a tampa no compartimento de
pilhas e aparafusar. Não apertar demasiado
os parafusos.
• Se os sons e/ou as luzes do produto
enfraquecerem ou pararem, as pilhas devem ser
substituídas (por um adulto).
• Se o produto começar a funcionar de forma
errática, pode ser necessário reiniciar a parte
eletrónica. Desligar o interruptor e voltar a ligar.
• LIGAR o interruptor de ligação ou DESLIGÁ-LO .
• Vi rekommenderar att batterierna byts ut mot
3 nya alkaliska AAA-batterier (LR03) för bästa
resultat och för att batterierna ska hålla längre.
• Leta upp luckan till batterifacket. Lossa skruven
i luckan med en stjärnskruvmejsel. Ta ut batterierna
och kassera dem på ett miljövänligt sätt.
• Sätt i 3 alkaliska AAA-batterier (LR03).
• När ljudet/ljuset från produkten börjar bli svagt
eller helt försvinner, är det dags att låta en vuxen
byta batterierna.
• Om produkten inte fungerar som den ska kan du
behöva återställa elektroniken. Dra strömbrytaren
till av och sedan till på igen.
• Sätt tillbaka luckan till batterifacket och skruva fast
den. Dra inte åt för hårt. Skjut strömbrytaren till
PÅ eller AV .
• Lelu toimii parhaiten ja pitkään, kun vaihdat siinä
alun perin olleiden paristojen tilalle 3 uutta
AAA (LR03)-alkaliparistoa.
• Etsi paristokotelon kansi. Avaa paristokotelon
kannen ruuvi ristipääruuvimeisselillä. Irrota
paristot ja hävitä ne asianmukaisesti.
• Aseta koteloon 3 AAA (LR03)-alkaliparistoa.
• Pane kansi takaisin paikalleen ja kiristä ruuvi.
Älä kiristä liikaa.
• Kun tuotteen äänet tai valot heikkenevät tai
sammuvat, aikuisen on aika vaihtaa paristot.
• Jos tuote ei toimi kunnolla, voit joutua
palauttamaan sen alkutilaan. Kytke virta pois
päältä ja sitten takaisin päälle.
• Kytke VIRTA PÄÄLLE tai POIS päältä
virtakytkimestä.
5
Battery Safety Information
In exceptional circumstances, batteries may leak
fluids that can cause a chemical burn injury or ruin
your product. To avoid battery leakage:
• Do not mix old and new batteries or batteries of
different types: alkaline, standard (carbon-zinc) or
rechargeable (nickel-cadmium).
• Insert batteries as indicated inside the
battery compartment.
•
Remove batteries during long periods of
non-use. Always remove exhausted batteries
from the product. Dispose of batteries safely.
Do not dispose of this product in a fire. The
batteries inside may explode or leak.
• Never short-circuit the battery terminals.
• Use only batteries of the same or equivalent type,
as recommended.
• Do not charge non-rechargeable batteries.
• Remove rechargeable batteries from the product
before charging.
• If removable, rechargeable batteries are used, they
are only to be charged under adult supervision.
Mises en garde au sujet des piles
Lors de circonstances exceptionnelles, des
substances liquides peuvent s’écouler des piles et
provoquer des brûlures chimiques ou endommager
le produit. Pour éviter tout écoulement des piles :
• Ne pas mélanger des piles usées avec des piles
neuves ou différents types de piles : alcalines,
standard (carbone-zinc) ou rechargeables
(nickel-cadmium).
• Insérer les piles comme indiqué à l’intérieur du
compartiment des piles.
• Retirer les piles lorsque le produit n'est pas utilisé
pendant une longue période. Ne jamais laisser des
piles usées dans le produit. Jeter les piles usées
dans un conteneur réservé à cet usage. Ne pas
jeter le produit au feu. Les piles incluses pourraient
exploser ou couler.
• Ne jamais court-circuiter les bornes des piles.
• Utiliser uniquement des piles de même type ou de
type équivalent, comme conseillé.
• Ne pas recharger des piles non rechargeables.
• Les piles rechargeables doivent être retirées du
produit avant la charge.
• En cas d’utilisation de piles amovibles et
rechargeables, celles-ci ne doivent être chargées
que sous la surveillance d'un adulte.
Información de seguridad acerca de las pilas
En circunstancias excepcionales, las baterías pueden
desprender líquido corrosivo que puede provocar
quemaduras o dañar el juguete. Para evitar el
derrame de líquido corrosivo:
• No mezclar pilas nuevas con gastadas ni pilas de
diferentes tipos: alcalinas, estándar (carbono-cinc)
o recargables (níquel-cadmio).
• Colocar las pilas tal como se indica en el interior
del compartimento.
• Retirar las pilas del juguete si no se va a utilizar
durante un largo período de tiempo. No dejar
nunca pilas gastadas en el juguete. Un escape de
líquido corrosivo podría estropearlo. Desechar las
pilas gastadas en un contenedor de reciclaje de
pilas. No quemar el juguete ya que las pilas de
su interior podrían explotar o desprender
líquido corrosivo.
• Evitar cortocircuitos en los polos de las pilas.
• Utilizar solo pilas del tipo recomendado en las
instrucciones, o equivalente.
• No intentar cargar pilas no recargables.
• Antes de recargar las pilas, sacarlas del juguete.
• Recargar las pilas siempre bajo la supervisión
de un adulto.
Batteriesicherheitshinweise
In Ausnahmefällen können Batterien auslaufen.
Die auslaufende Flüssigkeit kann Verbrennungen
verursachen oder das Produkt zerstören. Um ein
Auslaufen von Batterien zu vermeiden, beachten Sie
bitte folgende Hinweise:
• Niemals Alkali-Batterien, Standardbatterien
(Zink-Kohle) oder wiederaufladbare Nickel-
Cadmium-Zellen miteinander kombinieren.
Niemals alte und neue Batterien zusammen
einlegen. Immer alle Batterien zur gleichen
Zeit auswechseln.
• Darauf achten, dass die Batterien in der richtigen
Polrichtung (+/-) eingelegt sind.
• Die Batterien immer herausnehmen, wenn das
Produkt längere Zeit nicht benutzt wird. Alte oder
verbrauchte Batterien immer aus dem Produkt
entfernen. Das Produkt zum Entsorgen nicht ins
Feuer werfen, da die Batterien explodieren oder
auslaufen können.
• Die Anschlussklemmen dürfen nicht
kurzgeschlossen werden.
• Nur Batterien desselben oder eines entsprechenden
Batterietyps wie empfohlen verwenden.
•
Nicht wiederaufladbare Batterien dürfen
nicht aufgeladen werden. Wiederaufladbare
Batterien vor dem Aufladen immer aus dem
Produkt herausnehmen.

Other Fisher-Price Toy manuals

Fisher-Price CDL72 User manual

Fisher-Price

Fisher-Price CDL72 User manual

Fisher-Price POWER WHEELS BJH57 User manual

Fisher-Price

Fisher-Price POWER WHEELS BJH57 User manual

Fisher-Price 73394 User manual

Fisher-Price

Fisher-Price 73394 User manual

Fisher-Price W9914 Owner's manual

Fisher-Price

Fisher-Price W9914 Owner's manual

Fisher-Price H4652 User manual

Fisher-Price

Fisher-Price H4652 User manual

Fisher-Price W0429 User manual

Fisher-Price

Fisher-Price W0429 User manual

Fisher-Price GEOTRAX N3985 User manual

Fisher-Price

Fisher-Price GEOTRAX N3985 User manual

Fisher-Price Little People Animal Sounds Zoo 77949 User manual

Fisher-Price

Fisher-Price Little People Animal Sounds Zoo 77949 User manual

Fisher-Price T2745 User manual

Fisher-Price

Fisher-Price T2745 User manual

Fisher-Price Lil' Laugh & Learn L7334 User manual

Fisher-Price

Fisher-Price Lil' Laugh & Learn L7334 User manual

Fisher-Price DMK17 User manual

Fisher-Price

Fisher-Price DMK17 User manual

Fisher-Price CFM97 User manual

Fisher-Price

Fisher-Price CFM97 User manual

Fisher-Price M0251 User manual

Fisher-Price

Fisher-Price M0251 User manual

Fisher-Price Imaginext L9511 User manual

Fisher-Price

Fisher-Price Imaginext L9511 User manual

Fisher-Price P6831 User manual

Fisher-Price

Fisher-Price P6831 User manual

Fisher-Price FUN2LEARN L6723 User manual

Fisher-Price

Fisher-Price FUN2LEARN L6723 User manual

Fisher-Price T4949 User manual

Fisher-Price

Fisher-Price T4949 User manual

Fisher-Price Mountain Action Command Center MISSION SELECT RESCUE HEROES... User manual

Fisher-Price

Fisher-Price Mountain Action Command Center MISSION SELECT RESCUE HEROES... User manual

Fisher-Price ALPHASPINNER 77951 User manual

Fisher-Price

Fisher-Price ALPHASPINNER 77951 User manual

Fisher-Price B8727 User manual

Fisher-Price

Fisher-Price B8727 User manual

Fisher-Price Y5223 User manual

Fisher-Price

Fisher-Price Y5223 User manual

Fisher-Price Little People Maggie's Preschool User manual

Fisher-Price

Fisher-Price Little People Maggie's Preschool User manual

Fisher-Price P5600 User manual

Fisher-Price

Fisher-Price P5600 User manual

Fisher-Price W9832 User manual

Fisher-Price

Fisher-Price W9832 User manual

Popular Toy manuals by other brands

FUTABA GY470 instruction manual

FUTABA

FUTABA GY470 instruction manual

LEGO 41116 manual

LEGO

LEGO 41116 manual

Little Tikes LITTLE HANDIWORKER 0920 Assembly instructions

Little Tikes

Little Tikes LITTLE HANDIWORKER 0920 Assembly instructions

Eduard EF-2000 Two-seater exterior Assembly instructions

Eduard

Eduard EF-2000 Two-seater exterior Assembly instructions

USA Trains EXTENDED VISION CABOOSE instructions

USA Trains

USA Trains EXTENDED VISION CABOOSE instructions

Modellbau Laffont Z1601 Assembly instructions

Modellbau Laffont

Modellbau Laffont Z1601 Assembly instructions

NOCH 12905 instruction manual

NOCH

NOCH 12905 instruction manual

Eduard Ki-61-Id quick start guide

Eduard

Eduard Ki-61-Id quick start guide

Viessmann Vollmer 45616 Mounting instruction

Viessmann

Viessmann Vollmer 45616 Mounting instruction

Vollmer 42004 Mounting instruction

Vollmer

Vollmer 42004 Mounting instruction

Phoenix Model CLASSIC-EP instruction manual

Phoenix Model

Phoenix Model CLASSIC-EP instruction manual

H-KING Sopwith Camel British WW1 Fighter instruction manual

H-KING

H-KING Sopwith Camel British WW1 Fighter instruction manual

MODSTER Predator 4x4 Crawler user manual

MODSTER

MODSTER Predator 4x4 Crawler user manual

DHK Hobby 8136 User instruction manual

DHK Hobby

DHK Hobby 8136 User instruction manual

THUNDER TIGER Raptor 50 V2 kit manual

THUNDER TIGER

THUNDER TIGER Raptor 50 V2 kit manual

Timberkits Skateboarder instructions

Timberkits

Timberkits Skateboarder instructions

Hangar 9 Funtana 125 Assembly manual

Hangar 9

Hangar 9 Funtana 125 Assembly manual

QModeling XP Series instruction manual

QModeling

QModeling XP Series instruction manual

manuals.online logo
manuals.online logoBrands
  • About & Mission
  • Contact us
  • Privacy Policy
  • Terms and Conditions

Copyright 2025 Manuals.Online. All Rights Reserved.