CHAOS Nitro Pro 600 User manual

We thank you for purchasing R.C. Aerodyne products!
We incorporate the nest machining and technology available to bring
you enjoyable and worry free ight. Please read this manual carefully
and keep it for future reference for maintenance, adjustment and parts.
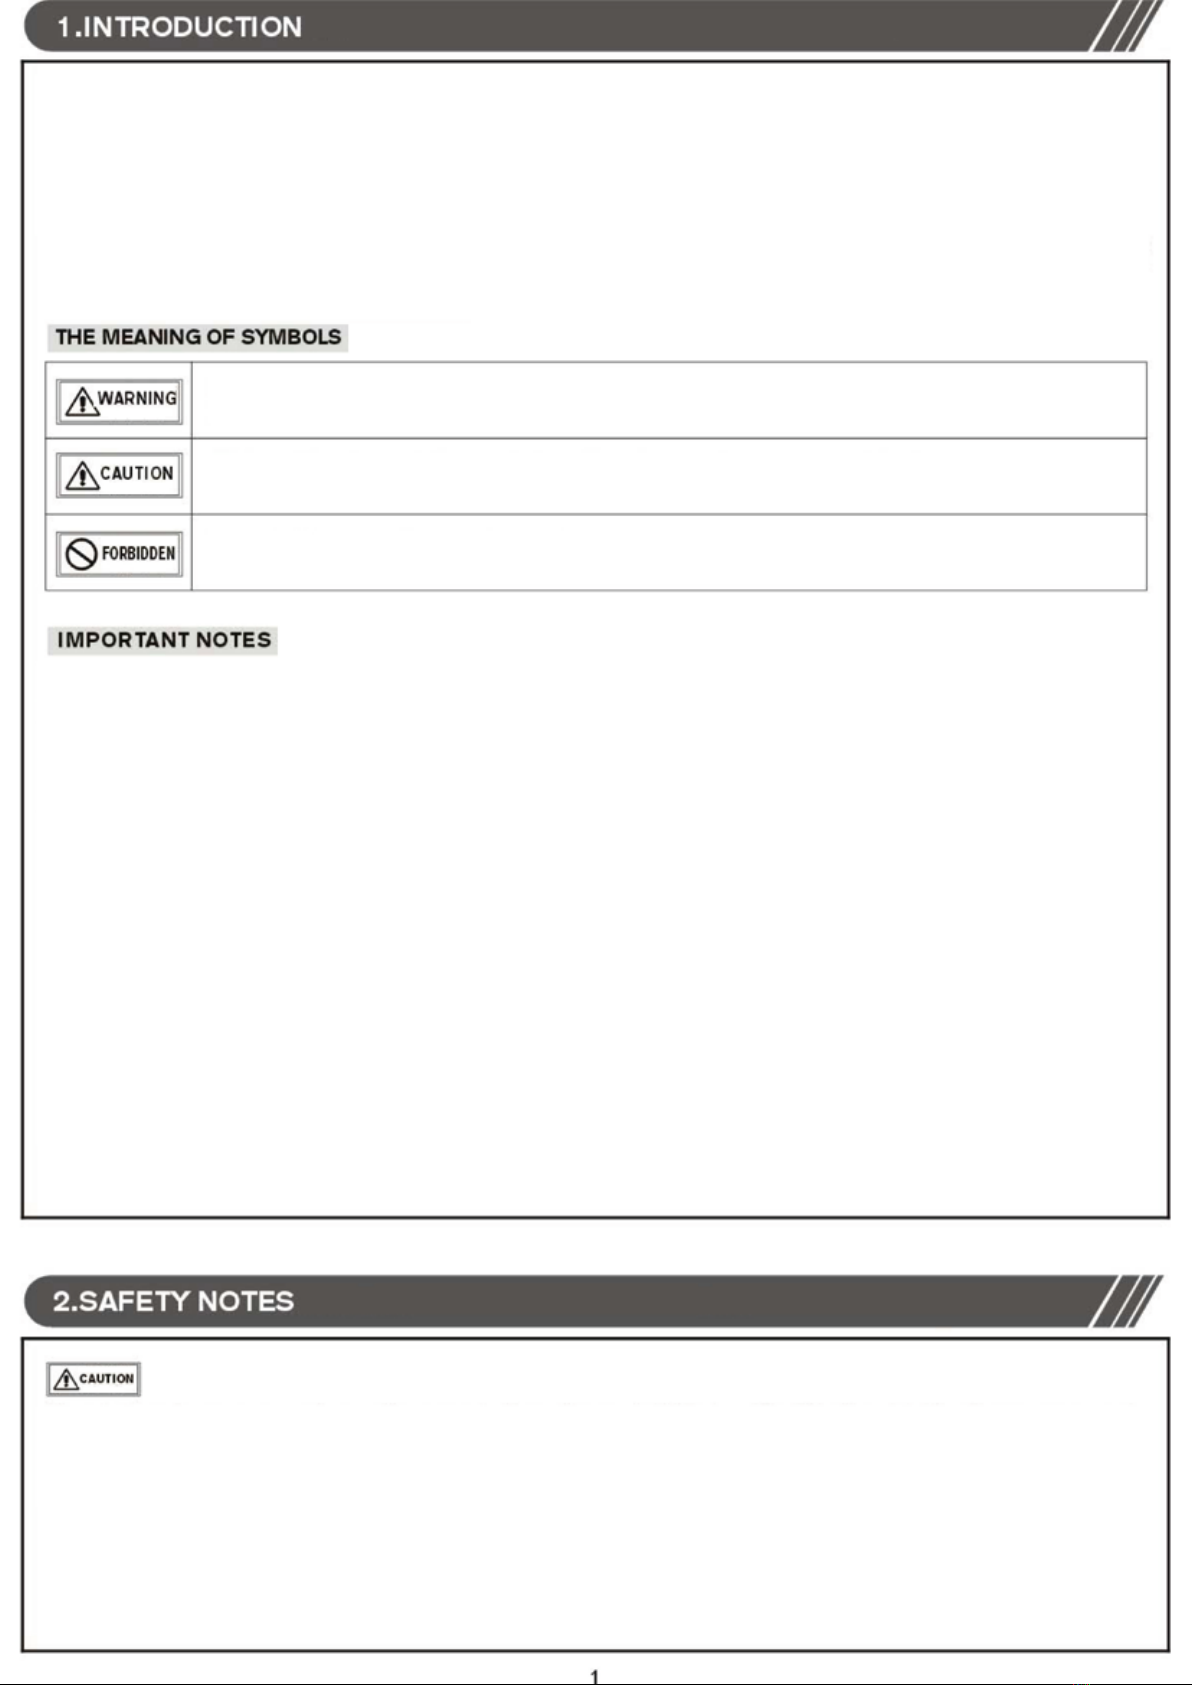
Thank you for purchasing R.C. Aerodyne products!
The Model (Insert) is a full featured R/C Helicopter fully capable of all forms of rotary ight. Please read this manual
carefully prior to assembling the unit. Be sure to pay close attention to all safety precautions, warnings
and recommendations contained in this manual. Failure to follow the appropriate warnings can
result in serious injury.
Failure to follow the warnings may result in damage to your unit as well as serious injury to
yourself and others.
Failure to follow the warnings may result in damage to your unit as well as serious danger to
yourself and others.
Never attempt this under any circumstances!
R.C. Helicopters are not to be treated as toys. Although every effort is made to provide a superior and dependable
product, improper use can cause serious injury and death. Be sure to read this manual carefully, paying close
attention to all warnings, precautions and recommendations. You should insure your personal safety and that of
others when operating R.C. Helicopters.
R.C. Aerodyne and the manufacturer assume no liability for the assembly, maintenance and operation of this
product.
This product is intended for use only by adults having extensive experience ying remote controlled helicopters.
You should y this product only at legal ying elds, away from homes, other people and trafc.
We strongly recommend that you obtain liability insurance for this product. One source for such insurance is thru
(Check with Cliff. There is a ying assoc. which provides this.)
Helicopter ying requires a degree of skill. Accidents, modications or damage during ight are not covered by any
warranty and are solely the pilots responsibiltity. Parts and service can, of course, be obtained thru R.C. Aerodyne
or our authorized service centers.
When ying for the rst time or if you are an inexperienced yer, we strongly recommend you obtain assistance
from an experienced pilot. Finding an experienced person to help you in assembly, set up and ying is the best
way to insure a satisfying and safe ying experience.
You are responsible for your actions!
Never fly this product near populated areas, homes, schools or near crowds. This product is not a toy and
can cause serious injury or death. We recommend flying only on approved, legal flying fields. It is strongly
recommended that you purchase liability insurance. Such insurance is available thru (See Cliff).
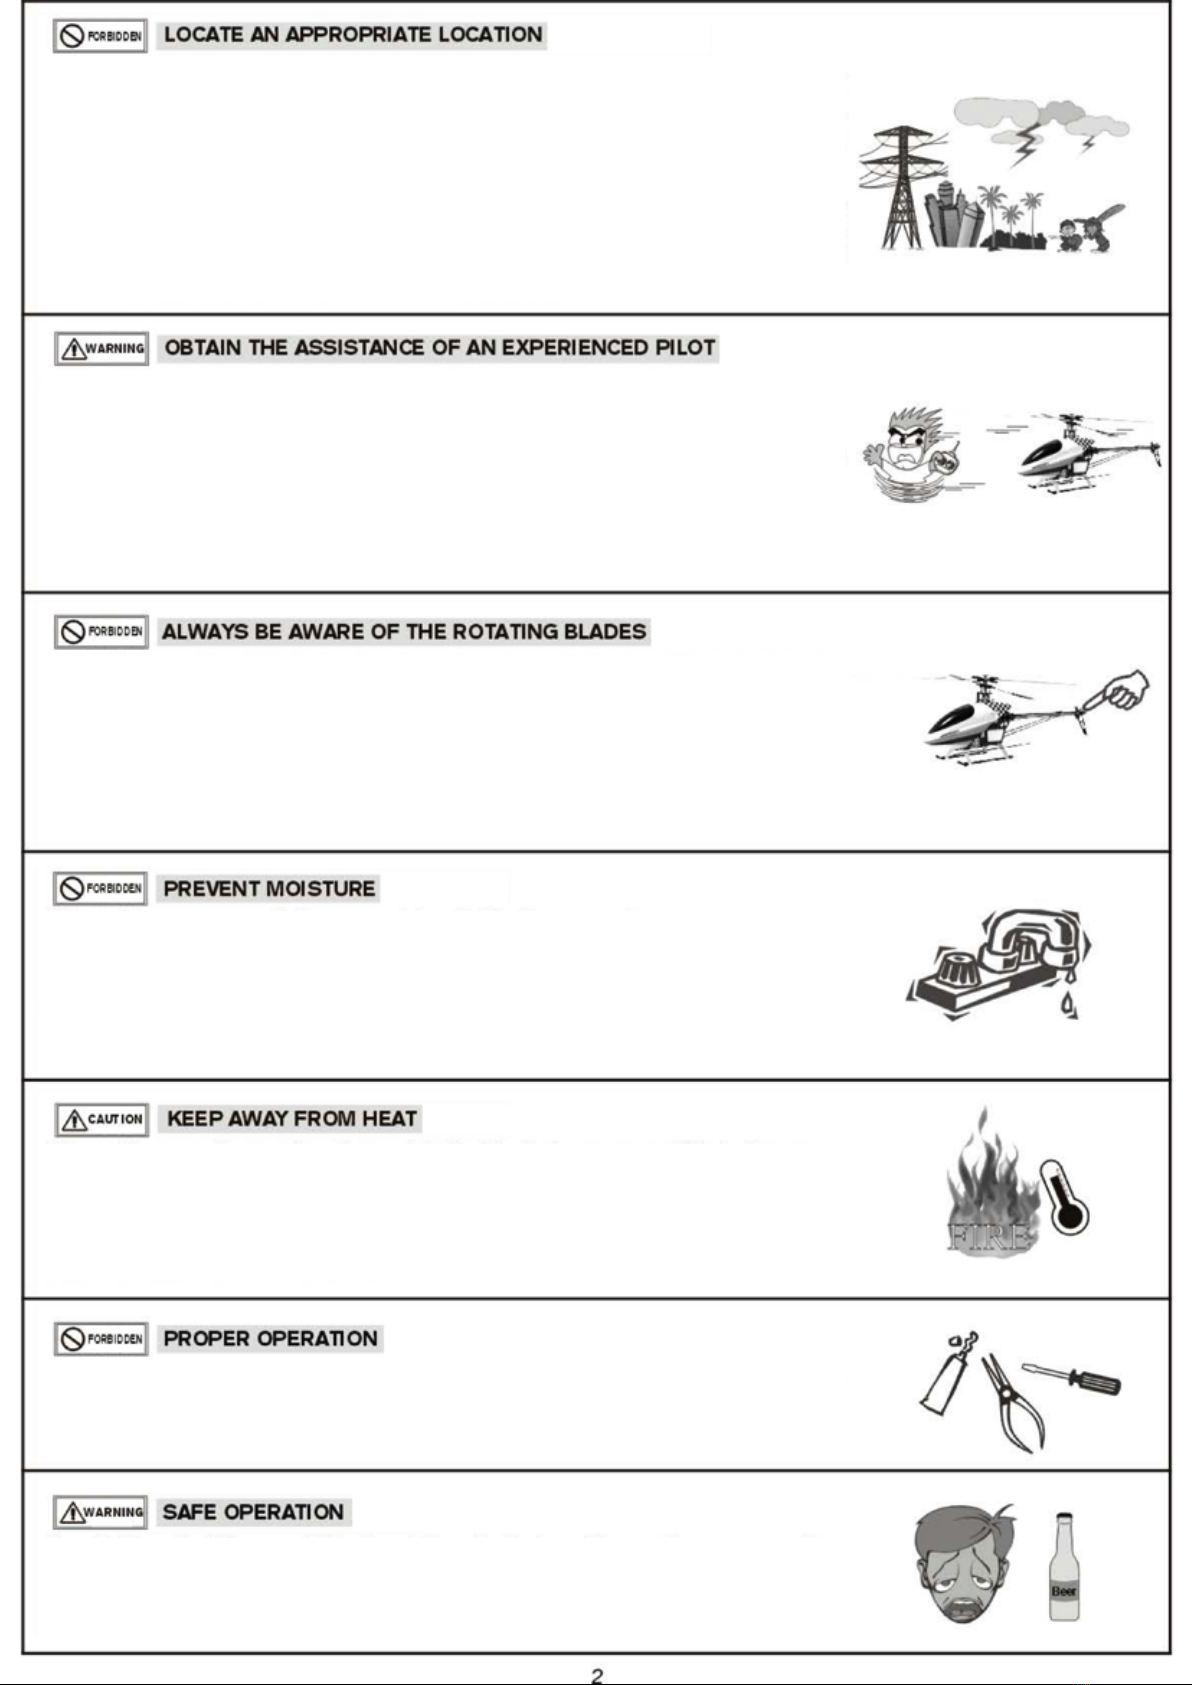
Rotating blades and high speed combine to make R.C. Helicopter ying dangerous. You
must take every precaution to insure your safety and the safety of those around you.
- Fly only on legal ying elds.
- Do not y near buildings.
- Do not y near crowds.
- Stay away from power lines.
- Fly only in areas without obstacles.
- Never y near, buzz or approach observers or others.
R/C Models container many electrical parts which can be affected by moisture and
other contaminants. Never y your units in rain, snow, darkness or any other type
of adverse conditions. Moisture in any form can cause failures in motors, servors,
transmitters, receivers and other components which can cause a loss of control,
crash and damage to your helicopter as well as injury to others or even death.
Please use only parts supplied thru R.C. Aerodyne so insure proper operation and
safety.
If you are not an experienced pilot, nd one to y with!
Before you begin, be sure that no one else is operating in the area on the same
frequency. Frequency interference can cause you or others to loose control of the
aircraft resulting in crashes and damage to your craft as well as injury or death.
Never operate this helicopter if you are tired, taking medications which may impair
your reactions or ability or under the inuence of alcohol or drugs.
Rotating blades of the helicopter move at a high rate of speed. They are very
dangerous and extreme care must be taken when operating a helicopter. Be
aware of your surrounding and take care not be fly near yourself or others.
Maintain a safe distance between yourself, others, building, power lines and other
obstructions and your helicopter. Once you have landed, you should immediately
turn off your transmitter to avoid causing the blades to rotate accidentally.
R.C. Helicopters are affected by heat and cold.
Store you Helicopter at a stable room temperature to avoid deformation. Never
place your helicopter near a heat source.
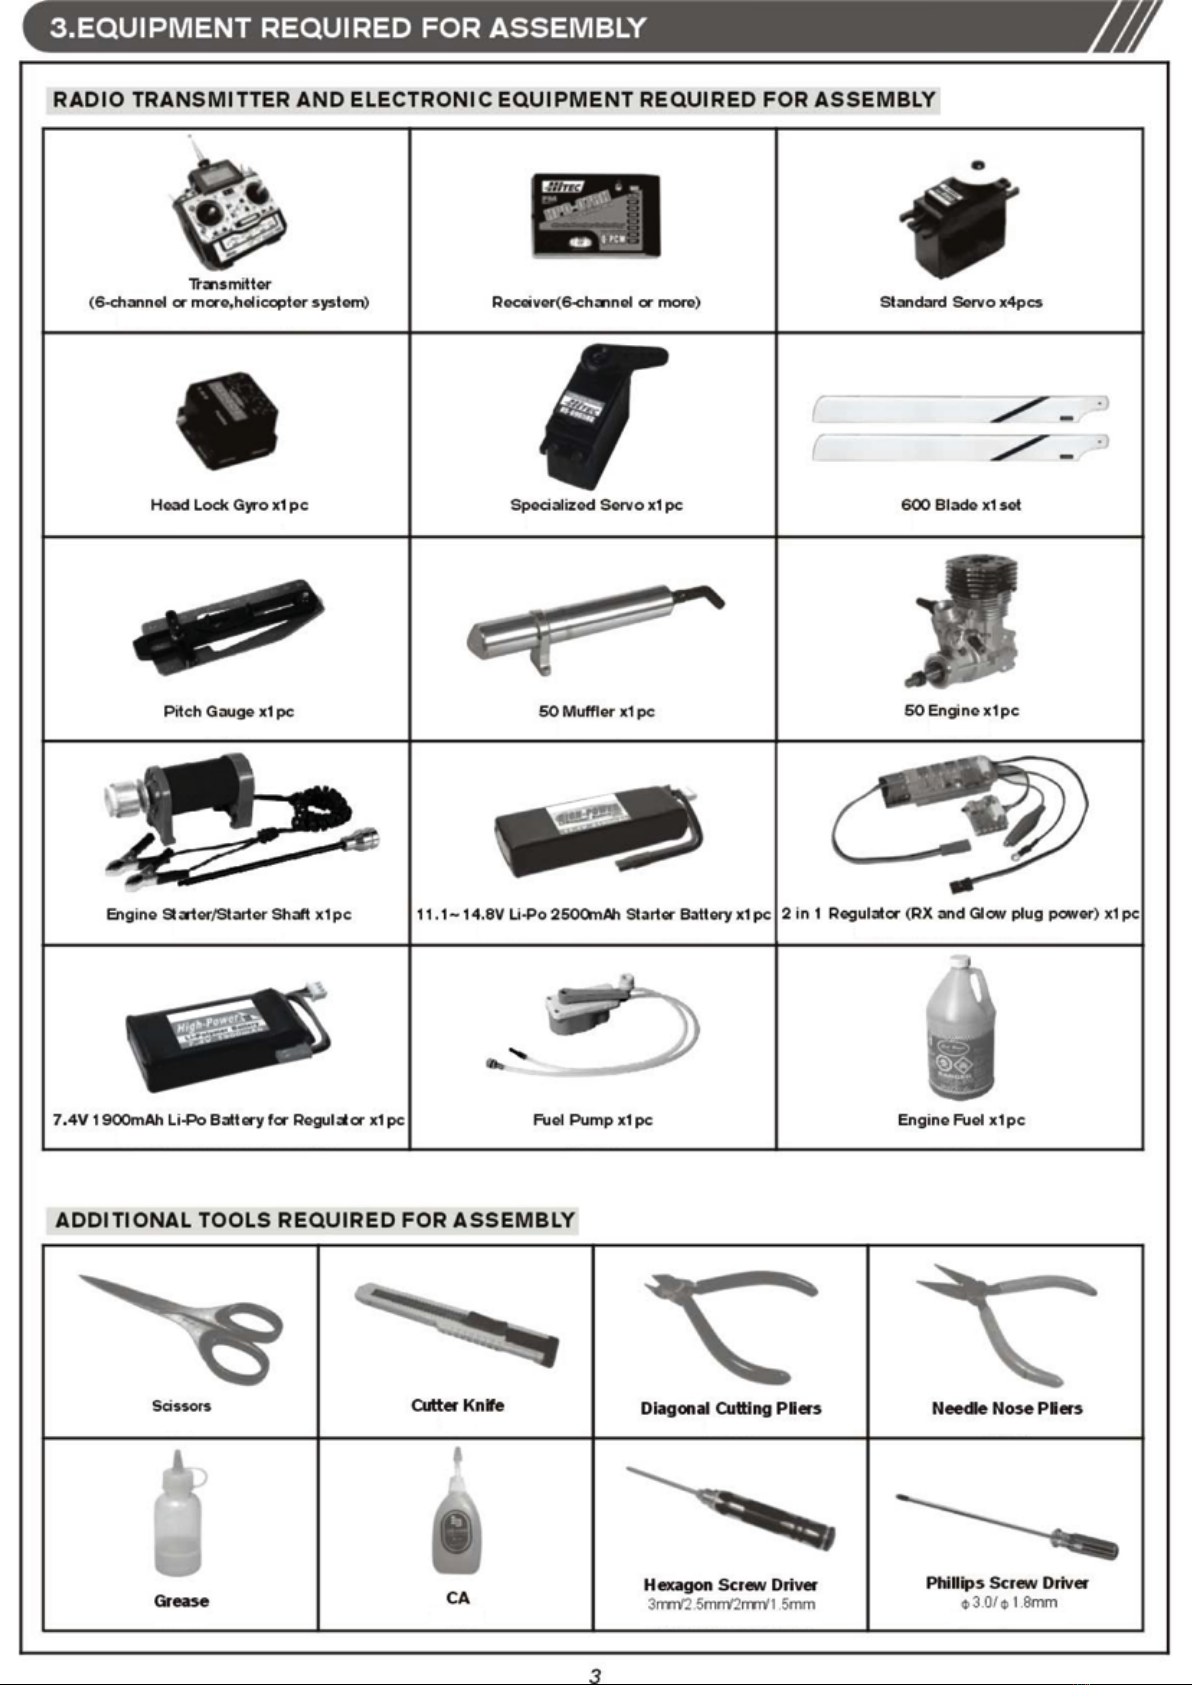

Please perfom the following preight examination before each ight:
Insure that there is no one in the ight area using the same frequency.
Insure that batteries are fully charged and ready for ight.
Prior to powering up your transmitter, be sure that the throttle switch is in the lowest position and the “Idle” switch
is off.
On/Off Procedures:
On: Turn the transmitter on rst, then turn on the receiver.
Off: First turn off the receiver, then turn off the transmitter.
Failure to follow this procedure could be hazardous!
Prior to each ight insure that all moving parts are operating smoothly, that the servos are operating properly and
that there are no damaged, chipped or broken gears.
Check for any loose connections, screws, nuts and bolts. Do not y this helicopter if there are any compromised or
damaged parts of loose connections. Secure all connections and replace any damaged parts prior to ight.
Ball links should be check for excess play and should be periodically replaced as needed.The quality and stability
of your ight will be compromised is there is too much play.
Helicopters vibrate. Check all battery connections to insure they have not been loosened in previous ight.
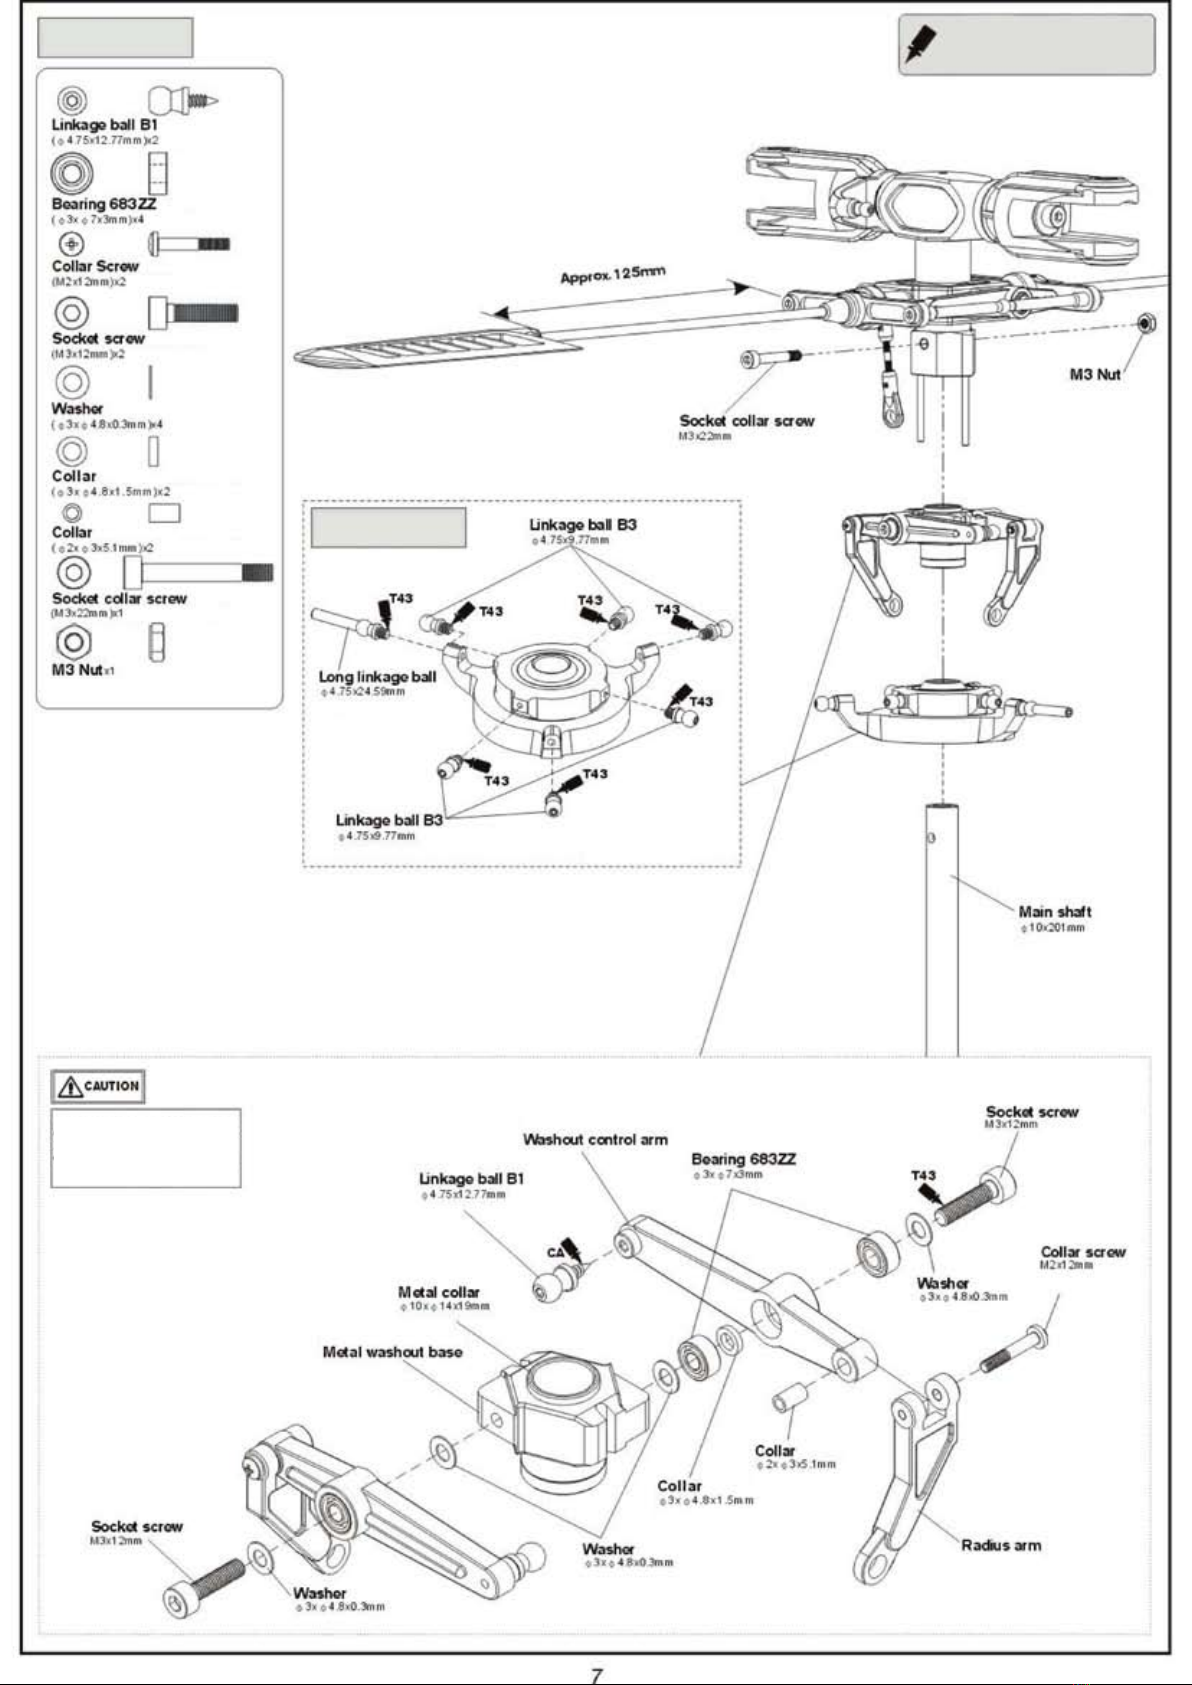
Ball links should be assembled with the “A” character
facing out.
CHAOS

P600NH1A
P600NH2A
When tightening a linkage ball to plastic parts, apply a small amount of CA
glue. Tighten rmly but carefully. Avoid over tightening as this may cause the
threads to strip.
When securing metal parts, apply a
small amount of thread lock.
When securing metal parts, apply a
small amount of thread lock.
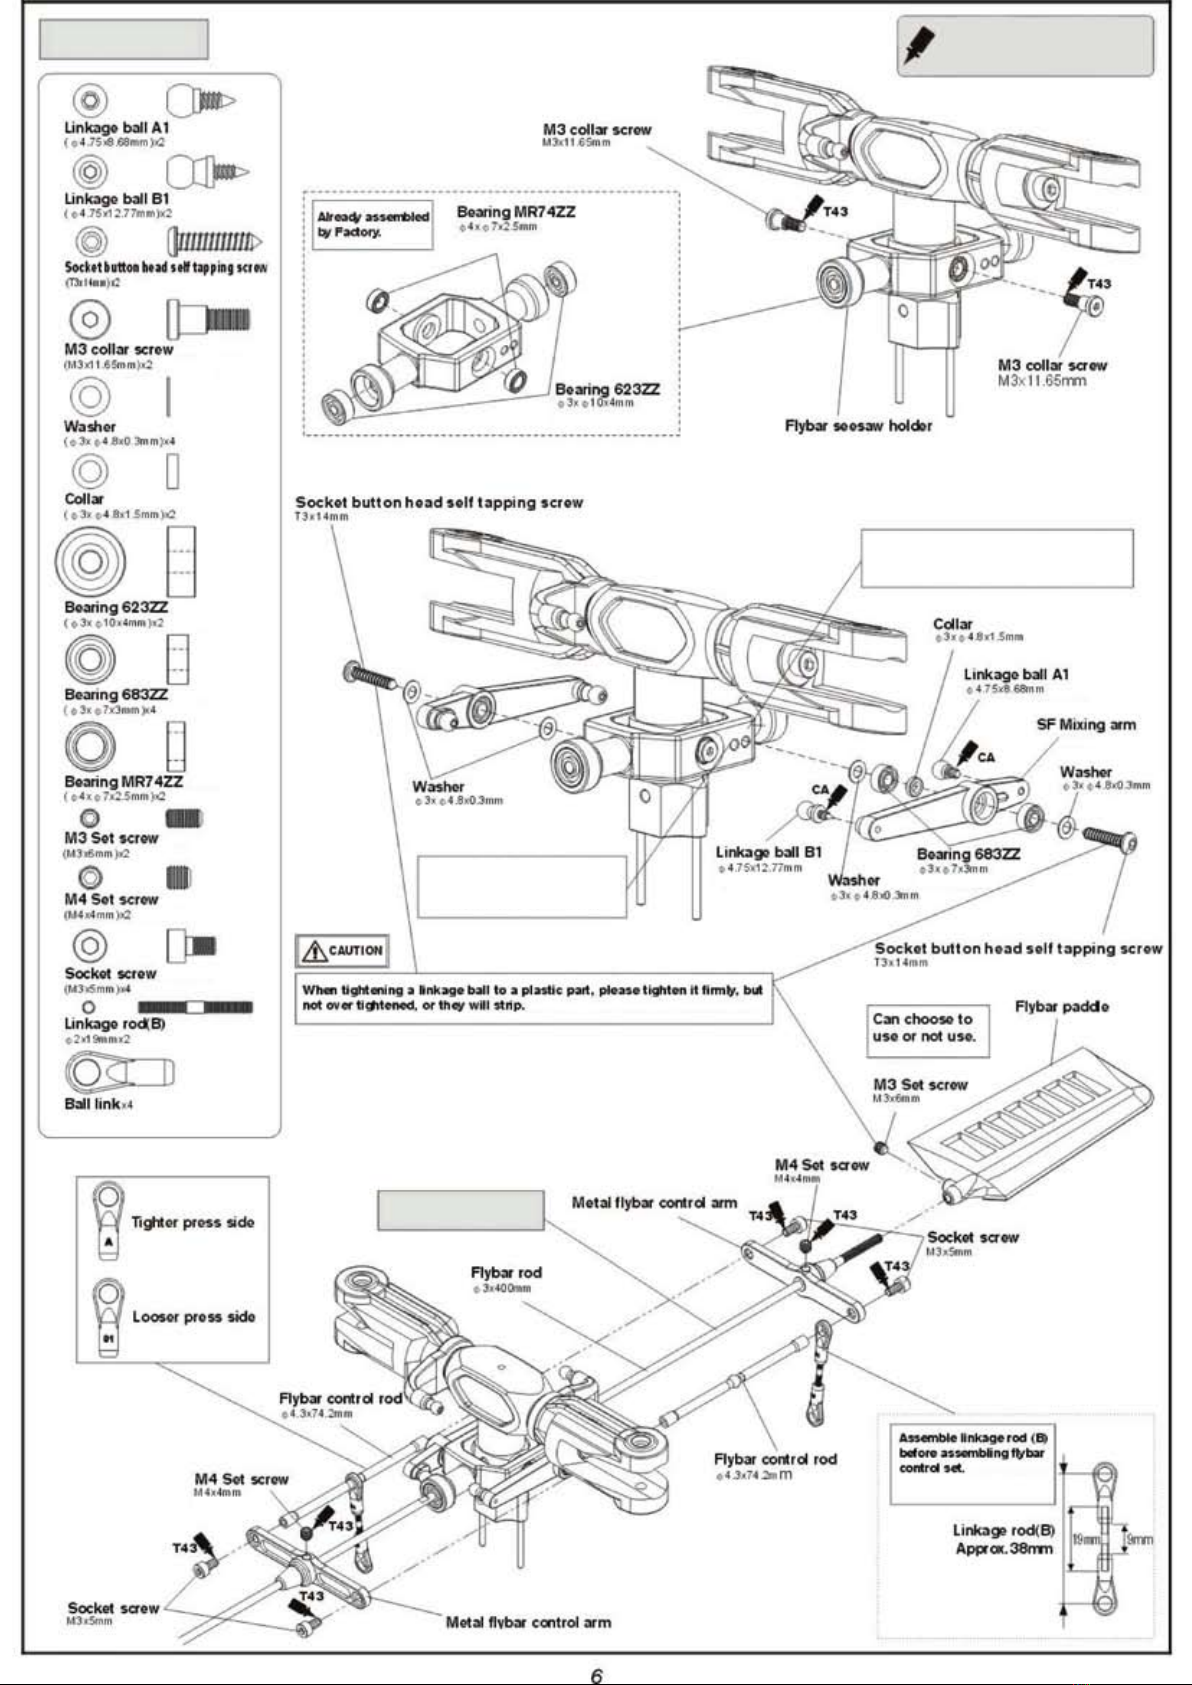
P600NH3A
P600NT001
When securing metal parts, apply a
small amount of thread lock.
For stability in 3D ight, use this mounting
position in the SF mixing arm. This is the
recommended position.
For more versatility in 3D flight,
use this mounting position in the
SF mixing arm.
P600NH4A
P600NH5A
When securing metal parts, apply a
small amount of thread lock.
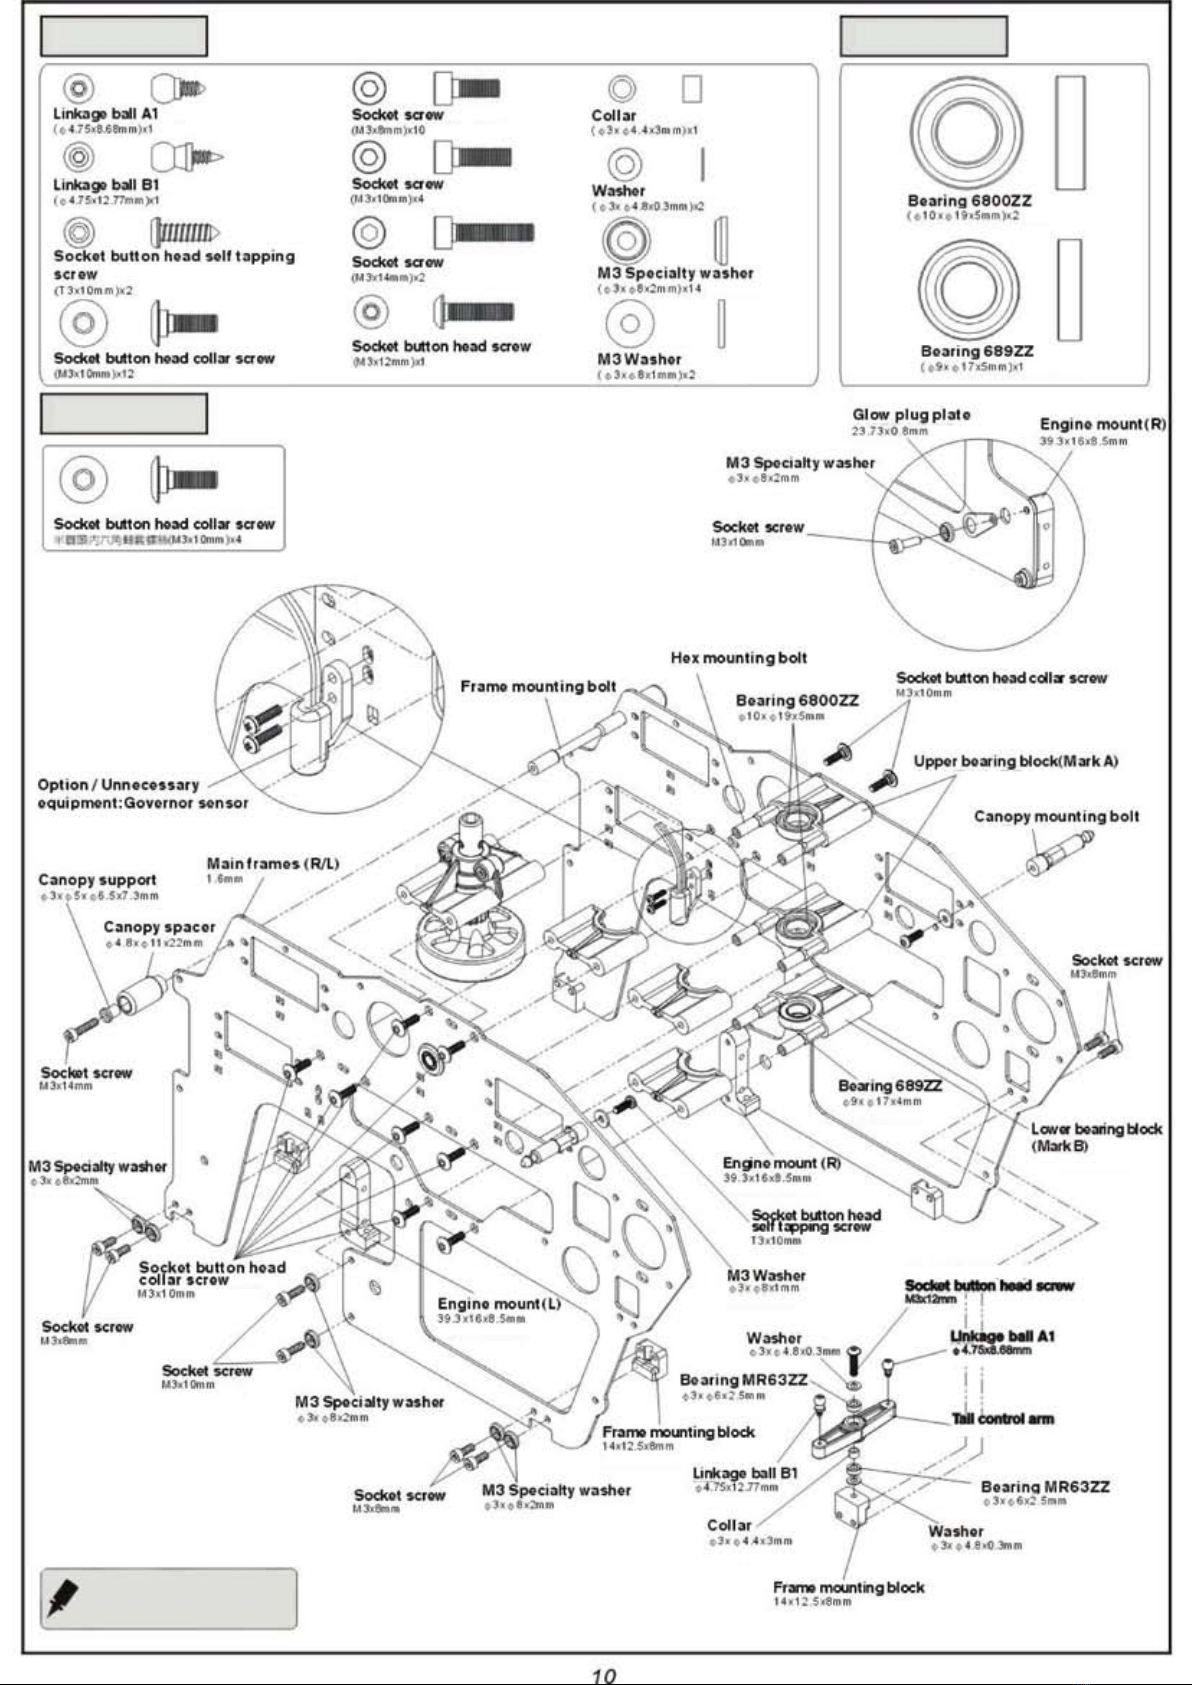
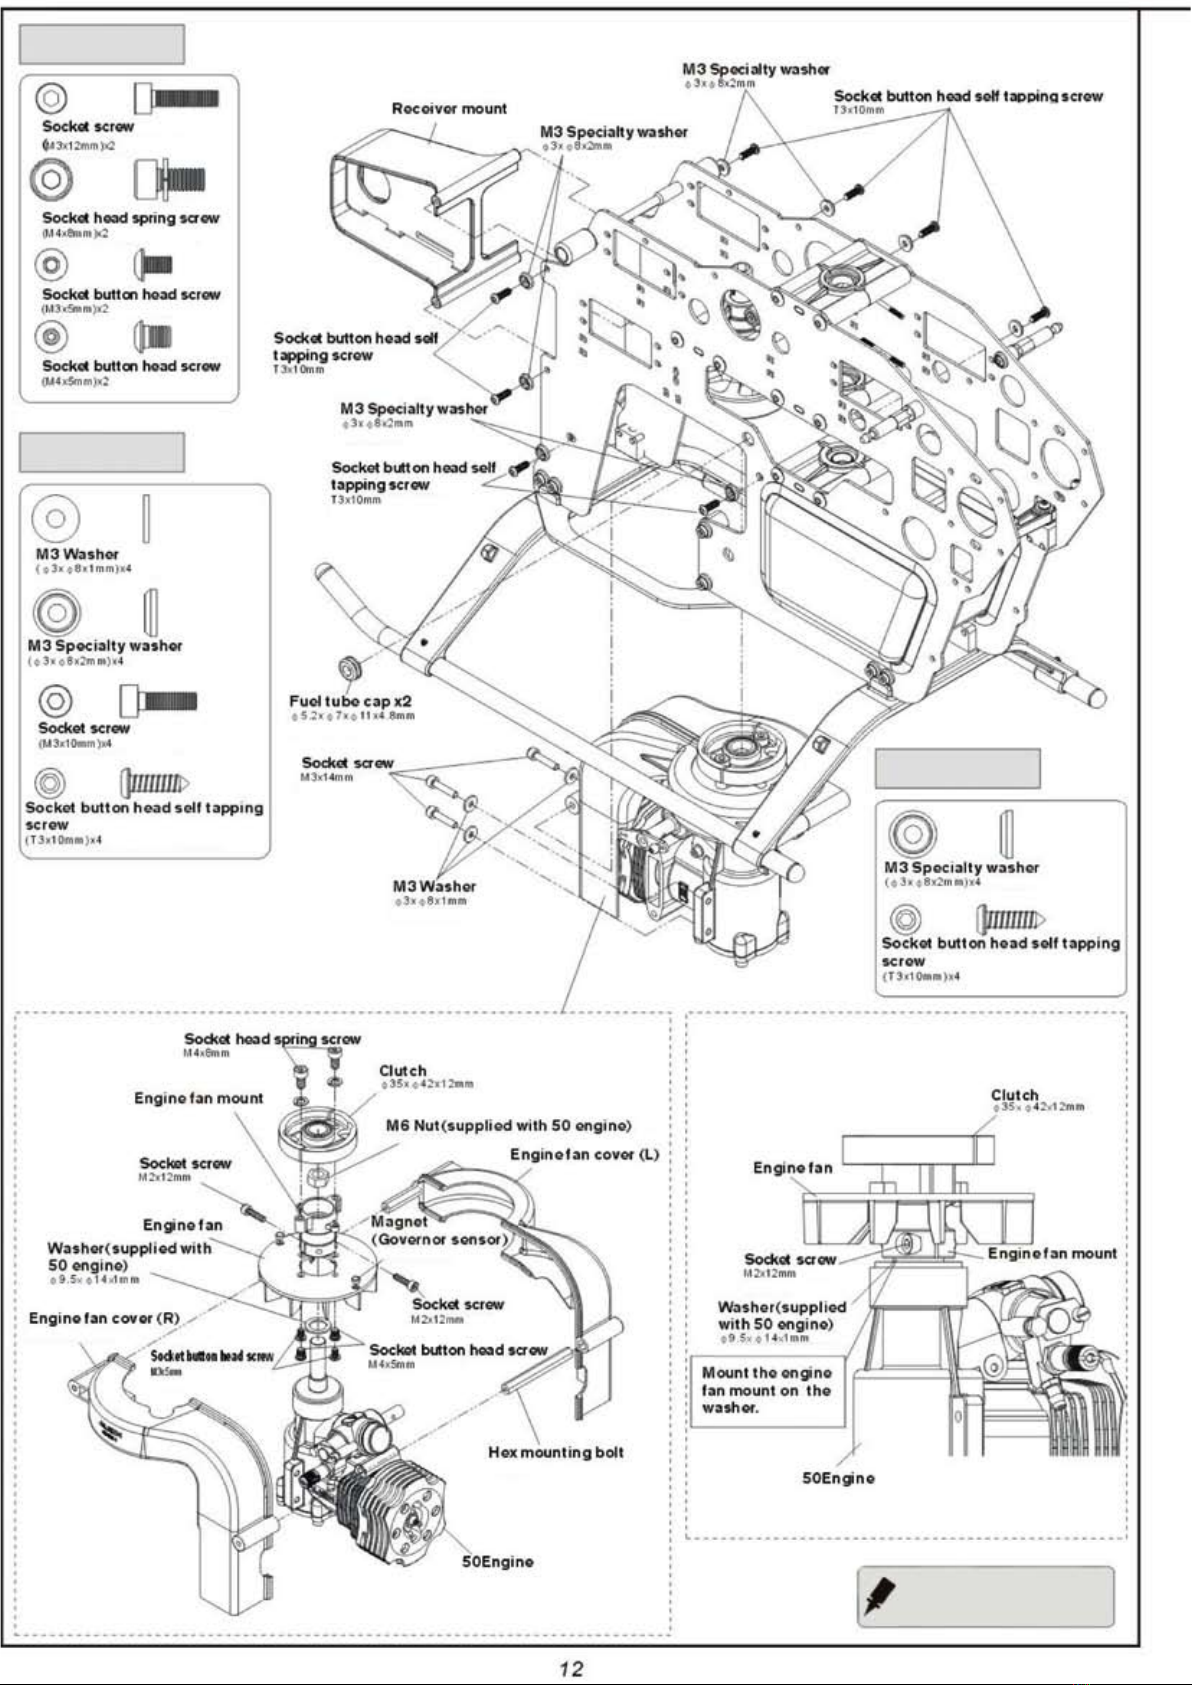
Although this section if
preassembled at the factory,
please check to insure that
all fasteners are secured
with glue.

P600NZ2
P600NZ2A
P600NH2A
When securing metal parts, apply a
small amount of thread lock.
Insure that both sides are of equal length.

P600NB3
P600NB4A
Although this section if
preassembled at the factory,
please check to insure that
all fasteners are secured
with glue.
When securing metal parts, apply a
small amount of thread lock.
Although this section if preassembled at
the factory, please check to insure that all
fasteners are secured with glue.
P600NB1C P600NB1A
P600NB4B
When securing metal parts, apply a
small amount of thread lock.

P600NB1C P600NG1
P600NZ003
When securing metal parts, apply a
small amount of thread lock.
Proper Main Frame Assembly
Assemble the main frame but do not fully tighten the
screws. Insert the three bearings and slide the main
shaft in. Place the frame so that the bottom bracket
rests rmly on a level table top. A glass table top works
well for this purpose. Begin tightening the screws
while insure that the movement of the shaft remains
smooth.
P600NB4A
P600NB1B
P600NB1C
When securing metal parts, apply a
small amount of thread lock.
P600NB1B When securing metal parts, apply a
small amount of thread lock.
P600NZ4

P600NZ2A
P600NZ2
P600NZ4
P600NT3B

P600NT1A
P600NT2A
P600NT005
When securing metal parts, apply a
small amount of thread lock.
Although this section if
preassembled at the factory,
please check to insure that
all fasteners are secured
with glue.
P600NT2B P600NT2C P600NT2D
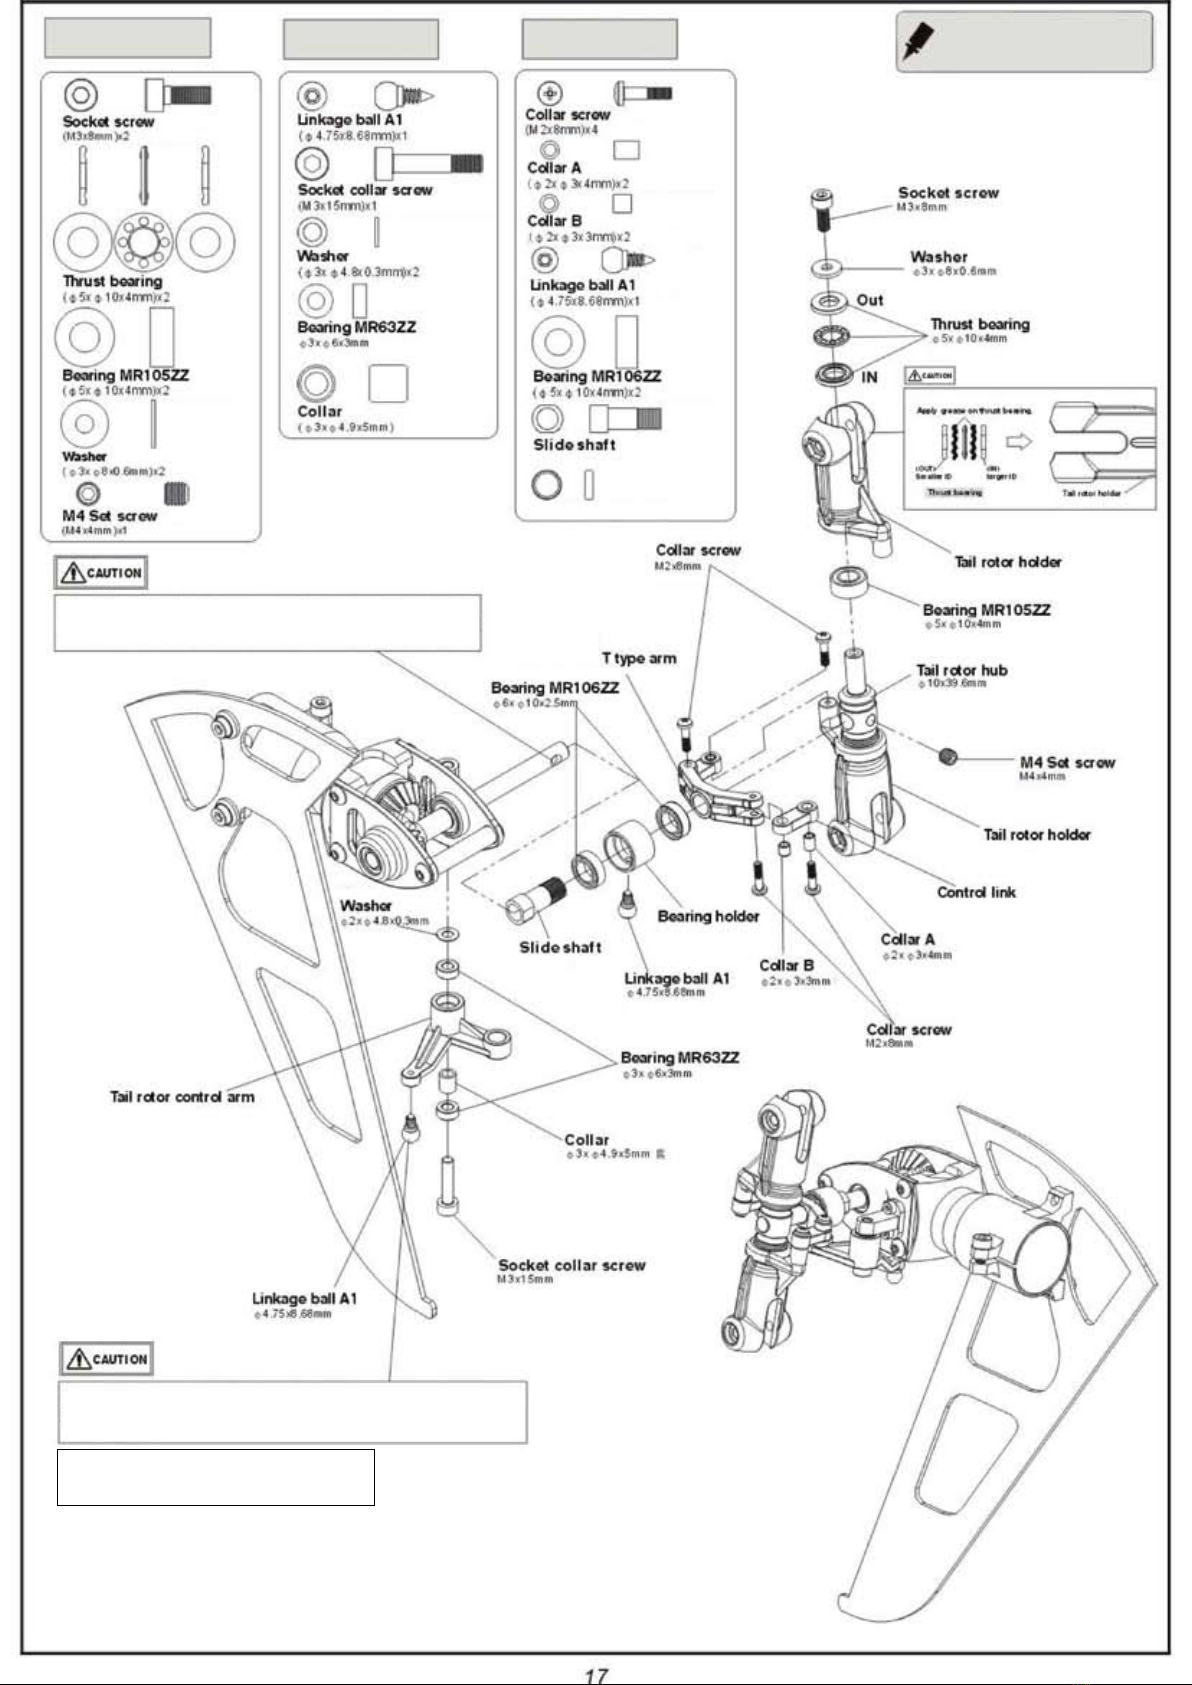
Position the tail rotor hug facing the concase section of the tail rotor
shaft. Apply a small amount of glue to the screw and secure.
When tightening a linkage ball to plastic parts, apply a small amount of CA
glue. Tighten rmly but carefully. Avoid over tightening as this may cause the
threads to strip.
When securing metal parts, apply a
small amount of thread lock.
After completion of the tail rotor assembly, insure
that the rotation is completely smooth. If not, make
necessary adjustments to insure smooth operation.
P600NT2B
P600NT1A
P600NT2EA
When securing metal parts, apply a
small amount of thread lock.
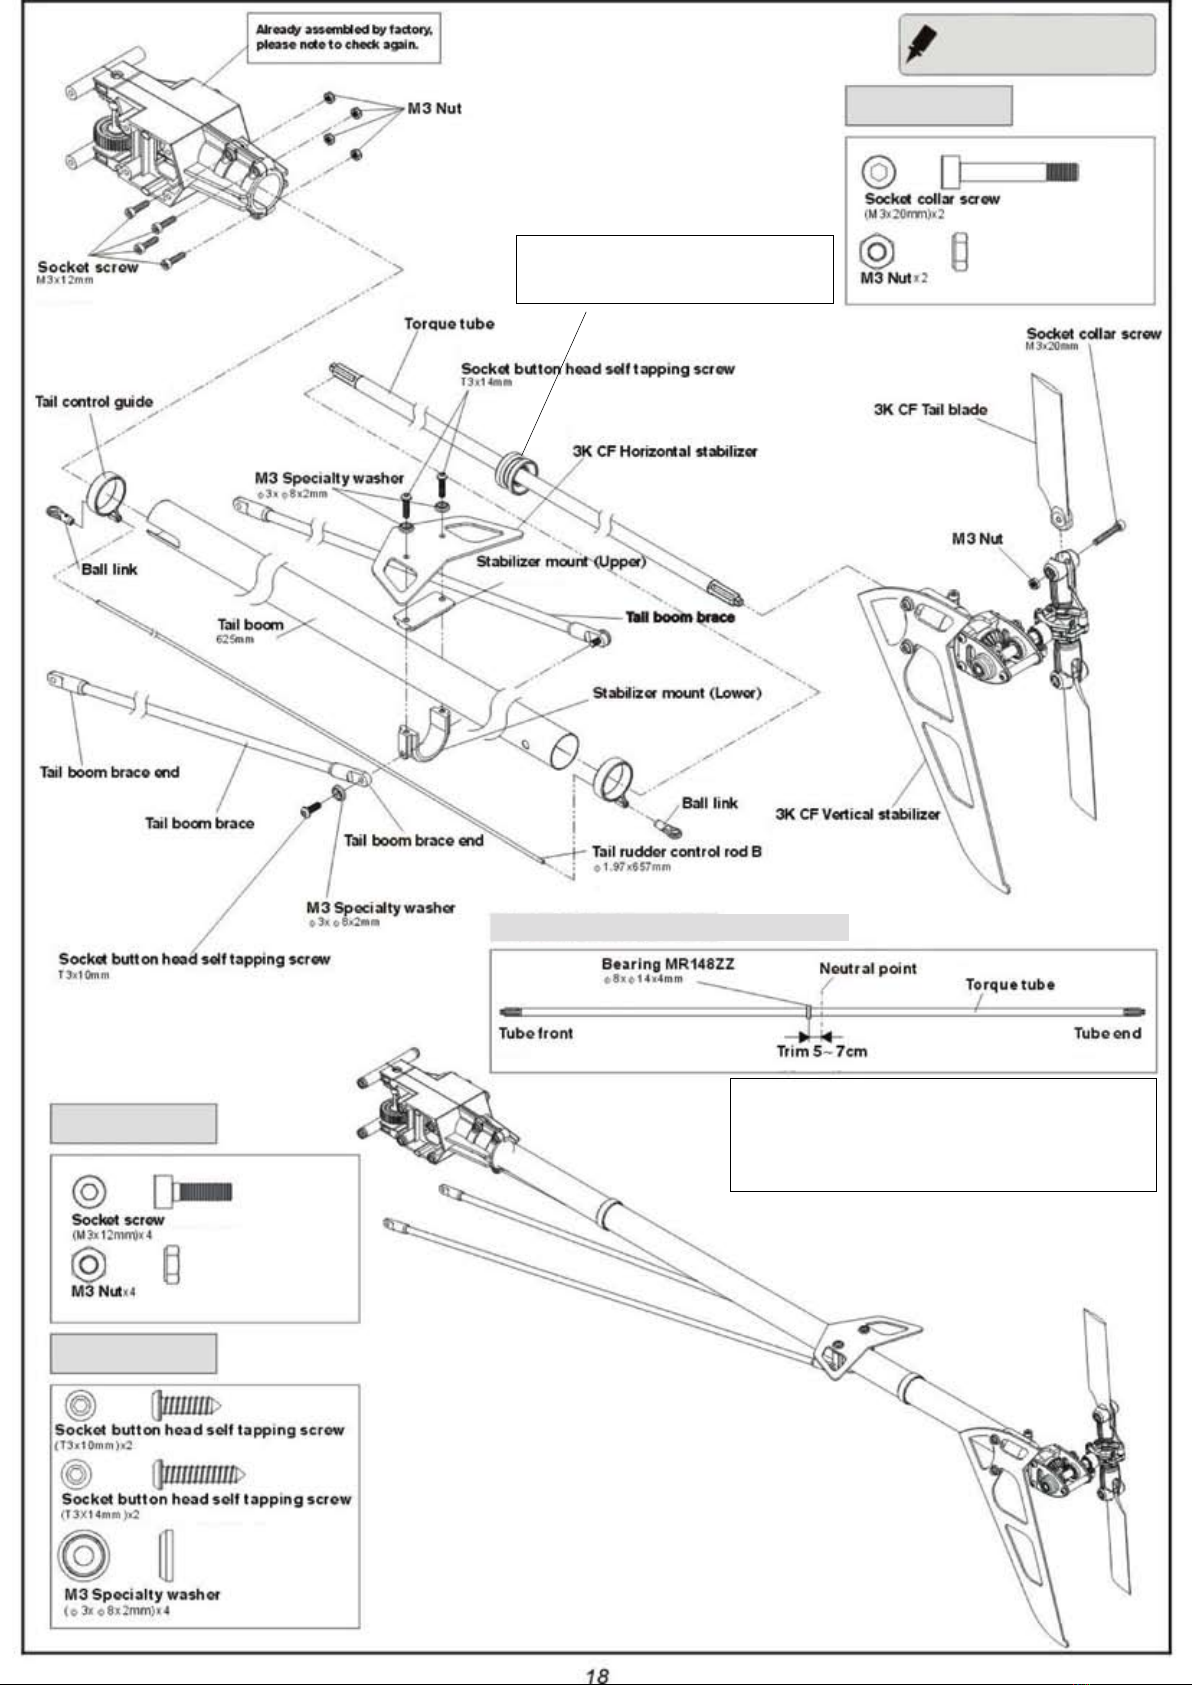
Secure the MR148 bearing in place with a small amount of CA glue.
Avoid allowing any glue to contaminate the bearing. This may cause
poor results or total binding of the bearing.
When inserting the Torque Tube into the tail boom, apply a lm of oil
and use the provided PVC packing tube to secure the bearing holder of
the torque tube into the tail boom while maintaining a square position
relative to the tail boom.
Tips for assembling the Torque Tube
When assembling the torque tube into the tail boom
section, apply a light lm of oil to the torque tube to
allow for smooth assembly. Once assembled check
for smooth rotation and adjust as needed.

P600NT1AP600NB1A
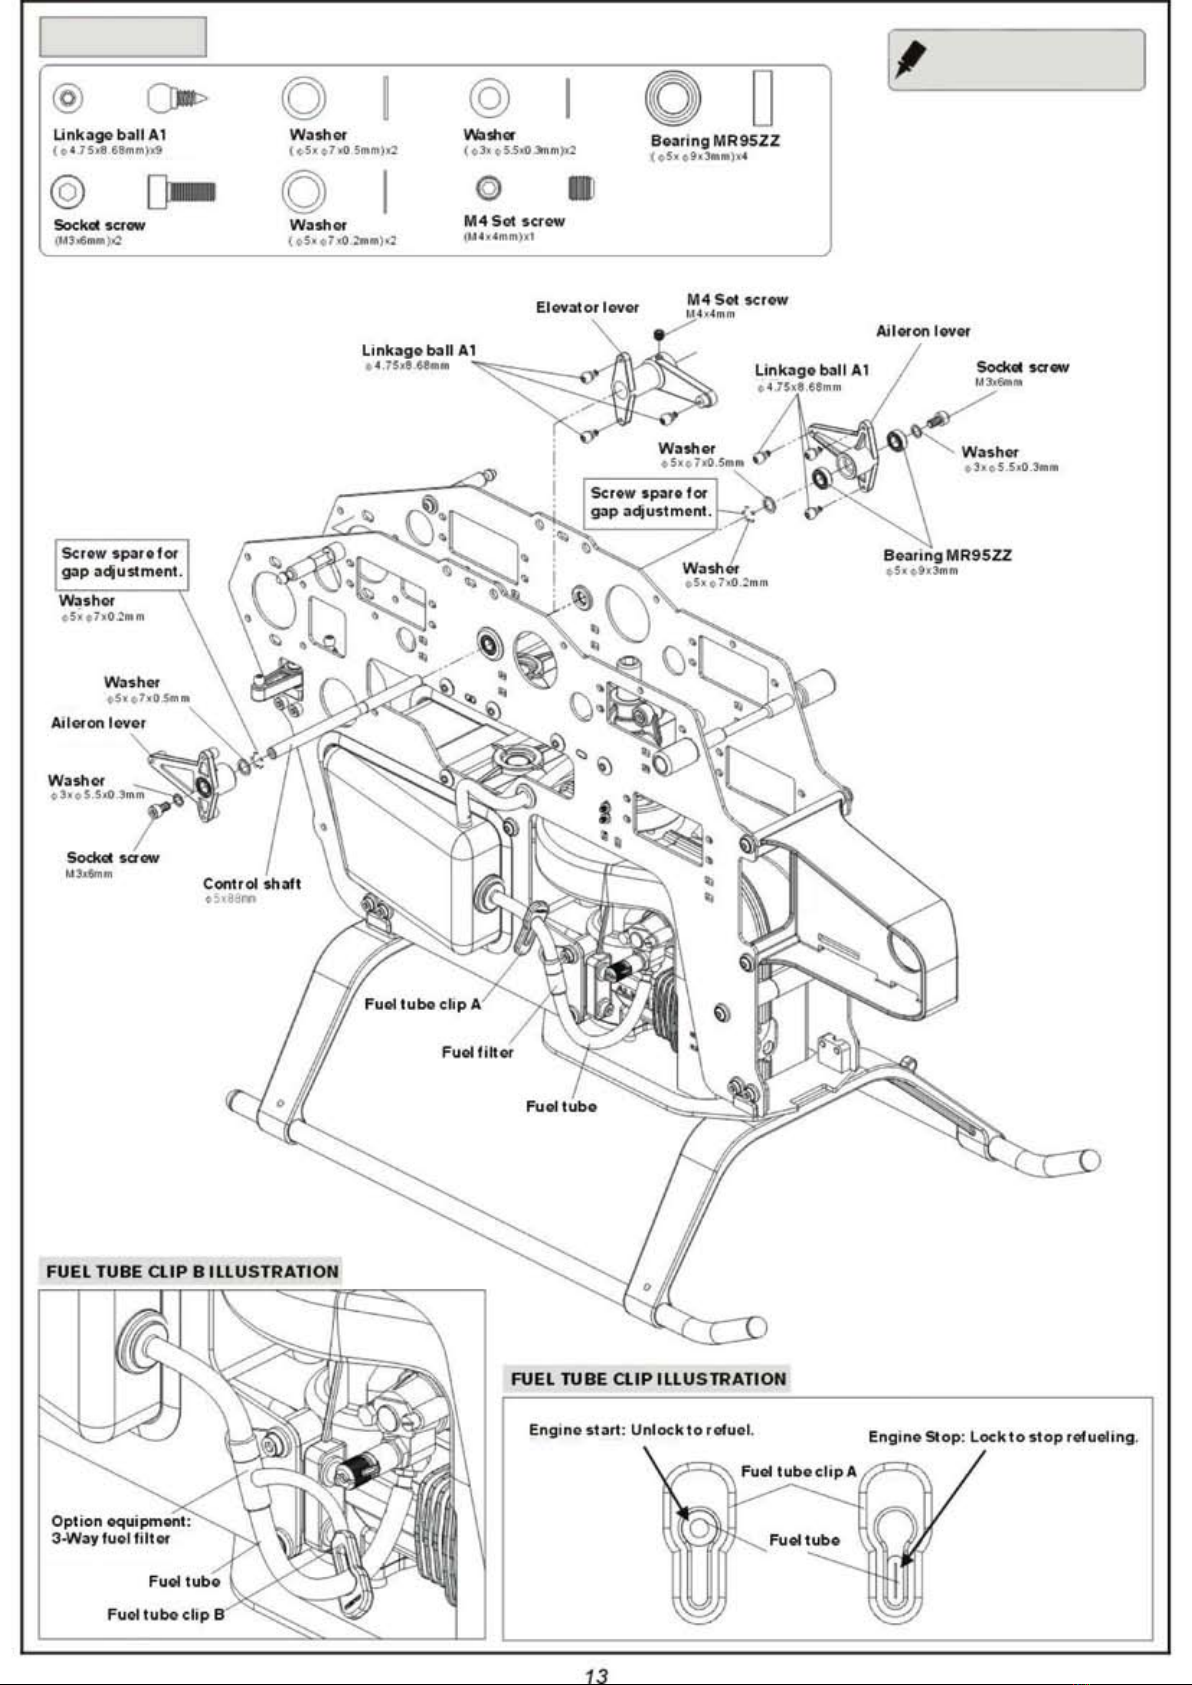
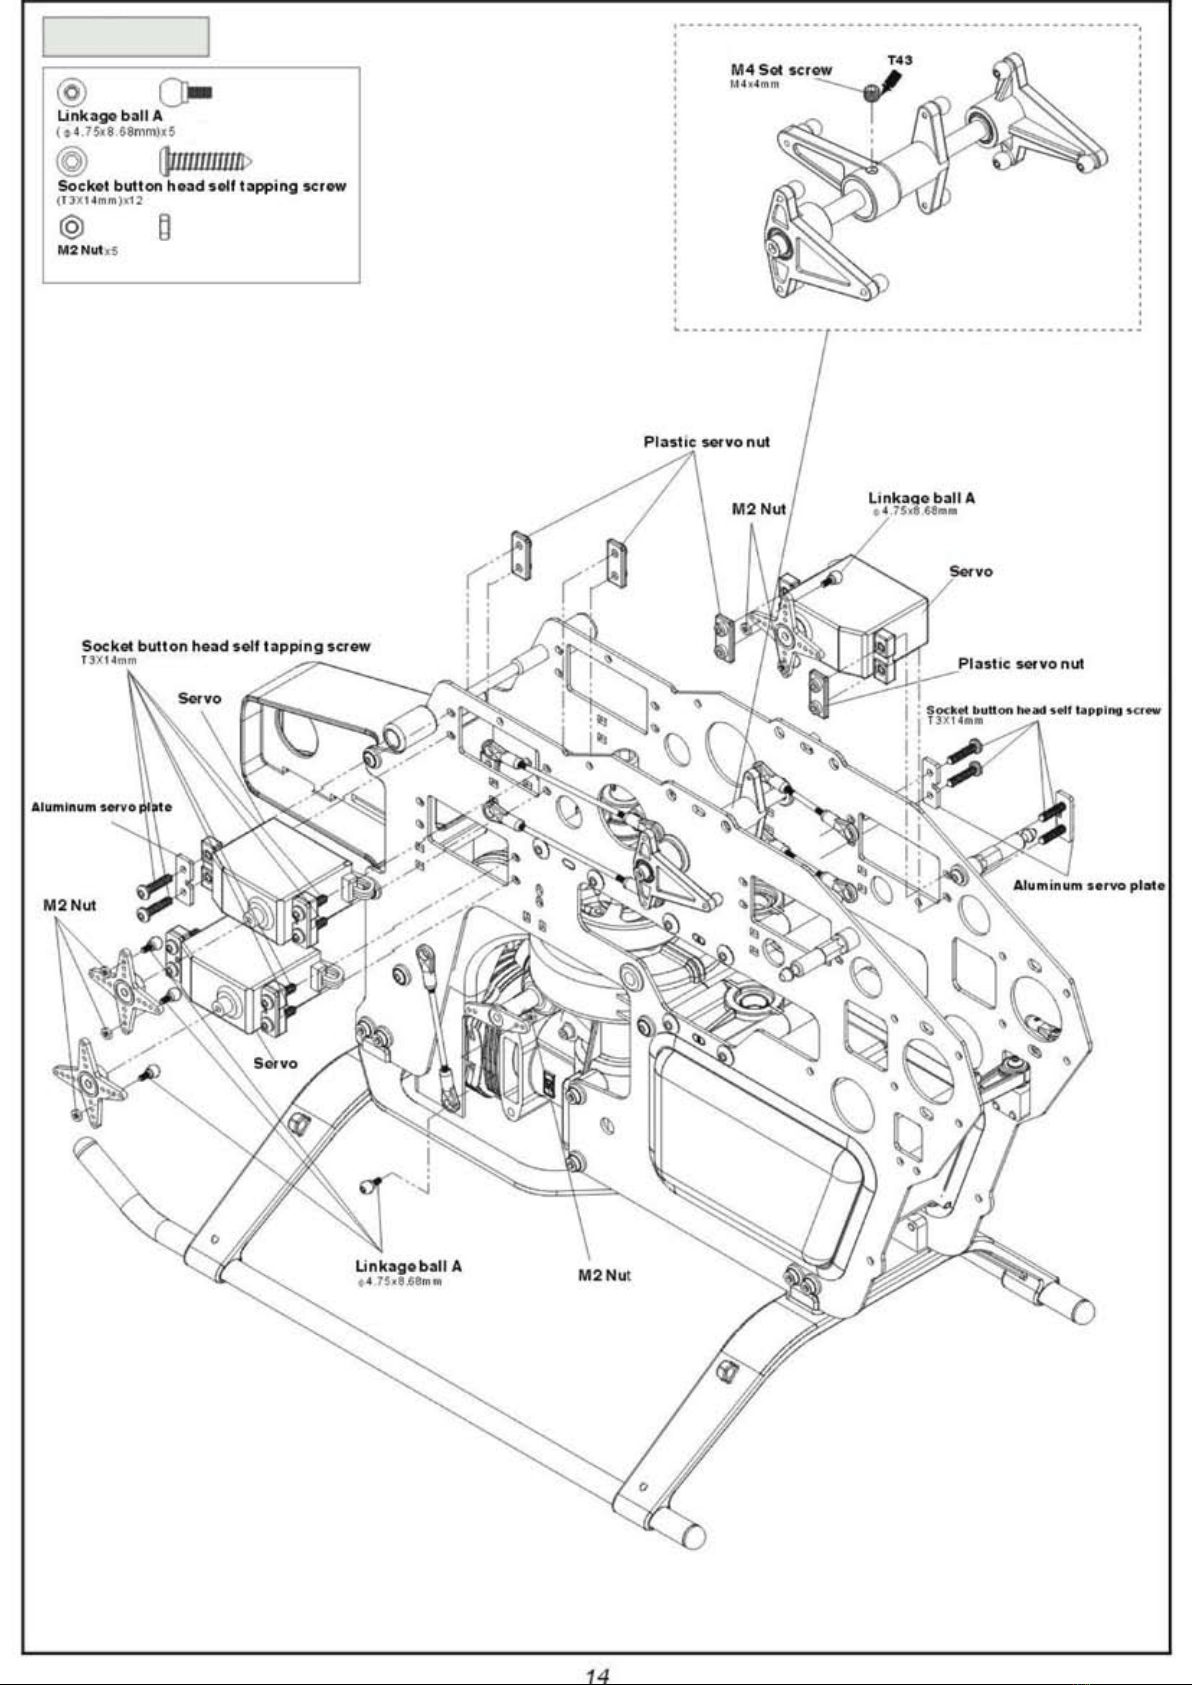
Assemble the “F” linkage rods inside the servo
horns to avoid any interference by the canopy.
When tightening a linkage ball to plastic parts,
apply a small amount of CA glue. Tighten rmly but
carefully. Avoid over tightening as this may cause
the threads to strip.


