Euroma KB-10 User manual

KB-10 Keyboard
User Manual
Precautions
Do not squeeze the LCD panel or leave keyboard under the sun for long hours.
Joystick must be properly packaged before shipment for repair.
Keyboard must be operate base on recommended temperature and humidity range.
Strictly follow the manual's wiring connections.
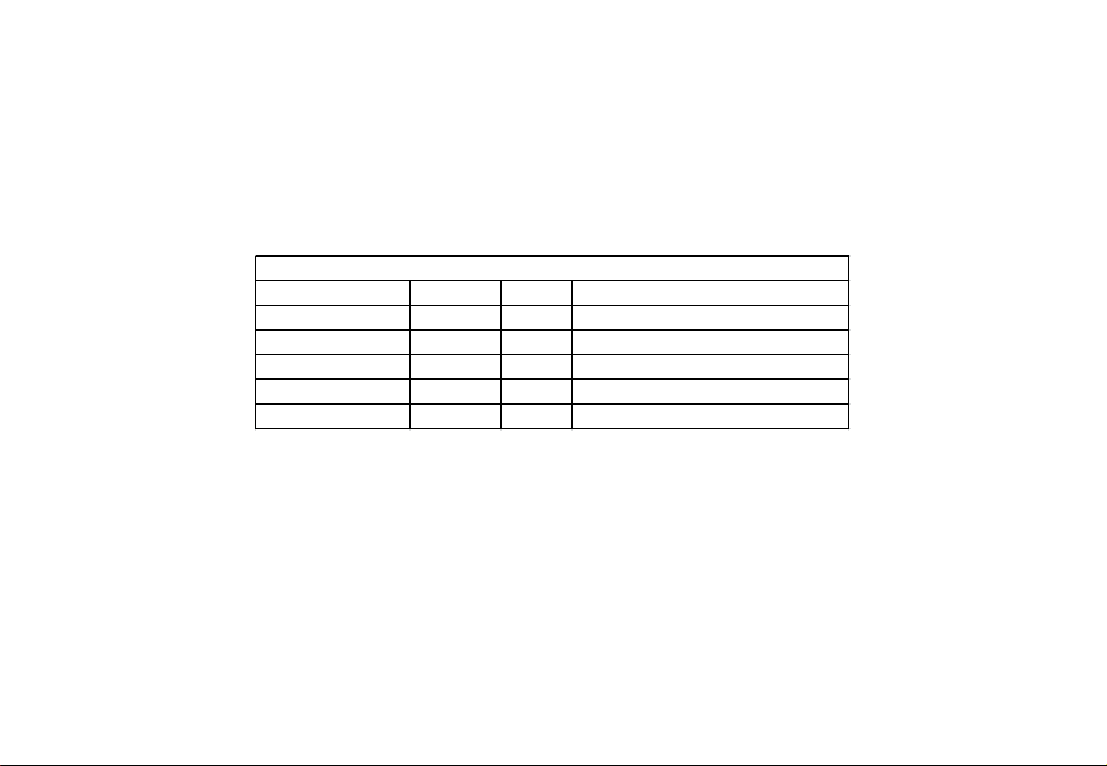
Device Packing List
Item
DC-12V Power
5PIN Adapter
User Manual
Certification
Warranty Card
Quantity Unit Remarks
Input: AC100V-240V 50Hz~60Hz
Pcs
Pcs
Set
Pcs
Pcs
1
2
1
1
1

1. Introduction .................................................................................................................................................................................................…..1
1.1 Control............................................................................................................................................................................................................1
1.2. Main and sub-control functions.........................................................................................................................................................................1
1.3. Features ........................................................................................................................................................................................................1
2. Installation Instructions ......................................................................................................................................................................................1
2.1. Interface Instructions ......................................................................................................................................................................................1
2.2. Control Key Description ......................................................................................................................................... .........................................3
2.3. Joystick Description ........................................................................................................................................................................................5
2.4. LCD display. ...................................................................................................................................................................................................6
3. Keyboard settings and queries ............................................................................................................................................................................6
3.1. Keyboard Settings ..........................................................................................................................................................................................6
3.2. Keyboard Queries ...........................................................................................................................................................................................6
4. Typical wiring diagram ................................................................................................. ......................................................................................7
5. Using Keyboard .................................................................................................................................................................................................8
5.1. Video Queries and Playback.............................................................................................................................................................................8
5.2. TV wall Control................................................................................................................................................................................................9
5.3. Camera Control.............................................................................................................................................................................................10
6. Technical Parameters .......................................................................................................................................... ............................................11
Contents

1. Introduction
KB-10 Keyboard is used to control NVR and front-end devices.
1.1 Control
Network Video Recorders are able to completely replace all the functions of remote control operations.
All operations are displayed on the LCD screen instructions.
A keyboard can simultaneously control multiple NVRs.
Control of front-end equipment: front-end equipment by NVR device control
1.2 Main and Sub-control function
Control NVR Support cascade control sub-control functions that can be cascaded with 15auxiliary keyboard.
Keyboard ID: 0 ~ 15
1.3 Features
Settings can be complete with operation on the LCD screen. This is to eliminate re-checking the manual to change the protocol.
2. Installation Instructions
2.1 Interface Instructions
RS-422
RXD
TXD
RS232
2P 3P 5P
RXD TXD GND
GND
GND
5
RS-232
12345 6
7
1

Physical Interface
NO.Connection
NVR Sub Keyboard Input
(NVR-AUX)
2Ra,RbConnect sub keyboard Ta,Tb
Ta,TbConnect NVR Serial Portto AB Port
TXD Control Indicator
RXD Control Indicator
When connected to NVR or TV wall, indicator light will blink
When cascading of keyboard, indicator light will blink
3
4
5Power Indicator (PW) When keyboard is in use, red indicator light will be on
1
NVR Keyboard Input
(NVR-CON)
6Power Adaptor Connect DC 12V power.
RS-232 232 to 485 interface, connect NVR serial port AB port
7
2
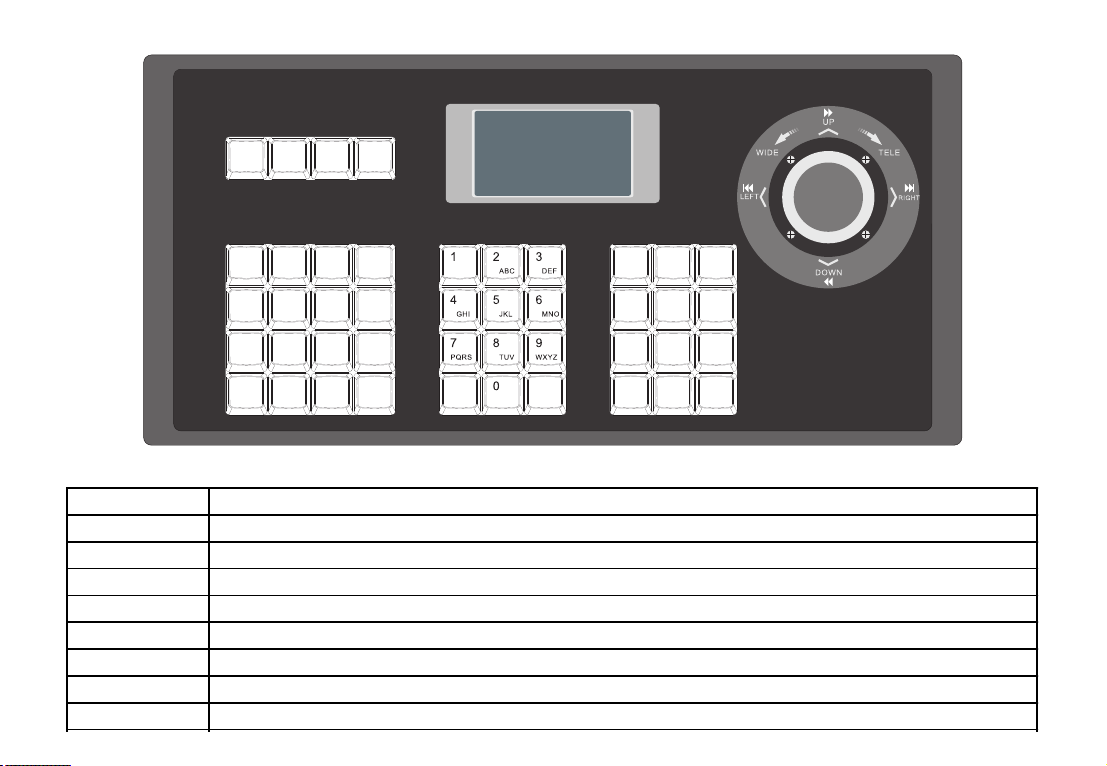
2.2 Control Key Description
NVR
PATROL
MON CAM PTZ
POW
OFF
VIDEO
OUT AUDIO MEN U
REC SHOT FULL
SCRN
VIEW LAYOUT *IME #Help
ESC SET QUERY MODE
OK WIPER LIGHT
BRIGHT-BRIGHT+
LOAD
PRESET
CLEAR
PRESET ZOOM -ZOOM+
BACK
SET
PRESET FOCU S+ FOCUS-
PLAY
NVR Control
NVR No.:
Keyboard Button Description
Description
ESC
SET
QUERY
MODE
NVR
MON
CAM
PTZ
Functions
Back to previous Menu
Long press 3 sec,enter into keyboard configure status(Default password:8888)
Keyboard parameters: device number, model number, serial number
Switch NVR or TV wall control mode, number of NVR 0-99, monitor device number, press NVR for different access control
NVR mode, enter PTZ status
Configure NVR number
TV wall mode to set TV number
TV wall mode to set camera number
3

MENU Enter PTZ mode under NVR mode.
POW OFF Off / Reboot NVR
PLAY Enter NVR main function menu
VIDEO OUT Switch NVR output:PAL, NTSC, VGA
AUDIO Configure NVR audio output
In NVR control mode, enter NVR single video playback menu; in NVR control mode, enter NVR recording control menu
Use NVR to enter Snapshot status
Full Screen
Select monitoring video on Loop switch NVR
Select monitoring video layout on Loop switch NVR
Switch IME
REC
SHOT
FULL SCRN
VIEW
LAYOUT
*IME
Clear input
Confirm
Preset high speed dome position
Clear preset of high speed dome position
Load preset position
Load auto patrol
Focus In
Focus Out
Zoom In
Zoom Out
Open aperture
BRIGHT+
ZOOM-
ZOOM+
FOCUS-
FOCUS+
PATROL
LOAD PRESET
OK
BACK
SET PRESET
CLEAR PRESET
Close aperture
BRIGHT-
Tips on shortcut, region selection, keyboard space
#HELP
On / Off Wiper
WIPER
On / Off Light
LIGHT
4

2.3 Joystick Description
Description
Joystick Operation
Up
Down
Left
Right
Turn
Clockwise
Turn
Anticlockwise
Zoom in
Zoom out
Pan right Control video forward
Pan left Control video rewind
Tilt down Control video slow motion
Tilt up Control video files quick
PTZ Control Mode NVR Control Mode
5

3.1 Keyboard Setting
3.2 Keyboard Queries
Press to query on keyboard address, model number and serial number.
QUERY
Press for 3 seconds to to enter the keyboard configuration menu ( Default password : 8888).
SET
2.4 LCD Display
All operation buttons will be display on the LCD screen. LCD screen will display if it does not receive any input, the power-saving mode will automatically
turn on after 30 seconds(brightness is reduced to a minimum).
3. Keyboard settings and queries
Settings and queries can be configured using joystick and buttons on keyboard as follows:
6

RS-422
RXD
TXD
RS232
2P 3P 5P
RXD TXD GND
GND
GND
5
RS-232
Slave Keyboard
Master Keyboard
RS-422
RXD
TXD
RS232
2P 3P 5P
RXD TXD GND
GND
GND
5
RS-232
Grounding
First NVR
Second NVR
4. Typical Wiring Diagram
7

2) During use multiple NVRs,on NVR control mode,press button, shown in the following picture.
Enter NVR device number and press to complete the action.
5. Using Keyboard
A keyboard can control multiple NVRs, operate surveillance operation for all functions.
The keyboard has two modes of operation:
NVR Control: The keyboard can operate NVR.
TV Wall Control: Set the correspondence buttons between the video source and video wall.
Keyboard mode switching: keyboard will go into default NVR control mode when power on.
5.1.Video Queries and Playback
1) Check the keyboard display panel, confirm the keyboard is under the NVR control mode, as shown in the following picture.
If not, press to switch to NVR control mode.
MODE
NVR
OK
8

3) Rotate the joystick to scroll the menu, press button, playback will pop up on the menu.
Playback: Rotate the joystick and select video then press to start video playback, as shown in the picture.
Record Queries: Rotate the joystick to select playback video source press to start video playback.
OK
OK
PLAY
5.2 TV Wall Control
Import the TV wall scheme layout and decoder channel for TVWall control usage.
1) Ensure the keyboard display is on TV wall mode as shown on figure below. If there is no TV wall mode, please press to switch to TV Wall control
mode.
MODE
9
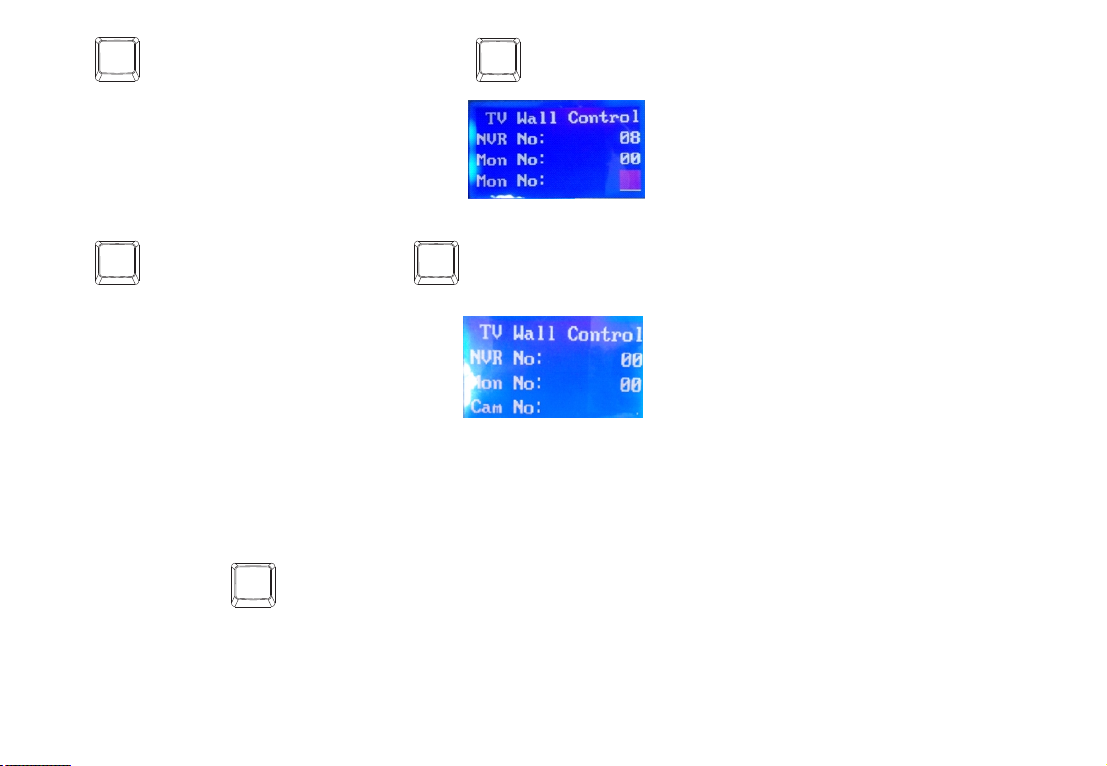
2) Press button and enter monitor device number, press to confirm.
OK
MON
3) Press button and enter camera number, press to confirm.
CAM OK
4) Users can control the camera operation by using the joystick or right keyboard region. Refer to 5.3.
5.3 Camera Control
On NVR control mode, press to operate on camera PTZ. On TV wall mode, select the camera and then operate the PTZ control.
1) Rotate the joystick to move the PTZ, the harder the movement, the faster the PTZ control will move
2) Adjust vision through joystick
3) Use left keyboard region to control button, focus, aperture, zoom and preset operation.
PTZ
10

Index
Control NVR
Control
Joystick
Com Port
LCD Display
Com Wiring
Operation
Environment
Power
Description
Multiple NVR
Joystick
RS-422 half duplex
Baud Rate: 9600
LCD: 128X64
-10~+50℃
DC-12V ±10% 50Hz
Dimension
Weight
360(L)X196(W)X110(H)
2.9kg
Power
Consumption
Max 1200m
Max 10W
6. Technical Parameters
11

20160120
Table of contents


