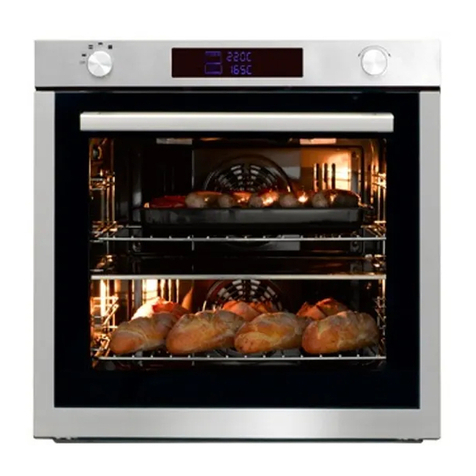
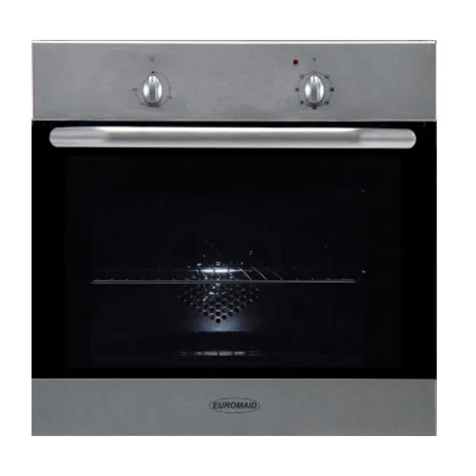
Euromaid EO610ATB User manual

PLEASE READ THE USER MANUAL CAREFULLY BEFORE USING THE UNIT
EO610ATB
60cm Built-in Oven
USER MANUAL

2
Dear Customer,
Congratulations on the purchase of your new product from Euromaid.
We recommend you please take some time to read the instruction manual
thoroughly to familiarise yourself with the functionality and operations to ensure
optimum performance of your new appliance.
Aer reading the manual, please store it in a safe and accessible location
for future reference.
Installation
The installation of your new appliance must be carried out by a qualified
installer / technician in accordance to local regulations. Please ensure all
packaging materials are disposed of correctly.
Customer Care
Our Customer Care centre is available should you wish to learn more about
your appliance in relation to how to use it to its best potential, or tips on cleaning
as well as available accessories.
Thank you.
Regards,
Euromaid Australia and New Zealand
For further details please contact our Customer Care Team
New Zealand
Ph: 09 274 8265
Australia
Ph: 1300 556 816
customer[email protected]

3
CONTENTS
Icon Type Meaning
Warning Serioud injury or death risk
Caution Injury or property damage risk
Important / note Operating the system correctly
Safety Information ....................................................................................................................
Warnings ...........................................................................................................................................
Environment Protection ...................................................................................................................
Product Overview ...................................................................................................................
Controls .............................................................................................................................................
Oven and Accessories ...................................................................................................................
Cooking Modes ..............................................................................................................................
Installation ..............................................................................................................................
Cabinet Details ..............................................................................................................................
Daily Use .................................................................................................................................
Positioning the Oven Trays & Shelves ..........................................................................................
Telescopic Rails ..............................................................................................................................
How to Use Your Oven ..................................................................................................................
Touch Control Digital Timer ..........................................................................................................
Hints & Tips .............................................................................................................................
Cooking Advice .............................................................................................................................
Cooking Guide ..............................................................................................................................
Cleaning & Maintenance .....................................................................................................
How to Remove the Oven Door ..................................................................................................
How to Dismantle the Oven Door for Cleaning .........................................................................
Replacing the Oven Lamps ..........................................................................................................
Product Information .....................................................................................................................
Manufacturer Gurantee .......................................................................................................
4 - 7
6
7
8 - 13
9
10
11
14 - 16
14
17 - 23
17
18
19
20
24 - 30
24
27
31 - 34
32
33
34
35
36 - 38

4
SAFETY INFORMATION
We recommend that you read the instructions in this owner’s manual carefully
before use for the best performance and to extend the life of your appliance.
It will provide you with all the information you need to ensure its safe installation,
use and maintenance. Retain this owner’s manual for future reference.
When handling the appliance, we recommend you always use the handles recessed
into the sides of the oven to prevent personal injury or damage to the appliance.
To maintain the eciency and safety of this appliance, we recommend that
you do the following:
• Always call the Glen Dimplex service department if there are
any faults with your appliance.
• Always use original spare parts available from Glen Dimplex.
• This appliance is designed for non-commercial, household use
and it must not be altered in any way.
Warning! This appliance is a domestic kitchen appliance suitable for indoor installation.
It is not suitable for outdoor installations such as alfresco kitchens or garages unless a
qualified, competent installer has deemed the location and installation to be suitable
& compliant.
• This appliance can only be used safely when it is correctly connected to an
ecient earthing system in compliance with current electrical safety standards.
• If the supply cord is damaged, it must be replaced by the manufacturer
or its service agent or a similarly qualified person in order to avoid a hazard.
• During use, the appliance becomes hot. Care should be taken to avoid
touching heating elements inside the oven.
Warning! Accessible parts will become hot when in use.
• To avoid burns and scalds, children should be kept away.
• This appliance is not intended for use by persons (including children) with reduced
physical, sensory or mental capabilities, or lack of experience and knowledge,
unless they have been given supervision or instruction concerning use of the
appliance by a person responsible for their safety.
• Young children should be supervised to ensure that they do not play with the appliance.
• Do not use a steam cleaner to clean the appliance.

5
SAFETY INFORMATION
Packaging items such as plastic bags, polystyrene, nails, etc. are potentially dangerous,
and therefore appropriate measures must be taken to prevent children and the disabled
from coming into contact with them.
Avoid the following:
• Touching the appliance with wet parts of the body.
• Using the appliance while barefoot.
• Improper or dangerous operation.
• Obstructing the ventilation or heat dissipation slots.
• Allowing power supply cables of other appliances
to come into contact with hot parts of the oven.
• Exposing the appliance to atmospheric agents such as rain, or direct sunlight.
• Using the oven for storage purposes.
• Using flammable liquids near the appliance.
Authorised personnel must be contracted to:
• Install the appliance according to these installation
instructions and any local requirements.
• Replace the temperature probe if it is damaged. The probe is part of thermostat.
Only use the temperature sensing probe recommended for this oven.
Glen Dimplex Service Department must be contacted:
• If in doubt about the operation of the appliance.
• If in doubt about the soundness of the appliance aer removing it from its packaging.
• If the power supply cable has been damaged or needs to be replaced.
• If the appliance requires a service.
• If you need spare parts.

6
SAFETY INFORMATION
Warnings
Warning! Do not steam clean the oven.
Warning! Do not use harsh abrasive cleaners or sharp metal
scrapers to clean the oven door glass since they can scratch
the surface, which may result inshattering of the glass.
Warning! Do notinstall the appliance behind a
decorative door in order to avoid overheating.
Warning! Only use the appliance to cook food and nothing else.
Warning! Check that the appliance has not been
damaged immediately aer it has been unpacked.
Warning! Disconnect the appliance from the electrical mains if it is not
functioning properly and before cleaning or performing maintenance.
Warning! When le unused for a long period,
unplug the appliance from the electricity mains.
Warning! Use oven gloves to place cookware in the oven or when removing it.
Warning! Always grip the oven door handle in the centre.
Warning! Make sure the knobs are in the off position when the appliance is not in use.
Warning! Glen Dimplex will not accept any liability as a result
of any damage due to incorrect installation or improper use.

7
SAFETY INFORMATION
Environment Protection
The appliance shall not be discarded together with the urban refuse and rubbish.
The materials used on this appliance marked by the symbol are recyclable.
EN - 2
Icon Type Meaning
WARNING Serious injury or death risk
RISK OF ELECTRIC SHOCK Dangerous voltage risk
SYMBOL ISO 7010 W021 :DUQLQJ5LVNRI¿UHÀDPPDEOHPDWHULDOV
CAUTION ,QMXU\RUSURSHUW\GDPDJHULVN
IMPORTANT / NOTE 2SHUDWLQJWKHV\VWHPFRUUHFWO\
'HDU&XVWRPHU
&RQJUDWXODWLRQVRQWKHSXUFKDVHRI\RXUQHZSURGXFWIURP%HOOLQJ
:HUHFRPPHQG\RXSOHDVHWDNHVRPHWLPHWRUHDGWKHLQVWUXFWLRQPDQXDOWKRURXJKO\WR
IDPLOLDULVH\RXUVHOIZLWKWKHIXQFWLRQDOLW\DQGRSHUDWLRQVWRHQVXUHRSWLPXPSHUIRUPDQFH
RI\RXUQHZDSSOLDQFH
$IWHUUHDGLQJWKHPDQXDOSOHDVHVWRUHLWLQDVDIHDQGDFFHVVLEOHORFDWLRQIRUIXWXUH
UHIHUHQFH
,QVWDOODWLRQ
7KHLQVWDOODWLRQRI\RXUQHZDSSOLDQFHPXVWEHFDUULHGRXWE\DTXDOLILHG
LQVWDOOHUWHFKQLFLDQLQDFFRUGDQFHWRORFDOUHJXODWLRQV
3OHDVHHQVXUHDOOSDFNDJLQJPDWHULDOVDUHGLVSRVHGRIFRUUHFWO\
&XVWRPHU&DUH
2XU&XVWRPHU&DUHFHQWUHLVDYDLODEOHVKRXOG\RXZLVKWROHDUQPRUHDERXW\RXU
DSSOLDQFHLQUHODWLRQWRKRZWRXVHLWWRLWVEHVWSRWHQWLDORUWLSVRQFOHDQLQJDVZHOO
DVDYDLODEOHDFFHVVRULHV
)RUIXUWKHUGHWDLOVSOHDVHFRQWDFWRXU&XVWRPHU&DUH7HDP
$XVWUDOLD
RUHPDLOFXVWRPHUFDUH#KDSOFRPDX
1HZ=HDODQG
RUHPDLOVDOHV#JOHQGLPSOH[FRQ]
7KDQN\RX
5HJDUGV
%HOOLQJ$XVWUDOLDDQG1HZ=HDODQG
EN - 4
1. SAFETY INSTRUCTIONS
&DUHIXOO\UHDGDOOLQVWUXFWLRQVEHIRUHXVLQJ\RXU
DSSOLDQFHDQGNHHSWKHPLQDFRQYHQLHQWSODFHIRU
UHIHUHQFHZKHQQHFHVVDU\
1.1 General Safety Warnings
7KLVDSSOLDQFHFDQEHXVHGE\FKLOGUHQDJHGIURP
\HDUVDQGDERYHDQGE\SHUVRQVZLWKUHGXFHG
SK\VLFDOVHQVRU\RUPHQWDOFDSDELOLWLHVRUODFN
RIH[SHULHQFHDQGNQRZOHGJHLIWKH\KDYHEHHQ
JLYHQVXSHUYLVLRQRULQVWUXFWLRQFRQFHUQLQJXVHRI
WKHDSSOLDQFHLQDVDIHZD\DQGXQGHUVWDQGWKH
KD]DUGVLQYROYHG&KLOGUHQVKRXOGQRWSOD\ZLWKWKH
DSSOLDQFH&OHDQLQJDQGXVHUPDLQWHQDQFHVKRXOG
QRWEHPDGHE\FKLOGUHQZLWKRXWVXSHUYLVLRQ
WARNING:7KHDSSOLDQFHDQGLWVDFFHVVLEOHSDUWV
EHFRPHKRWGXULQJXVH&DUHVKRXOGEHWDNHQWRDYRLG
WRXFKLQJKHDWLQJHOHPHQWV.HHSFKLOGUHQOHVVWKDQ
\HDUVRIDJHDZD\XQOHVVWKH\DUHFRQWLQXDOO\
VXSHUYLVHG
WARNING:8QDWWHQGHGFRRNLQJRQDKREZLWK
IDWRURLOFDQEHGDQJHURXVDQGPD\UHVXOWLQILUH
1(9(5WU\WRH[WLQJXLVKVXFKDILUHZLWKZDWHUEXW
VZLWFKRIIWKHDSSOLDQFHDQGFRYHUWKHIODPHZLWKDOLG
RUDILUHEODQNHW
WARNING:'DQJHURIILUH'RQRWVWRUHLWHPV
RQWKHFRRNLQJVXUIDFHV
WARNING:,IWKHVXUIDFHLVFUDFNHGVZLWFKRII
WKHDSSOLDQFHWRDYRLGWKHSRVVLELOLW\RIHOHFWULFVKRFN
(1
)RUPRGHOVZKLFKLQFRUSRUDWHDKREOLGFOHDQDQ\
VSLOODJHVRIIWKHOLGEHIRUHXVHDQGDOORZWKHFRRNHU
WRFRROEHIRUHFORVLQJWKHOLG
'RQRWRSHUDWHWKHDSSOLDQFHZLWKDQH[WHUQDOWLPHU
RUVHSDUDWHUHPRWHFRQWUROV\VWHP
WARNING: To prevent
WKHDSSOLDQFHWLSSLQJWKH
VWDELOLVLQJEUDFNHWVPXVWEH
LQVWDOOHG)RUGHWDLOHG
LQIRUPDWLRQUHIHUWRWKHDQWL
WLOWLQJNLWVHWJXLGH
'XULQJXVHWKHDSSOLDQFHZLOOJHWKRW&DUHVKRXOG
EHWDNHQWRDYRLGWRXFKLQJKHDWLQJHOHPHQWVLQVLGH
WKHRYHQ
+DQGOHVPD\EHFRPHKRWDIWHUDVKRUWSHULRGGXULQJ
XVH
'RQRWXVHKDUVKDEUDVLYHFOHDQHUVRUVFRXUHUVWR
FOHDQRYHQVXUIDFHV7KH\FDQVFUDWFKWKHVXUIDFHV
ZKLFKPD\UHVXOWLQVKDWWHULQJRIWKHGRRUJODVVRU
GDPDJHWRVXUIDFHV
'RQRWXVHVWHDPFOHDQHUVWRFOHDQWKHDSSOLDQFH
WARNING:7RDYRLGWKHSRVVLELOLW\RIHOHFWULF
VKRFNPDNHVXUHWKDWWKHDSSOLDQFHLVVZLWFKHGRII
EHIRUHUHSODFLQJWKHODPS
CAUTION:$FFHVVLEOHSDUWVPD\EHKRWZKHQ
FRRNLQJRUJULOOLQJ.HHS\RXQJFKLOGUHQDZD\IURPWKH
DSSOLDQFHZKHQLWLVLQXVH
<RXUDSSOLDQFHLVSURGXFHGLQDFFRUGDQFHZLWKDOO
DSSOLFDEOHORFDODQGLQWHUQDWLRQDOVWDQGDUGVDQG
UHJXODWLRQV
0DLQWHQDQFHDQGUHSDLUZRUNVKRXOGRQO\EHFDUULHG
RXWE\DXWKRULVHGVHUYLFHWHFKQLFLDQV,QVWDOODWLRQ
DQGUHSDLUZRUNWKDWLVFDUULHGRXWE\XQDXWKRULVHG
EN - 10
'RQRWKDQJWRZHOVGLVKFORWKVRUFORWKHVIURPWKH
DSSOLDQFHRULWVKDQGOHV
1.4 During Cleaning and Maintenance
0DNHVXUHWKDW\RXUDSSOLDQFHLVWXUQHGRIIDW
WKHPDLQVEHIRUHFDUU\LQJRXWDQ\FOHDQLQJRU
PDLQWHQDQFHRSHUDWLRQV
'RQRWUHPRYHWKHFRQWURONQREVWRFOHDQWKHFRQWURO
SDQHO
7RPDLQWDLQWKHHIILFLHQF\DQGVDIHW\RI\RXU
DSSOLDQFHZHUHFRPPHQG\RXDOZD\VXVHRULJLQDO
VSDUHSDUWVDQGWRFDOORXUDXWKRULVHGVHUYLFHDJHQWV
ZKHQQHHGHG
Disposal of your old machine
7KLVV\PERORQWKHSURGXFWRURQLWVSDFNDJLQJ
LQGLFDWHVWKDWWKLVSURGXFWVKRXOGQRWEH
WUHDWHGDVKRXVHKROGZDVWH,QVWHDGLWVKRXOG
EHKDQGHGRYHUWRWKHDSSOLFDEOHFROOHFWLRQ
SRLQWIRUWKHUHF\FOLQJRIHOHFWULFDODQG
HOHFWURQLFHTXLSPHQW%\HQVXULQJWKLVSURGXFWLV
GLVSRVHGRIFRUUHFWO\\RXZLOOKHOSSUHYHQWSRWHQWLDO
QHJDWLYHFRQVHTXHQFHVIRUWKHHQYLURQPHQWDQG
KXPDQKHDOWKZKLFKFRXOGRWKHUZLVHEHFDXVHGE\
LQDSSURSULDWHZDVWHKDQGOLQJRIWKLVSURGXFW)RUPRUH
GHWDLOHGLQIRUPDWLRQDERXWUHF\FOLQJRIWKLVSURGXFW
SOHDVHFRQWDFW\RXUORFDOFLW\RIILFH\RXUKRXVHKROG
ZDVWHGLVSRVDOVHUYLFHRUWKHUHWDLOHUZKR\RX
SXUFKDVHGWKLVSURGXFWIURP
EN - 12
ABCC
DE
2.3 Gas Connection
Assembly of gas supply and leakage
check
&RQQHFWWKHDSSOLDQFHLQDFFRUGDQFH
ZLWKDSSOLFDEOHORFDODQGLQWHUQDWLRQDO
VWDQGDUGVDQGUHJXODWLRQV)LUVWFKHFN
ZKDWW\SHRIJDVLVLQVWDOOHGRQWKHFRRNHU
7KLVLQIRUPDWLRQLVDYDLODEOHRQDVWLFNHU
RQWKHEDFNRIWKHFRRNHU<RXFDQILQG
WKHLQIRUPDWLRQUHODWHGWRDSSURSULDWHJDV
W\SHVDQGDSSURSULDWHJDVLQMHFWRUVLQ
WKHWHFKQLFDOGDWDWDEOH&KHFNWKDWWKH
IHHGLQJJDVSUHVVXUHPDWFKHVWKHYDOXHV
RQWKHWHFKQLFDOGDWDWDEOHWREHDEOHWR
JHWWKHPRVWHIILFLHQWXVHDQGWRHQVXUHWKH
PLQLPXPJDVFRQVXPSWLRQ,IWKHSUHVVXUH
of used gas is different than the values
VWDWHGRULVQRWVWDEOHLQ\RXUDUHDLWPD\
EHQHFHVVDU\WRDVVHPEOHDQDYDLODEOH
SUHVVXUHUHJXODWRURQWKHJDVLQOHW<RX
VKRXOGFRQWDFWDQDXWKRULVHGVHUYLFHFHQWUH
WRPDNHWKHVHDGMXVWPHQWV
Points that must be checked during
flexible hose assembly:
,IWKHJDVFRQQHFWLRQLVPDGHE\D
IOH[LEOHKRVHIL[HGRQWRWKHJDVLQOHWRI
WKHKRELWPXVWEHIL[HGRQE\DSLSH
FROODU
&RQQHFW\RXUDSSOLDQFHZLWKDVKRUW
DQGGXUDEOHKRVHWKDWLVDVFORVHDV
SRVVLEOHWRWKHJDVVRXUFH
7KHSHUPLWWHGPD[LPXPOHQJWKRIWKH
KRVHLVP
7KHKRVHWKDWVXSSOLHVWKHDSSOLDQFH
ZLWKJDVPXVWEHFKDQJHGRQFHD\HDU
IRU\RXUVDIHW\
7KHKRVHPXVWEHNHSWFOHDURIDUHDV
WKDWPD\KHDWXSWRWHPSHUDWXUHVRI
PRUHWKDQ&
7KHKRVHPXVWQRWEHFUDFNHGWRUQ
EHQWRUIROGHG
.HHSWKHKRVHFOHDURIVKDUSFRUQHUV
DQGREMHFWVWKDWFRXOGPRYH
%HIRUH\RXDVVHPEOHWKHFRQQHFWLRQ
\RXPXVWPDNHVXUHWKHKRVHLVQRW
GDPDJHG8VHEXEEO\ZDWHURUOHDNDJH
IOXLGVWRSHUIRUPWKHFKHFN'RQRWXVH
DQDNHGIODPHWRFKHFNIRUJDVOHDNDJH
$OOPHWDOLWHPVWKDWDUHXVHGGXULQJ
JDVFRQQHFWLRQPXVWEHIUHHIURP
UXVW&KHFNWKHH[SLU\GDWHRIDQ\
FRPSRQHQWVXVHGIRUFRQQHFWLRQ
The symbol on the product or on its packaing indicates that this product
may not be treated as household waste. Instead it should be taken to the
appropriate collection point for the recycling of electrical and electronic equipment.
By ensuring this product is disposed of correctly, you will help prevent potential negatice
consequences for the environment and human health, which could otherwise be caused
by inappropriate waste handling of this product. For more details information about
recycling of this product, please contact your local concil, your household waste
disposal service or the shop where you purchased the product.
Packaging Materials
The materials with the symbol are recyclable.
Dispose the packaging in a suitable collection containers to recycle it.

8
PRODUCT OVERVIEW
Top panel Air fry basket
Control panel Telescopic rails
Side panel Baking tray
Element Grill insert
Fan and element cover Door seal
Side racks Oven door
Chrome wire shelf Oven door handle
1
4
4
10
8
13
2
6
9
3
7
12
5
11
9
14
1 8
2 9
310
411
512
13
14
6
7
Note: Above picture is for reference only. The actual appliance maybe slightly dierent.

9
PRODUCT OVERVIEW
Controls
1Cooking mode selection knob
2Electronic clock / timer
3Cooking temperature selection knob
1 2 3

10
Oven and Accessories
There are five shelf positions in the oven. The oven is supplied with:
12x chrome wire shelf supports
21x baking tray
31x grill insert
PRODUCT OVERVIEW
1
4 5
2 3
Note: The oven comes with a so close door feature which will only operate correctly
when sucient initial force is applied when closing. Should insucient force be applied,
the door may need to be closed manually.
4
2
5
1
3
41x air fry basket
51x set telescopic rails

11
PRODUCT OVERVIEW
Cooking Modes
Grill
Directs radiant heat from the powerful upper element onto the food.
The grill function is best suited for cooking dierent cuts of meat such as
steak, chops, sausages and fish, or for making toasted sandwiches and
other quick-cooking foods. For the best results, allow the grill to preheat for
3 minutes before placing food inside. This will help to seal in the natural juices
and maintain tenderness of meats. Always grill with the oven door closed.
Maxi Grill
Directs radiant heat from the 2 powerful upper elements onto the food.
Maxi grill allows you to use the full size of the grill tray for cooking larger
meals, and will cook faster than the grill function.
Maxi grill is best suited for cooking dierent cuts of meat such as steak, chops,
sausages and fish, or for making toasted sandwiches and other quick-cooking
foods. For the best results, allow the grill to preheat for 3 minutes before placing
food inside. This will help to seal in the natural juices and maintain tenderness
of meats. Always use maxi grill with the oven door closed.
Fan Grill
Generates heat from the upper element which is circulated throughout the cavity
by the fan. This combination helps to distribute the heat more evenly onto the food,
which helps to avoid burning or overcooking. The fan grill function is ideal for larger
cuts of meat which require longer cooking times and will achieve results similar to
rotisserie cooked meat. Use the fan grill function with the oven door closed.
Bake
The oven is heated using two elements, one located at the top of the cavity and
the other below the floor of the oven. This traditional baking function achieves the
best results when cooking on a single oven shelf, to ensure even heat distribution
to the food. It is ideal for cooking single trays of biscuits, muns, cakes and roasts.

12
PRODUCT OVERVIEW
Fan Assist
The oven is heated using two elements, one located at the top of the cavity
and the other below the floor of the oven. The fan circulates the hot air around the
cavity for better heat distribution, allowing you to place food in dierent positions in
the oven to cook at the same time. It is suggested to use a maximum of two shelves
with the fan assist function and avoid using the bottom shelf to prevent overcooking
the base. Food placed on the upper shelf will cook more quickly than the lower shelf.
Fan Forced
Uses the rear element surrounding the fan to generate heat. The fan then
circulates the hot air to maintain a consistent temperature throughout the
oven cavity. This allows you to cook food in dierent areas of the oven at
the same time. Fan forced is a very versatile cooking function which can
be used for most types of cooking and baking, and will cook foods faster
and at a lower temperature than standard bake functions.
Air Fry
Delivers the benefits of a bench top Air Fryer into your built-in oven. This premium
function generates heat from the powerful upper and fan elements, which is
circulated by the fan to rapidly heat the oven cavity. The hot air ensures food is
cooked quickly and thoroughly without having to turn it, while the radiant heat
from the upper element helps to achieve the crispiest results. The Air Fry function
combined with the Euromaid Air Fry basket are ideal for oven frying your favourite
frozen foods such as chips, wedges or chicken nuggets without any oil.
Defrost
Uses the fan to circulate room temperature air around the cavity.
This function helps to defrost (thaw) dierent kinds of food before cooking.
Using the defrost function will reduce defrosting times by up to 50%.
Light
Turns on only the oven light, the light remains on when the oven is operating.

13
PRODUCT OVERVIEW
Easy Steam / Steam assisted cooking
Cooking with steam is a great addition to regular hot air or fan forced
cooking functions. Steam helps to bring out the natural flavours of food,
cooking it more evenly and retaining more nutrients and goodness.
Steam assisting cooking functions, such as Euromaid easy steam,
consistently produce juicy, succulent interiors with crispy, golden finishes.
Warning! Risk of burns or damage to the appliance.
Warning! Do not open the oven door when the Easy
Steam function is in operation, except when preheating.
Warning! Open the oven door carefully once the steam function has completed.
How to use
1Open the oven door.
2Add 150ml of water to the well on the base of the cavity while oven is cold.
3Turn the function knob to easy steam mode .
4Turn the temperature knob to select the cooking temperature between 220 and Max.
2 3 4
5Pre heat for 10 minutes or until the oven has reached the set temperature.
6Place food into the oven and cook as per recipe suggestions.
Caution! Do not refill cavity well with water during cooking or while oven is hot.
7To turn o the oven, turn the function control knob to the 12 o’clock position.
8Once the oven is cool, wipe away any excess water from the cavity well.

14
INSTALLATION
Important! Installation,
assembly and electrical
connections must be carried
out by authorised personnel.
Cabinet Details
In order to ensure that the
built-in appliance functions
properly, the cabinet containing
it must be appropriate.
The figure below gives the
dimensions of the cut-out for
installation under the counter
or in a wall cabinet unit.

15
INSTALLATION
The panels of the adjacent cabinets must be made of heat resistant material.
In particular, cabinets with a veneer exterior must be assembled with glues
which can withstand temperatures of up to 75°C.
In compliance with current safety standards, contact with the electrical
parts of the oven must not be possible once it has been installed.
All parts, which ensure the safe operation of the appliance,
must be removable only with the aid of a tool.
To fasten the oven to the cabinet, open the door of the oven and attach it by
inserting the 2 wood screws into the 2 holes located on the perimeter of the frame.
Electrical connection
• The appliance is usually supplied fitted with a power cord and 3 pin plug.
Install the cooker so that the plug is easily accessible. Plug the 3-pin plug
into a properly earthed, 15A general purpose power outlet preferably on
a separate dedicated circuit. The supply cable should be positioned so that
it does not reach a temperature of more than 75°C along its entire length.
• If the appliance is not supplied with a plug or if connecting the cable directly
to the mains, connection to the electricity supply must be made by an authorised
person in accordance with the Wiring Rules AS/NZS3000. The installation must include
a suitable isolating switch with a minimum contact opening of 3mm between the
appliance and the mains. The isolating switch should be sized according to the load
on the data label and should comply with current regulations (the earth wire should
not be interrupted by the circuit breaker).

16
Before making the connection
• Check that the switch, wiring and electrical system
can support the appliance load (see data plate);
• Check the power supply system has an ecient earthing
connection which complies with the provisions of current regulations;
• Check the power outlet or omnipoar circuit-breaker is
easily accessible once the cooker has been installed.
INSTALLATION
NL
Replacing the power supply lead
• If the supply cord or plug is damaged, it must be replaced by the manufacturer
or its service agent or a similarly qualified person in order to avoid hazard.
Warning! All electrical connections must be made by a suitably
qualified and licenced person in accordance with local regulations.
Glen Dimplex will not be held responsible for damages caused to
cabinetry due to incorrect installation.

17
DAILY USE
Positioning the Oven Trays & Shelves
• The Grill Tray or Oven Shelf can be located in any of the five height positions
in the oven. Refer to the cooking guide table for the recommended shelf position.
When fitting the trays or shelves, ensure they are fitted between the two wires that
are closest together as shown below.
• Oven Shelves have a stop so that they are not fully withdrawn by accident.
To fully remove the oven shelves, lift the front of the shelf slightly and
withdraw fully from the oven.
Note: that the Baking Tray does not have a stop position and can be fully
withdrawn without interruption, so be careful not to accidentally fully withdraw the
tray.
• Fit trays and shelves between bars as shown below.
•To remove the oven side racks, push the wire support backwards towards the rear
of the oven cavity to release from the locking pin. Once released, the side racks
can be removed by gently pulling out of the positioning holes in the oven walls,
towards the centre of the oven. To replace the side racks, repeat steps in reverse
procedure.

18
DAILY USE
Telescopic Tails
The oven may also include a set of telescopic rails which can be positioned
on dierent levelsand allow the oven racks or trays to slide in and out eortlessly.
1To un-clip the telescopic rail for cleaning or repositioning
purposes you must apply outwardpressure on the underside
of the telescopic rail to release. (Note: reverse of rail shown).
2To re-fit the telescopic rail, locate the clip into the top rail on
the shelf guide and push downward, the rail will clip into place.
3The telescopic rail is designed to support either a shelf or
grill / baking tray and can be installed on any of the shelf positions.
1 3

19
DAILY USE
How to Use Your Oven
This fan forced oven is an extremely versatile appliance that allows you to choose
easily and safely between dierent cooking modes. The various cooking modes are
selected by means of a cooking mode selection knob, located on the control panel.
To operate the oven
• Turn the cooking mode selection knob to the desired cooking
mode (explanation of cooking modes is on pages 10 to 11).
• Turn the cooking temperature selection knob to the desired
temperature (cooking guide is on page 16) or to Max if Grilling.
• The first time you use your appliance, we recommend that you set the thermostat
to the highest setting, set the cooking mode selection knob to a cooking mode
and leave the oven on for about half an hour with nothing in it and the oven door
closed. Then, open the oven door and allow the oven to cool. Any odour that may
be detected during this initial use is due to the evaporation of substances used to
protect the oven during storage.
Note: Place tray on the bottom shelf position of the oven to prevent any spillages
from dripping onto the bottom of the oven. Never place anything (including foil
and oven trays) on the bottom of the oven when it is in operation because this
could damage the enamel. Only place your cookware (dishes, trays, aluminum
foil, etc.) on the oven shelves provided with the appliance.

20
DAILY USE
Touch Control Digital Timer
This model has a digital display, 24hr clock with 3 control buttons. When the power
is connected, the screen displays 12:00 and the bar above the symbol flashes.
Setting the time when power is first connected
• To set the correct time, press the or button to advance forward or backward
until the correct time is displayed. Aer 5 seconds the time will be locked in.
Adjusting the time
• Press the function button repeatedly until the bar above flashes, then press
or button to set the time. Aer 5 seconds the time will be locked in.
Manual operation setting
• When power is first connected, the oven will be in manual operation as soon as the
time is set. Manual operation will only be cancelled if the power to the oven is switched
o or if an automatic cooking time is selected and the bar above or is flashing.
See next section on automatic setting.
Button functions
Decrease time
Increase time
Timer mode
Timer
Set cooking time
(amount of time to cook)
End cooking time
(end time for cooking)
Set the time
Table of contents
Other Euromaid Oven manuals

Euromaid
Euromaid SCNG 7531 User manual

Euromaid
Euromaid BS 5 User manual

Euromaid
Euromaid ET12 User manual

Euromaid
Euromaid ETP12XL User manual

Euromaid
Euromaid BS8 User manual

Euromaid
Euromaid EO605MTS User manual

Euromaid
Euromaid EPO617ASTB User manual

Euromaid
Euromaid GE90S User manual

Euromaid
Euromaid CDDS60 User manual

Euromaid
Euromaid PS12 User manual

Euromaid
Euromaid ETD90B User manual

Euromaid
Euromaid ETP12 User manual

Euromaid
Euromaid DS 1 User manual

Euromaid
Euromaid ES60 User manual

Euromaid
Euromaid BS6 Owner's manual

Euromaid
Euromaid EO910TS User manual

Euromaid
Euromaid BS7 Manual

Euromaid
Euromaid DS 2 Installation instructions

Euromaid
Euromaid DOSS1 User manual

Euromaid
Euromaid 1505 TI User manual