Euromex ImageFocus Plus User manual

This guide is for information purposes only and does not constitute any
commitment. If there is inconsistency between the image and the actual
product, the actual product shall govern.
Copyright © Euromex microscopen b.v. , 2019, All rights reserved.
Euromex
ImageFocus Plus
Quick start guide

1) Camera
3) PC
5)Optional c-mount
7) Standard c-mount with optional
30/30,5mm adapter for replacing eyepiece
2) USB Cable
4) Microscope
6) Standard included
23,2mm c-mount
2. Camera Installation
3.1. System configuration recommendation:
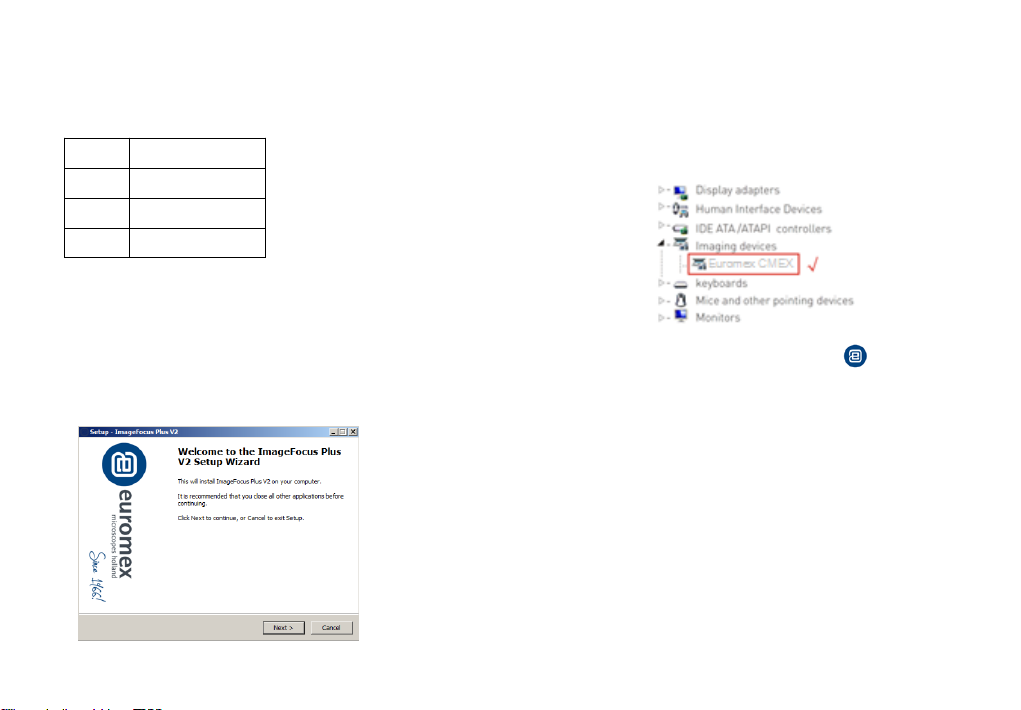
3.2. Connect the camera to the PC. Insert the USB-Stick(or CD) comes with
the camera, copy the software "ImageFocus Plus V2 Setup.exe" to the
computer. Double click on it and follow the [Next] button to finish the
installation. After [finish], a software shortcut will be created on the
desktop.
3.4. Double-click the ImageFocus Plus V2 shortcut to start the
software. When running the software, the current frame rate is displayed
in the exposure control.
3.5.The software version number, camera model and computer
configuration information will be obtained from the information in the info
menu at the top right of the software.
Note: If the camera is connected correctly, the camera device will
automatically recognize and enter the preview state when the software is
turned on. If get the “No Camera” error, it could be the camera is not
detected by the PC or the driver is not installed properly. Please go to
Device Manager to check the camera driver installation status.
-3- -4-
OS Windows 7/8/10 (64bit)
CPU Intel Core i5 or better
Memory
8GB or more
USB ports
USB3.0
3. Software Installation
3.3. Go to the Device Manager and check whether the driver is installed
properly. If there is NO YELLOW FLAG with the camera under Imaging
Devices in Device Manager, the driver is installed successfully. If there is
YELLOW FLAG, you need to reinstall the driver.
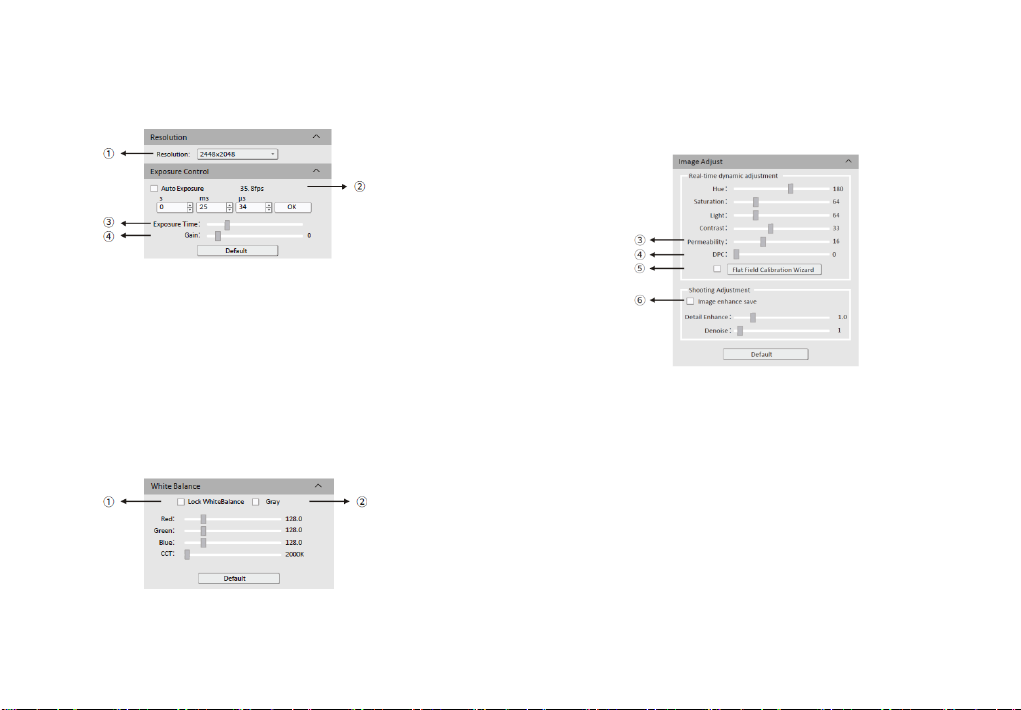
①Click the resolution drop-down box to select the working resolution.
②Display and view the live preview frame rate.
③Observe the preview screen, and select the automatic or manual
exposure setting according to the actual application requirements to obtain
the desired image intensity.
④Depending on the application requirements, adjust the gain value to
obtain the required image signal enhancement effect.
③When the preview shows a hazy effect, adjust [Permeability] to restore
the clear picture.
④When the preview image has dead pixels and color points, adjust [DPC]
the dead pixel correction function to effectively remove the dead pixels to
obtain a cleaner image.
⑤When the light source is not uniform, or the preview image has dirty
spots, use the [Flat Field Calibration Wizard] option to correct the image
default background and obtain greater uniformity.
⑥Check [Image enhance save] to perform detail enhancement and noise
reduction processing to obtain the desired image effects. This function is
only effective when image capture is saved, and real-time effect preview is
not supported.
Note: CMEX -f series cameras do not support color temperature, hue, light,
permeability and image enhancement.
4. Software Settings
4.1.Basic Settings
4.2. Image Adjustment
①Move the sample under the objective to an evenly illuminated
featureless position to set white balance, then check the option [Lock White
Balance].
This will prevent the camera from performing automatic white balance
recalculation, which would result in chromatic aberration.
②After selecting [Gray], the preview screen will turn into monochrome
mode.
-5- -6-
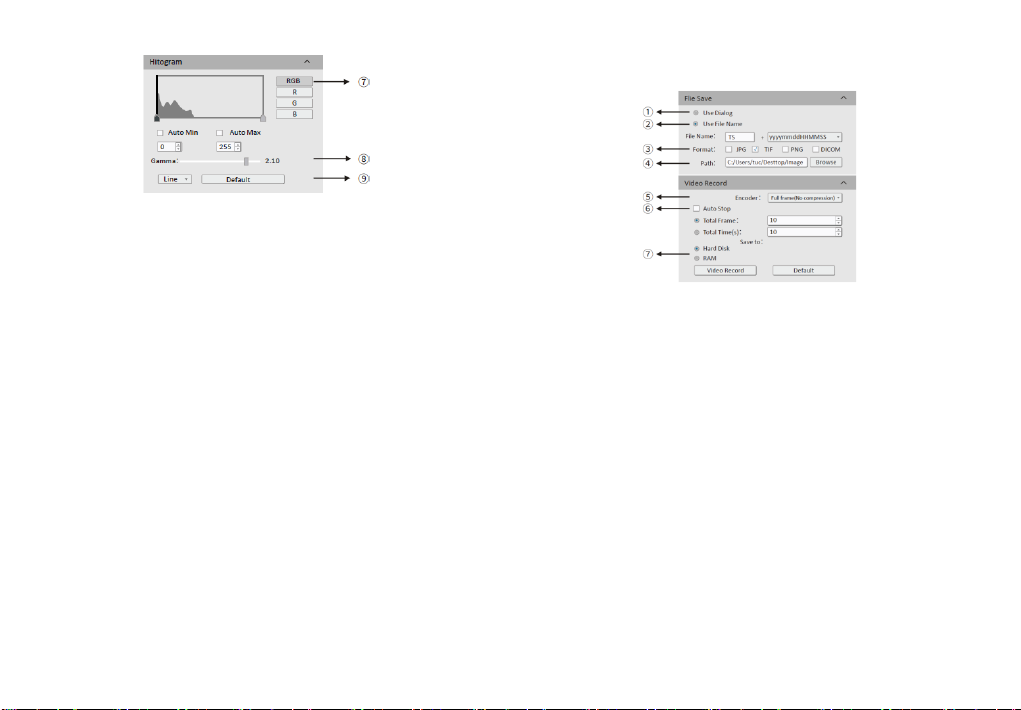
①Select [Use Dialog]: the software will pop up the Dialog to set the picture
save path, picture name and format when taking pictures.
②Select [Use File Name]: A file will be saved with the name "TS" as default,
but the name can be customized. "Customized name + time stamp" is
supported. A name can contain up to 64 bytes .
③File format: Support JPG \TIF \PNG \DICOM, default to TIF, and can be
checked simultaneously, but at least one of them must be chosen.
④Under default status, the image file shall be saved to a filefolder specified
in defined [ Path ]; user could modify the saveing path through [Browse].
⑤The video provides two encoding modes: [Compression] and [Full frame
(No compression). [Full frame (No compression)] is chosen as default.
⑥Select [Auto Stop], the recording mode is available in [Total Frame] and
[Total Time]. [Total Frame] is chosen as default. Unselect [Auto Stop] ,user
could manually click to stop the current video recording.
⑦[Hard Disk] In the process of capturing images, the function will
automatically
write the data into disk. Which is suitable for long-term shooting .
[RAM] Save the data into computer memory; after image capturing, write the
data into a disc file. Limited by the size of memory space, this mode is not
suitable for a long time capturing images .
4.3. Image capturing
⑦RGB channel selection, view the grayscale map of different channels.
⑧[Auto Min]&[Auto Max] automatically obtains the pixel values o f the
darkest and brightest intervals with even distribution. (Single channel does
not support automatic color graduation).
⑨Appropriately adjust the gamma value, change the brightness value of the
gray tone of the image, and increase the layering of a monochrome image.
-7- -8-
1.Avoid removing the lens cap in a dusty environment.
2.When removing the lens cap or mounting a lens, hold the camera face
down to prevent dust from falling on the sensor surface.
3. When the camera is not being used, the lens cap should be replaced.
4.Use a professional dust removal tool to remove any dust on the camera
optical filter. ①If dust gets on the filter, it should be removed using low
pressure air. ②For stubborn oily dust, the surface can be gently wiped using
a lint-free cotton swab dipped in ethanol.
5.If it still cannot be cleaned, contact the after-sales personnel for
assistance. The use of non-professional equipment for cleaning is prone to
lead to scratches on the filter surface.
6.Use only the original power adapter. Ensure the adapter and associated
cables are free from items that may cause damage. If the power adapter is
damaged, please contact the supplier for an immediate replacement.
-9-
6. Maintenance
5. Precautions
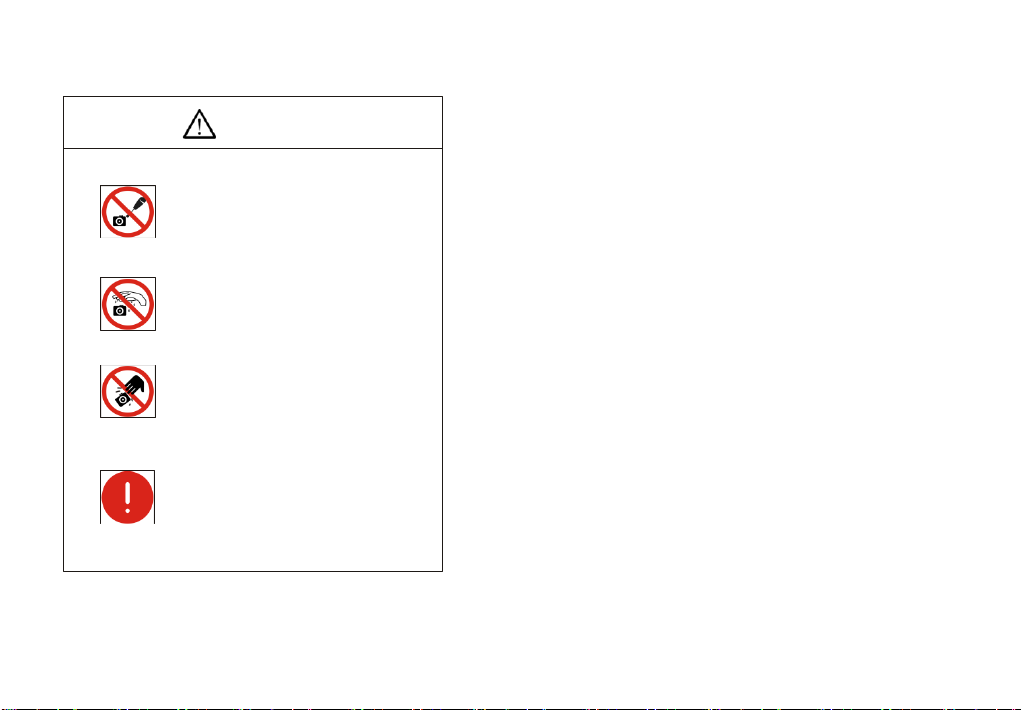
CAUTION
Do not disassemble
Do not contact water
Do not subject the
camera to physical shock
Immediate repairrequest
Do not disassemble, repair or modify on
your own. Otherwise it will cause damage to
the camera chip or devices on the circuit
board.
Avoid allowing the camera to get wet, since
this may cause the failures such as circuit
board device corrosion, burnout and so on.
Avoid physical impacts such as dropping or
banging.
Unplug the data cable, then request Euromex
Microscopes to have the authorized dealer
or sales for repair.
Note: Man-made damage including self-disassembly, water ingress, physical
shock and so on is not within the scope of warranty.
-10-
Table of contents
Other Euromex Digital Camera manuals


