manuals.online logo
Brands
  1. Home
  2. •
  3. Brands
  4. •
  5. EUROPRO
  6. •
  7. Sewing Machine
  8. •
  9. EUROPRO 8660 User manual

EUROPRO 8660 User manual

8660
Instruction Manual
Manual de Instrucciones
Model/ Modelo
EURO-PRO Operating LLC, 4400 Bois Franc, St. Laurent, Quebec H4S 1A7 Tel. 1 (800) 361-4639
94 Main Mill Street, Door 16, Plattsburgh, New York 12901 Tel. 1 (800) 361-4639
When using an electrical appliance, basic safety precautions
should always be followed, including the following:
Read all instructions before using this sewing machine.
1. An appliance should never be left unattended when plugged in.
2. Always unplug this appliance from the electric outlet
immediately after using and before cleaning.
3. Always unplug before relamping. Replace bulb with same
type rated 1 watts (11 -12 V area) or 15 watts (22 -24 V
area).
1. Do not allow to be used as a toy. Close attention is necessary
when this appliance is used by or near children.
2. Use this appliance only for its intended use as described in
this manual. Use only attachments recommended by the
manufacturer as contained in this manual.
3. Never operate this appliance if it has a damaged cord or plug,
if it is not working properly, if it has been dropped or
damaged, or dropped into water. Return the appliance to the
nearest authorized dealer or service center for examination,
repair, electrical or mechanical adjustment.
4. Never operate the appliance with any air openings block.
Keep ventilation openings of the sewing machine and foot
controller free from accumulation of lint, dust, and loose cloth.
5. Keep fingers away from all moving parts. Special care is
required around the sewing machine needle.
6. Always use the proper needle plate. The wrong plate can
cause the needle to break.
7. Do not use bent needles.
8. Do not pull or push fabric while stitching. It may deflect the
needle causing it to break.
9. Switch the sewing machine off ("O") when making any
adjustments in the needle area, such as threading needle,
changing needle, threading bobbin, or changing presser foot,
and the like.
1 .Always unplug sewing machine from the electrical outlet when
removing covers, lubricating, or when making any other user
servicing adjustments mentioned in the instruction manual.
11.Never drop or insert any object into any opening.
12.Do not use outdoors.
13.Do not operate where aerosol spray products are being used
or where oxygen is being administered.
14.To disconnect, turn all controls to the off ("O") position, then
remove plug from outlet.
15.Do not unplug by pulling on cord. To unplug, grasp the plug,
not the cord.
This sewing machine is intended for household use only.
DANGER
SAVE THESE INSTRUCTIONS
- To reduce the risk of electric shock
WARNING - To reduce the risk of burns, fire,
electric shock, or injury to persons
IMPORTANT SAFETY INSTRUCTIONS
"Cuando usar una máquina de coser eléctrica, la precaucion
basica hay que slempre se seguido, incluiendo el sequito."
"Leer todas instrucción antes de usar esa máquina de coser."
"Esta máquina de coser esta diseñada por el uso casero."
"Reducir el riesgo del choque eléctrico"
1. "Una máquina de coser debe nunca esta desligada cuando
esta enchufada. Siempre no enchufar esta máquina de coser
desde la salida eléctrica èn seguida déspues de usar y antes
de limpiar."
2. "Usar esta máquina de coser solamenta por el uso prometido
como se describe en ese manual. Usar solamente los
accessories recomendados por el fabricante que se contiene
en ese manual.
3. "Nunca operar esta máquina de coser si la cuerda o el
enchufe esta dañado, si la máquina de coser no trabaja
oportunamente, si ella ha sido caida o dañada, o caido en
aguá. Traer la máquina de coser a el comerciante autorizado o
el centro de servicio dónde es cerca de Vd, para examen,
remiedo y ajuste eléctrico o mecanico."
4. "Nunca dirigir la máquina de coser con la abertura del aire
obstruido. Quedar la abertura del aire fuera de hilas, pelo y
ropa."
5. "Nunca caer o insertar alguno objeto en alguna obertura."
6. "No usar al aire libre."
7. "No operar a dónde el productos pulverulentos están usados o
oxigeno se administra."
8. "Para desconectar, carrar todos dominados a la posición "O",
entonces quitar el enchufe desde la salida."
9. "No desenchufar por sacar sobre la cuerda. Agarrar el enchufe
pero no agarrar la cuerda."
A. La máquina de coser.
a.Reemplazar la bombilla con el tipo mísmo con 1 vatio (11 -
12 V área) o 15 vatio (22 -24 V area).
b."Tener dedos alejado desde tatas piezas motriz. Cuidado
especial esta necesltado alrededor la aguja de la máquina de
coser."
c. "Siempre usar el plato de la aguja propla. El plato falso puede
casusar la aguja romper."
d."No usar la aguja forcida."
e."No sacar o impeler la tela cuando coer. Ello puede desviar la
aguja romper."
f. "Desconectar la máquina de coser a "O" cuando hace alguno
ajuste en la area de la aguja, tal como enhebrar la aguja,
cambiar la aguja, enhebrar el carrete, o cambiar prensatelas."
g."Siempre desenchufar la máquina de coser desde la salida
cuando quitar la cubierta, lubricar o cuando ajustar."
"PELIGRO" "CONSERVAR LOS
INSTRUCCIONES DE LA
ADVERTENCIA"
INSTRUCCION DE SEGURIDAD IMPORTANTE
Congratulations
As the owner of a new sewing machine, you will
enjoy precision quality stitching on all types of fabrics, from
multiple layers of denim to delicate silks.
Your sewing machine offers the ultimate in
simplicity and ease of operation. For your safety and to fully
enjoy the many advantages and ease of operation of your
sewing machine, we recommend that you read all the
important safeguards and use and care instructions in this
instruction book.
May we suggest that before you start to use your sewing
machine, you discover the many features and advantages by
going through this instruction book, step by step, while seated
at your sewing machine.
Le felicitamos muy cordialmente por su nueva máquina de
coser.
Vd. acaba de comprar un producto de calidad que ha sido
fabricado con el máximo cuidado. Su máquina de coser es
fácil de usar pero naturalmente hay que seguir las reglas. Y
estas las hemos especificado en este manual de
instrucciones. Si Vd. les presta atención entonces realizará
sus trabajos perfectamente desde el comienzo.
Por supuesto que Vd. tendrá algunas preguntas que en este
manual no hemos podido agotar del todo. En este caso el
representante de nosotro estará siempre a su disposición,
para cualquier pregunta que Vd. pueda tener.
Le deseamos buen divertimiento con su hobby. De rienda
suelta a su máquina de coser y a su fantasía.
Estimado Cliente
EURO-PRO
EURO-PRO
Details of the machine............................................................................2/3
Accessories ...............................................................................................4
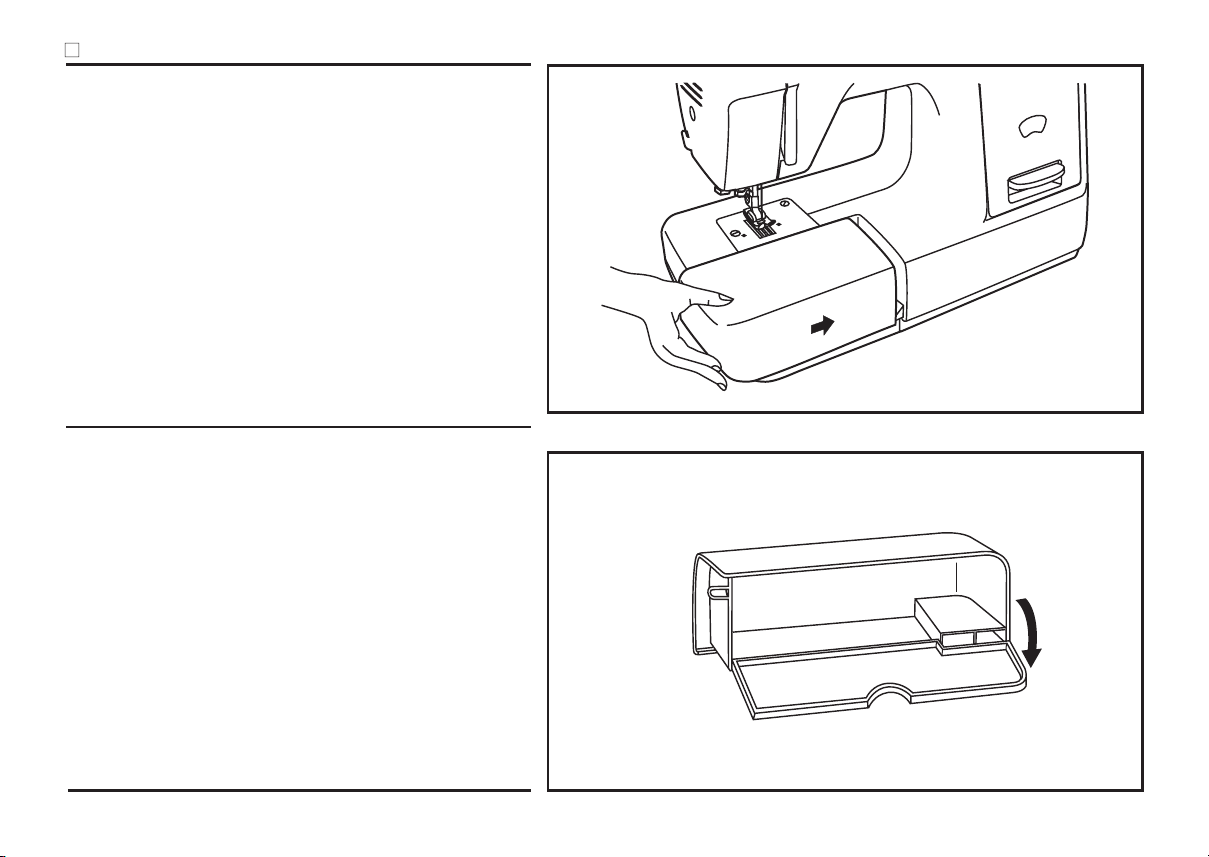
Fitting the snap-in sewing table.................................................................5
Connecting machine to power source .......................................................6
Changing the bulb .....................................................................................8
Two-step presser foot lever/ Adjusting the presser foot pressure .............9
Attaching the presser foot holder ............................................................1
Winding the bobbin..................................................................................11
Inserting bobbin.......................................................................................12
Changing the needle (System 13 / 7 5H) ..............................................13
Threading the upper thread.....................................................................14
Automatic needle threader ......................................................................15
Thread tension ........................................................................................16
Bringing up the lower thread ...................................................................17
Reverse sewing/ Removing the work/ Cutting the thread .......................18
Matching needle/ fabric/ thread ...............................................................19
How to choose your pattern ....................................................................21
Straight stitching and needle position......................................................22
Zig zag sewing ........................................................................................23
Blind hem/ lingerie stitch .........................................................................24
Overlock stitches .....................................................................................25
Sewing on buttons...................................................................................26
How to sew buttonholes ..........................................................................27
Zippers and piping...................................................................................29
Sewing with the hemmer foot ..................................................................3
3-step zig-zag..........................................................................................31
Stitch selection ........................................................................................32
Smocking stitch .......................................................................................33
Sewing with the cording foot ...................................................................34
Free motion darning ................................................................................35
Practical stitches .....................................................................................36
Darning....................................................................................................37
Attaching lace..........................................................................................38
Quilting ....................................................................................................39
Gathering.................................................................................................4
Patch work...............................................................................................41
Applique ..................................................................................................42
Monogramming and embroidering with embroidery hoop*.................43/44
The walking foot accessory .....................................................................45
Maintenance............................................................................................47
Trouble shooting guide............................................................................49
Detalles de la máquina...........................................................................2/3
...............................................................................................4
Ajusta la snap-in mesa plana corrediza ....................................................5
Conecta la máquina al fuente eléctrico .....................................................7
Cambio de la bombilla...............................................................................8
Palanca alza-prensatelas con dos escalones/
Ajuste de la presion del pie prensatla ..................................................9
Montaje del porta-pie...............................................................................1
Embobinado del hilo inferior....................................................................11
Colocación de la canilla...........................................................................12
Colocación de la aguja (Sistema 13 /7 5H) ...........................................13
Enhebrado del hilo superior ....................................................................14
Enfilador automático de aguja.................................................................15
Tensión del hilo .......................................................................................16
Subir el hilo inferior..................................................................................17
Coser hacia atrás/ Como sacar la labor de la máquina/ Cortar el hilo ....18
Guía de selección de aguja/ tejido/ hilo...................................................2
Cómo seleccionar el diseño ....................................................................21
Punto recto y posición de la aguja ..........................................................22
Zigzag......................................................................................................23
Costura invisible/ punto de lenceria ........................................................24
Puntos overlock.......................................................................................25
Coser botones .........................................................................................26
Coser ojales ............................................................................................28
Colocación de cremalleras ......................................................................29
Coser con el pie para ruedos ..................................................................3
Zig-zag cosido .........................................................................................31
Elección del punto ...................................................................................32
Punto de nido de abeja ...........................................................................33
Coser con el pie para hilo de cordon.......................................................34
Zurcido de brazo libre..............................................................................35
Puntos útiles............................................................................................36
Zurcido ....................................................................................................37
Cómo pegar encajes ...............................................................................38
Para acolchar ..........................................................................................39
Para fruncir..............................................................................................4
Patch work...............................................................................................41
Aplicación ................................................................................................42
Creación de monogramas y recamado con aro de bordar* ...............43/44
Accesorio de presión compacta opcional................................................46
Manutención de la máquina ....................................................................48
Eliminación de averías ............................................................................5
Accessorios
List of contents Indice
2
1
3
5
6
7
11
12
2
4
9
10
13
1. Thread tension dial
2.
3. Thread take-up lever
4.
5.
6. Needle plate
7. Sewing table and accessory box
8. Bobbin stopper
9.
1 .
11. Stitch display
12. Reverse sewing lever
13. Automatic threader
Presser foot pressure
Thread cutting
Presser foot
Stitch length dial
Stitch width dial
1.
2.
3.
4.
5.
6.
7.
8.
9.
1 .
11.
12.
13.
Tensión del hilo
Presiion de pie
Palanca tensora del hilo
Corta-hilos
Prensatela
Placa de la aguja
Mesa plana corrediza y coja de accesorios
Tapón de bobina
Disco de la longitud de puntada
Disco para puntada zigzag
Pantalla del modelo
Control de retroceso
Enfilador automático
Details of the machine/ Detalles de la máquina
8
3
21
23
24
16
15
17
18
19
20
22
14
14. Spool pin
15. Bobbin winder
16. Hole for second spool pin
17. Handwheel
18. Patten selector dial
19. Power switch
2 . Main plug socket
21. Bobbin thread guide
22. Upper thread guide
23. Handle
24. Presser foot lever
14. Portabobinas
15. Devanadera
16. Porta carretes extra
17. Volante
18. Botón selector de puntos
19. Interrupto de puntos
2 . Enchufe de conexión a la red
21. Guia de la devanada
22. Guia de devanadera
23. Asa de transporte
24. Palanca alza-prensatelas
Details of the machine/ Detalles de la máquina
Accessories/ Accesorios
acd
Standard accessories / Accesorios standard
006806008
b
006905008 006909008 006914008
4
g
jk
e
il
fh
m
006804008
o
006800008
q
006916008
t
006016008
u
006917008
s
006812008
r
Optional accessories / Accesorios opcional
006815008
p
006810008
n
006803008
006093009 006099008 006013009 R12373210
006014148 006008001 006084009 006117009
Standard accessories Optional accessories
a. All purpose foot
b. Zipper foot
c. Buttonhole foot
d. Button sewing foot
e.
f.
g.
h. Spool holder
i.
j.
k.
l.
m.Satin stitch foot
n. Overcasting foot
o.
p.
q.
r. Walking foot
t.
u.
L-screwdriver
Seam ripper/ brush
Oil bottle
Pack of needles (3x)
Seam guide
Bobbin (3x)
Darning plate
(These 9 accessories are not
supplied with this machine; they
are however available as
special accessories from your
local dealer.)
Hemmer foot
Cording foot
Quilting foot
s. Blind hem foot
Darning/ Embroidery foot
Gathering foot
Accesorios standard Accesorios opcional
a. Pie universal
b. Pie para cremallera
c. Pie para ojales
d. Pie para coser botones
e. Destornillador grande
f. Pincel/ Corta-ojales
g. Aceitera
h. Portacarrete
i. Agujas(3x)
j. Regla de borde
k. Canillas(3x)
l. Zurcida plancha
(Ces 9 pieds-de biche ne sont
pas fournis avec cette machine:
ils sont cependant disponibles
comme accessorires spéciaux
de votre dépositair.)
m. Pie para bordar
n. Pie overlock
o. Pie para ruedos
p. Pie para hilo de cordon
q. Pie para acolchar
r. Pie regular
s. Pie para puntada ciega
t. Pie para zurcido
u. Pie fruncidor
1
2
5
Fitting the snap-in sewing table/ Ajusta la snap-in mesa plana corrediza
Hold the snap-in sewing table horizontal, and push it in the
direction of the arrow. (1)
The inside of the snap-in sewing table can be utilized as an
accessory box.
To open, lift up at the point of the arrow. (2)
Guarda la horizontalidad de la snap-in mesa plana corrediza y
lo empuje a la dirección de saeta. (1)
El interior de la snap-in puede utilizar como una caja accesoria.
Levante la tapa desde el punto de la saeta para abrir. (2)
Caution:
Attention:
Always make sure that the machine is unplugged from power source
and the main switch is on "O" when the machine is not in use and
before inserting or removing parts.
- This machine is equipped with a polarized plug which must be used
with an appropriate electrical outlet.
- Connect the machine to a power source as illustrated (1).
- The power switch is located above the terminal box. Your machine will
not operate unless this switch is on " I ". (1)
- Sewing light turns on automatically when the main switch is on " I ".
- To start the machine, press on the foot control (3). The speed of the
machine is regulated by the amount of pressure exerted on the foot
control.
Consult a qualified electrician if in doubt as to connect machine to
power source. Unplug power cord when machine is not in use.
The appliance must be used with the foot controller 4C-316B (11 -
12 V area)/ 4C-326G or 4C-326C (22 -24 V area) manufactured by
MATSUSHITA ELECTRIC (TAIWAN) CO., LTD.
For appliance with a polarized plug (one blade is wider than the other).
To reduce the risk of electric shock, this plug is intended to fit in a
polarized outlet only one way. If it does not fit fully in the outlet, reverse
the plug. If it still does not fit, contact a qualified electrician to install the
proper outlet. Do not modify the plug in any way.
IMPORTANT NOTICE
1
6
Connecting machine to power source
23
Polarized attachment plug
Conductor
intended to be
grounded Foot control regulates the
sewing speed.
Conecte la máquina a un fuente eléctrico según la ilustración. (1)
Este dispositivo tienen un enchufe polarizado para lo que le instale el
toma apropiado.
Desenchufe la máquina del toma corriente cuando no la use.
El pedal de control puede regular la velocidad de coser. (2)
Consulte a un electricista capacitado si tiene la duda cuando usted
conecta la máquina al fuente eléctrico. Desenchufe la máquina del
toma corriente cuando no la use.
El pedal debe ser usado con el dispositivo de enchufe 4C-316B
(11 -12 V área) / 4C-326G o 4C-326C (22 -24 V área)
manufacturado por MATSUSHITA ELECTRIC (TAIWAN) CO., LTD.
Conectar el interruptor principal para la eléctrica y la luz. ("I")
Atención:
Atención:
Pedal de control
Alumbrado del trabajo
1
7
Conecta la máquina al fuente eléctrico
23
Enchufe polarizado
Descarga tierra El pedal de control puede
regular la velocidad de
coser.
1
2
8
AB
Changing the bulb/ Cambio de la bombilla
C
Caution:
Make sure to disconnect the electrical supply plug from wall outlet before
changing light bulb.
- Loosen screw (A) as illustrated. (1)
- Remove the cover (B).
- Unscrew the bulb and fit new one (C). (2)
- Replace the cover and tighten screw.
Desenchufar la maquina de la red electrical.
En caso de confusion acuda a la proxima asistencia tecnina.
- Destornillar el tornillo (A) de la parte posterior (1)
- Sacar la tapa frontal (B)
- Sacar la bombilla (C) y cambiarla por una nueva (2)
- Montar y atornillar la tapa frontal
9
Two-step presser foot lever/ Palanca alza-prensatelas con dos escalones
Adjusting the presser foot pressure/ Ajuste de la presion del pie prensatla
A
When sewing several layers or thick fabrics, the presser foot can be raised a second stage for easy
positioning of the work. (A)
Para coser ropas extremamente gruesas se puede ensanchar el pasaje de la ropa debajo del pie
subiendo la palanca del alza-prensatelas de un escalón. (A)
The presser foot pressure of the machine has ben pre-set and requires no particular readjustment
according to the type of fabric (light-or-heavy weight).
However, if you need to adjust the presser foot pressure, turn the presser adjusting screw with a
coin.
For sewing very thin fabric, loosen the pressure by turning the screw counter clockwise, and for
heavy fabric, tighten by turning it clockwise.
La presiõn del pie prensatela de la máquina ha sido preseleccionada y no requiere especiales
ajustes de acuerdo con el tipo de tejido (liviano o pesado).
Sin embargo, si se necesita ajustar la presión del pie presatela gire el tornillo de ajuste de presión
con una moneda. Para coser tela muy fina afloje la presión girando el tornillo en sentido antihorario
y para telas pesadas aumente la presión girán dolo en sentido horario.
Loosen/
Aflojar
Tighten presser
adjusting screw/
Aumenta la presi n
ajustando el tornillo
ó
3
12
4
a
b
c
d
e
f
a
e
Attaching the presser foot holder/ Montaje del porta-pie
b
g
Attention:
Turn power switch to "O" before carrying out any of the
operations below.
Raise the needle to its highest position and raise the presser foot lever.
Attach the presser foot holder (b) to the presser foot bar (a). (1)
Lower the presser foot holder (b) until the cut-out (c) is directly
above the pin (d). (2)
Raise the lever (e).
Lower the presser foot holder (b) and the presser foot (f) will engage
automatically.
Raise the presser foot.
Release the pressure foot by raising lever (e) located at the back of
the foot holder. (3)
Attach the seam guide (g) in the slot as illustrated. Adjust the
distance as required for hems, pleats, etc.... (4)
Attaching the presser foot
Removing the presser foot
Attaching the seam guide
Levantar la barra presatelas (a) e introducir el porta-pie (b) como en
la ilustración. (1)
Bajar la barra presatelas (a) hasta que la ranura (c) esté
directamente sobre la espiga (d). (2)
Empujar ligeramente la palanca (e) hacia adelante. Bajar la barra
prensatelas (a) y el pie (f) se quedará enganchado al porta-pie.
Levantar el pie. (3)
Apretar ligeramente la palanca (e) hacia adelante y entonces el pie
quedará libre.
Montar la reglar de borde (g) con cuidado, como en la ilustración.
Para dcbladillos, pliegues, etc. (4)
Cualquier manipulación debe efectuarse con el interruptor
principal a ("O")!
Montaje del pie
Desmontaje del pie
Montaje de la regla de borde
Atención:
10
1
3
Place an empty bobbin on the bobbin winder spindle.
Take the thread from the spool through the bobbin winder
tension disc. (1/2)
Wind the thread a few times by hand around the empty bobbin
in a clockwise direction. Push the bobbin to the right towards
the bobbin winding position. (3)
Press the foot control gently. The bobbin will stop winding when
it is full. Push the bobbin to the left to "sewing position" and
remove it.
When the bobbin winder spindle is in "bobbin winding" position,
the machine will not sew-the hand wheel will not turn. To start
sewing, push the bobbin winder spindle to the left (sewing
position).
Please Note
Poner la canilla vacia en el eje de la devanadera.
Tirar el hilo de la bobina y hacerlo pasar por las guias. (1/2)
Envolver el hilo a mano en la canilla en el sentido contrario de
las agujas del reloj. Poner en marcha el motor pisando el pedal.
Cuando la canilla está llena el embobinado se para
automáticamente. Cortar el hilo y sacar la canilla llena. (3)
11
Winding the bobbin/ Embobinado del hilo inferior
2
Attention:
Turn power switch to "O" before inserting or removing the bobbin.
When inserting or removing the bobbin, the needle must be fully raised.
- Open the hinged cover. (1)
- Hold the bobbin case with one hand. Insert the bobbin so that the
thread runs in a clockwise direction (arrow). (2)
- Pull the thread through the slot, down and to the left until it enters the
delivery eyelet (rectangular opening) under the tension spring. (3)
- Hold the bobbin case by the hinged latch. (4)
- Insert the bobbin case fully into the shuttle race and release the latch.
Make sure that the metal finger fits into the notch at the top of the race
cover. (5)
12
Inserting bobbin/ Colocación de la canilla
12
34
5
La aguja tiene que estar siempre arriba del todo al poner y sacar la
canilla.
Abrir la tapa con charnela. (1)
Sujetar el porta-canilla con una mano. Poner la canilla de manera que el
hilo se devane en el sentido de las agujas del reloj (flecha). (2)
Pasar el hilo por la ranura y por debajo del muelle. (3)
Introducir el porta-canilla en el carril de la lanzadera sujetando la
charnela con el pulgar y el indice. (4/5)
El interruptor principal tiene que estar a ("O").
Atención:
Cambiar la aguja con frecuencia, sobre todo cuando aparezcan las
primeras dificultades en el cosido.
Montar la aguja según la ilustración:
A. Aflojar el tornillo del porta-agujas y después de haber colocado la
aguja, apretarlo de nuevo. (1)
B. El lado plano tiene que estar hacia atrás.
C/D. Introducir la aguja hasta el tope.
El interruptor principal tiene que estar a ("O").
La aguja tiene que estar impecable. (2)
Problemas en el cosido se manifestan si:
A. La aguja está torcida
B. La aguja está despuntada
C. La punta tiene garfios
Atención:
A
B
C
D
1
2
13
AB C
Changing the needle (System 130/705H)/ Colocación de la aguja (Sistema 130/705H)
Caution:
Turn power switch to "O" before inserting or removing the needle.
Replace the needle at the first sign of thread breakage or skipped stitches.
Select the correct type and size of needle for the fabric to be sewn. Turn
the balance wheel towards you until the needle is at highest position.
Loosen the needle clamp screw (A) and tighten again after inserting the
new needle. (1)
The flat side of the needle shaft should be facing away from you (B).
Push the needle up (C) into the needle clamp as far as it will go (D).
Tighten the needle clamp screw firmly.
The sewing needle must always be straight and sharp for smooth sewing.
Replace the needle (2) if it is bent (A), blunt (B) or the point is damaged (C).
1
23456
Caution:
Before threading, turn power switch to "O".
Raise the needle bar to its highest position. Follow exactly the numbered
threading sequence illustrated below. If you skip a step or fail to properly engage
the thread in any of the thread guides, the machine will not sew properly. (1-5)
Continue to draw the thread down and into the needle bar thread guide. Insert the
thread through the eye of the needle from front to back. Leave about 1 cm (4") of
thread loose behind the needle. (6)
14
Threading the upper thread/ Enhebrado del hilo superior
Atención:
El interruptor principal tiene que estar a ("O"). Subir la prensatela.
Enhebre la aguja por las siguientes posiciones: Guiahilos de tapa superior,
regulador de tensión, muelle de tirahilos, palanca tirahilos, guiahilo del brazo,
guiahilo de la barra de aguja. (1-5)
Enhebre la aguja pasando el hilo desde el frente hacia el reverso por el ojo de la
aguja y deje más o menos 1 cm (4 pulgadas) hilo. (6)
- Raise the needle to its highest position
- Press lever (A) right down
- The threader automatically swings to the threading position (B)
- Take the thread round the hook (C)
- Take the thread in front of the needle round the hook (D) from bottom to
top
- Release lever (A)
- Pull the thread through the needle eye.
Turn power switch to "O"!
Attention:
15
A
B
D
C
A
2
1
A
C
B
D
Automatic needle threader/ Enfilador automático de aguja
- Levanta la aguja a su posición más alto.
- Apreta la palanca (A) a abajo.
- El enfilador girar automáticamente a la posición (B).
- Saca el hilo alrededor del gancho (C).
- Saca el hilo delante de la aguja alrededor del gancho (D) desde el fondo
a la cima.
- Aflojar la palanca (A).
- Poner el hilo pasando el ojo de aguja.
Girar el interrupor de energia a la posición "O"!
Atención:
Tensión del hilo inferior
Tensión del hilo superior
Para controlar la tensión del hilo inferior coger el porta-canillas lleno por
la punta del hilo y dejarlo colgado en el aire. Si la canilla no se
desenrolla mientras el porta-canillas se oscila ligeramente, entonces la
tensión es demasiado fuerte. Pero si en cambio se cae al suelo o se
devana muy facilmente, entonces la tensión es muy floja.
La tensión es correcta cuando el porta-canillas baja unos 1 cm y
después se para colgado al hilo.
Normalmente no es necesario cambiar la tensión del hill inferior.
Regulación de base de la tensión del hilo: "4".
Para aumentar la tensión del hilo superjor hay que girar el boton de
regulación hacia un número más alto.
Para aflojar la tensión del hilo se gira dicho botón hacia un número más bajo.
A.Tensión del hilo normal
B.Tensión del hilo superior muy floja
C.Tensión del hilo superior demasiado fuerte
Atención:
A
B
C
12
3
16
4
Thread tension/ Tensión del hilo
Note:
The bobbin thread tension has been adjusted at the factory and
readjustment is usually not required.
To test the bobbin thread tension, remove the bobbin case and bobbin
from the machine and hold the bobbin case suspended by the thread.
Shake it once or twice. If the tension is correct, the thread will unwind by
about an inch or two. If the tension is too tight, it will not unwind. If the
tension is too loose, the thread will unwind for more than two inches.
To adjust, turn the small screw on the side of the bobbin case. (1)
Basic thread tension setting: "4". (2)
To increase the tension, turn the dial up to a higher number. To reduce
the tension, turn the dial to a lower number.
A. Normal thread tension.
B. Thread tension too loose.
C. Thread tension too tight.
Lower thread tension
Upper thread tension

Other manuals for 8660

1

Other EUROPRO Sewing Machine manuals

EUROPRO Euro-Pro 7133 User manual

EUROPRO

EUROPRO Euro-Pro 7133 User manual

EUROPRO 6130 User manual

EUROPRO

EUROPRO 6130 User manual

EUROPRO 8135H User manual

EUROPRO

EUROPRO 8135H User manual

EUROPRO 380 User manual

EUROPRO

EUROPRO 380 User manual

EUROPRO 9025 User manual

EUROPRO

EUROPRO 9025 User manual

EUROPRO 425WC User manual

EUROPRO

EUROPRO 425WC User manual

EUROPRO 9105 User manual

EUROPRO

EUROPRO 9105 User manual

EUROPRO 1100H Dressmaker User manual

EUROPRO

EUROPRO 1100H Dressmaker User manual

EUROPRO 607H User manual

EUROPRO

EUROPRO 607H User manual

EUROPRO 9110 User manual

EUROPRO

EUROPRO 9110 User manual

EUROPRO 7100 User manual

EUROPRO

EUROPRO 7100 User manual

EUROPRO Select 762XH User manual

EUROPRO

EUROPRO Select 762XH User manual

EUROPRO 372 User manual

EUROPRO

EUROPRO 372 User manual

EUROPRO 6130A User manual

EUROPRO

EUROPRO 6130A User manual

EUROPRO 7500 User manual

EUROPRO

EUROPRO 7500 User manual

EUROPRO 8630M User manual

EUROPRO

EUROPRO 8630M User manual

EUROPRO 9110 User manual

EUROPRO

EUROPRO 9110 User manual

EUROPRO 7130 S User manual

EUROPRO

EUROPRO 7130 S User manual

EUROPRO BONUS FEET FOR SERGER EP550 H User manual

EUROPRO

EUROPRO BONUS FEET FOR SERGER EP550 H User manual

EUROPRO 385X User manual

EUROPRO

EUROPRO 385X User manual

EUROPRO 8260 User manual

EUROPRO

EUROPRO 8260 User manual

EUROPRO 8260 User manual

EUROPRO

EUROPRO 8260 User manual

EUROPRO 7535 User manual

EUROPRO

EUROPRO 7535 User manual

EUROPRO 416 User manual

EUROPRO

EUROPRO 416 User manual

Popular Sewing Machine manuals by other brands

Lervia KH 4001 operating instructions

Lervia

Lervia KH 4001 operating instructions

Duerkopp Adler 743-121 operating instructions

Duerkopp Adler

Duerkopp Adler 743-121 operating instructions

Kenmore 385. 19000 owner's manual

Kenmore

Kenmore 385. 19000 owner's manual

Pfaff 937 instruction manual

Pfaff

Pfaff 937 instruction manual

Siruba ASP-EBJ100S Instruction book and parts list

Siruba

Siruba ASP-EBJ100S Instruction book and parts list

Bernina 801 Sport instruction manual

Bernina

Bernina 801 Sport instruction manual

Singer 2502 user manual

Singer

Singer 2502 user manual

Riccar RL-340 operating instructions

Riccar

Riccar RL-340 operating instructions

Singer 9444 parts list

Singer

Singer 9444 parts list

Brother LK3-B434E parts manual

Brother

Brother LK3-B434E parts manual

Adler 168 operating instructions

Adler

Adler 168 operating instructions

Brother XL-6041 instruction manual

Brother

Brother XL-6041 instruction manual

ZOJE ZJ20U Series manual

ZOJE

ZOJE ZJ20U Series manual

Brother PC-3000 Operation manual

Brother

Brother PC-3000 Operation manual

Singer 11W8 parts list

Singer

Singer 11W8 parts list

Pfaff 937 instruction manual

Pfaff

Pfaff 937 instruction manual

Brother HS-2500 Quick setup guide

Brother

Brother HS-2500 Quick setup guide

Kenmore KENMORE 385.1915 owner's manual

Kenmore

Kenmore KENMORE 385.1915 owner's manual

manuals.online logo
manuals.online logoBrands
  • About & Mission
  • Contact us
  • Privacy Policy
  • Terms and Conditions

Copyright 2025 Manuals.Online. All Rights Reserved.