Euroscreen Thor User manual

1
Thor
Made in Sweden
1
1
2
2
3
3
4
4
A A
B B
C C
D D
SHEET 1 OF 1
DRAWN
CHECKED
QA
MFG
APPROVED
Niclas 2013-09-23
DWG NO
TITLE
SIZE
C
SCALE
REV
160
160
51 54
20
27
27
7
27 feb. 2019, 08:02
2
Thank you for choosing a Euroscreen®to be part of your AV
installation. We hope it will bring you many hours of entertainment and/or
education depending on your preference. Please read through the
manual completely before installation and usage.
Tack för att ni valt en Euroscreen® som en del i er AV-installation. Vi
hoppas den kan ge er många timmar av underhållning och/eller
utbildning, beroende på aktivitet. Läs igenom hela manualen innan
installation och användning.
CAUTION: The installation must be wired
and connected by a certified electrician!
This screen is intended to be installed indoors, in a dry environment.
Please note that most of the parts used to secure the bottom dowel during transport are parts also
needed to mount the screen. DO NOT THROW THEM AWAY!
VARNING: Installationen måste kopplas av behörig elektriker!
Denna produkt är avsedd att installeras inomhus i en torr miljö.
Vänligen notera att de flesta delar som låser bottenprofilen under transport också används till att
montera upp duken. KASTA INTE DEM!
3
10,50
6,50
10,50
6,50
13,50
6,50
90
84
15
40
75
110
137
150
4
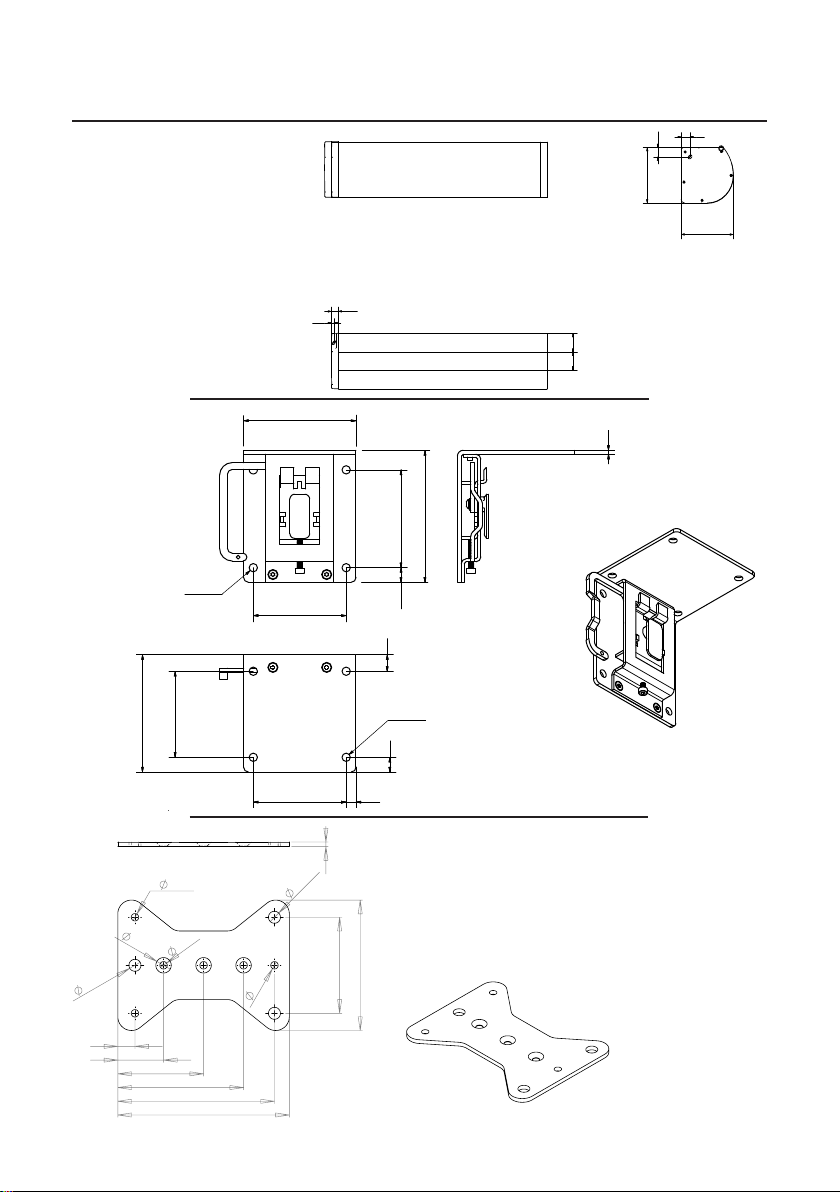
fig 3
Valhalla bracket / Valhallakonsol
Ceiling bracket / Takkonsol
1
1
2
2
3
3
4
4
A A
B B
C C
D D
SHEET 1 OF 1
DRAWN
CHECKED
QA
MFG
APPROVED
Niclas 2013-09-23
DWG NO
TITLE
SIZE
C
SCALE
REV
160
160
51 54
20
27
27
7
Overview / Översikt
1
1
2
2
3
3
4
4
A A
B B
C C
D D
SHEET
1
OF
1
DRAWN
CHECKED
QA
MFG
APPROVED
Niclas 2013-09-23
DWG NO
TITLE
SIZE
C
SCALE
REV
160
160
51 54
20
27
27
7
Case / Kassett
fig 1
95
88
10
17
100
95
120
135
115
15
15
4
Ø 8
Ø 8
fig 2
4
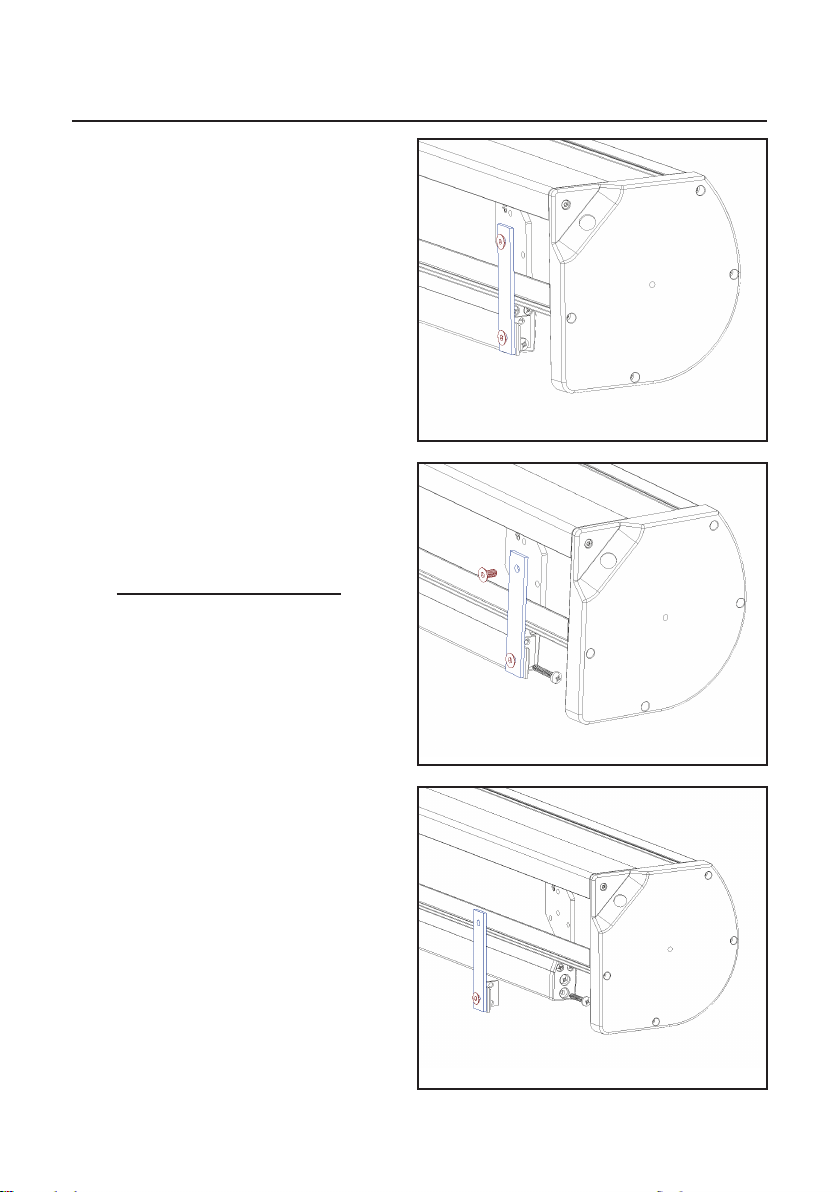
fig 4
Unpacking / Uppackning
UK: Release the dowel from the bracket by
removing the screws (fig 4 & 5).
Remove the bracket and its fastening plate
from the case (fig 6).
SE: Lossa bottenprofilen från konsolen
genom att ta bort skruvförbandet (fig 4 & 5).
Skruva av konsolen och ta ur fästplattan ur
kassettspåret (fig 5).
fig 5
fig 6

5
fig 7
fig 8
fig 9
UK:
Refit the screw in the bottom dowel (fig 7).
Twist and remove the fastening plate from the
casing (fig 8).
SE:
Skruva tillbaka skruven i bottenprofilen (fig 7).
Vrid och ta bort fästplattan från kassetten
(fig 8).
Other manuals for Thor
1


