EuroSky STB 2007 User manual

Owner’sManual
DigitalSatellite
Receiver
Common Interface
MadeinGermany

2
Contents
Contents.........................................................................................................................................2
General instructions.......................................................................................................................3
Cleaningandcare..........................................................................................................................5
Connectingthereceiver.................................................................................................................6
Control elements, frontandrearpanels........................................................................................7
Remotecontrol...............................................................................................................................8
Operatingthereceiver..................................................................................................................11
Settings.........................................................................................................................................13
Settings–receiver setup........................................................................................................14
Settings–OSD parameters...................................................................................................15
Audio- Settings.......................................................................................................................16
Settings–subtitle...................................................................................................................16
Fittings..........................................................................................................................................17
Installation–LNB configuration..............................................................................................18
Installation–transmitter search.............................................................................................20
Installation–factorysetting....................................................................................................21
Installation–downloadingsoftware.......................................................................................22
Installation–motor settings....................................................................................................24
Installation–CommonInterface(CI).....................................................................................26
Press EXITtoleavethemenus...................................................................................................26
Channel list.............................................................................................................................27
Channel list–assort manually..............................................................................................27
Channel list–edit favourites.................................................................................................27
Channel list–erasesatellites.................................................................................................28
Timer.............................................................................................................................................29
Timer–Sleep-Timer...............................................................................................................29
Timer–recordtimer...............................................................................................................30
Information....................................................................................................................................31
Video text......................................................................................................................................31
EPG–ElectronicProgrammeGuide...........................................................................................32
Audiolanguageoftheaccompanying audio...............................................................................32
DOLBYDIGITAL- AC 3mode(Option)......................................................................................32
Using serial interface....................................................................................................................32
Solvingproblems..........................................................................................................................33
Makeacontricution toprotectourenvironment..........................................................................34
Technical data..............................................................................................................................35

3
General instructions
Warranty
The periodofguarantee startswhenbuyingthedevice.Pleaseverifytheexactdatebye.g.
salescheck,deliverynoteorinvoice.Storethecomponentscarefully.Ourwarrantyrefersto
ourtermsvalidat thetimewhenbuyingthereceiver. Incaseyou desireservicepleasetakeor
sendtheunitin toyour specializeddealer.
The unit islabelled withtheCE-signandthereforeconformswiththegeneral requirementsof
theEuropean guideline89/336EWGconcerning electromagneticsecurity.
Dumping hintforpackaging
Packagingandpackagingresourcearerecycableandshouldprincipallybeadded torecycle.
Packagingandwrappingmaterialse.g.foilsarenotoysand shouldneverbeavailablefor
children.

4
Safety Instructions
Beforeinstalling yourdigital satellitereceiver, allsecurityand operatinginstructionsshouldbe
read carefully.TheUser’sManualshouldberetained for futurereference.
All operating and using instructionsshouldbefollowed.
Neverallowchildren tooperatethiselectricaldevicewithout supervisor.
ENVIRONMENTAL CONDITIONS
Protect thereceiveragainst humidity,heat andcold. Allow10cmspacearoundthereceiverfor
sufficientventilation. Donot coverthereceiver’sventilation openingswithitemslike
newspapers, tablecloths, curtains,etc..
Donotplaceanyobjectsfilled withliquids,suchasvases,onthesatellite-receiver.
Takecarethatnoforeignbodiesorliquidsaregettingintothedevice.
Donotexposetheset-top-box (receiver)todripping orsplashingliquids.
CONNECTINGTOANTENNA
Beforeconnectingtothepowersupplythereceivermustbecabled completely.
Attention: Thetotal current consumption of alldevices(LNB,multiswitch, …) connected tothe
IF-Inputmustnotexceed300mA. Theconnected antennamustbegroundedcorrectly.
PleasenotetheVDEprescriptions.
CONNECTINGTOMAINSSUPPLY(SAFETYFEATURE!)
Connectthemainscabletoawellreachablemainssupplysocket230V~50Hzonly. Donot
tilt, donot usedisproportionatepoweranddonot damagethereceiver’spower socket and its
electrical connectionswhenconnectingthepower cord.Ifthepowercordshouldfailtofit,
contact your supplier.
FAILURE
Ifthepower cordorthepower socket oritselectrical connection isdamaged,immediately
unplug themainscablefrom themainssupplysocket. Donottrytoopen or repairthereceiver
on yourown!Servicemust becarried outonlybyexpertsataproper servicecentre.
Ifreplacementpartsarerequired,onlyoriginal componentsareallowed touse. Theuseof
unauthorised componentsmay result inriskoffireand electricshock.
Imageinterfacesbyprogrammeswithafrequencyof approx.12480MHz(SAT.1, ProSieben,
Kabel1etc.) can possiblybecaused bycellularphones,which arelocated nearthereceiver
or theantennacabel.Ifsothedistancebetweenreceiver andtelephoneshouldbeenlarged
until theproblemsstoptoemerge.

5
Cleaningand care
Beforecleaning,unplug thedevicefromthepower supply.
For cleaningthecasing,pleaseuseasoft,dampcloth. Donotuseany washing-upliquidsthat
affect thecasing. Donotspray acleanertowardsthereceiver
PLACEMENT
Intouchwithcertainfurnituresurfacesitmay happen that thereceiver’srubber feetmay rub
off.You shouldplacethedeviceon aproperundergroundthatisstableandnoteasily
inflammatory. Otherwisethereceivermay fallandcauseseriousinjurytopeopleandserious
damagestothedevice.
Donotusethisproductnearwater(e.g.bathtube,washbowl,…).

6
Connecting the receiver
Foroperating thereceiver pleasefollow thedescribed stepsfor connectingthereceiver. The
corresponding printingisattached atthereceiver’srearpanel (see drawing onpage7):
TV
(4)
Connectthesupplied SCARTcablebetweenthemainSCARTsocket on the
TV andtheTV SCARTsocketon thereceiver.
IF-INPUT
DIGITAL
(2)
Connectthecoaxialcablefrom theLNB of yoursatelliteantennawiththeIF-
INPUTDIGITALconnectoron thereceiver’srear.
Attention: Incaseofwarning“Short circuitor congestion atantennaentry”
thereceiver shouldimmediatelybedisconnected from thepower supply
systemuntil theproblem issolved.Inthiscasethereisacircuitin theLNB
cabel or intheLNBitself.
AUDIOL/R
(3)
Ifyou wanttoconnectastereo system,pleaseuseastereo- cinch cable
andconnect it totheAUDIOL/R RCA-cinchoutputsatthereceiver’srear.
Pleasetakecarenot tomixleftandright channel (L:Leftaudiooutput, R:
Rightaudiooutput).
VCR
(7)
Hereyou can connectavideo cassetterecorder (VCR)viaafurther SCART
cable(notsupplied!). IftheVCRisswitched toplayback-mode,thesignals
from theVCR aredirected throughthereceiver towardstheTV (Loop
Through function).Ifthisfunctionisnot working,youcan forcetheLoop
RS232
(5)
ForusingsamePC-based functionsofthissatellitereceiver (e.g. software
update), youcanconnect aPC tothereceiver’sRS232-port.
230V 50Hz
23 Wmax.
(6)
Connectthepower cordtothepowersocketof thereceiver andthe230V~
power supplysocket (keeptheprevioussafetyandimportant instructions!).
Afterconnectingthereceivertothepower supplythereceiverisinstandby-
mode(display:-).
DIGITAL
OUT
(8)
The receiverownsan opticalport fortheDOLBYDIGITALsignal.Should
yourhi-fisystemownthecorresponding access you can connecttheport
DOLBYDIGITAL

7
Controlelements, front and rearpanels
Frontpanel
14-digit7segment LED display (optionally);showschannel number.
4digit LED DisplayLED diode
-red
Receiverisinstandbymode.
Channel numbergreenReceiverisinpoweronmode.
rEC. Timerrecordactive
FAIL LNB short cut
2IF Input Digital –Connector forLNB
3AUDIOL/R Cinchportsfor connectingthereceiver toahi-fisystem
4TV-Scartport forconnectingtotheTV
5RS232interfacefor connectingtoaPC in ordertousefurtherPC-based functionsof
thereceiver
6Powersocket for connectingthereceivertothepower supplyviathePowercord.
7VCR-Scartport for connectingtothevideo recorder
8Optical exitport fort heDOLBY DIGITALsignal
9Common Interfaceslot

8
Remote control
ON-/OFF-Key: Switchesreceiverin“Standby”or “Power On”mode
Mute:Turnssoundon/off
0-9 Toselect channelsandinputchannelnumbers.
InMenu: Inputof numericparameters(frequency,etc.)
EPG/I displaysElectronicProgrammeGuide(EPG)
LIST displayschannellist
VOL ► volumecontrol
Inmenu: changeparametersor switchlists
CH st switchesbetween channels
Inmenu: selectsmenulike
SWAP Activateslastselected channel.
Inmenuchangeslistsand replacesprogrammes
OK Inmenu: Opens,confirmsormodifiescurrently
selecteditem
EXIT leavecurrentmenu or OSD (On ScreenDisplay)
MENU activatesmainmenu
TV switchesbetween TVandRADIOmode.
RADIO switchesbetween RADIOandTVmode
Redbutton movesthecursor inthemenuvideo andaudio
downwards
Greenbutton Nofunction
Yellowbutton Openstheinformation menu
Bluebutton turnsthevideo text on
F1 Openstheaudiomenu
F2 Opensthesleep-timermenu

9
Howto insert batteries
Open thecoverat thetop of therearsideoftheremotecontrol.
InserttwoAAAtypebatteries(1.5V) .
Attention: Takecareof appropriate+/-polarity!
Note:
Iftheoperationalrangeoftheremotecontrol isgettingsmaller,itindicatesthat thebatteries
arealmost consumed. Replacealwaysbothbatteriestogether.
Caution:
Donotheat, disassembleor rechargethebatteries.
Consumed batteriesarenot allowedtobedisposed indomesticrefuse.
They must besuppliedtoafacility,collecting anddisposing exhaustedbatteriesaccordingto
theEU environmentalprotection rules.
10
Willkommen
Menüsprache[1/8]
Deutsch
English
Franais
e
Türke
ština
ç
Italiano
Polski
ç
Willkommen
Land[1/9]
Deutschland
Österreich
Frankreich
Spanien
Italien
Schweiz
Polen
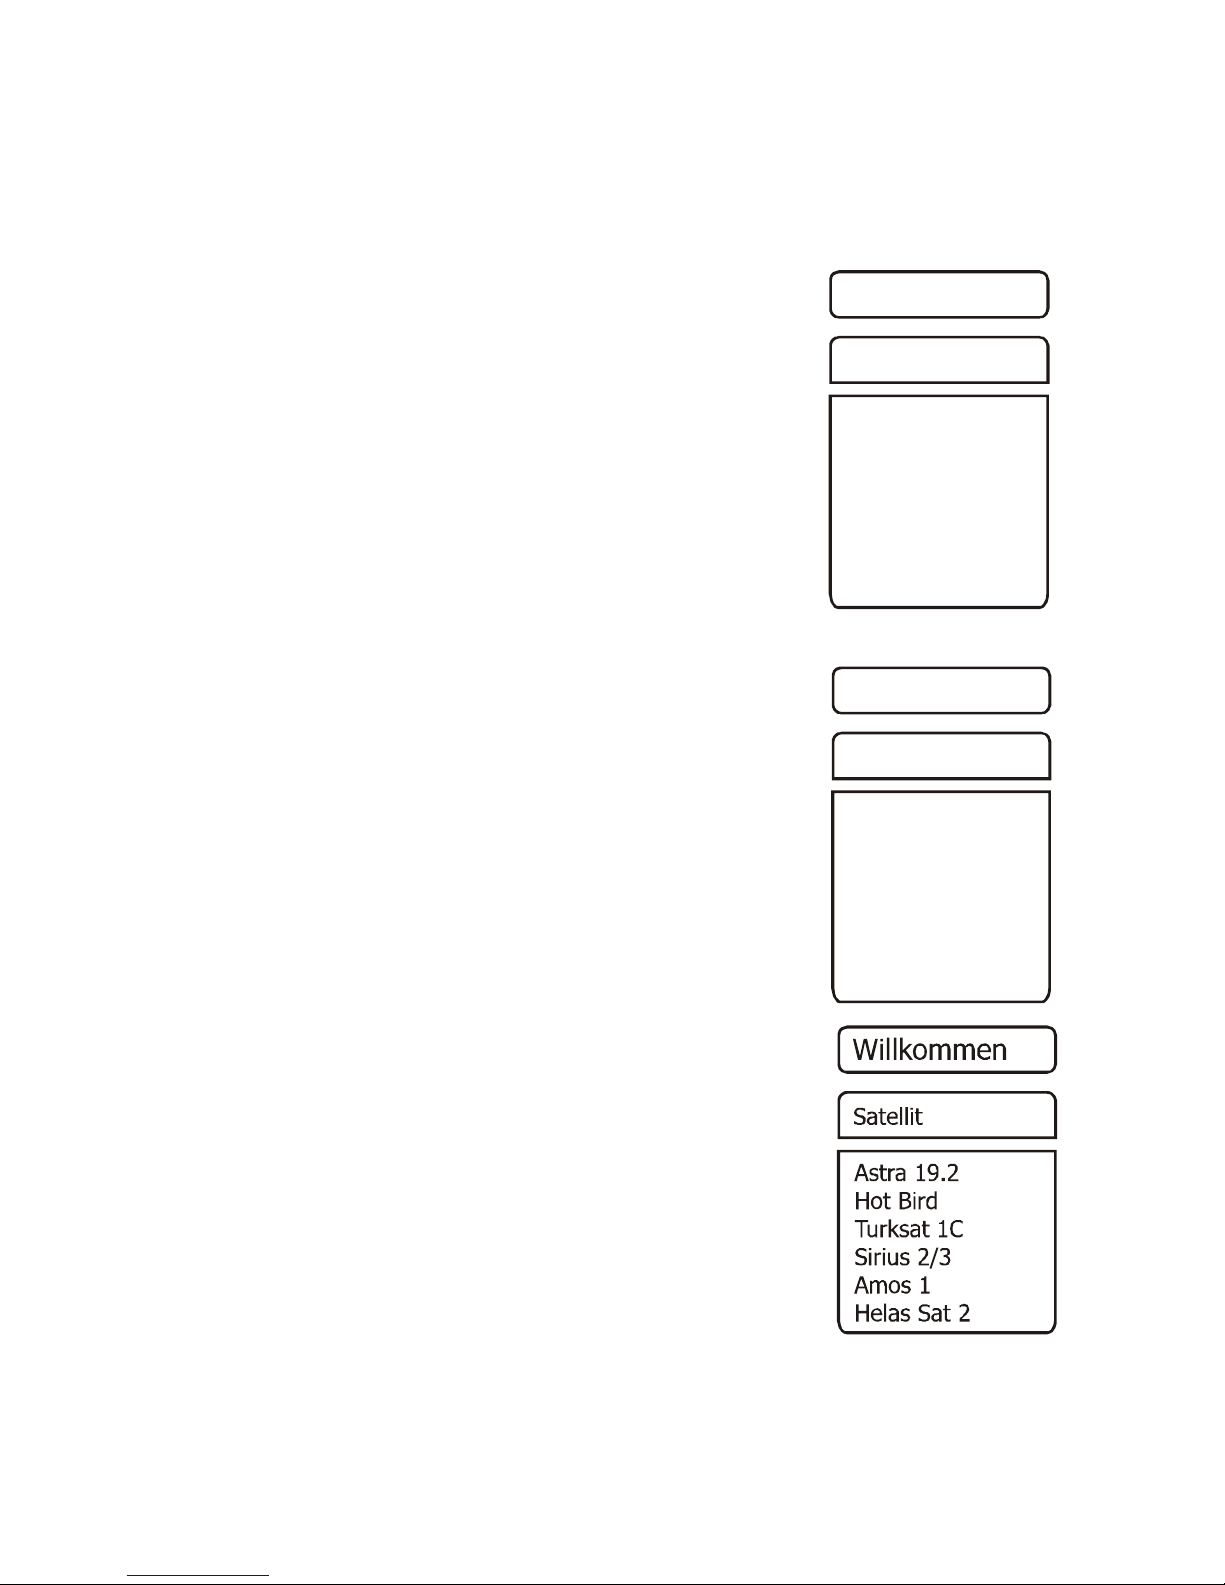
Initial installation
Afterreadingthesecuritytipsandfinishingtheactionsexplainedinthe chapter“connecting
thereceiver” linktheunittothepowersupplysystem.Byusingthereceiverforthefirsttime
the“welcome” display oftheinstallation assistantappears.Withitshelpyou can carryoutthe
mostimportantinstallationsinaveryeasyway.
Languageofthemenu
Inthefirststep oftheinstallation pleaseselectthelanguageofall
menusbyusingCH s or CH t andconfirmby OK.
Country
Inthenextstep selectthecountry.Thereforepress CH st and
then OK.Press EXITtogettothefirstinstallationstep again.Here
youcan correctpossiblemistakes.
Tip: Thechoiceofthecountryaffectsthesorting ofthechannel list.
Satellite
Inthelaststep pleaseselectthesatellitewhichshouldbelisted in
thefirstplacepressingCH s orCH t andendtheinstallation with
OK.A correctioncanbecarried outbypressing EXIT.
Tip: If you don´t completetheinstallation assistant (e.g. becauseof
power failure)or thereceiverissetbackintotheinitial status,it
startswiththewelcomedisplay again.
IfyouusetheDiSEqC switcherthepreinstalled configuration inthe
menu“Installation LNB-Konfiguration” (configuration) shouldbe
adaptedcorrespondingtoyour…

11
Operatingthe receiver
ON/OFF
Youcanswitchthereceiver on bypressing; OK, CH sor CHtorwithoneofthe
numberbuttons. Thelastactivatedchannel willbedisplayed(e.g.0015).
The digital receiverisswitched inStandbymodebypressing .
Tip: Onlybypullingthepowerplugyoucan disconnectthereceiver from thepowersupply
system.
Choosing themodeofoperation
Youcanchoosebetweentheoperation modeTV (TV channels)and RADIO(radiochannels)
bypressingTVorRADIO.
Volume control muting
Pleasenoticethatyoucan´tchangethevolumeduring thereceiverisinmenu. Bypressing
VOL ►or VOL .Afterwardsyoucan see avolumecontrolscaleon thescreen.
Tip: volumechangesregulatethesignalsattheTV, VCR andAUDIOLR portsofthe
receiver.
Bypressing the button youcan totallyswitchthevolumeoff. Toswitchvolumeon press the
button again.
Choosing theprogramme
1.Normalswitching
Tochangetheprogrammesstepwisepress thebuttonsCH •or CH •.Inorderto
switchtheprogrammesquickerholdthebuttonspressed accordinglylonger.
2.Switchingbydirectintake
One-ormoredigit programmenumberscanbeentered bytyping1-0on theremote
control andenteringOK.Programmeplacesnotprogrammed willbeignored.
3.Choosingprogrammesfrom thechannel list
Bypressing theLISTbuttonthelastactivatedchannel listor thefavouriteslistis
shown. Browsethechannel list bypressingVOL ►. Bypressing CH•orCH •
choosetheprogrammeyou wishandpress OK then.

12
Afterpressing LIST thefollowingmenu appears:
Favoritenliste(list offavourites): your personal listoffavourite
programmes
Radioliste(radiolist): listof thestored radioprogrammes
TV-Liste(TVlist):list ofthestored TVprogrammes
Alphabet: listofthestoredTVor RADIOprogrammesin alphabetical order.
Choosethefavouredlistbypressing CH sorCH t andactivateit by pressingOK.
Afterwardsyoucanchoosetheprogrammewith CH s orCH t andrepeat OK.
Inthealphabetlisttheprogrammesaresorted alphabetically.Inordertosearchfora
program switchintothelistwithlettersbypressingSWAP. Choosethe firstletterofthe
program byCH st and VOL ► andthen press OK. Nowyoucansee thesitewiththe
channel listwheretheprogramswiththecorrespondinginitial letterarestored.Bypressing
SWAP youchangeintothechannel listagainandcan nowchoosethe programmeyou
have searched forbypressingCH st and OK.
4.Changefromcurrent programme to theprevious:
Yourreceiverremembersthepreviousactivatedprogramme:
- Bypressing SWAP youcan changefrom thecurrent tothepreviousprogramme
- Bypressing SWAP againchangetothecurrentprogramme
Everytimeyouchangetheprogrammethetitleandbroadcastingtime ofthecurrentandthe
followingprogrammearefadedin.Atthescaleofprogression belowtheprogrammenumber
youcan see thetemporalprogress ofthecurrentbroadcasting.Youcanalsochoosethis
information bypressingOK.
13
Settings
Inthesettingsmenu (Einstellungen) theinitial functionabilityofthereceiverisfixed.
Byconnectingthereceiverwiththestored settingstoafunctionable,digitallyableASTRA-
satellitedish therecipienceofASTRA programmesisimmediatelypossible.Merelythe
derivationofthelocal timehaseventuallytobecorrected inordertosee therightdisplayed
timeandbroadcastingtime.
Tip:
The differentpossibilitiestohandleareexplainedintheflashonthelower screen brink.
Bypressing VOL ► youcan changethesettings.Leavingthemenu(EXITbutton)you´ll be
asked tostoretheundertaken settings(Yes/Ja)ortokeeptheprestoredsettings(No/Nein).
PleasechooseoneofthepossibilitiesbypressingVOL ► andconfirmitbytheOKbutton.
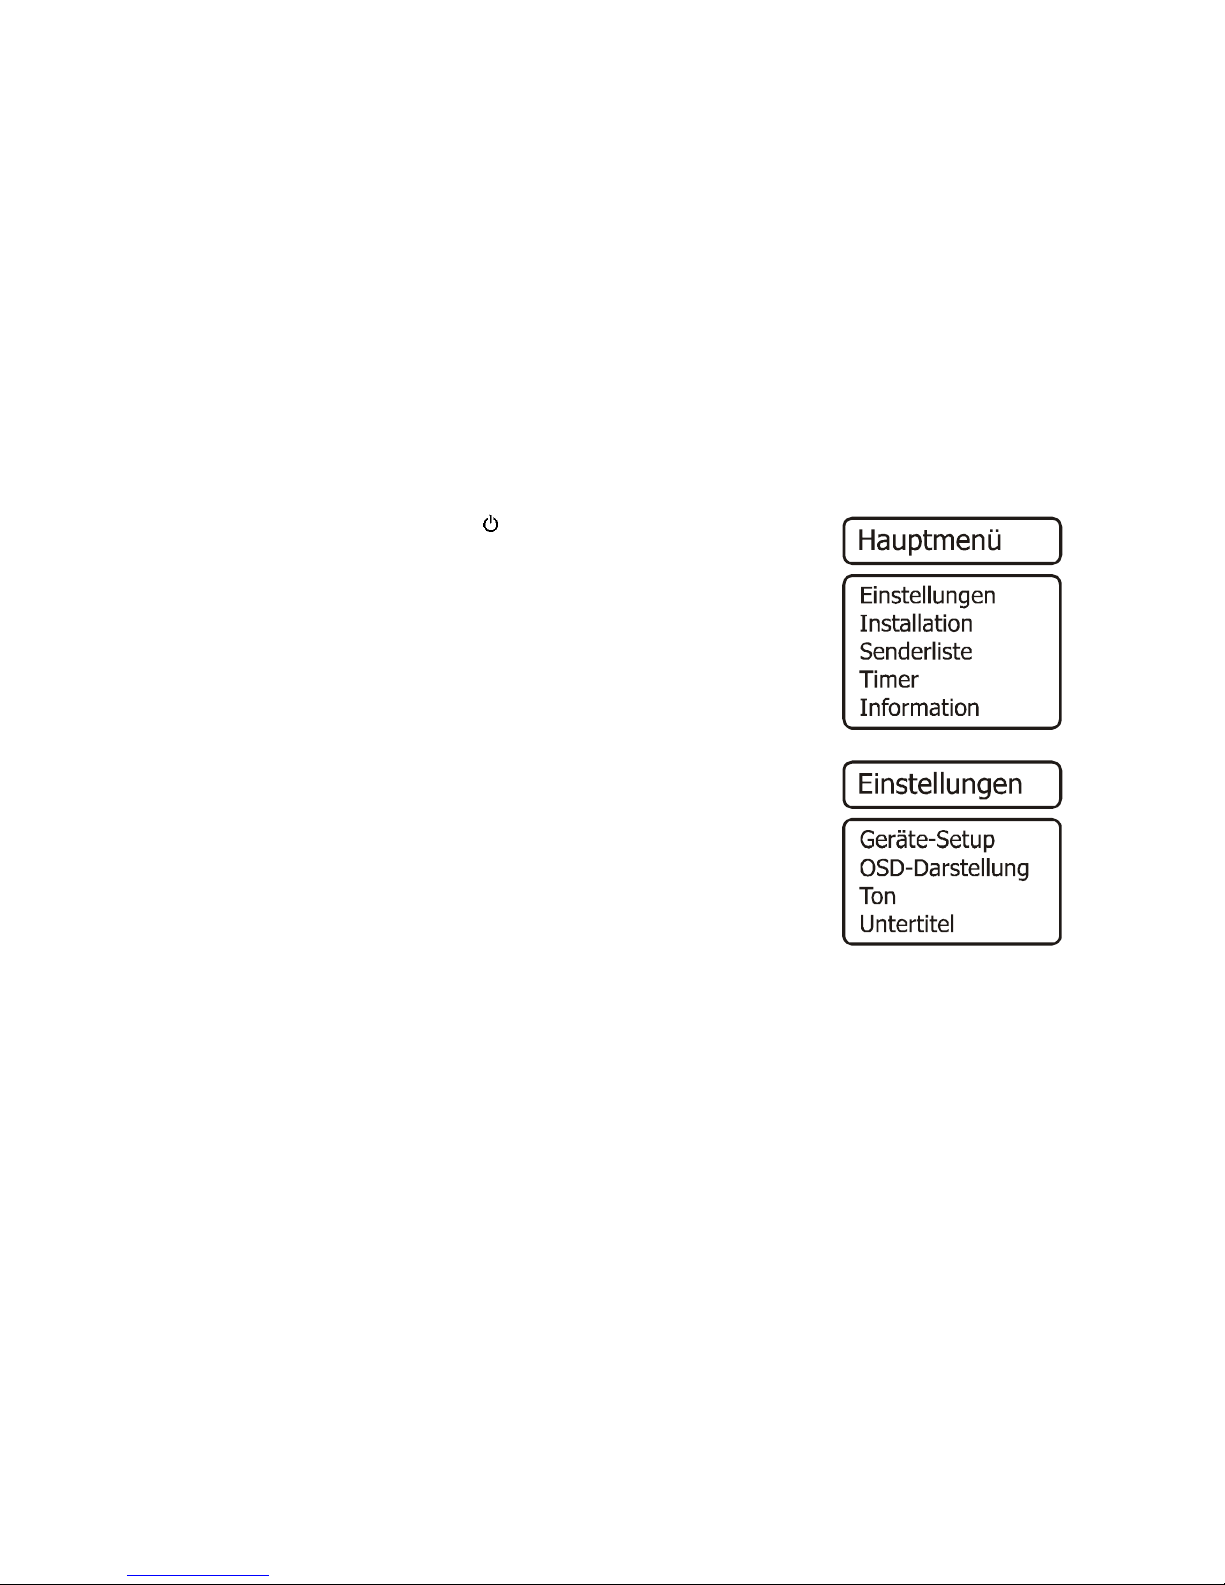
Turnthereceiveronbypressing.
Press theMENU button.
Main menuisdisplayed:
The first line Einstellungen ismarked.
Press the OK button.
The followingmenuisdisplayed:
ChoosebypressingCH st andconfirmwith OK.

14
Settings – receiversetup
1) SCARTexit
ToadjusttoyourTVtheoutputsignal (FBAS, RGB[Option], YUV or Y/C)fortheSCART
socketcanbechosenbypressing VOL ►.
2) Local time
Afterturningthereceiveronforthefirsttimeyou shouldsetthederivationbetweenthe
local timeandthereceivedGMTtimebypressing VOL ►.ForCentral Europethe
followingderivationsarevalid:wintertime:+1.00Std.andsummertime:+2.00Std.This
settingshave tobeupdated after eachsummertimeshift.
3) Choiseof themenu language
Chooseyourlanguagebypressing VOL ►.
4)Broadcasting size
Toadjusttoyour TVyou can choosethesize(4:3,16:9)bypressing VOL ►.
5)Alignment
Bypressing VOL ► theSCART outputsignal exitmodeischosen dependingon the
signal size:pan & scan,letterbox,pillarbox or center.
Press EXIT toleavethemenu.Tostoretheundertaken modificationschoose(Yes/Ja)by
pressingVOL ►.Tokeeptheprevioussettings(No/Nein). Confirmbypressingthe OK
button.

15
Settings – OSD parameters
Move thecursorin the Installation menuby CH st tothe OSD Darstellung (OSDdisplay)
lineandpress OK. Thefollowingmenu appears:
1)OSDtransparancy:
Bypressing VOL ► thetransparancyofthe OSD display can beset.
2) Flashperiod:
WithVOL ► youcan choosetheflashperiodoftheprogrammeinformation shownat
switching betweenthechannels(1-10seconds).
3)OSDcolour:
Bypressing VOL ► youcan choosethecolouroftheOSDdisplay.
Press EXIT toleavethemenu.Tostoretheundertaken modificationschoose(Yes/Ja)by
pressingVOL ►.Tokeeptheprevioussettings(No/Nein). Confirmbypressingthe OK
button.
16
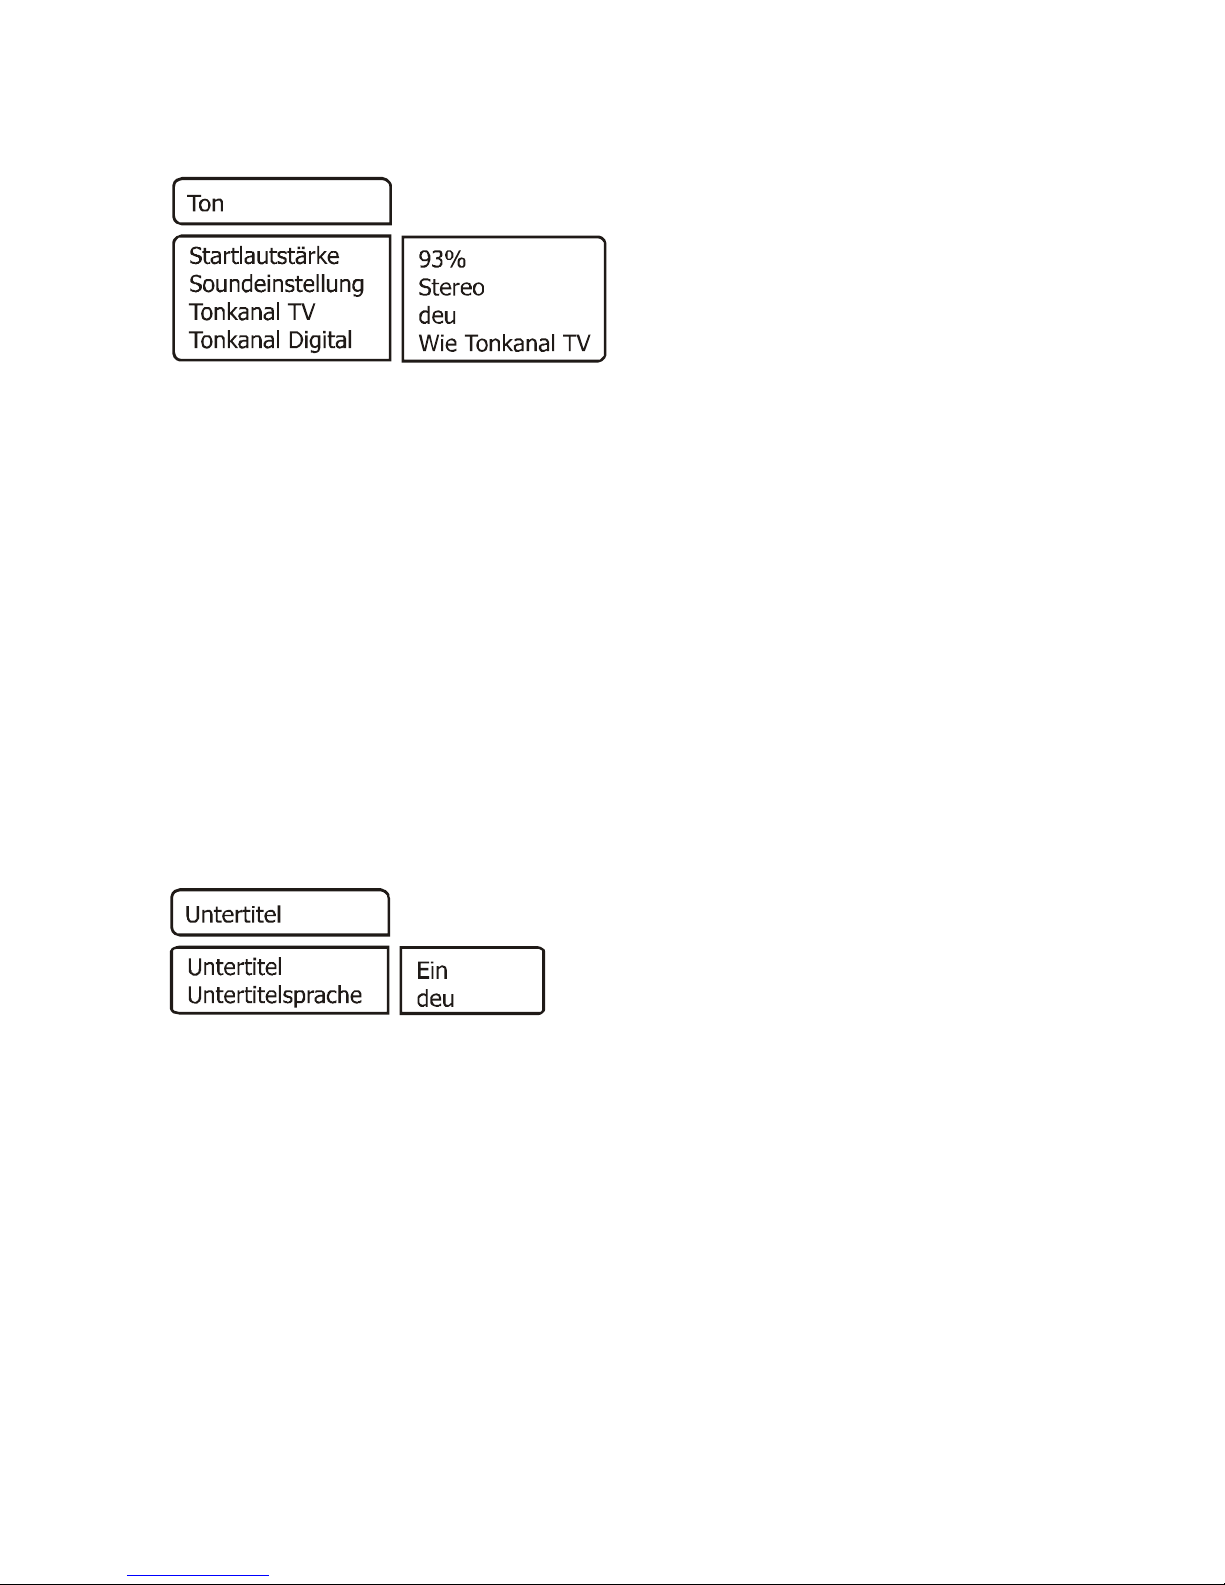
Audio-Settings
1) Initial volume
Choosetheinitial volumebypressing VOL ►.
2) Sound setting
Youcanchossebetween Stereo, Mono links (left) resp. Mono rechts(right) with VOL ►.
3)AudiochannelTV
Incaseofthebroadcasted programmehasdifferentoptionsyoucan choosetheaudio
channel oftheSCARTportforthecurrentprogrammebypressingVOL ►.
4)Audiochanneldigital
Pressing VOL ► youcanselect theaudiochannel forthecurrentprogrammeatthedigital
exitofreceiver.
Press EXIT toleavethemenu.Tostoretheundertaken modificationschoose(Yes/Ja)by
pressingVOL ►.Tokeeptheprevioussettings(No/Nein). Confirmbypressingthe OK
button.
Settings – subtitle
1) Subtitle
Pressing VOL ► youturnthedisplayofsubtitleONor OFF.
2) Languageof thesubtitle
Pressing VOL ► you canselectthelanguageof thesubtitle.If nosubtitleis
broadcastedthe„-„sign isdisplayed.
Press EXIT toleavethemenu.Tostoretheundertaken modificationschoose(Yes/Ja)by
pressingVOL ►.Tokeeptheprevioussettings(No/Nein). Confirmbypressingthe OK
button.
17
Fittings
Thisdigitalreceiverhasalreadybeen preadjustedandisready-to-operateconnected tothe
mostsatelliteantennasandLNB configurationswithoutfurtherfittings.Changesinthismenu
have adirecteffecton thereceiving attributesandshouldonlybeundertakenbyspecialists.
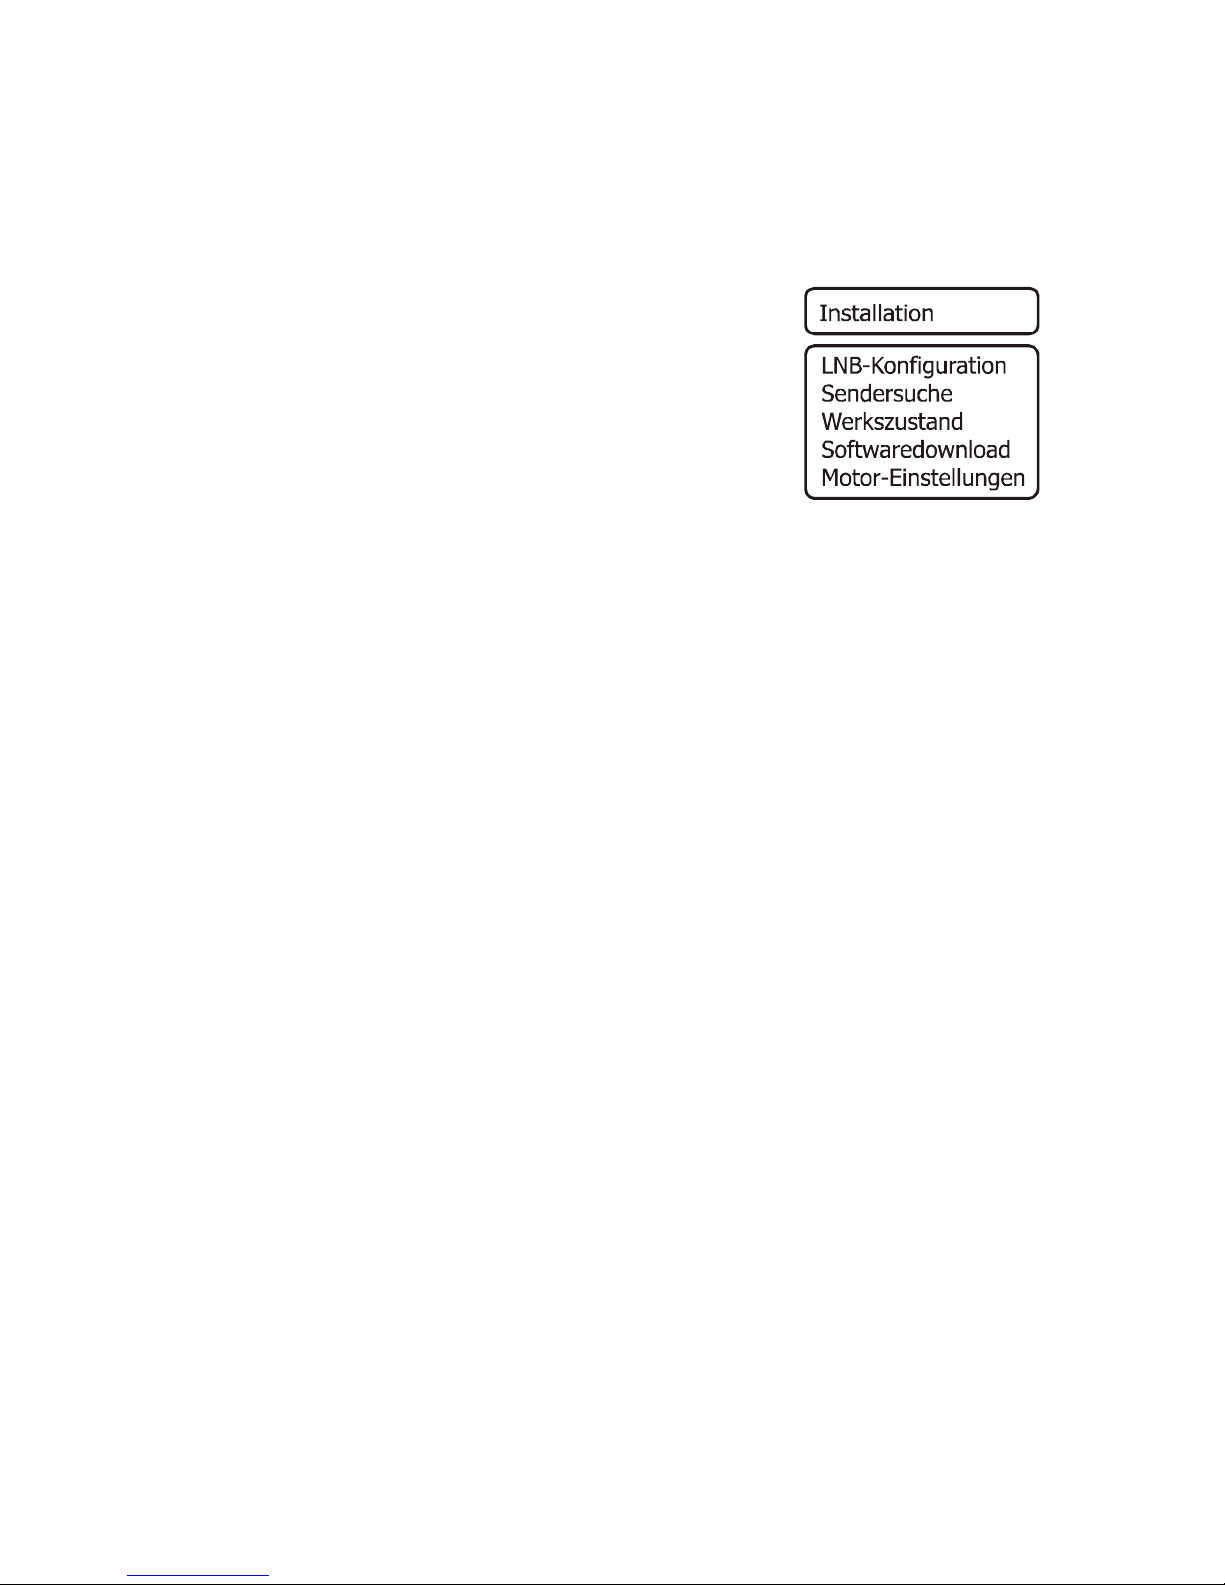
Chooseline Installation bypressing CH st andconfirm
withOK. Thefollowingmenu isdisplayed:
Ifin themenu LNB-Konfiguration(LNBconfiguration)
DiSEqC1.0isstoredtheline Motor-Einstellungen(motor
settings) isn´t displayed.
Press CH st tochooseandconfirmwith OK.
18
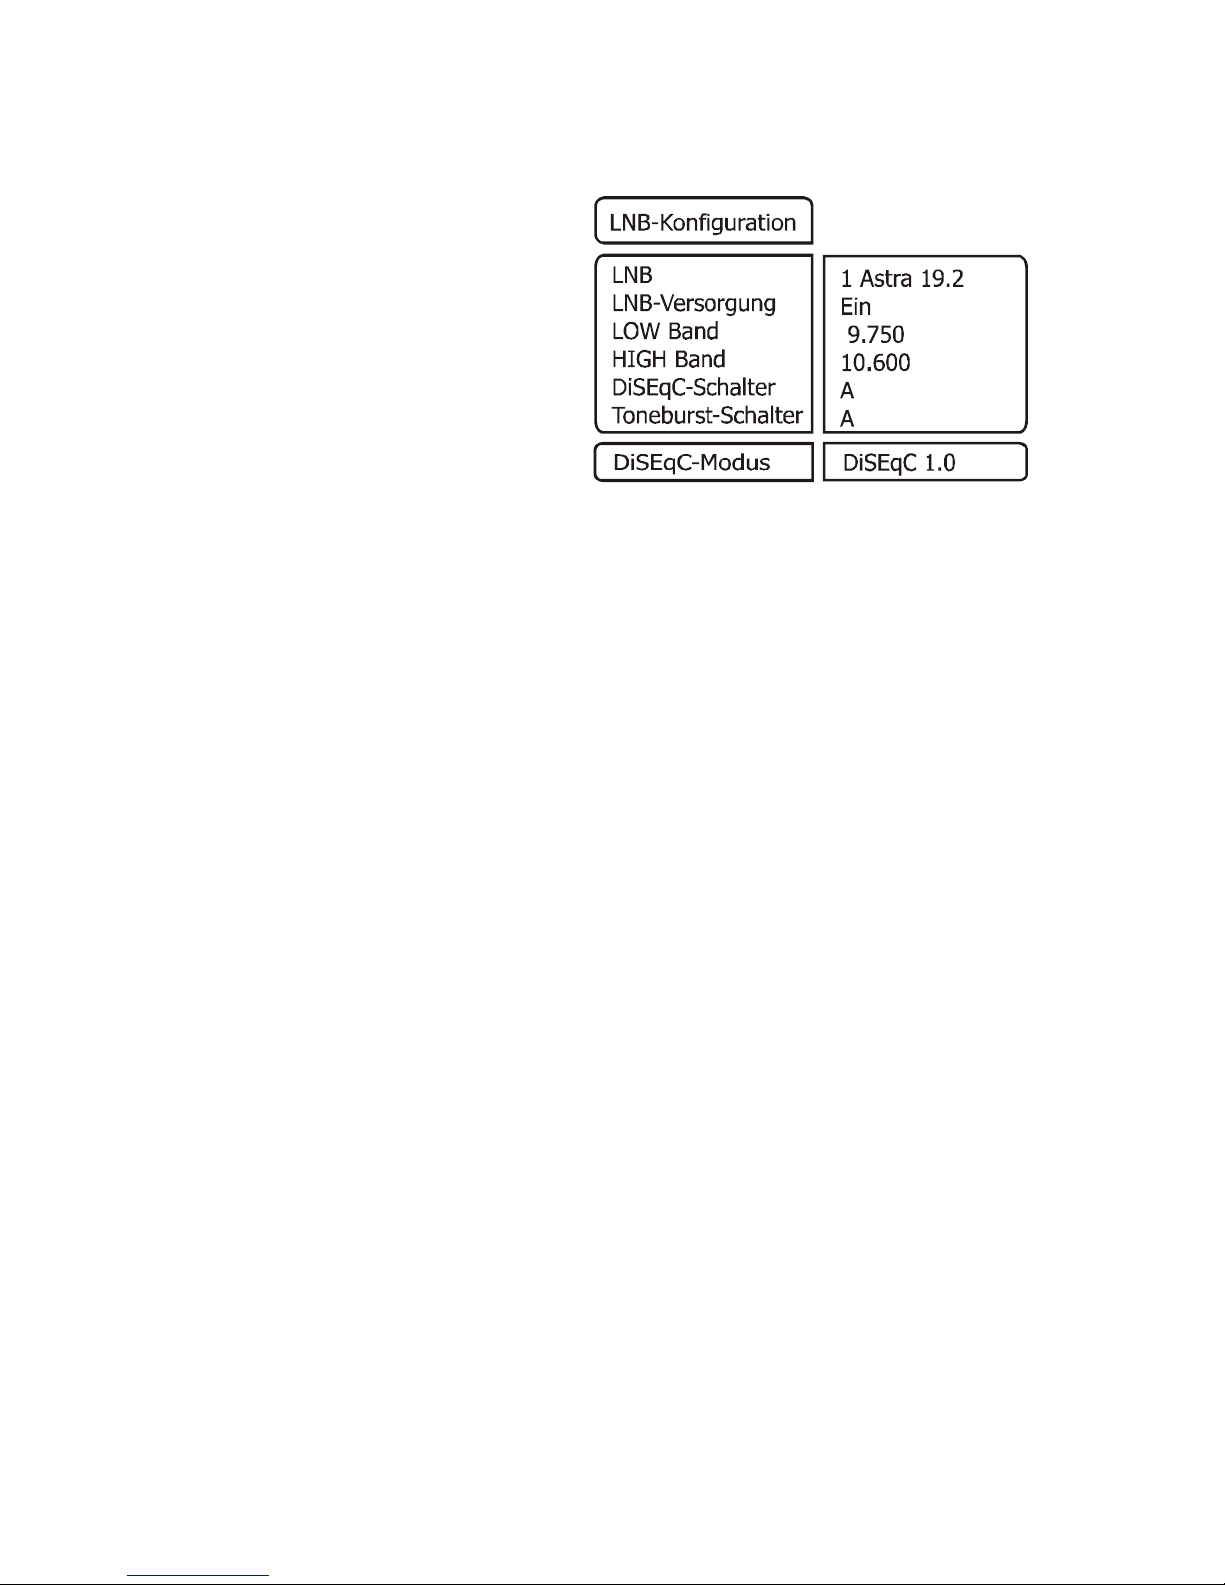
Installation –LNB configuration
Chooselineneedfullinewith CH st and
storethefittingwith VOL ► or 1-0.

1) LNB:
satellitesname
2) LNB supply
Pressing VOL ► you can turn the LNB supplytension on oroff.
3) LOWBand
oszillatorfrequencyfor LOWbandcan befitted bypressing VOL ► orafterOKhasbeen
pressed directlybypressing buttons 1-0.
4)HIGHBand
oszillator frequencyforHIGHband can befitted bypressing VOL ► orafter OK hasbeen
pressed directlybypressing buttons 1-0.
5)DiSEqC switcher
Ifyour receiverisoperated withasatelliteantennasystemthat receives several satellites
(multifeed antennasystem),pleaseset theinputoftheDiSEqC-Switchwheretheselected
LNB (item 1)above)isconnected to(keys+ or-).
6) Toneburst-Schalter
Ifyour receiverisoperated withasatelliteantennasystemthat receives two satellites(multi
feed antennasystem), pleaseset theinputof theA/B-Switchwheretheselected LNB(item2)
above)isconnectedto(keys+or -).
7)DiSEqC-Modus
ChoosetheDiSEqCmodepressing VOL ►.Choose DiSEqC 1.0 forfixedand DiSEqC1.2
formotor- drivenantennas.If theDiSEqC1.2ischosen themenu item Motor-Einstellungen in
menu Installation appears.
Press EXIT toleavethemenu.Tostoretheundertaken modificationschoose(Yes/Ja)by
pressingVOL ►.Tokeeptheprevioussettings(No/Nein). Confirmbypressingthe OK
button.

20
Installation –transmittersearch
Thisdigitalreceiverhasalreadybeen preprogrammedwithmostdigitalTV- andRADIO
programmesof thefollowingsatellites
-Astra19,2° Ost(East),
-Hot Bird13°Ost (East),
-Türksat1C42°Ost (East),
-Sirius2/35° Ost (East),
-Amos14° West (West),
-HellasSat239°Ost (East)
Youcansee allpreprogrammedsatelliteprogrammesin thechannel list inTVorRADIOmode
pressing LIST.
Therearecontinuouslynewsatelliteprogrammesbroadcasted orsatelliteparametersare
changed. Thereforewerecommendtosearch forchannelstimeaftertime.
Move thecursorin Installation menupressing CH st tothe Sendersuche lineand press OK.
The followingmenuappears:
Table of contents


