4 CALIBRATION
4.1 Important Information on Meter Calibration
Your meter has four measuring ranges. You have an option of calibrating your meter in a single point
calibration for all the 4 ranges or for better accuracy; you can calibrate one point in each of the measuring
ranges (up to four points).
When you perform a single point recalibration, the old calibration will be replaced by the new one even if the
new calibration is done in a different range from the old calibration. For example, if you have previously
calibrated at 1413 µS in 0 to 2000 µS range, and you recalibrate at 12.88 mS in 0 to 20.00 mS range, the
new calibration will override the previous calibration in 0 to 2000 uS range.
In the case of multi point calibration, when you perform a multi point recalibration, old calibrations are
replaced only on a range basis. For example, if you previously calibrated at 1413 µS in 0 to 2000 µS range
and you recalibrate at 1500 µS (also in 0 to 2000 µS range), the meter will replace only the old calibration
data (1413µS) in that range. The meter will retain all calibration data in other ranges. To completely
recalibrate your meter, or when you use a replacement electrode, it is best to clear all calibration data.
The measuring ranges are:
Meter range symbol Conductivity range TDS range Resistivity range
r1 0 µS – 200.0 µS/cm 0 – 200.0 ppm 0 – 20.00 KΩ
r2 200.0 µS – 2.000 mS/cm 200.0 – 2000 ppm 20.00 – 200.0 KΩ
r3 2.000 mS – 20.00 mS/cm 2000 – 20000 ppm 200.0 KΩ– 2.000 MΩ
r4 20.00 mS – 500.0 mS/cm 20000 – 99999 ppm 2.000 – 100.0 MΩ
4.2 Preparing the Meter for Calibration
Before starting calibration, make sure you are in the correct measurement mode. For best results, select a
standard value close to the sample value you are measuring.
4.3 Temperature Calibration
Your electrode features a built-in temperature sensor which is factory calibrated. Calibrate your sensor only if
you suspect temperature errors may have occurred over a long period of time or if you have a replacement
electrode.
1. Connect the electrode.
2. Switch the meter on.
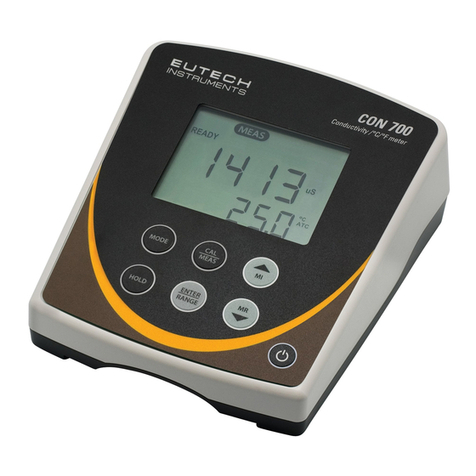
3. Press std.
4. Press mode to enter temperature calibration mode.
5. Dip the electrode into a solution of known temperature (i.e. a temperature bath). Allow
time for the built-in temperature sensor to stabilize.
6. Scroll with save/▲or view/▼to set the correct temperature value (i.e. the temperature
of the temperature bath). Maximum offset value is ±5.0 °C.
7. Press enter to confirm. The meter will be calibrated and return to measure mode.
Note: To exit without confirming the temperature calibration value, press std.
Note: Since temperature affects the accuracy of conductivity, TDS and Resistivity, it is recommended to
carry out a conductivity, TDS or Resistivity calibration after a temperature calibration is done.
4.4 Automatic or Manual, Single or Multi point Calibration (P5.0)
You can either choose automatic conductivity calibration or manual conductivity, TDS or Resistivity
calibration.
In the automatic calibration mode, the meter automatically detects and verifies the appropriate known
calibration standards solutions before accepting these particular calibration standards as one of its
calibration values in a specific measurement range. The known calibration standards used for automatic
calibration are:
At 25.0°C : 84µS , 1413µS , 12.88mS , 111.8mS
At 20.0°C : 76µS , 1278µS , 11.67mS , 102.1mS
In the manual calibration, non-standard calibration values can be used. You can manually input the
appropriate values as your desired calibration standards in each specific range.


