Evadale Healthcare Bedside Commode Manual instruction

Please
read these
instructions
before use
Bedside Commode Chair
Set-up and OperatiOn
The Bedside Commode is manufactured from durable
powder-coated steel with a vinyl padded toilet seat,
backrest and armrests for comfort and pressure relief.
The toilet seat is front hinged for easy access to the
removable pan with lid. Seat, pan and lid can be easily
removed for cleaning.
Some minor assembly required.
Adjusting the height
The commode is height adjustable to match
individual user requirements. A series of holes
along each leg allow seat height to be adjusted
from 500 mm to 610 mm.
A brass locking button is used
to secure the height of each leg.
Press in the locking button to disengage, and
turn the leg slightly so the button is no longer
aligned with the holes. Move the leg up or
down to your ideal height setting, then turn
the leg back to align the locking button with the
nearest hole. The locking button must be fully
engaged and protruding through the height
adjustment hole to ensure a positive lock.
Repeat for all four legs, adjusting height
evenly or individually to match an uneven
floor surface.
Before use, test that locks are fully engaged and
ensure the commode is stable and resting firmly on
the floor’s surface.
Ideal seat height
Ideal height is when the user’s
feet rest flat on the floor, with
thighs parallel to the ground or
slightly angled with hips just above
knee level. Knees should never
project above the upper leg.
Box Contents and Inspection
Carefully remove all components from the box,
remove all packaging and plastic wrapping and check
items against the list below. Any damaged or missing
components should be reported to your authorised
dealer or Evadale Healthcare.
Set-Up and Operation
Instructions (this guide)
chair
pan with lid
toilet seat
padded toilet seat cover
wire pan holder
Assembly
To assemble the commode, hook
the wire pan holder to the base of
the frame (wider hooks to the front;
narrow hooks to the rear). Hang the
pan over the wire pan holder, with
the rim handles positioned to the
sides.
To attach the toilet seat, position
the clips over the front of the frame
and push down to secure. The loose
padded toilet seat cover can be
used as required – fit over the toilet
seat with the wider edge to the front.
Make sure the seat is firmly secured
before using the chair.
www.evadale.com.au
For more information
or to order, freecall
1300 883 194
©2012 Evadale Healthcare. All rights reserved.
Regular maintenance
The leg locking buttons should be regularly inspected
to ensure they are fully inserted.
Regularly check the commode for damage and
wear, paying special attention to the condition of
the toilet seat, backrest and rubber tips. Do not use
the commode if the product is worn, damaged or
deformed in any way.
Replace the rubber tips immediately if you see
evidence of rips, tears, cracks or other general wear.
Warranty
Evadale Healthcare Pty Ltd warrants this product for
a period of 12 months. Please refer to our Warranty
Statement for full details. Please contact your
authorised dealer or Evadale Healthcare for a list of
available spare parts.
Specifications
Item Bedside Replacement
Commode Pan and Lid
Product Code ED1386 ED1546
Max User Weight 110 kg -
Product Weight 12 kg 0.5 kg
Overall Height 820 > 930 mm 220 mm
Seat Height 500 > 610 mm -
Armrest Height 220 mm above seat -
Overall Width 660 mm 290 mm
Between Armrests 500 mm -
Warranty 1 year 1 year
ARTG 176831 Made in China
Care & cleaning
To clean the commode and pan after each use, wipe
clean with a mild soap and warm water solution and
rinse well. Dry with a clean cloth.
For heavier soiling, wipe clean with a diluted bleach
solution and rinse well before drying. Do not use water
temperatures in excess of 80°C.
It is recommended the frame be cleaned after heavy use
or at least once a week. To clean, wipe with a soft clean
cleanser and warm water solution and rinse well.
Avoid harsh, abrasive cleaning agents or utensils
(such as a wire brush) as these can lead to deterioration
of the frame.
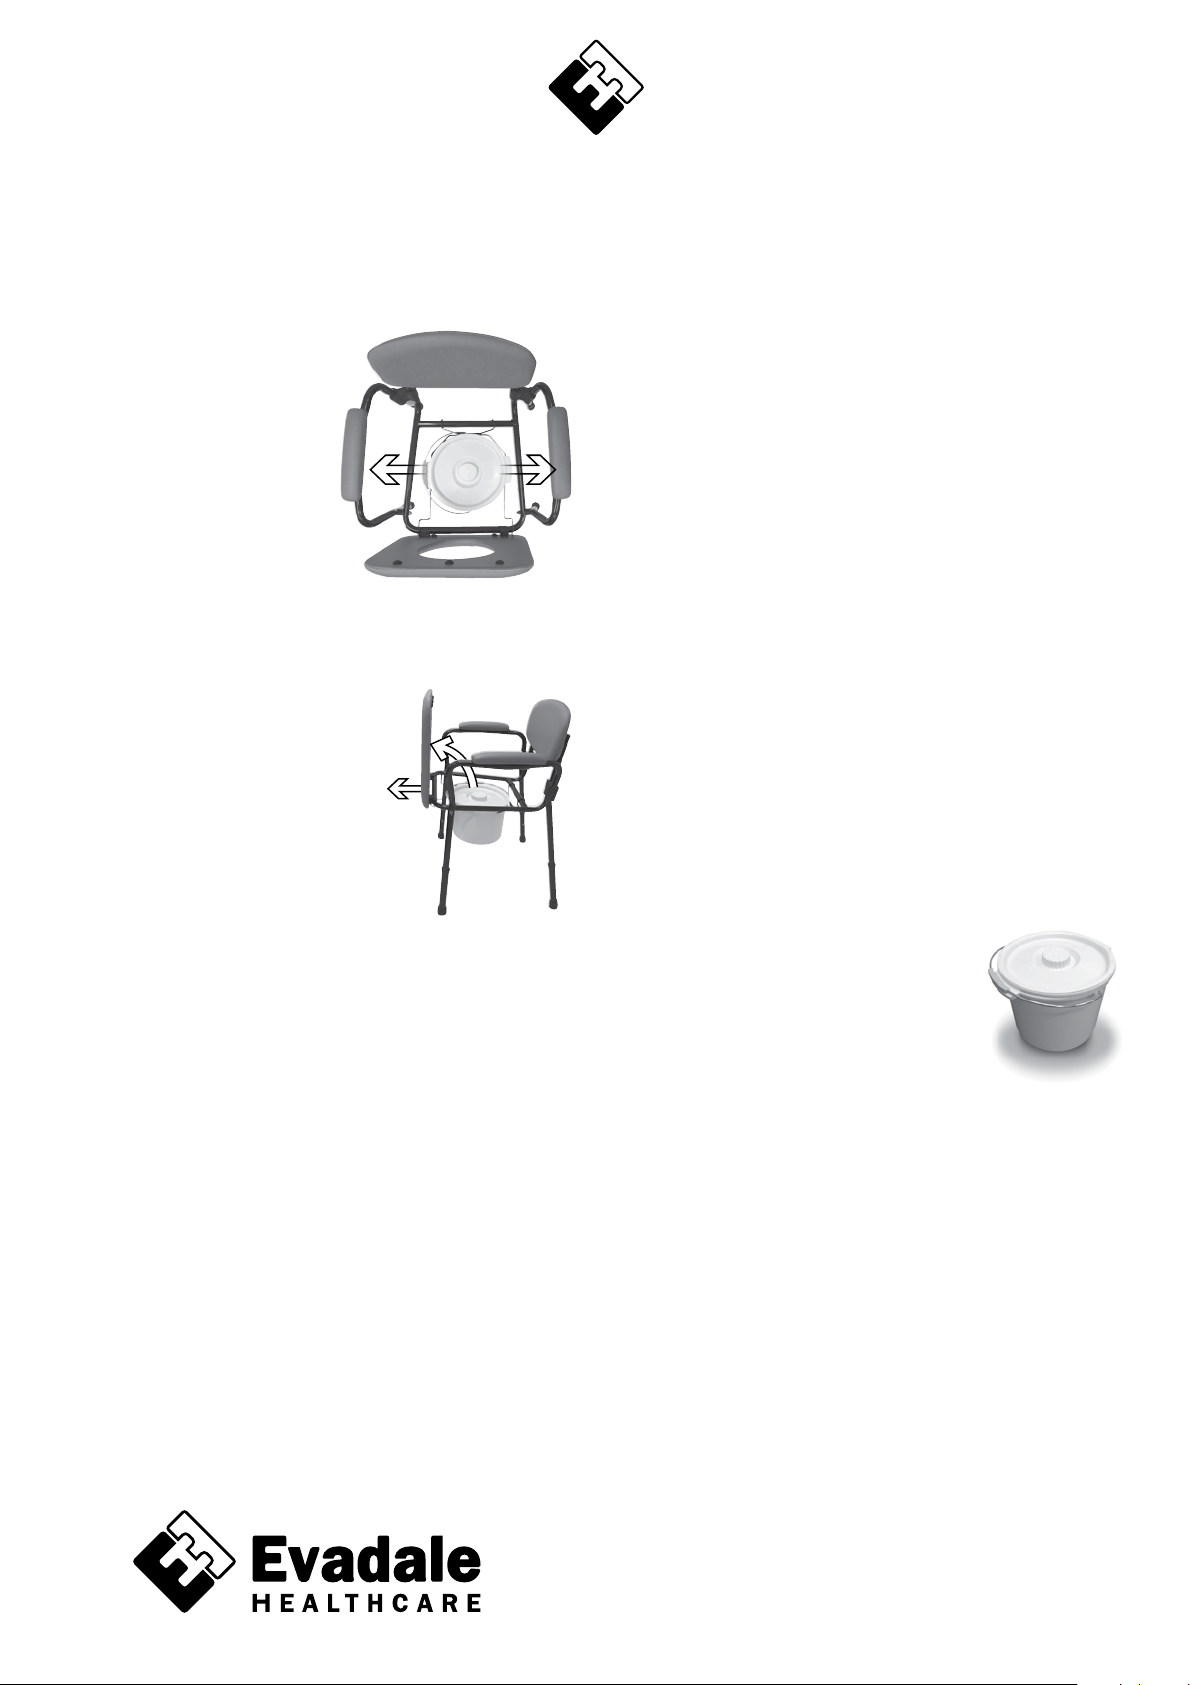
Inserting the pan and lid
Attaching and removing the toilet seat
To insert the pan and lid, raise
the toilet seat forwards. Hang
the pan over the wire pan
holder, with the rim handles
positioned to the sides.
To remove the pan, raise the
toilet seat forwards, secure
the lid (on the pan) and lift the
pan out using the pan handle.
To remove the toilet seat, raise the
seat forwards and push against the
locking clips until they disengage.
To reattach, position the clips over
the front of the frame and push down
to secure. Make sure the seat is
firmly secured before using the chair.
The loose padded toilet seat cover can be used as
required – fit over the toilet seat with the wider edge to
the front.
Toilet seat clips must be attached to the front edge of
the frame, not the rear.
This manual suits for next models
1
Popular Indoor Furnishing manuals by other brands


Relita
Relita LUKA Assembly instructions

Moray
Moray BONLAB Height Adjustable Desk Operation manual

Furniture of America
Furniture of America CM3882PC - 2PK Assembly instructions

Forever Redwood
Forever Redwood MAYNARD WOOD SHOWER BENCH Assembly instructions

Artesano
Artesano 24801 Assembling instructions

IKEA
IKEA BILLY instructions

IKEA
IKEA FLÄRKE TV UNIT 25X17" instructions

Dimensions Furniture
Dimensions Furniture MōDRN Marni Barrel Accent Chair 1214 Assembly instructions

BDI
BDI MÜV 1252 quick start guide

eclisse
eclisse MIMESI instructions

JSI
JSI SWISH installation instructions

GreenForest
GreenForest BEARD QU BK Assembly instruction