To enter test mode follow the below steps;
Turn oven off at the electrical outlet
Press temperature buttons "PLUS" ( + ) & "MINUS" ( - ) together
Each button has another function, from left to right;
Turn on oven at the electrical outlet while keeping the temperature + & - buttons depressed
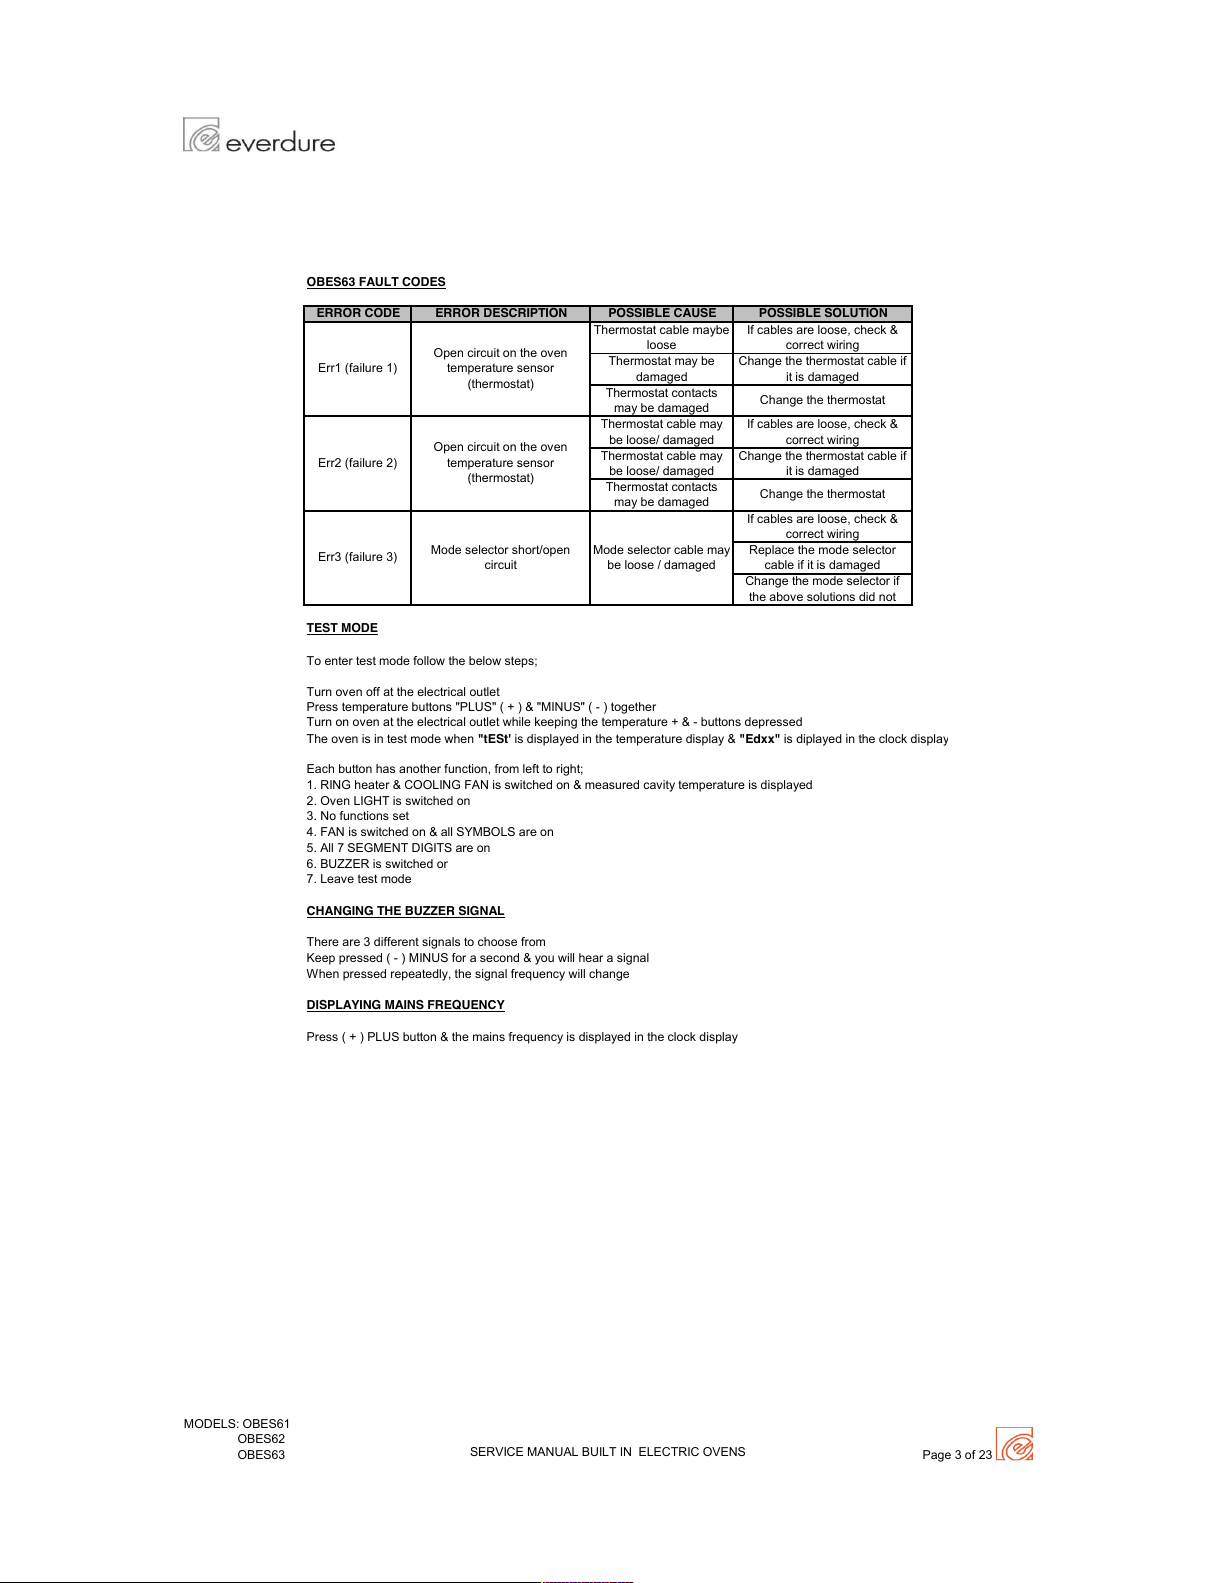
Thermostat cable maybe
loose
Thermostat may be
damaged
Thermostat contacts
may be damaged
If cables are loose, check &
correct wiring
Replace the mode selector
cable if it is damaged
Change the mode selector if
the above solutions did not
Mode selector cable may
be loose / damaged
Change the thermostat cable if
it is damaged
Thermostat cable may
be loose/ damaged
Thermostat contacts
may be damaged
DISPLAYING MAINS FREQUENCY
5. All 7 SEGMENT DIGITS are on
4. FAN is switched on & all SYMBOLS are on
The oven is in test mode when "tESt' is displayed in the temperature display & "Edxx" is diplayed in the clock display
1. RING heater & COOLING FAN is switched on & measured cavity temperature is displayed
2. Oven LIGHT is switched on
Open circuit on the oven
temperature sensor
(thermostat)
Open circuit on the oven
temperature sensor
(thermostat)
Mode selector short/open
circuit
There are 3 different signals to choose from
CHANGING THE BUZZER SIGNAL
Keep pressed ( - ) MINUS for a second & you will hear a signal
Thermostat cable may
be loose/ damaged
Press ( + ) PLUS button & the mains frequency is displayed in the clock display
When pressed repeatedly, the signal frequency will change
If cables are loose, check &
correct wiring
Change the thermostat cable if
it is damaged
If cables are loose, check &
correct wiring
MODELS: OBES61
OBES62
OBES63
SERVICE MANUAL BUILT IN ELECTRIC OVENS
All manuals and user guides at all-guides.com