EVEREST REFRIGERATION LAB Series User manual

EBWR1-LAB, EBWR1-LAB, EBGWR1-LAB,
EBR2-LAB, EBGR2-LAB, ETBF1-LAB,
EBWF1-LAB, EBF2-LAB
Laboratory Refrigerators
& Freezers - LAB Series
Owner’s Manual

this page intentionally left blank

Everest Owner’s Manual
Contents
Hydrocarbon Guidelines ............................. 1, 2
Installation Instructions.................................3–5
General Safety..................................................6
Electrical Safety................................................7
Operation....................................................8–24
Care and Maintenance............................ 25, 26
Door Reversal Instructions ...................... 27, 28
Troubleshooting Guide ............................ 29, 30
Warranty Information ............................... 31, 32
Laboratory Refrigerators & Freezers - LAB Series
EBWR1-LAB, EBWR1-LAB, EBGWR1-LAB, EBR2-LAB, EBGR2-LAB, ETBF1-LAB,
EBWF1-LAB, EBF2-LAB

1Hydrocarbon Guidelines
Hydrocarbon Guidelines
DANGER - Risk of fire or explosion. Flammable refrigerant used. Do not use mechanical devices or
other means to accelerate the defrosting process. Do not puncture refrigerant tubing.
DANGER - Risk of fire or explosion. Flammable refrigerant used. To be repaired only by trained service
personnel. Do not puncture refrigerant tubing.
CAUTION - Risk of fire or explosion. Flammable refrigerant used. Consult Service Manual or Owner’s
Manual before attempting to install or service this product. All safety precautions must
be followed.
DANGER - Risk of fire or explosion. Dispose of properly in accordance with federal or local regulations.
Flammable refrigerant used.
DANGER - Risk of fire or explosion due to puncture of refrigerant tubing; follow handling instructions
carefully. Flammable refrigerant used.
WARNING - THIS UNIT USES R290, A HYDROCARBON, PROPANE REFRIGERANT THAT IS
ENVIRONMENTALLY FRIENDLY BUT IS ALSO HIGHLY FLAMMABLE AND EXPLOSIVE. PLEASE
READ THIS MANUAL CAREFULLY AND FOLLOW ALL SAFETY PRECAUTIONS CONTAINED HEREIN
TO AVOID THE RISK OF FIRE OR EXPLOSION. FAILURE TO FOLLOW THE SAFETY PRECAUTIONS
MAY RESULT IN SERIOUS INJURY, OR DEATH, AND/OR PROPERTY DAMAGE.
This section applies to R290 Hydrocarbon units only. To identify the refrigerant type,
see the data plate in the cabinet interior.

2
Hydrocarbon Guidelines
PROPANE (R290) IS HIGHLY APPROVED FOR USE AS A REFRIGERANT IN COMMERCIAL,
SELF-CONTAINED UNITS IN THE US UNDER LIMITED USE CONDITIONS. IT CAN ONLY BE
USED IN NEW EQUIPMENT. BACKFITTING OR MODIFICATIONS OF OLD EQUIPMENT ARE
NOT ALLOWED. IT MUST BE CHARGED IN A STRICTLY LIMITED VOLUME OF UP TO 150
GRAMS (5.3 OZ) PER REFRIGERATION CIRCUIT. EVEN THOUGH THIS IS A SMALL AMOUNT,
IT STILL PRESENTS A FIRE OR EXPLOSION HAZARD IF IT LEAKS OUT OF PARTS THAT HOLD
REFRIGERANT. WHEN IT COMES IN CONTACT WITH AIR, A FLAMMABLE PROPANE-AIR
MIXTURE CAN BE CREATED AND EASILY IGNITED BY ELECTRICAL SPARKS, OPEN FLAMES
OR HOT SURFACES. THE RISK IS HIGHER IN SMALL, CONFINED, POORLY VENTILATED
SPACES. PROPANE WILL SETTLE AT LOWER ZONES BECAUSE IT IS HEAVIER THAN AIR.
TO REDUCE THESE RISKS, OBSERVE THE FOLLOWING PRECAUTIONS
• Avoid installation of unit in areas with open flames or in general vicinity of open flames or
high surface temperatures.
• Avoid unit installation in small, confined spaces. Ensure ample ventilation at all times. Keep
all exhaust vents free of any blockage or obstruction.
• Do not rely on smell to detect potential leaks of propane refrigerant. Propane refrigerant is a
high-purity propane gas and does not contain odorants or stenching agents. These additives
are typically used in fuel-grade propane and natural gas in order to give them a distinctive
smell, which makes it easier to detect leaks.
• General service and repairs must be performed in well-ventilated areas.
• General service and repairs must be performed only by professionals authorized by
Everest Refrigeration.
• Component shall be replaced with Everest-issued, like components to minimize the risk
of possible ignition resulting from incompatible parts or improper repairs.
• Do not modify, re-appropriate, or remove any functional part(s) from the unit.
• Handle the unit with care to avoid any damage.
• Practice safety guidelines when transporting the unit. Consult with your local Department
of Transportation for requirements in moving flammable gasses.

3Installation Instructions
Installation Instructions
1. Inspect for any freight damage upon delivery
of the unit. If damage is detected, immediately
report it to an Everest representative. Everest
is not responsible for damage that occurs
during shipment.
2. Keep the unit upright at all times. The
compressor contains oil, refrigerant,
lubricants, and various chemicals. When tilted,
these fluids may shift and travel to sections
where they don’t naturally occur. This will
lead to system contamination and compressor
failure.
3. Some units require caster installation for
proper performance. Visit our website at
www.everestref.com and enter your product’s
model number in the search field to determine
its caster requirements.
4. Do not place your hands under the unit when
moving it to avoid injury from sharp edges,
protruding parts or weight impact.
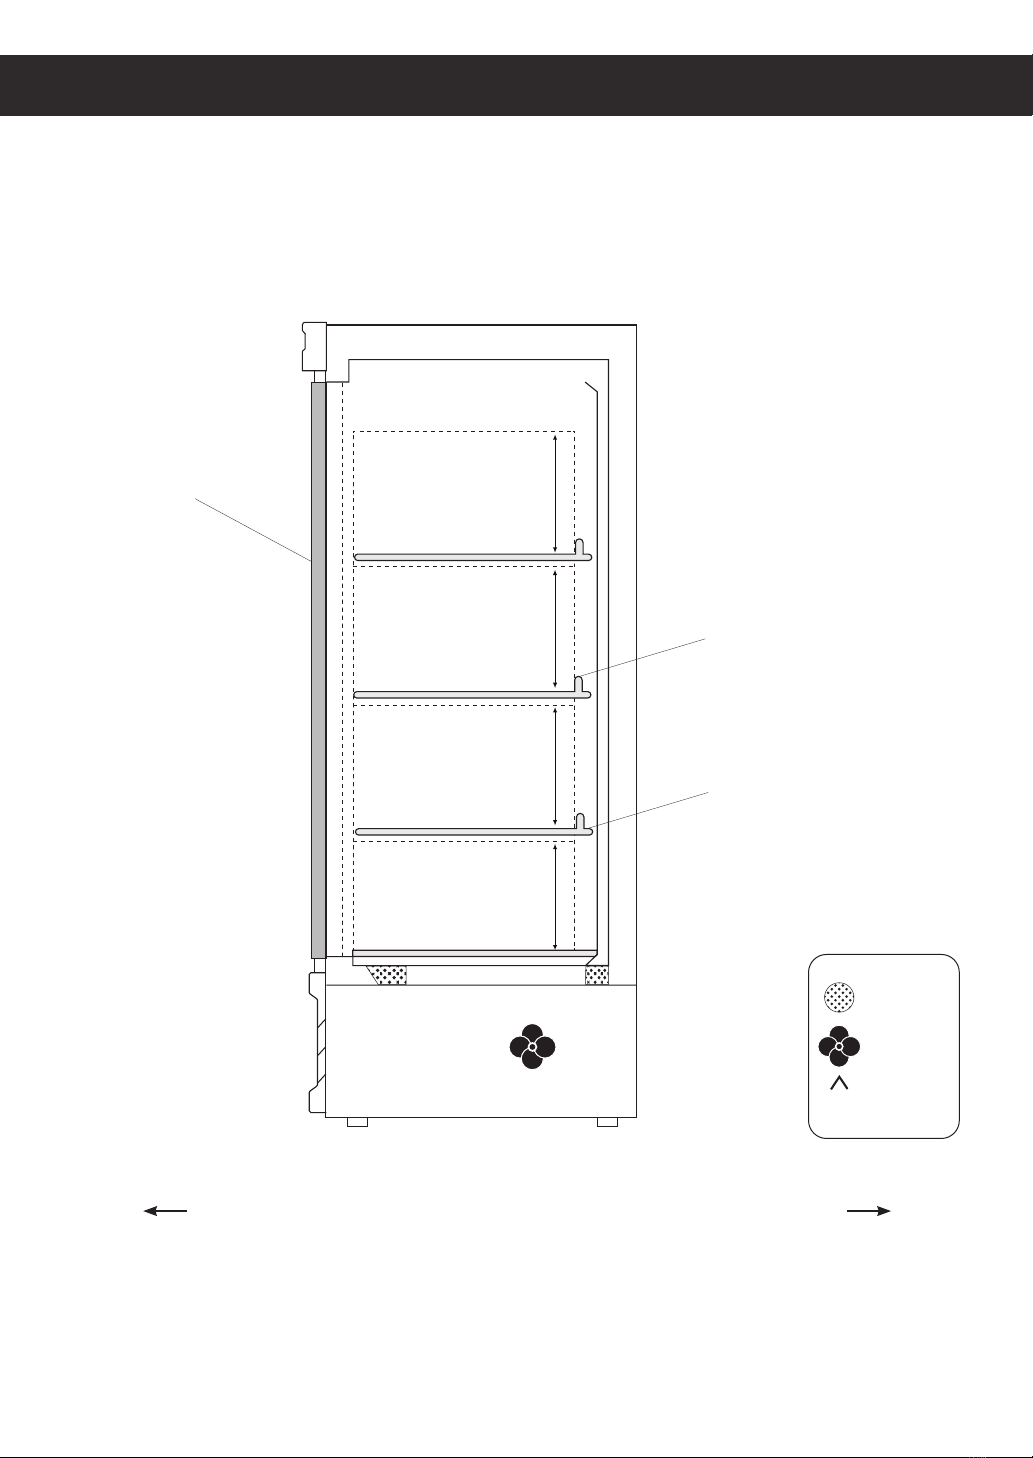
5. Select a location with good air ventilation.
Poor ventilation rapidly increases ambient
temperature. High ambient temperatures
exceeding 86°F (30°C) promote excessive
compressor activity in order to maintain the
desired cabinet temperature. This will result in
decreased performance, advanced component
failure and the risk of fire.
6. Select a location away from heat-generating
equipment such as stoves, ovens, etc. Heat
sources rapidly increase the temperature of
the immediate vicinity. High temperatures
exceeding 86°F (30°C) promote excessive
compressor activity in order to maintain the
desired cabinet temperature. This will result in
decreased performance, advanced component
failure, and the risk of fire.
7. A distance of 6" is required for backside
clearance. This ensures proper ventilation
and prevents overheating which can lead
to advanced component failure and the
risk of fire.
8. Select a location with a hard, leveled surface.
Use a leveling tool on the unit to ensure proper
alignment. Proper door function and condensate
removal is dependent on accurate balance.
Install the front leg stabilizers for units that
come standard with it to ensure proper door
functions and unit stability.
9. Select a location close to an electrical wall
outlet to ensure direct connection without the
use of extension cords.
10. Select a location away from severe moisture
conditions. This may compromise the unit’s
electrical components and lead to electrical
shocks or the risk of fire.
11. Select a location that will not expose the unit
to extremely dusty conditions. Environments
with high dust and debris content will
significantly hasten condenser coil blockage
and will result in decreased performance,
advanced component failure and the risk of fire.
12. Do not build an enclosure or cabinet around
the unit. This will restrict air ventilation
resulting in elevated compressor activity,
decreased performance, advanced component
failure and the risk of fire.
13. The unit is not intended for use in food trucks.
Limited space, lack of ventilation, and ambient
temperatures exceeding 86°F (30°C) typical to
this setting will result in elevated compressor
activity, decreased performance, advanced
component failure, and the risk of fire.
14. The unit is intended for indoor use only.
Outdoor use will cause a decrease in
performance, advanced component failure
and the risk of fire.
This section applies to all Everest products. Correct installation ensures proper performance
and longevity of your appliance. Professional installation by a trained refrigeration technician
and electrician is recommended. Warranty is void if the following guidelines are not met.

4
Installation Instructions
Shelf Installation
1. Attach the shelf clips onto the pilasters by inserting its
top hook into a pilaster notch followed by the bottom
hook. Do not use pliers or other crimping tools to
modify the shape of the shelf clips. This will result in
shelf mounting instability.
2. Place shelves on the shelf clips making sure all
corners are mounted securely and evenly with identical
distance from the unit’s floor and up. Always lay the
back of each shelf down on the rear clips before
the front.
3. When removing a shelf, unmount the shelf from the
shelf clips. To detach the shelf clip from the pilaster,
tilt up the shelf clip until the bottom hook clears,
followed by the top hook.

5
Product Load Level & Shelf Placement
Product Load Level for EB
Installation Instructions
Air Vent
Fan
Air Flow
Side View
Solid Door
Airflow Guard
Shelf
Load Level 12"
Load Level 12"
Load Level 12"
Load Level 12"
Front Rear

6
General Safety
General Safety
This section applies to all Everest products. Use your appliance according to its designed
function as specified in this Owner’s Manual. Warranty is void if the following guidelines
are not met.
• Before the unit is used, it must be installed and connected according to the installation instructions
provided in this manual.
• Remove all packaging material and protective vinyl covering from the unit before it is used.
These items are flammable and can lead to a fire.
• Do not store or use gasoline or other flammable vapors and liquids in the vicinity of the unit.
Do not store combustible or explosive items and substances such as aerosol cans in or around
the vicinity of the unit.
• Do not place objects on or around the exhaust vents of the unit. This can cause overheating
which may lead to a fire or explosion. Objects may also fall when opening and closing doors
which may lead to serious injury.
• Do not climb, stand, or hang on the shelves, doors or drawers of the unit. This can damage the
unit and lead to serious injury.
• Do not touch the freezer interior if your hands are wet or damp. This may lead to freezer burn
or cause your skin to stick to the cold surface.
• If you suspect a refrigerant leak or a compromised refrigeration system, disconnect the unit,
and contact Everest Refrigeration immediately.
• When disposing the unit, remove all doors and shelves to avoid any risk of injury or entrapment.
Ensure that the refrigerant in the condensing unit is properly disposed of by a qualified refrigeration
technician according to governmental codes, requirements and regulations.

7Electrical Safety
Everest units are equipped with a 115V/60Hz/1Ph,
NEMA 5-15P. A 15 amp breaker must be used for
units that come with a NEMA 5-15P plug. A 20
amp breaker must be used for units that come
with a NEMA 5-20P plug.
The ground prong must not be removed to reduce
the risk of electric shock and related hazards.
If the grounding pin is missing, the cord must
be removed from use. If the outlet is a standard
2-prong outlet, it must be replaced with the
properly grounded 3-prong wall outlet. Only
a qualified electrician may install the correct
power source.
To guarantee electrical safety, the wall outlet and
circuit must be checked by a qualified electrician
to make sure it is properly grounded.
Remove debris from the power plug prongs
with a soft cloth or brush before connecting
it to an outlet.
Assign the unit to a dedicated, undamaged
electrical circuit with a voltage rating that
matches the data plate. Check the incoming
voltage with a multi-meter. This avoids the
overloading and overheating of circuit wires
which may lead to a fire.
Do not use extension cords, adapter plugs
or other third party electrical connections.
Everest is not responsible for issues resulting
from improper electrical connections, electrical
power failures and voltage fluctuations.
Everest does not recommend the use of
generators in conjunction with the unit due
to voltage fluctuations that may compromise
electrical components.
Turn off the unit using the power button before
unplugging. Wait at least 5 minutes before
re-plugging to prevent damage to the compressor.
Do not unplug the unit by tugging on the power
cord. Grip the plug and pull it securely out of the
outlet.
Prevent damage to the power cord by providing
sufficient clearance around and under the unit.
Do not use a power cord that shows cracks or
exposed wires. Power cords that have been
severely worn or damaged must be replaced
with original manufacturer parts and only by
an authorized technician.
Electrical Safety
This section applies to all Everest products. Basic safety precautions must be observed when
using electrical appliances in addition to the following. Warranty is void if these guidelines
are not met.
115/60/1
NEMA 5-15R
115/60/1
NEMA 5-20R

8
Operation
Operation
This section applies to all Everest products. Use according to the described and intended
functions. Warranty is void if these guidelines are not met.
Starting your Everest Product
After plugging in the unit, the current temperature and compressor symbol will appear on the
digital temperature control’s LED display. will flash at short intervals for 1 minute after which the
compressor(s) and condenser fan motor(s) will initiate. At the beginning of every compressor cycle,
the condenser fan motor is automated to rotate in reverse for 30 seconds in order to blow dust off the
condenser coil.
The evaporator fan motor(s) will initiate once the evaporator coil reaches a specific temperature
relative to the digital temperature control setting and for as long as the door is closed. A fan symbol
will appear on the LED display to indicate that the evaporator fan is running.
Allow the unit to operate for 24 to 72 hours before storing contents in the cabinet. This lets the
cabinet temperature fully stabilize. Use this time to verify proper installation and operation.
The interior light and evaporator fan motor is controlled by a door switch for solid door models and
a rocker switch for glass door models.
The default temperature setting is 35.0°F (2.0°C) for refrigerators and -4.0°F (-20.0°C) for freezers.
The factory recommended temperature range is between 35°F. Temp-set range from 32°F to 54°F.
for refrigerators and -4°F. Temp-set range from -10°F to 54°F for freezers. Setting the temperature
outside of the recommended range will cause performance issues and in some cases may result in
component failure that is outside of warranty coverage.
The compressor, condenser and evaporator fan motors run while the unit is on refrigeration cycle.
The compressor, condenser and evaporator fan motors stop running while the unit is on defrost cycle.
The unit is preset to defrost every 5-6 hours with a duration of 45 minutes or less depending on the
evaporator coil temperature. Changing the preset outside of the default range will result in cooling
issues and advanced component failure.
The digital temperature control is intended to read and display the cabinet’s air temperature, not actual
food product temperature. The displayed temperature may fluctuate due to frequent or prolonged door
operation. The most conclusive method to determine a unit’s cooling performance is to measure the
food product’s temperature using a digital food thermometer.

9Operation Guidelines
Everest units are equipped with a Carel Digital Temperature Control. The type of controller is
dependent on the model and production date.
Setting the Temperature
1. Press and hold Temperature Set Button for 2 seconds until the LED blinks SET
alternating with a number. The blinking number is the current set temperature.
CAUTION:If PS appears on the LED
This means the Temperature Set button was held down longer than 3
seconds. To exit this mode and restart, press Temperature Set Button
Alarm in Progress
Compressor Running
Power / Up Button
Cabinet in Defrost
Manual Defrost / Down Button
Evaporator Fan Running
Temperature
Set Button
Cabinet Temperature
Carel ‘Easy’ Digital Temperature Control

10
2. Toggle through the desired temperature by pressing UP or DOWN The number
increases or decreases by a decimal point.
3. The recommended setting is 35.0°F (2.0°C) for refrigerators and -4.0°F (-20.0°C) for freezers.
The available temperature setting range is 33.0°F to 54.0°F (1.0°C to 12.0°C) for Refrigerators
and -10.0°F to 54.0°F (-23.0°C to 12.0°C) for Freezers.
4. Press and hold the Temperature Set Button for 3 seconds to save the new temperature
and exit the setting mode. The LED will return to the current cabinet temperature.
Initiating Manual Defrost
The controller has an automatic defrost cycle in place so initiating manual defrost is not
necessary unless there is an abnormal accumulation of ice around the evaporator coil.
1. Press and hold down the Manual Defrost Button until the Defrost Symbol
appears on the LED display.
The compressor, condenser and evaporator fan motors will stop running.
The refrigeration system will remain in defrost cycle for 45 minutes or until
the evaporator coil reaches the safety termination temperature setting.
Setting the Temperature ( continued )
Operation Guidelines

11
Setting the Temperature
1. Press and hold Temperature Set Button for 2 seconds until a number blinks on the LED.
The blinking number is the current set temperature.
2. Toggle through the desired temperature by pressing UP or DOWN. The number
increases or decreases by a decimal point.
3. The recommended setting is 35.0°F (2.0°C) for refrigerators and -4.0°F (-20.0°C) for freezers.
The available temperature setting range is 33.0°F to 54.0°F (1.0°C to 12.0°C) for Refrigerators
and -10.0°F to 54.0°F (-23.0°C to 12.0°C) for Freezers.
4. Press and hold the Temperature Set Button for 3 seconds to save the new temperature
and exit the setting mode. The LED will return to the current cabinet temperature.
Everest units are equipped with a Carel Digital Temperature Control. The type of controller is
dependent on the model and production date.
Carel ‘ir33’ Digital Temperature Control
Compressor Running
Cabinet in Defrost
Evaporator Fan Running
Cabinet Temperature
Alarm in Progress
Error
Up Button /
Auxiliary
Down Button /
Manual Defrost
Program Button
Temperature Set Button
Operation Guidelines

12
The controller has an automatic defrost cycle in place so initiating manual defrost is not necessary
unless there is an abnormal accumulation of ice around the evaporator coil.
1. Press and hold down the Manual Defrost Button until the Defrost Symbol appears on
the LED display.
The compressor, condenser and evaporator fan motors will stop running. The refrigeration system
will remain in defrost cycle for 45 minutes or until the evaporator coil reaches the safety termination
temperature setting.
Initiating Manual Defrost
Operation Guidelines

13 Operation Guidelines
Each Everest Laboratory Refrigerator and Freezer comes equipped with a standalone electronic
keypad door lock featuring a programmable auto-lock function. Access can be obtained using either
an RF keycard or a digital key/password. This section provides information on keycard and digital
key registration and other setting adjustments.
Electronic Keypad Lock
KEYCARD AND DIGITAL KEY MANAGEMENT
• Key Functions: *Key Functions: * (Cancel(Cancel //End), #End), # (Enter)(Enter)
Keycard Registration
• Keycard: Admin code (X2) →# →1# →Attach your card to reader (repeat from) →#(End).
• By address: Admin code (X2) →# →2#→Press your address to register →# →Attach your
card to reader →(repeat from) →*(End).
Digital Key Registration
• Digital Key: Admin code (X2) →# →3# →Press your address to register →(4–8 digits) → # →
Repeat from →*(End).
• By address: Admin code (X2) →# →4#→Press your address to register →# →Press your
digital key to register (4–8 digits) →# → *(End).
Mass Deletion of Keycards and Digital Keys
• Card: Admin code (X2) →# →6# →Admin code →*(End).
• Digital Key: Admin code (X2) →# →7# →Admin code →*(End).
Individual Deletion of Keycards and Digital Keys
• By Address: Admin code (X2) →# →8# →Press address to delete →# →Repeat →*(End).
• By Card: Admin code (X2) →# →9# → Attach your card →# →*(End).
Address Numbers
• Card: 0001 ~ 7000
• Digital Keys: 7001 ~ 7100
• When you register an additional digital key, register it by address.When you register an additional digital key, register it by address.
• Registering a new basic digital key will delete the original one.Registering a new basic digital key will delete the original one.
FACTORY DEFAULT
• Admin Code: 1234
• Digital Key Number: 0000

14
Operation Guidelines
KEYPAD SETTING ADJUSTMENT
Relay Output Time Adjustment
• Admin code (X2) →# →11# →Press input time (01–60 sec) →#(End).
Key Switch Adjustment
• ON: Admin code (X2) →# →22# →*(End).
• OFF: Admin code (X2) →# →33# →*(End).
Forced Open Adjustment
• Forced Open ON: Admin code (X2) →# →55# (End).
• Forced Open OFF: Admin code (X2) →# →66# (End).
Admin Code Adjustment
• Admin code (X2) →# →99# →Admin code →# Press new admin code (4 digits) → # →*(End).
• Change the admin code after installation.Change the admin code after installation.
Resetting the Admin Code to Factory Settings
• Turn off your reader →Turn on your reader while pressing 1,2,3 at the same time.
Resetting the Reader to Factory Settings
• Turn off your reader →Turn on your reader while pressing *,#,0 at the same time.
• Resetting back to factory settings will delete all registered keycards and digital keys.Resetting back to factory settings will delete all registered keycards and digital keys.
Electronic Keypad Lock ( continued )

15
WiFi Connected High-Accuracy Vaccine Temperature
Monitoring Kit with Alarm Warning Light and Sounder
EL-WiFi-VACX
• Temperature measurement range -40 to +60°C (-40 to +140°F).
• Configurable alarm levels with on-board warning light and sounder.
• Digital calibratible probe with 3m cable.
• No need to remove from service for recalibration, just replace the probe.
• Wirelessly stream and view data on the EasyLog Cloud, and configure
alarm email notifications.
• View and analyse multiple devices, including graphing of historic data.
• Easy device setup using free PC software or mobile app.
• Device memory stores all data even if Wi-Fi is temporarily disconnected.
• Traceable calibration certificate supplied at 2°C and 8°C.
The EL-WiFi-VACX measures the temperature of a probe fitted within a glycol-filled bottle, designed to
mimic the temperature response of vaccine samples. Data is streamed wirelessly over any compatible
Wi-Fi network and can be viewed on any internet-enabled device, via browser or free mobile app.
Device setup and connection to a WiFi network and the EasyLog Cloud are simple, just download
the free EasyLog WiFi PC software or the free EasyLog Cloud mobile app and follow the device
setup wizard. The device can be placed anywhere within range of the Wi-Fi network. If the device
temporarily loses connectivity with the Wi-Fi network, it will log readings until it is able to communicate
again with the EasyLog Cloud (max. 30 days at 10 second sample interval).
The device is IEEE 802.11bgn (2.4GHz) compliant, supports WEP, WPA /WPA2 encryption and
enterprise networks (PEAP, TTLS, FAST).
The EL-WiFi-VACX has a protection rating of IP42, and the probe IP67. The device is freestanding, but
can be attached to a wall or surface using the bracket provided, and clipped in and out of the bracket
as required. The device is equipped with a translucent back to show a red flashing indicator when it is
in an alarm state as well as a moderate volume sounder to alert anyone in close proximity.
Operation Guidelines
SPECIFICATIONS Minimum Typical Maximum Unit
Battery Life*>6 Months
USB supply voltage (@500mA) 4.5 5.0 5.5 Vdc
Operating temperature range -20 (-4) +60 (+140) °C (°F)
Logging period (user configurable) 10 sec 10 min 12 hrs
Transmission period (user configurable) 1 min 1 hr 24 hrs
Temperature measurement range -40 (-40) +60 (+140) °C (°F)
Temperature measurement resolution 0.01 (0.02) °C (°F)
Temperature display resolution 0.01
Temperature accuracy**
±0.1/±0.2
(-10 to +60/
+14 to +140)
±0.6/±1.1
(-40 to +60/
-40 to +140)
°C/°F
IP Rating Logger IP42, Probe IP67 (Bung fully inserted, not permanenetly powered,
probe connector fitted and fully inserted, device mounted vertically.)
Dimensions 82 x 70 x 36 mm (3.22 x 2.75 x 1.41")
*Please note the battery life statement on page 16 of this data sheet.
** Accuracy may be affected when suing a non-approved power supply to charge or permanently power the EL-WIFI-VACX

16
WiFi Connected High-Accuracy Vaccine Temperature
Monitoring Kit with Alarm Warning Light and Sounder
EL-WiFi-VACX ( continued )
Operation Guidelines
Easy Device Set Up and Connection
EL-WIFI-VACX is easy to set up and connect to the EasyLog Cloud.
Use the EasyLog WiFi software for PC* or the EasyLog Cloud app
available from Google Play or on the App Store.
*Requires Windows 7, 8.1,10
EasyLog Cloud: Your Data. Anytime. Anywhere
EasyLog Cloud harness the power of loT to automate data logging and alert notifications, enabling
you to monitor and manage multiple data logging devices in different locations completely remotely.
The system easily scales to meet your needs. Perfect for compact systems with just a few measuring
points, or corporate solutions with thousands of devices around the globe.
You will need to create an account at www.easylogcloud.com before setting up your cloud-connected
data logger.
Store your
data logging
records
securely on
the cloud
Connect
multiple users
with variable
account
privalages
Connect data
loggers from
multiple sites
in a single
account
Easily access
your most
important
data,
anywhere
Remotely
manage
all of your
data logging
devices
Never miss a
critical event
with flexible
advanced
notifications
Review and
analyze your
data with
powerful
graphing
functionality
Keep track of
data events
and system
activity with
a detailed
event log
Features at a glance*
Battery Life and Power Supply
The battery can be recharged (the unit must be between 0 and 40°C) via a PC, a USB +5V wall adapter,
or a portable USB battery pack using the USB lead provided. It can also be permanently powered by a
USB wall adapter or a USB battery pack. Readings may be affected while the internal battery is being
charged. However, once charged, continued connection of the charger will have no effect.
Battery life is dependent on: transmission period, Wi-Fi encryption method, WiFi encryption key rotation
frequency (determined by the router/access point), signal strength between router/access point and
Wi-Fi device, presence, volume, and type of Wi-Fi traffic from other devices, sample rate, operating
temperature, and frequency of audible and visual alerts.
Specications liable to change without prior warning
www.lascarelectronics.com/data-loggers
*Features depend on account type

17 Operation Guidelines
Easylog Cloud SMS Tutorial
This tutorial guides you through setting up SMS notifications on your EasyLog Cloud account,
and also explains how this very useful feature works.
Step 1: Activate SMS Notifications on Your Account
From the Account menu, click on the spanner icon to view the Account Settings tab. On the left hand.
side you’ll see an option to view the SMS settings menu.
Click on Contact Us and a new message window opens. This is pre-completed for requesting SMS
notifications on your account. Click to confirm you're not a robot and then click Send.
This manual suits for next models
7
Table of contents
Other EVEREST REFRIGERATION Refrigerator manuals

EVEREST REFRIGERATION
EVEREST REFRIGERATION EMGR33-SS User manual

EVEREST REFRIGERATION
EVEREST REFRIGERATION EMGR5B User manual

EVEREST REFRIGERATION
EVEREST REFRIGERATION EDA1 User manual

EVEREST REFRIGERATION
EVEREST REFRIGERATION EPBSR2 User manual

EVEREST REFRIGERATION
EVEREST REFRIGERATION EBR1 User manual

EVEREST REFRIGERATION
EVEREST REFRIGERATION EMGR5 User manual

EVEREST REFRIGERATION
EVEREST REFRIGERATION EMGR5 User manual

EVEREST REFRIGERATION
EVEREST REFRIGERATION EBD1 User manual