EverFocus NVR8008X User manual

NVR8008X Enterprise Rack Mount NVR
8-Bay, up to 100-Channel Megapixel Recording, RAID Storage
User’s Manual
Copyright © EverFocus Electronics Corp,
Release Date: December, 2014
Notice: The content is subject to change without notice.

E V E RF O C U S E L E C T R O N I C S C O R P O R A T I O N
NVR8008X
User’s Manual
1995-2014 EverFocus Electronics Corp
www.everfocus.com
All rights reserved. No part of the contents of this manual may be reproduced or transmitted in any form
or by any means without written permission of the EverFocus Electronics Corporation.
Release Date: December, 2014
QuickTime is a registered trademark of the Apple Computer, Inc.
Windows is a registered trademark of the Microsoft Corporation.
Linksys is a registered trademark of the Linksys Corporation.
D-Link is a registered trademark of the D-Link Corporation.
DynDNS is a registered trademark of the DynDNS.org Corporation.
Other product and company names mentioned herein may be the trademarks of their respective owners.

ii
Safety Precautions
It is strongly recommended to use the Local Display only for short-term operation, such as
system configurations. To ensure better system efficiency, the Local Display is not
recommended for long term operation or video monitoring.
Refer all work related to the installation of this product to qualified service personnel or
system installers.
Do not block the ventilation openings or slots on the cover.
Do not drop metallic parts through slots. This could permanently damage the applian ce.
Turn the power off immediately and contact qualified service personnel for service.
Do not attempt to disassemble the appliance. To prevent electric shock, do not remove
screws or covers. There are no user-serviceable parts inside. Contact qualified service
personnel for maintenance. Handle the appliance with care. Do not strike or shake, as this
may damage the appliance.
Do not expose the appliance to water or moisture, nor try to operate it in wet areas. Do
take immediate action if the appliance becomes wet. Turn the power off and refer servicing
to qualified service personnel. Moisture may damage the appliance and also may cause
electric shock.
Do not use strong or abrasive detergents when cleaning the appliance body. Use a dry cloth
to clean the appliance when it is dirty. When the dirt is hard to remove, use a mild
detergent and wipe gently.
Do not overload outlets and extension cords as this may result in a risk of fire or electric
shock.
Do not operate the appliance beyond its specified temperature, humidity or power source
ratings. Do not use the appliance in an extreme environment where high temperature or
high humidity exists. Use the NVR at temperatures within 5°C~40°C / 41°F~104°F. The input
power source is 100-240 VAC~ / 500W max.
Read Instructions
All the safety and operating instructions should be read before the unit is operated.
Retain Instructions
The safety and operating instructions should be retained for future reference.

iii
Heed Warnings
All warnings on the unit and in the operating instructions should be adhered to.
Follow Instructions
All operating and use instructions should be followed.
Cleaning
Unplug the unit from the outlet before cleaning. Do not use liquid cleaner s, abrasive or
aerosol cleaners. Use a damp cloth for cleaning
Attachments
Do not use attachments not recommended by the product manufacturer as they may
cause hazards.
Water and Moisture
Do not use this unit near water-for example, near a bath tub, wash bowl, kitchen sink, or
laundry tub, in a wet basement, near a swimming pool, in an unprotected outdoor
installation, or any area which is classified as a wet location.
Servicing
Do not attempt to service this unit by yourself as opening or removing covers may expose
you to dangerous voltage or other hazards. Refer all servicing to qualified service
personnel.
Power Cord Protection
Power supply cords should be routed so that they are not likely to be walked on or pinched
by items placed upon or against them, playing particular attention to cords and plugs,
convenience receptacles, and the point where they exit from the appliance.
Object and Liquid Entry
Never push objects of any kind into this unit through openings as they may touch
dangerous voltage points or short-out parts that could result in a fire or electric shock.
Never spill liquid of any kind on the unit.
Battery
There is a risk of explosion if battery is replaced by an incorrect type. Dispose of used
batteries according to the instructions.
a. Use only two AAA dry cell batteries.
b. Do not dispose of the batteries in a fire as it may explode.

iv
This Product is RoHS compliant.
ATTENTION! This is a Class A product which may cause radio interference in a
domestic environment; in this case, the user may be urged to take adequate measures.
Federal Communication Commission Interference Statement
This equipment has been tested and found to comply with the limits for a Class B digital
device, pursuant to Part 15 of the FCC Rules. These limits are designed to provide
reasonable protection against harmful interference in a residential installation. This
equipment generates, uses, and can radiate radio frequency energy and, if not installed
and used in accordance with the instructions, may cause harmful interference to radio
communications. However, there is no guarantee that interference will not occur in a
particular installation. If this equipment does cause harmful interference to radio or
television reception, which can be determined by turning the equipment off and on, the
user is encouraged to try to correct the interference by one of the following measures:
•Reorient or relocate the receiving antenna.
•Increase the separation between the equipment and receiver.
•Connect the equipment into an outlet on a circuit different from that to which the
receiver is connected.
•Consult the dealer or an experienced radio/TV technician for help.
FCC Caution: Any changes or modifications not expressly approved by the party
responsible for compliance could void the users’ authority to operate this equipment.
WEEE
The information in this manual was current upon publication. The manufacturer reserves the right
to revise and improve his products. Therefore, all specifications are subject to change without prior
notice. Manufacturer is not responsible for misprints or typographical errors.
Please read this manual carefully before installing and using this unit. Be sure to keep it handy for
later reference.
Your EverFocus product is designed and manufactured with high quality materials and
components which can be recycled and reused. This symbol means that electrical and
electronic equipment, at their end-of-life, should be disposed of separately from your
household waste. Please, dispose of this equipment at your local community waste
collection/recycling centre. In the European Union there are separate collection systems
for used electrical and electronic product.
Please, help us to conserve the environment we live in!

v
TABLE OF CONTENTS
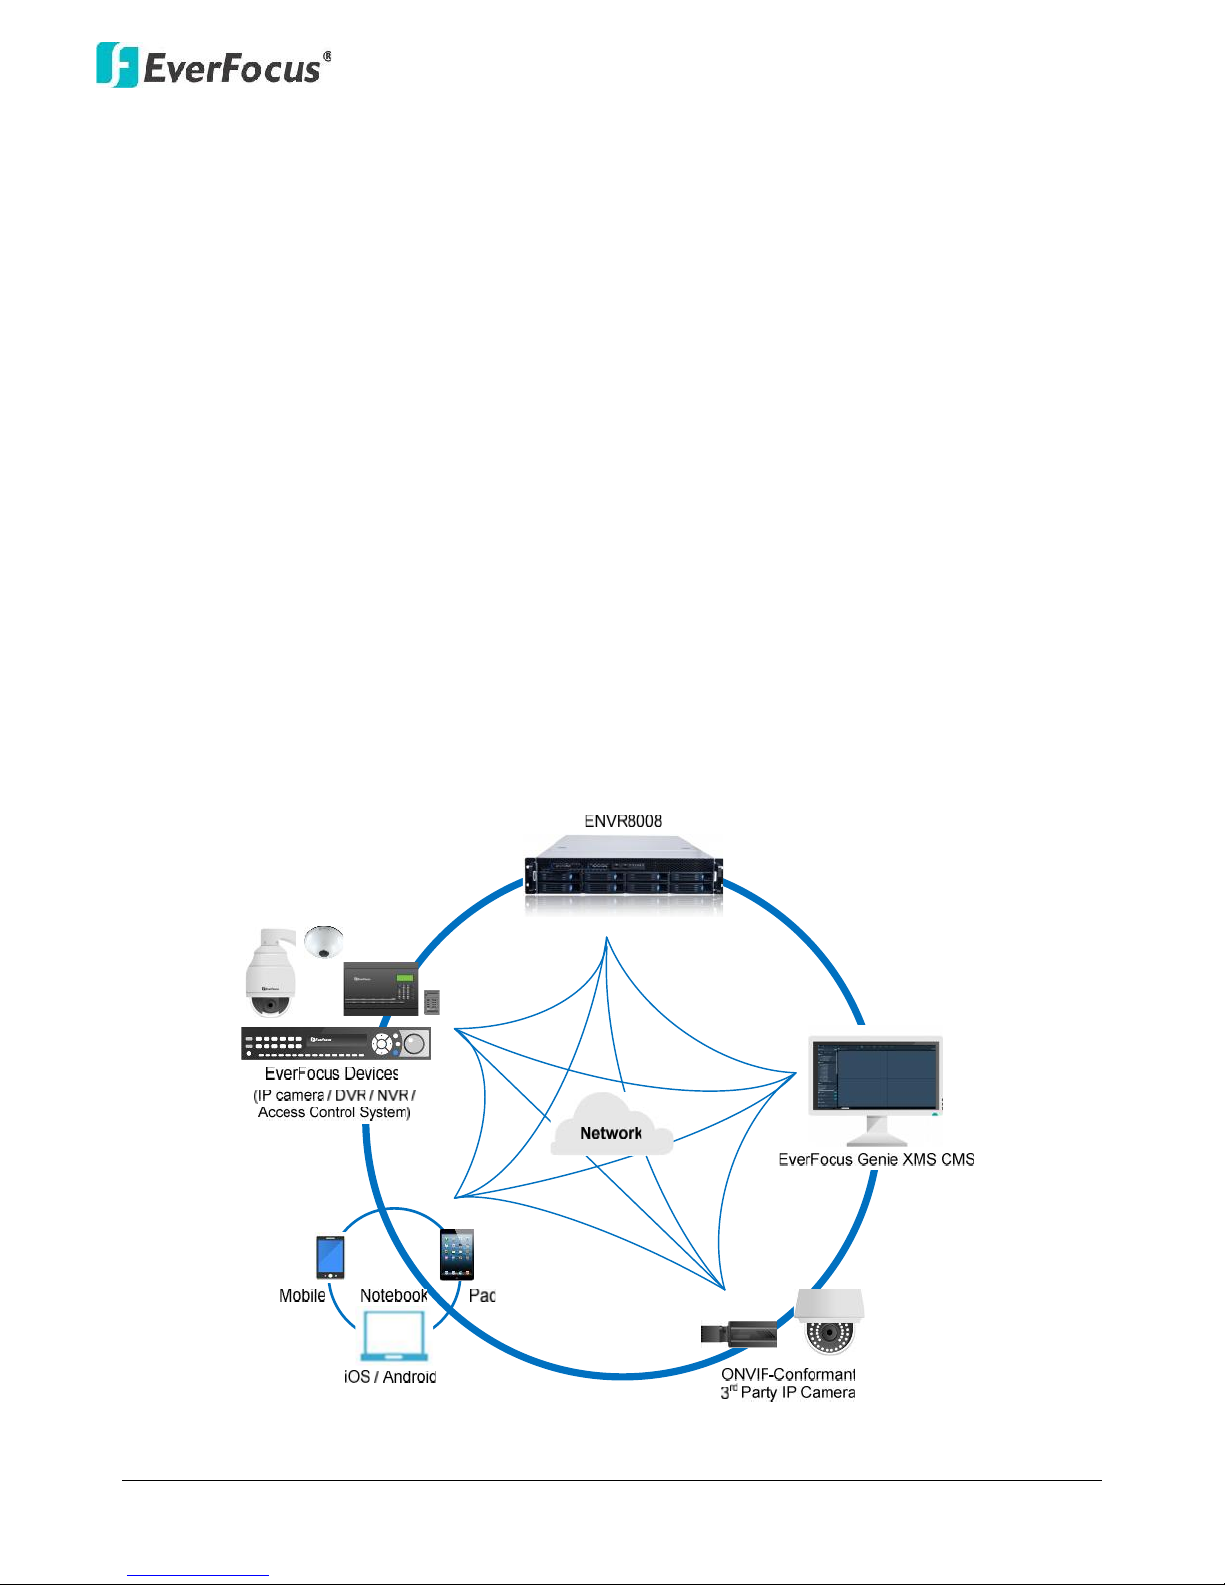
1. INTRODUCTION ............................................................................................................. 1
1.1 SUPPORTING OPERATING SYSTEMS AND BROWSERS ................................................................. 2
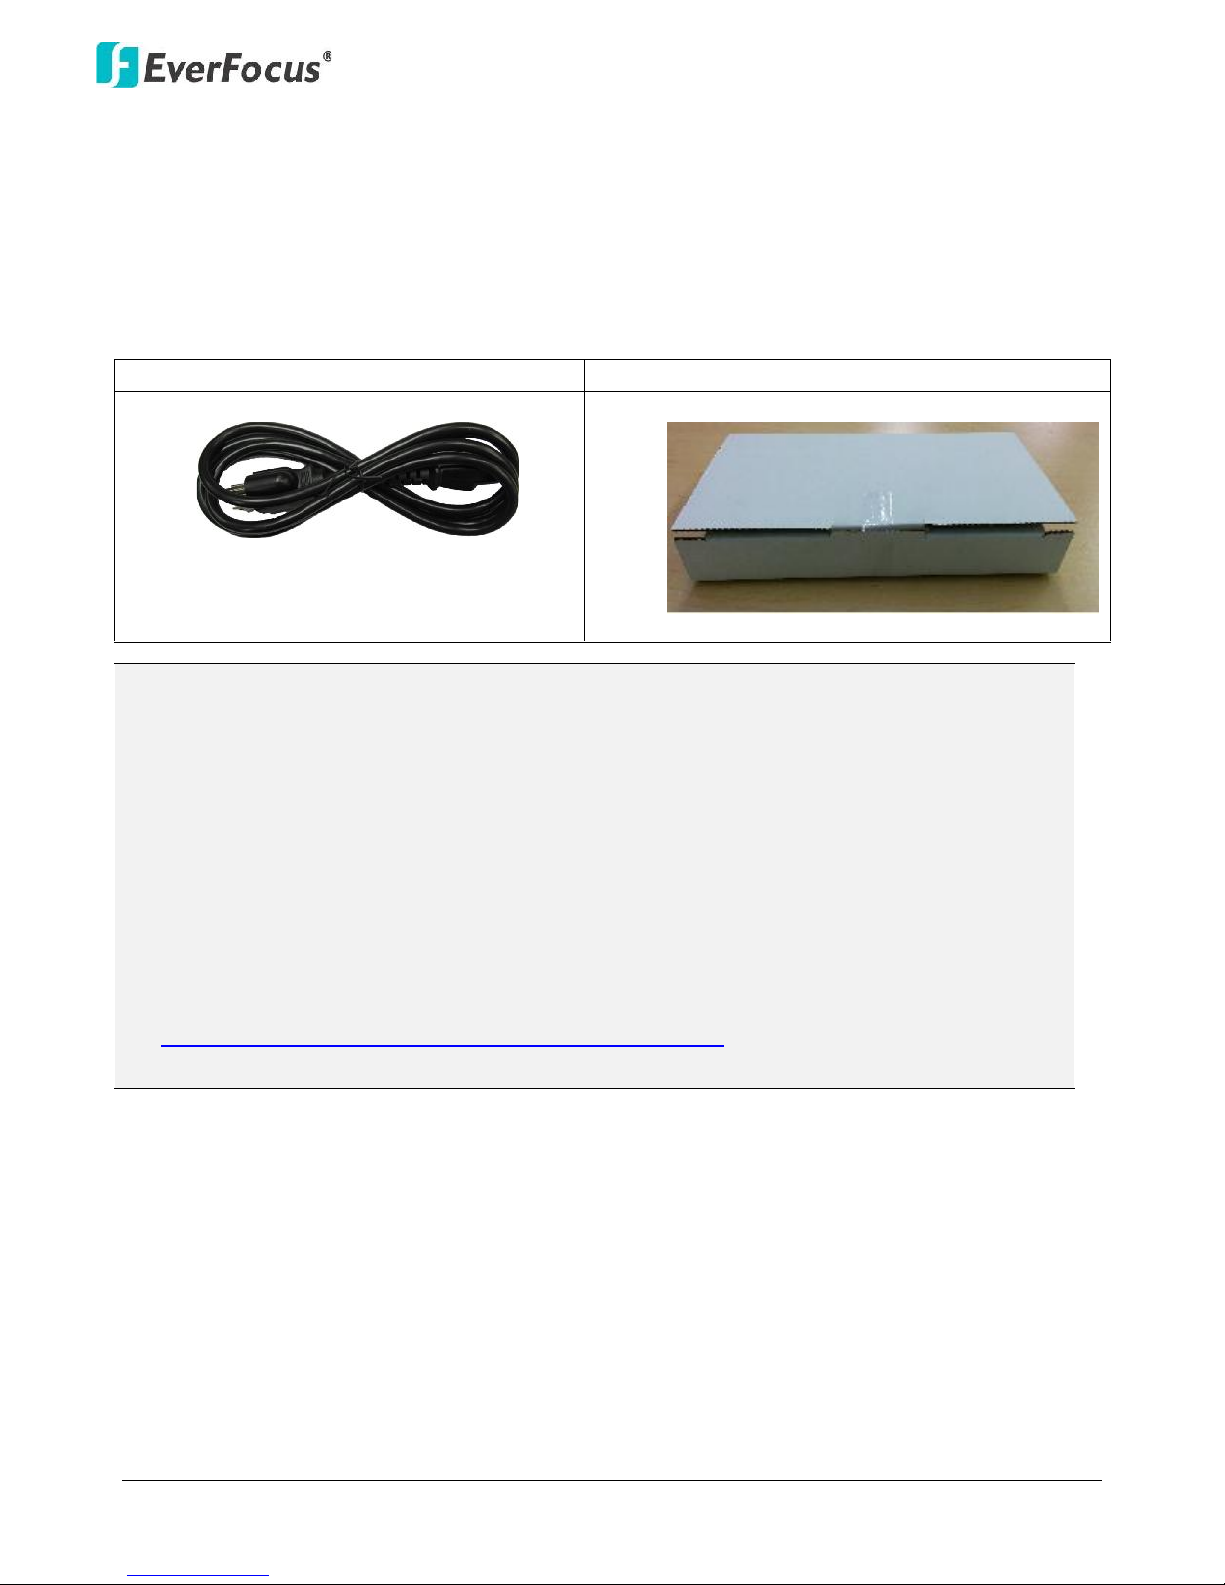
1.2 PACKING LIST ..................................................................................................................... 2
1.3 OPTIONAL ACCESSORIES ...................................................................................................... 3
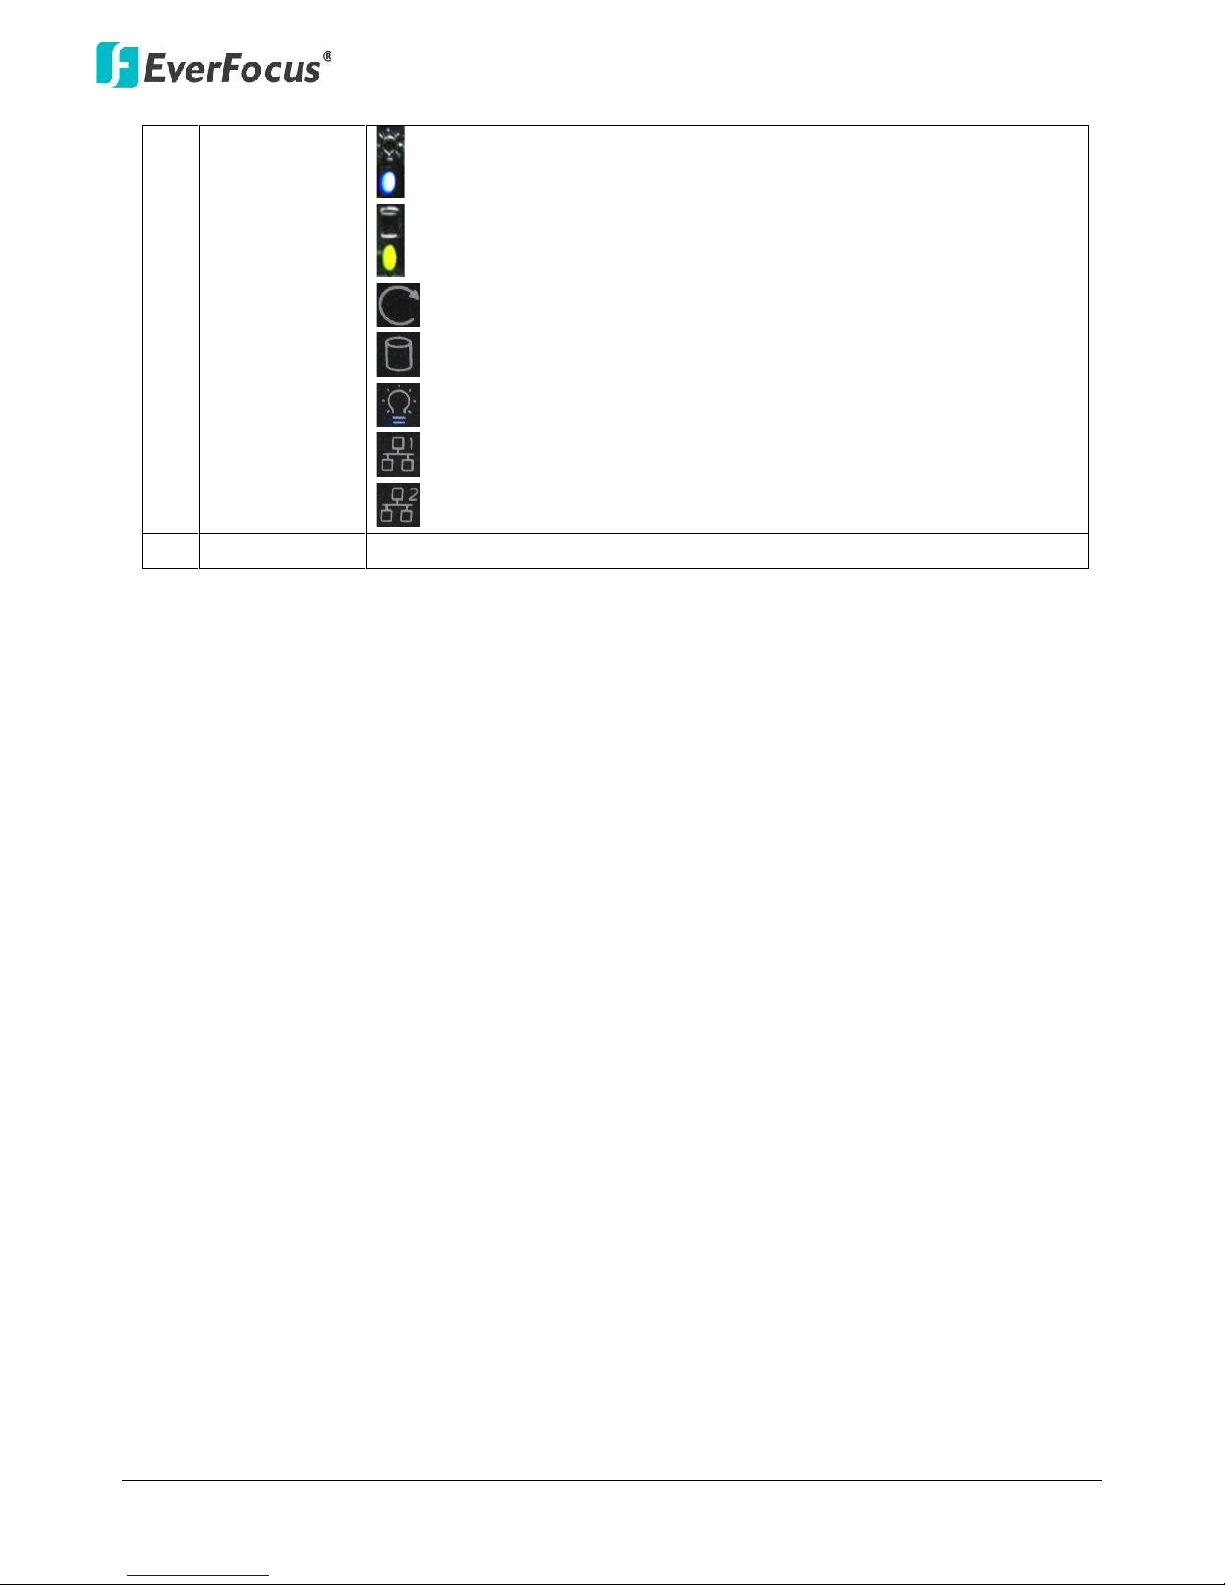
1.4 FRONT PANEL .................................................................................................................... 3
1.5 REAR PANEL ...................................................................................................................... 5
2. INSTALLATION ............................................................................................................... 6
2.1 HARD DISK DRIVE INSTALLATION........................................................................................... 6
2.1.1 Hard Disk Compatibility List.........................................................................................................8
2.2 BASIC CONNECTION ............................................................................................................ 9
2.3 CHECKING THE DYNAMIC IP ADDRESS .................................................................................. 11
3. GENERAL OPERATION ................................................................................................. 14
3.1 LOGIN / LOGOUT .............................................................................................................. 14
3.2 LIVE VIEW WINDOW ......................................................................................................... 15
3.2.1 eMap...........................................................................................................................................17
3.2.2 Live View Tool Bar ......................................................................................................................18
3.2.3 Device List Setup.........................................................................................................................19
3.2.4 Layout Setting ............................................................................................................................24
3.2.5 Page Setting ...............................................................................................................................25
3.3 RECORDING ..................................................................................................................... 26
3.3.1 Setting up the Recording Path ...................................................................................................27
3.4 QUICK PLAYBACK.............................................................................................................. 28
3.5 SETTING .......................................................................................................................... 29
3.5.1 Date / Time.................................................................................................................................30
3.5.2 License ........................................................................................................................................30
3.5.3 User Management .....................................................................................................................31
3.5.4 Recording Data Report...............................................................................................................32
3.5.5 Disk Information.........................................................................................................................33
3.5.6 Storage Device Management ....................................................................................................33
3.5.7 Motion Detection .......................................................................................................................36
4. SPECIFICATIONS........................................................................................................... 37

NVR8008X Enterprise Rack Mount NVR
1
1. Introduction
EverFocus NVR8008X is an enterprise-level NVR, supporting scalable channel numbers from 64 up
to 100 channels. Featured with 8-bay hot swappable SATAIII HDDs and RAID 0,1,5,6,10functionality
with the highest data protection, the NVR8008X is able to record at 250 Mbps in speed with
approximately64 channels working simultaneously at 2-megapixel / 30 fps with H.264 codec
without remote playback.
Operating on a Linux-based system, the NVR8008X provides a storage capacity of up to 32 TB (4 TB
per drive),and is compatible with all EverFocus devices such as IP cameras, DVR, NVR, access
control systems and EverFocus CMS software, Genie XMS. The ONVIF-conformant 3rd-party
cameras can also be connected to the NVR. Industry standard video compression formats, such as
H.264, MPEG4 and M-JPEG (depends on IP cameras) are all supported. The NVR8008X is also
supported by EverFocus MobileFocus apps on iOS and Android devices extending video surveillance
from fixed locations to mobile environments.
Chapter
1

NVR8008X Enterprise Rack Mount NVR
2
1.1 Supporting Operating Systems and Browsers
Operating System: Microsoft Windows XP (32-bit)/ 7 (32/64-bit)/ 8 (32/64-bit)
Web Browsers: Google Chrome
1.2 Packing List
NVR8008X x1
Quick Guide x 1
Power Cord x 1
HDD. Packed in white boxes
Note:
1. Any physical damage to the NVR due to improper installation or handling will not be
covered under warranty.
2. Every install environment is different. RAIL MOUNTS are not included with the NVR. This is
an optional accessory.
3. Equipment configurations and supplied accessories vary by country. Please consult your
local EverFocus office or agents for more information. Please also keep the shipping carton
for possible future use.
4. Contact the shipper if any items appear to have been damaged in the shipping process.
5. The latest version of the manuals is available for download from the EverFocus Website.
This also contains part numbers for optional accessories.
http://www.everfocus.com/product.cfm?productid=1855

NVR8008X Enterprise Rack Mount NVR
3
1.3 Optional Accessories
Rack Mount Rail x 2
Front Bracket x 2
EKB200 (USB controller keyboard: connect to the PC to
control the PTZ cameras connected to the NVR
1.4 Front Panel
No.
Name
Description
1
HDD Tray
Pull the HDD tray out to install the HDD.
2
USB
2 USB2.0 ports for connecting to a mouse or external storage device.

NVR8008X Enterprise Rack Mount NVR
4
3
Status LED
Power: Indicates the HDDs are installed.
HDD R/W: Indicates the HDDs are reading/writing data.
Reset: Use a paper clip to press the reset button.
HDD: Indicates the internal HDD 1~8 is activating.
Power: Indicates the power is on.
LAN1: Indicates the NVR is connected to the network.
LAN2: Indicates the NVR is connected to the network.
4
Power
Press to turn on / off the NVR.

NVR8008X Enterprise Rack Mount NVR
5
1.5 Rear Panel
No.
Name
Description
1
Power Port
Connects to the 100-240 VAC~ power using the supplied Power Cord.
2
USB2.0 Port
Two USB2.0 ports
3
USB 3.0 Port
Two USB3.0 ports
4
VGA Port
Connects to monitor using a VGA cable. This is for configuration
purpose only, not for live viewing of IP camera.
5
Network
Connects to the network using a standard RJ-45 CAT5 10/100Mb
Ethernet cable. Connects to a router or switch for connecting IP
cameras using a standard RJ-45 CAT5 10/100Mb Ethernet cable.

NVR8008X Enterprise Rack Mount NVR
6
2. Installation
2.1 Hard Disk Drive Installation
1. Open the white boxes containing the hard drive.
Chapter
2

NVR8008X Enterprise Rack Mount NVR
7
2. Open the HDD tray by pressing the blue button.
3. Insert the HDD tray into the NVR, and push back the black panel to close it.

NVR8008X Enterprise Rack Mount NVR
8
2.1.1 Hard Disk Compatibility List
Please use the hard disk models recommended in the list below to ensure your hard disks will be
compatible.
SATA Hard Disk
Model
Capacity
Seagate
CE-Video SATA3 / ST1000VM002
1TB
CE-Video SATA3 / ST2000VM003
2TB
CE-Video SATA3 / ST3000VM002
3TB
CE-Video SATA3 / ST4000VM000
4TB
SV35 SATA6 7200/ ST4000VX000
4TB
SV35 SATA6 7200/ ST1000VX000
1TB
SV35 SATA6 7200/ ST2000VX000
2TB
SV35 SATA6 7200/ ST3000VX000
3TB
Constellation CS SATA3 7200 / ST1000NC000
1TB
Constellation CS SATA3 7200 / ST3000NC000
3TB
CE-Video SATA6 5900RPM / ST1000VM002
1TB
CE-Video SATA6 5900RPM / ST2000VM003
2TB
SV35 SATA3 7200/ST3000VX000
3TB
SV35 SATA3 7200/ST2000VX000
2TB
SV35 SATA3 7200/ST1000VX000
1TB
Toshiba
MD03ACA200V 2TB SATA 7200RPM 64MB
2TB
MD03ACA300V 3TB SATA 7200RPM 64MB
3TB
MD03ACA400V 4TB SATA 7200RPM 6MB
4TB
Western Digital
WD40PURX-64GVNYO
4TB
WD30PURX-64P6ZY0
3TB
WD20PURX-64P6ZY0
2TB
WD10PURX-64D85Y0
1TB
Note: If using two or more hard disks, please choose the hard disks with the same capacity.

NVR8008X Enterprise Rack Mount NVR
9
2.2 Basic Connection
The instructions below describe the basic connection for NVR8008X.
Before powering on the NVR, make sure the internal HDDs have been installed
properly. When you have completed the basic cable connections, you are ready to
turn on the NVR.
This NVR has dual network ports. It is recommended to separate your IP-camera network from your
other network.
The diagram below is an example of an initial network set up.

NVR8008X Enterprise Rack Mount NVR
10
Once NVR and IP camera configuration is complete, the DHCP Server/Router and
PC-1 can be removed from the Camera Network.

NVR8008X Enterprise Rack Mount NVR
11
2.3 Checking the Dynamic IP Address
You can look up the IP address and access the Web interface of the NVR using the IP Utility (IPU)
program, which is contained in the CD. It can also be downloaded from EverFocus’ Website:
http://www.everfocus.com/
1. Save IP Utility Setup AutoRun.exe in your computer. Double click the .exe file and follow
the on‐screen instructions. Check Run IPUtility.exe and click the Finish button, the IP Utility
will be launched to search the IP devices connected in the same LAN automatically.
2. To optionally configure the Machine Name, IP Address, IP Type or Port Number using the IPU:
a. Log in the NVR by checking the desired model and then click the Log in icon. The Log in
dialog box appears.

NVR8008X Enterprise Rack Mount NVR
12
b. Type the Username and Password. Click the OK button, the status of the selected camera
will display Login.
Note:
1. The default user ID is admin and the default password is 11111111.
2. If you select more than one NVR that have the same user ID / password, you will
be able to log in several NVRs at once.
c. Right click the column to configure the setting. Click Apply Changes button to apply
and save the settings.
Note: Most networks uses DHCP to assign IP address, if you are unsure of your network
settings, please consult your network administrators for configuration details .
3. To access to the Live View window, open a Google Chrome Web browser, type the IP address
of the NVR in the address field and press the Enter key on the keyboard, the Welcome window
appears. Follow the instruction steps to update the latest Plug-in version.
Note: The Welcome window will only be prompted for the first time login in order to
update the system to the latest plug-in version.

NVR8008X Enterprise Rack Mount NVR
13
4. After reloading the webpage, the login window is displayed again. Type the user ID and
password to log in. By default, the user ID is admin, and the password is 11111111.
5. Click the Login button, the Live View window (see 3.2 Live View Window) appears.

NVR8008X Enterprise Rack Mount NVR
14
3. General Operation
You can view the live videos or operate the Live View Window through the Web browser.
3.1 Login / Logout
1. To log in the system, open a Google Chrome Web browser, type the IP address of the NVR in
the address field and press the Enter key on the keyboard, the Welcome window pops up.
Follow the instruction steps to update the latest Plug-in version. After reloading the webpage,
the login window pops up. Type the user ID and password to log in. By default, the user ID is
admin and the password is 11111111.
Note: The Welcome window will only be prompted for the first time login in order to
update the system to the latest plug-in version.
2. To log out the system, click the Logout button on the upper-right corner of the Live View
Window. The system will return to the login window.
Chapter
3
Other manuals for NVR8008X
1
Table of contents
Other EverFocus Storage manuals