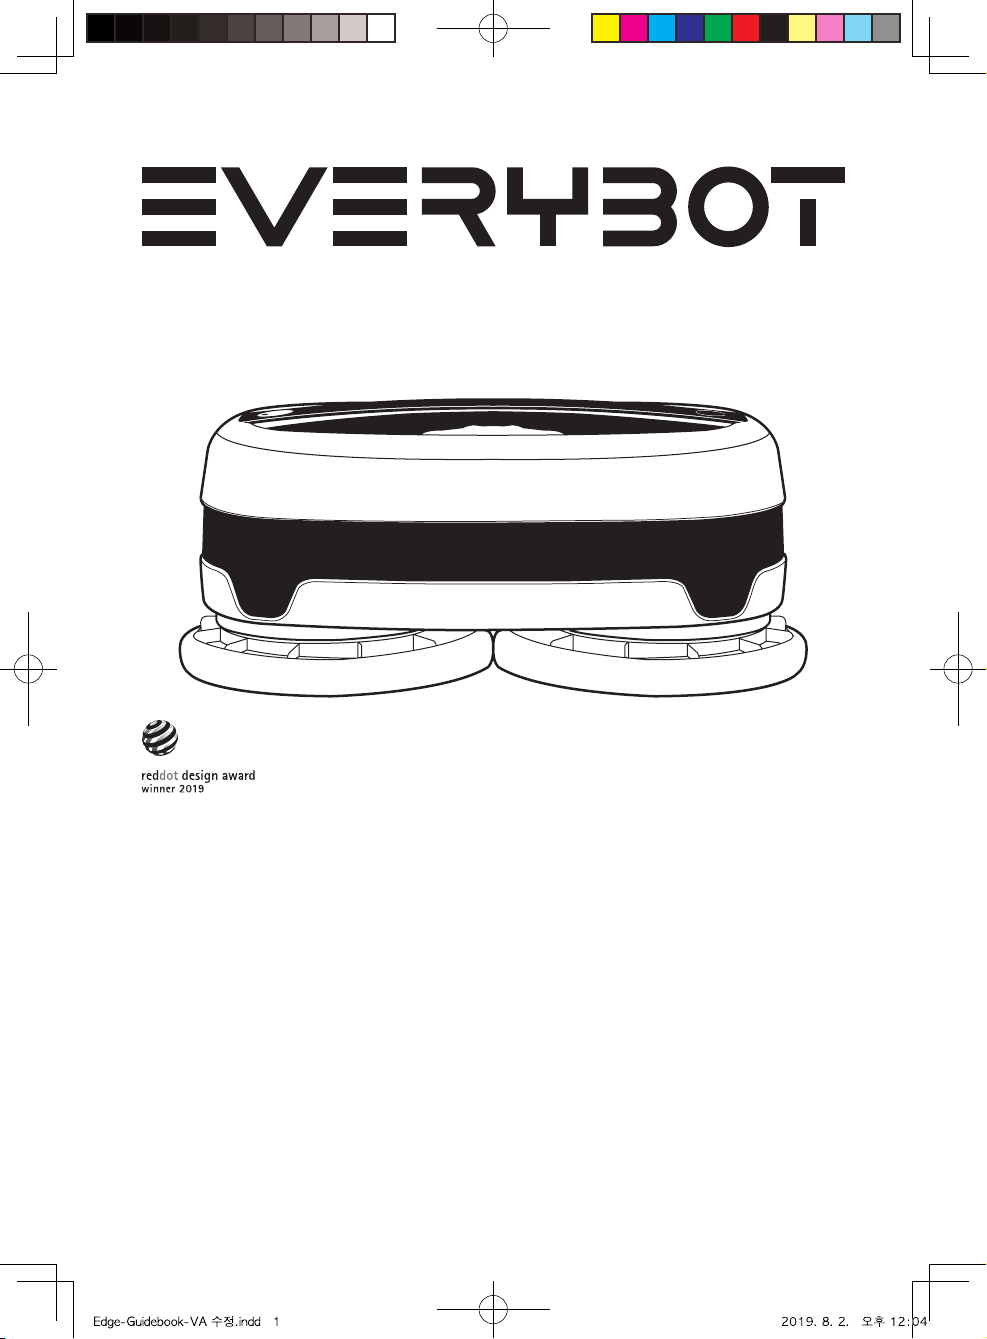
Everybot Edge User manual
User Manual
Please carefully read this manual before
operate the machine. This manual includes
Warranty card so please keep it well aer reviewing.
This machine is only allowed for home use.
Please do not use for industrial or commercial
purpose. Please fully charge the battery before of
first operation. EVERYBOT Inc. assumes no
responsibility for technical or editorial errors or
omissions contained herein, nor for any incidental or
consequential damages and failures of appliance
caused by not following the precautions and
instructions.
Contents
Safety Information
Parts Name & Product Component
Charging Status and Indication
Installing Water Supply Mop Kit
Water Supply Mop Kit & Mop Maintenance
Cleaning Operation & Remote Control
Cleaning Modes
Handy Cleaning Mode & Product
Maintenance
LED Indications
Troubleshooting
Product Specifications
Product Warranty
2
4
6
7
8
9
10
11
12
13
14
15
EDGE
Ver 1.0 Copyright © 2019 Everybot Inc. All rights reserved

This contents below are important notifications that contain for using the machine
correctly and preventing unpredictable damage or danger for users.
EVERYBOT Inc. assumes no responsibility for technical or editorial errors or omissions
contained herein, nor for any incidental or consequential damages and failures of
appliance caused by not following the precautions and instructions.
Safety Information
Please use power source and socket with correct voltage and current.
Do not use unauthorized power adaptor or multiple plugs in a single socket.
Do not use damaged power cord or plug.
Make sure the power cord is not bent or crushed by heavy objects.
When plugging in or removing the power plug, always plug it in or remove it by holding
the plug, not the cable.
Do not use a damaged power cord! To repair or replace a damaged power cord,
contact a qualified service agent to ensure safety.
Do not touch the plug or wall socket with wet hands.
Do not use the robot cleaner in a place where it can be exposed to direct sunlight
or where the temperature is too low or too high. (Lower than -5°C and higher than 40°C)
Do not use the robot cleaner in a place where children, seniors physicallychologically
challenged people, or pets are residing alone.
The robot cleaner is not intended for use by children, or by persons with limited physical,
sensory or mental capabilities.
Ensure clothes or any part of the body (hair, finger, foot, etc.) not to get entangled in
the rotating plate of the robot cleaner.
Do not use or store the robot cleaner near flammable materials
(alcohol, gasoline, kerosene, thinner, etc.) or heating sources. (cigarettes, candles, stove, etc.)
If you notice smoke or a burning smell or an unusual sound from the robot cleaner,
turn the system power switch o immediately and contact your service center.
Do not disassemble or try to fix the robot cleaner except for assigned repairing
center or engineer.
Warnings
2
■
■
■
■
■
■
■
■
■
■
■
■
■
■
Before using the robot cleaner, remove objects.
(fragile objects, valuables, pet litter, cables, long strings, etc.) from the floor.
Do not soak the robot cleaner in water or spray oil on it.
Do not kick the robot cleaner or apply strong impact.
Do not use the robot cleaner on a table or other high places.
If there are some shoes or any objects right below of low threshold, the robot cleaner
may fall down because the robot cannot sense it as a cli.
If the robot cleaner attached wet mop stays long time on the floor, the floor may be
discolored or polluted. Thus, please separate the water supply mop kits aer using.
If there is any sharp and hard object on the cleaning area, it may damage the robot
cleaner or floor. Please pay attention with it.
Make sure that children or pets do not step or sit on the robot cleaner while operating.
Do not let the robot cleaner pass over or sweep up liquid, oil, pet droppings, etc.
Do not insert chopsticks or pins in the robot cleaner.
The robot cleaner is made to be used in home environments. Do not use it outdoor or
in any other places.
Please discard the life-end battery according to the disposal regulation of each country.
Please turn o the power when you clean or maintain the robot cleaner.
Please keep clean the senor windows and water supply mop kits.
Cautions
Do not use the robot cleaner on a floor with a slope wove than 10°.
Before cleaning, check that battery is good enough, or otherwise, recharge the robot cleaner.
Make sure to close the door of the room that is not to be cleaned.
Remove obstacles (chair, etc.) for quick and through cleaning.
If there is dust or foreign substances at the bottom of the robot cleaner, remove it.
Aer using the water supply mop kit and wet mop, clean them throughly.
Note
3
■
■
■
■
■
■
■
■
■
■
■
■
■
■
■
■
■
■
■
■
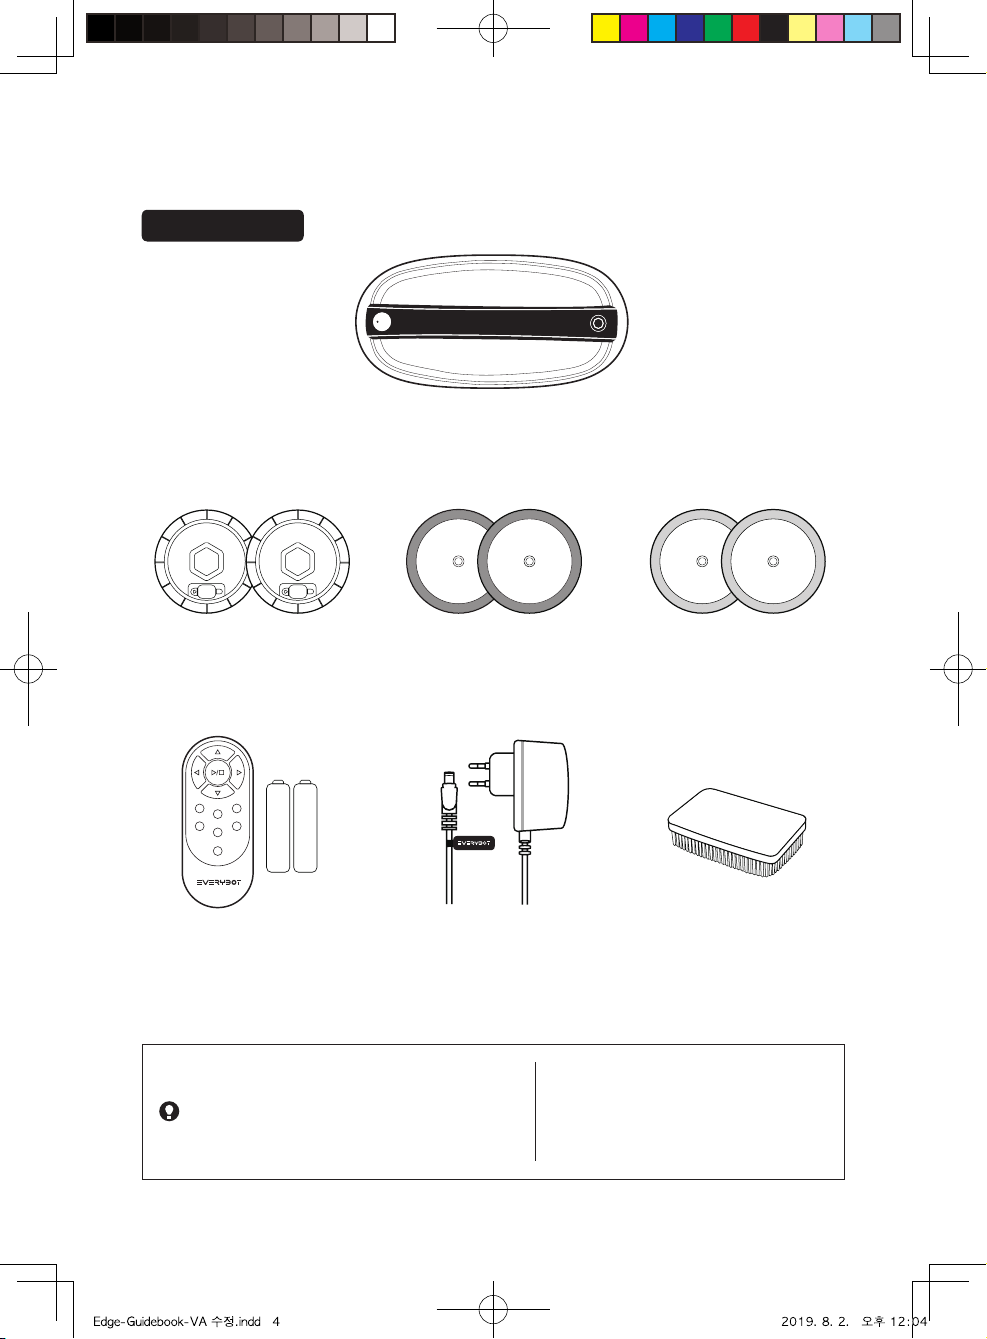
Parts Name & Product Component
Main Unit
Remote Control
(with Battery)
Power Adaptor Silicon Brush
Water Supply Mop Kit Mother Yarn Mop
(Grey Color)
Microfiber Mop
(Green Color)
Components
Mother yarn mop (Grey color)
It is included with mother yarn which
is 100times thicker than microfiber.
Thus, it is good for cleaning up dust
in cracks and stains.
Microfiber yarn (Green color)
It is a mop with richer and longer
yarns so it has superior wiping
performance.
Note
4

Main Unit Front
Main Unit Main Unit
Bottom Rear
Water Supply Mop Kit Top Water Supply Mop Kit Bottom
Mop guide kit set screwMop guide kit Power jack
Illumination sensor/Remote control receiver
Obstacle detection
sensor
Handle
Cli detection sensor
Operation button/
LED lamp
Water inlet
Rubber cap
Mop Velcro
Water supply device
5
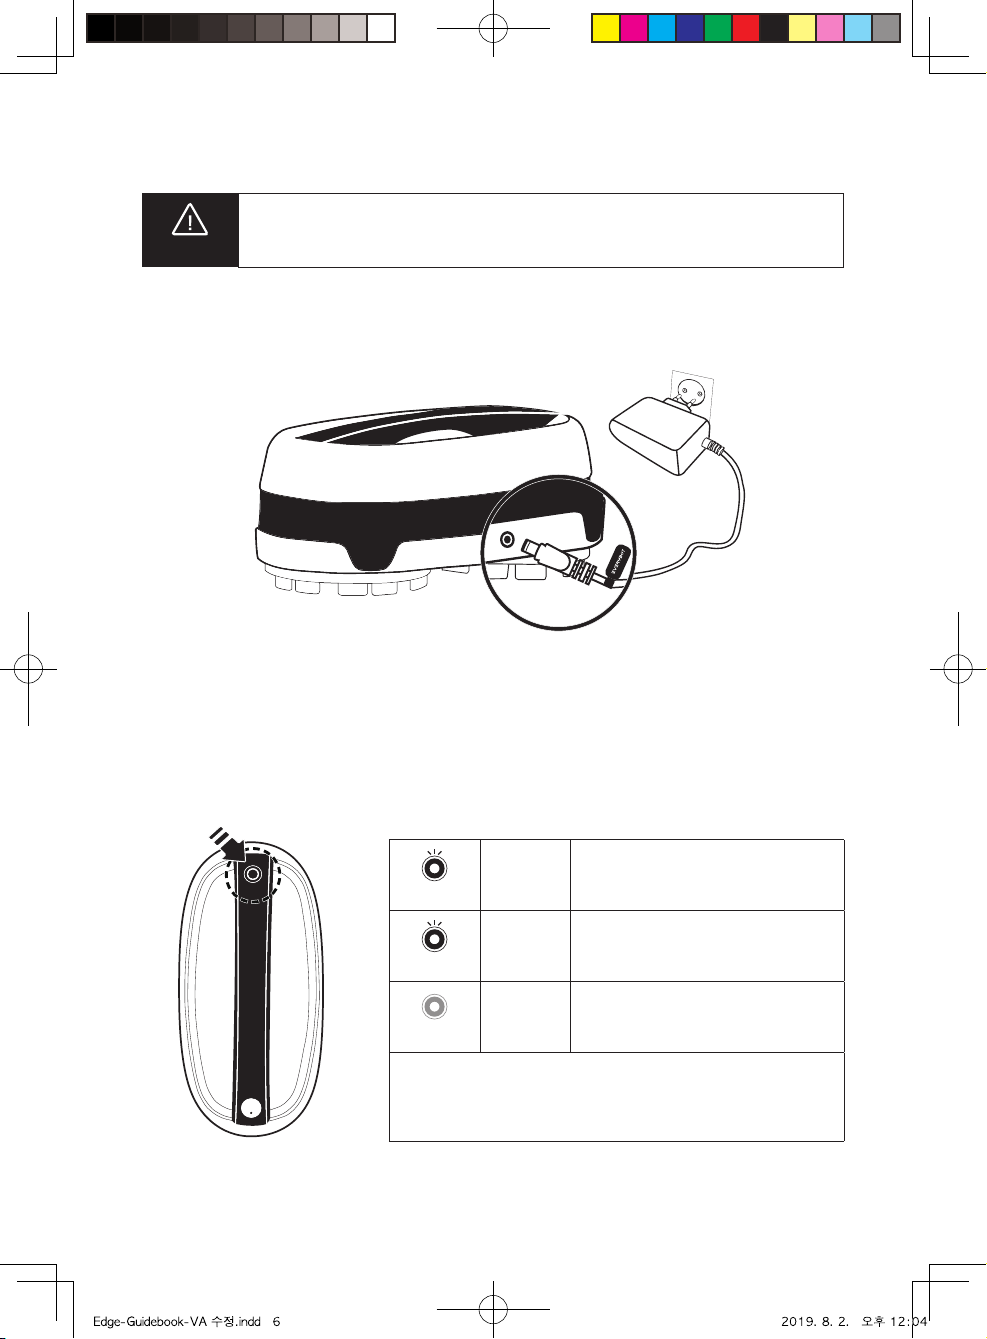
Charging Status & Indication
How to Charge
Connect the power adaptor to the charging port on the back of main unit.
Battery Level Indication
Battery level can be checked through LED lamp.
Yellow
Yellow
Blinking
Blue
Blinking
LED
O
Low battery
Blue
Enough battery more than 80%
OFF
Fully charged
Charging time: About100min (In case of full discharge,150min)
Operating time: About 100min (It may causes a little dierence
depends on the floor status)
Do not use unauthorized adaptors. It may cause serious damage for
the product.
Cautions
6

Installing Water Supply Mop Kit
How to Install Water Supply Mop Kit
·Please turn o the main power when you install or detach water supply mop kits.
Please tightly squeeze out water the mother yarn mops before attaching,
otherwise the cleaning speed may slower down.
·
Cautions
When attaching the water supply mop kit
to the main unit, refer to the right pictures.
If the mop does not attach correctly,
the mop can cover cli detection sensors
and the robot cleaner can be stopped.
Correct Wrong Correct Wrong Correct Wrong
Aer filling water in the water supply
mop kit, fully close the rubber cap.
If rubber cap does not close, there
will be failure or malfunction in the
robot cleaner.
Cautions
When you attach the mops to water
supply mop kits, please pay attention to
attach the mop correctly to the kit without
chink. If the mop is attached in wrong
way, it may cause some malfunctions.
1
Wet mops throughly in water
and apply them in the main
unit aer wringing them out.
2 3 Open the rubber cap of
the water supply mop kit.
5
Close the rubber cap of the water supply mop kit and attach
the water supply mop kit in the bottom of the main unit.
(Pressing it while turning side to side will install it with a click sound)
4Fill water into the water tank.
7
Attach the mop pads to fit the
joint parts to the hole of water
supply mop kit. (See the Figure below)
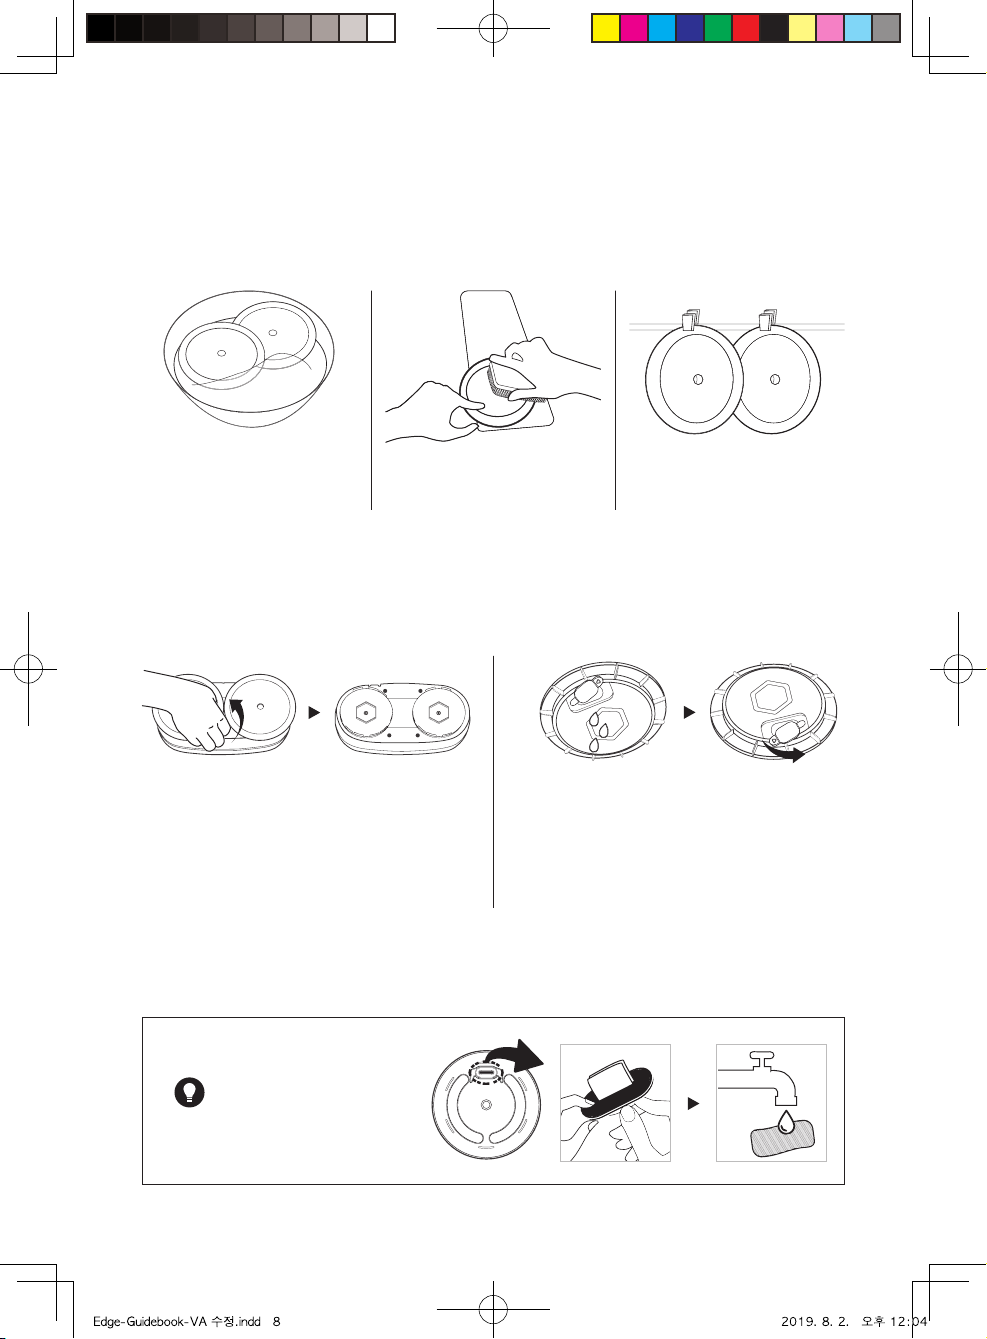
Water Supply Mop Kit & Mop Maintenance
Washing Mops
You can use included silicon brush for easier mop washing.
1Wet mops enough. 2Use a natural detergent
for washing mops.
3Squeeze out water and
dry them under the sun light.
Maintaining Water Supply Mop Kits
1 Separate the mop from the water tank
mop kit aer finished operating.
· Please just pull out the water tank
mop kit by hands.
If it is hard to pull out, please twist it
a little bit.
·
2 Open the rubber cap to dry out inside of
water tank aer pour remained water.
If water supplying is not
so well, please wash
the water supply cloth
or change the water
supply device as
the picture beside.
Note
8

Remote Control The range of remote control is max.5m
Cleaning Operation & Remote Control
Start Cleaning
1Press the operation button more
than 2sec.
2 Press the operation button on the main unit or play
button of a remote control to start the machine.
If you start cleaning without installing the water suppply mop kit, the main unit
may be damaged.
Cautions
·If you press the operating button on the main unit or Start/Stop button on
the remote control while cleaning, cleaning stops.
If the unit does not operate for 5minutes aer power switch is on,
the LED lamp turns o and the unit is automatically switched o.
If you press operation button for 2sec., It will turn on again and available
to start cleaning.
·
·
Cautions
Start/Stop
Start the auto cleaning or
stop the cleaning mode.
Auto Cleaning
Eectively cleans the whole area
as a basic cleaning mode.
Intensive Cleaning
Intensively cleans with straight
and turn around moving patterns.
Y Cleaning Button
Throughly clean with Y curve
pattern as if wiping floor by hands.
Direction
When the main unit stops, the unit can
be controlled with direction buttons.
Edge Cleaning
Focuses to clean corners and
edges of floor.
Focus Cleaning
Intensively cleans the surrounding area
relative to the main unit’s current location.
Step Cleaning
Cleans le and right alternatively
like human walking.
50min. Cleaning
Random cleaning only for 50min.
good for small room or isolated area.
9
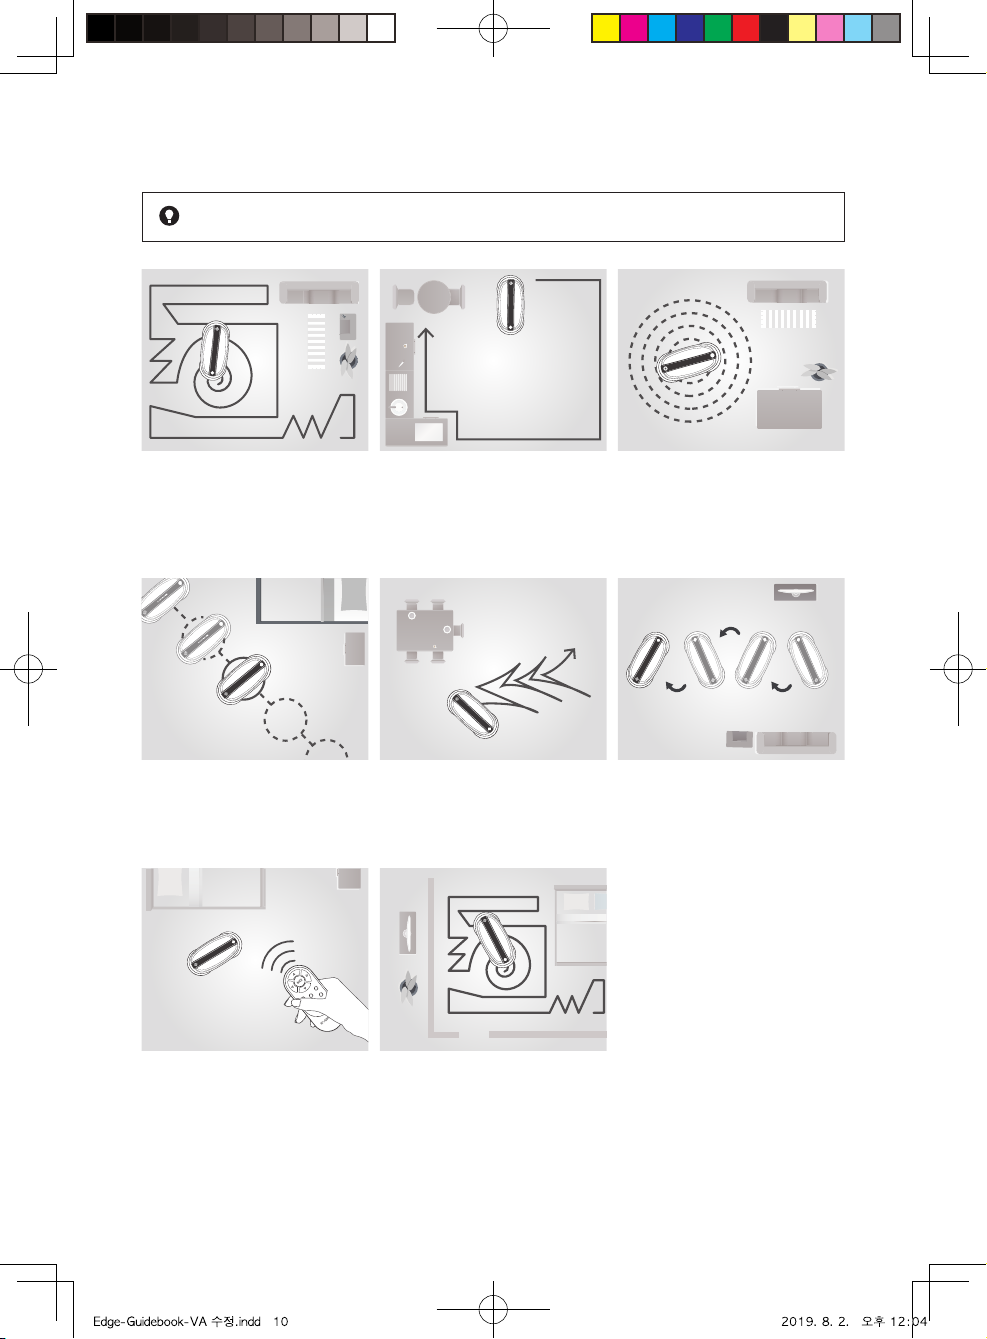
Cleaning Modes
Select a cleaning mode you want by using the remote control.
Auto Cleaning
As a basic cleaning mode,
cleans the entire space eciently
Edge Cleaning
Focuses to clean corners and
edges of floor
Focus Cleaning
Intensively cleans the surrounding
area relative to the main unit
location
Intensive Cleaning
Intensively cleans with straight
and turn around moving patterns
Y Cleaning
Throughly clean with ‘Y ’curve
pattern as if wiping floor by hands
Step Cleaning
Cleans le and right alternatively
like human walking
Manual Cleaning
Cleans with direction button keys
of remote control
*
Only moves when the direction button
is pressed
50min. Cleaning
Random cleaning only for 50min.
good for small room or isolated
area.
Note
10
Other manuals for Edge
3
Table of contents
Other Everybot Vacuum Cleaner manuals


