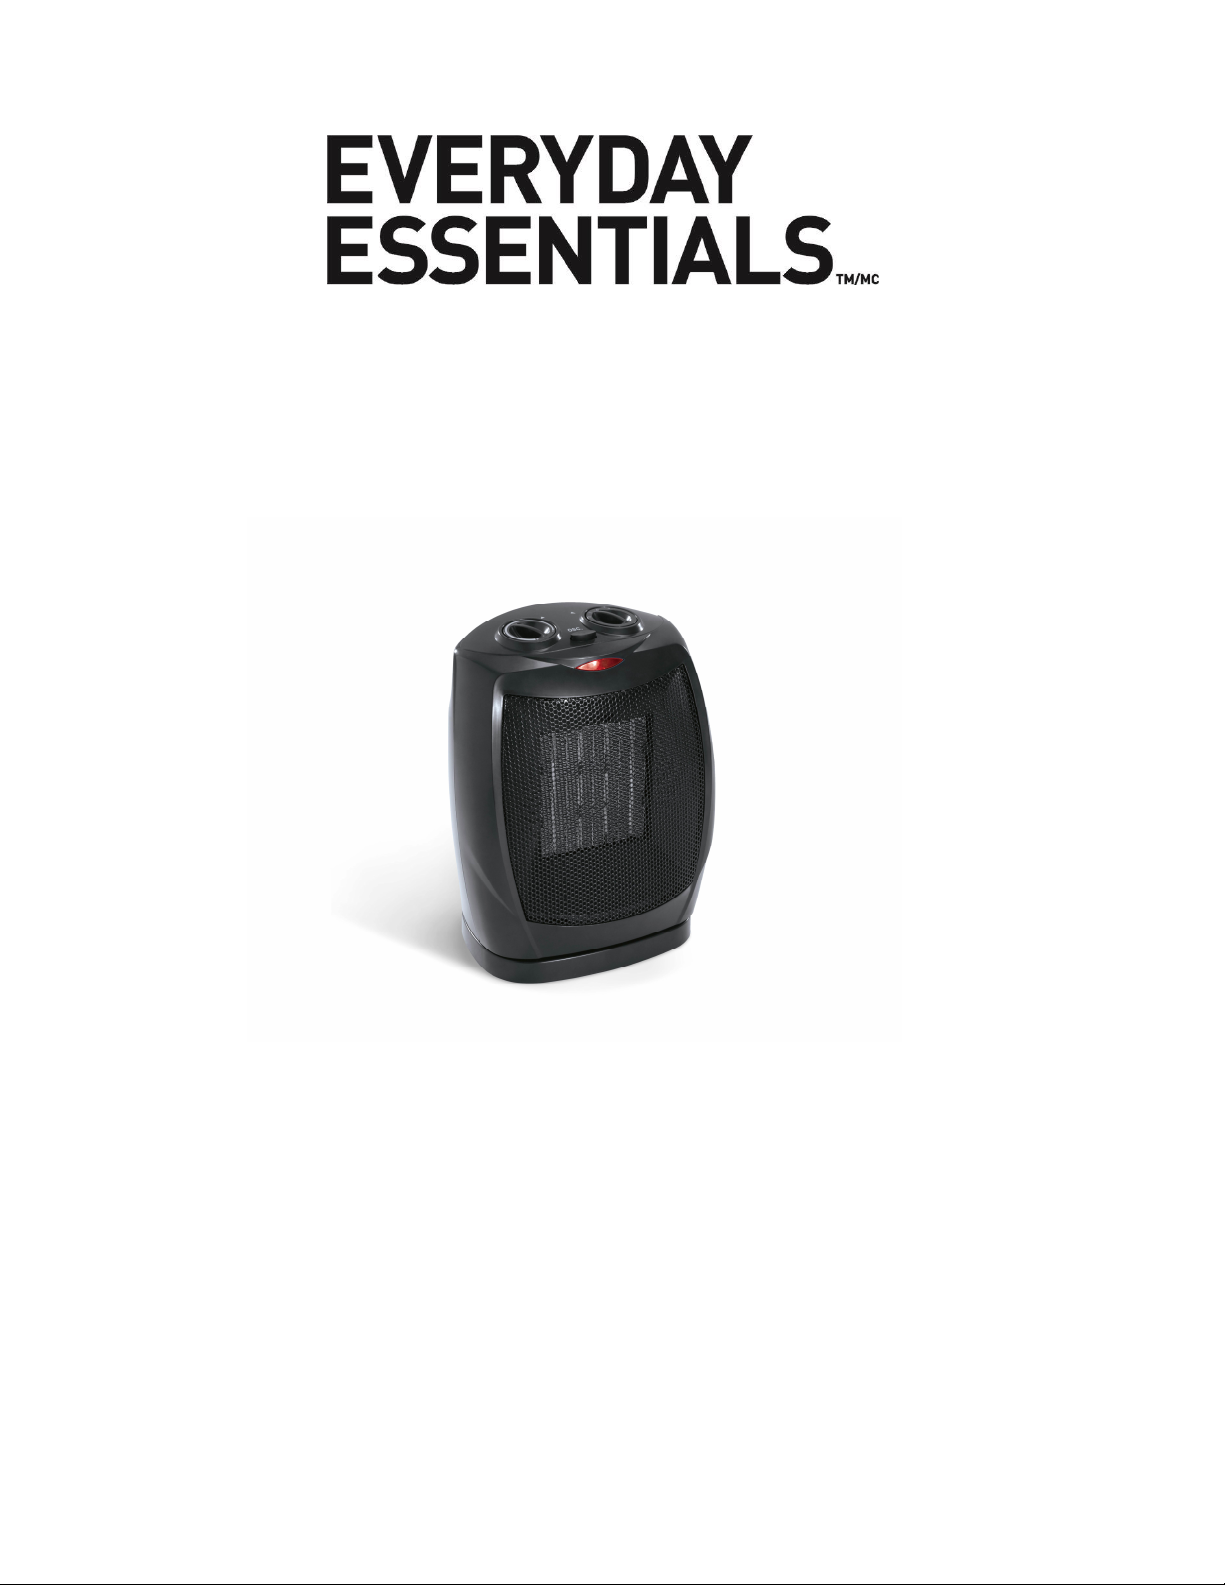
Everyday Essentials FH102 User manual

1
Oscillating Ceramic Heater
Owner’s Manual
Model : FH102
PLEASE READ AND SAVE THESE
IMPORTANT SAFETY INSTRUCTIONS

2
IMPORTANT INSTRUCTIONS
PLEASE READ ALL INSTRUCTIONS BEFORE USING THIS HEATER.
WHEN USING ELECTRICAL APPLIANCES, BASIC PRECAUTIONS SHOULD ALWAYS
BE FOLLOWED TO REDUCE THE RISK OF FIRE, ELECTRIC SHOCK AND PERSONAL
INJURY, INCLUDING THE FOLLOWING:
When switching on the appliance for the first time, allow it to run at full power for
about two hours to get rid of the unpleasant smell. Make sure that the room in which
the appliance is located is well ventilated during this operation. It is normal for the
appliance to emit small cracking sounds when you turn it on if the first time.
1. Read all instructions before using this heater.
2. This heater is hot when in use. To avoid burns, do not let bare skin touch hot surfaces.
Use handle when moving the unit. Keep flammable materials such as furniture, pillows,
bedding, papers, clothes, and curtains at least 3 feet (0.9 m) from the front and top of
the heater and keep them away from the sides and rear of the heater. Keep the rear
grille away from walls or drapes so as not to block the air intake.
3. Extreme caution and supervision is necessary when any heater is used near children or
invalids and whenever the heater is left operating and unattended.
4. Always unplug heater when not in use.
5. Do not use any heater with a damaged cord or plug or after the heater malfunctions or
has been dropped or damaged in any manner. Discard heater or return to an
authorized service facility for examination and/or repair.
6. Do not use outdoors.
7. This heater is not intended for use in bathrooms, laundry areas or other similar indoor
locations. Never locate heater where it may fall into a bathtub or other water container.
8. Do not run cord under carpeting. Do not cover cord with throw rugs, runners, or similar
coverings. Do not route cord under furniture or appliances. Arrange cord away from
traffic areas and place it where it will not be tripped over.
9. To disconnect heater, turn controls to off, then remove plug from outlet.
10. This appliance has a polarized plug (one blade is wider than the other). This plug is
intended to fit a polarized outlet only one way. If the plug does not fit fully in the outlet,
reverse the plug. If it still does not fit, consult a qualified electrician. Do not connect the
heater to extension cords, surge protectors, timers, direct breakers, or an outlet with
other appliances connected to the same outlet. Risk of fire, overheat, malfunction,
property damage, injury, or even death may result if not adhered to!
11. Connect to properly polarized outlets only.
12. Do not insert or allow foreign objects to enter ventilation or exhaust openings, as this
may cause an electric shock or fire, or damage the heater.
13. To prevent a possible fire, do not block air intakes or exhaust in any manner. Do not
use on soft surfaces, like a bed, where openings may become blocked.

3
14. A heater has hot and arcing or sparking parts inside. Do not use it in areas where
gasoline, paint, or flammable liquids are used or stored.
15. Use this heater only as described in this manual. Any other use not recommended by
the manufacturer may cause fire, electric shock, injury to persons or other damage to
property.
16. This heater must be plugged into a 120V, 15 amp (or more) circuit of its own. Nothing
else can be plugged into the same circuit. If unsure if you home meets this specification,
consult a certified electrician prior to use. Risk of fire, overheat, malfunction,
property damage, injury, or even death may result if not adhered to!
17. To prevent overload and blown fuses, be sure that no other appliance is plugged into
the same outlet or into another outlet wired into the same circuit.
18. It is normal for the heater’s plug and cord to feel warm to the touch. Aplug or cord that
becomes hot to the touch or becomes distorted in shape may be a result of a worn
electrical outlet. Worn outlets or receptacles should be replaced prior to further use of
the heater. Plugging heater into a worn outlet/receptacle may result in overheating of
the power cord or fire.
19. Ensure the heater is on a stable, secure surface to eliminate the potential of tipping
over.
20. Always plug heaters directly into a wall outlet/receptacle. Never use with an extension
cord or relocatable power tap (outlet /power strip).
21. Be sure that the plug is fully inserted into appropriate receptacle. Please remember that
receptacles also deteriorate due to aging and continuous use: check periodically for
signs of overheating or deformations evidenced by the plug. Do not use the receptacle
and CALL your electrician.
22. Check that neither the appliance nor the power cable has been damaged in any way
during transportation.
23. Make sure that no pieces of polystyrene or other packaging material have been left
between elements of the appliance. It may be necessary to pass over the appliance
with a vacuum cleaner.
24. This appliance is not intended for use by persons (including children) with reduced
physical, sensory or mental capabilities, or lack of experience and knowledge, unless
they have been given supervision or instruction concerning use of the appliance by a
person responsible for their safety. Children should be supervised to ensure that they
do not play with the appliance.
CAUTION: To prevent electric shock, match wide blade of plug to wide slot, fully
insert.
SAVE THESE INSTRUCTIONS
4
Be sure to plug into a 120V AC, 60Hz outlet. Check that the plug and the socket fit well, then you
can operate the appliance.
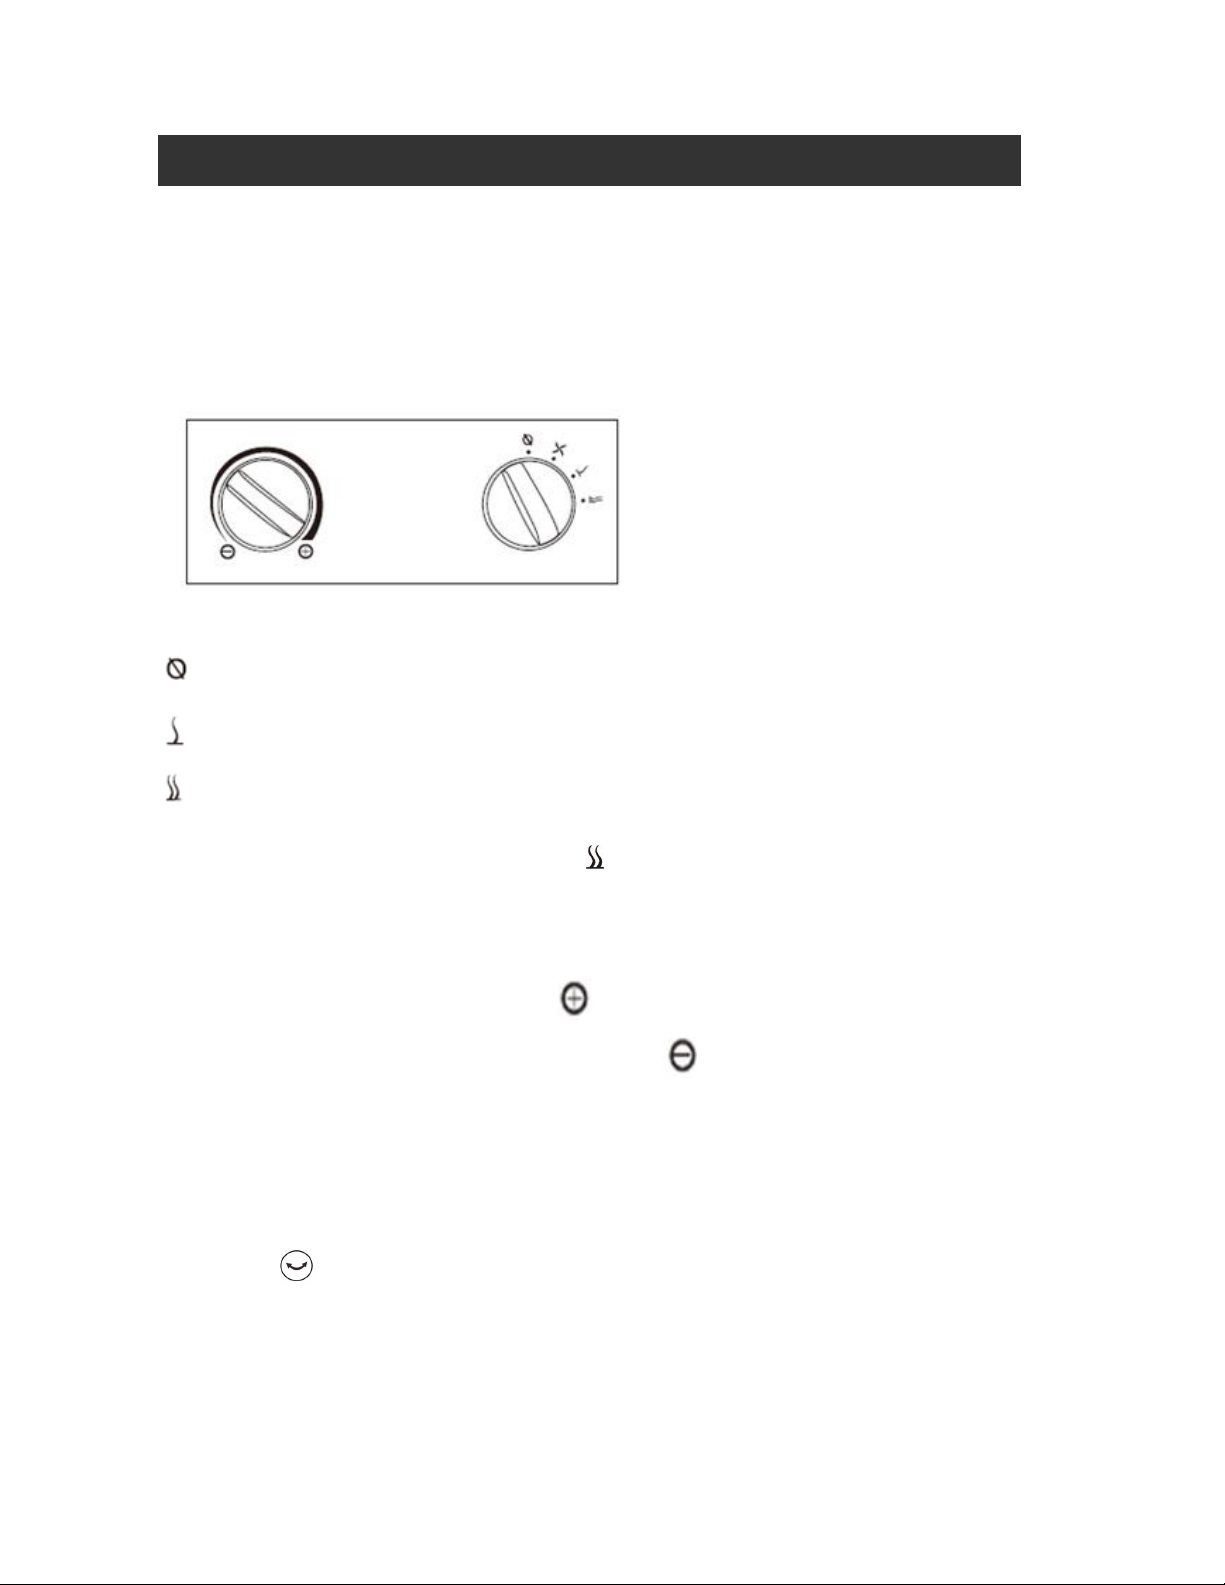
This model is equipped with a POWER switch and a thermostat.
POWER SETTING CONTROL:
This model is equipped with a 4-position power setting switch.
Fig.1 Control Panel
Symbol Function
(OFF) Power off
(LOW) Low heat (750 W)
(HIGH) High heat (1500 W)
Set the power and setting control switch to for fast warm-up of a room. Once the room is
comfortable, select a lower power setting to prevent the room from becoming too warm.
TEMPERATURE SETTING (THERMOSTAT):
Adjust the thermostat clockwise to maximum ( ) and select the desired power setting. Once the room
is comfortable, rotate the thermostat counterclockwise to , until the heater shuts off. The thermostat
will now maintain the temperature by cycling the heater on or off during particularly cold weather, the low
power setting may be insufficient to satisfy the thermostat. Select a higher setting for these periods.
OSCILLATION FUNCTION
This heater is equipped with an oscillation feature. If you want to obtain a wider area of heat circulation,
press button for oscillation function.
OPERATION INSTRUCTIONS

5
OVERHEAT PROTECTION
This heater includes an overheat protection system that shuts the unit off when parts of the heater
overheat. If this occurs, turn the heater off, unplug it, and inspect and remove any objects on or
adjacent to the heater that may cause high temperatures. Wait five to ten minutes for the unit to cool
down. Then plug it back in, and resume the normal operation.
TIP-OVER SWITCH
Your heater is equipped with a tip-over switch, which is designed to automatically shut off unit when
tipped forward or backwards. When returned to normal upright position, the heater will automatically
come on again. This is a safety to avoid possibility of fire should the unit be accidentally tipped over.
POWER INDICATOR LIGHT
This heater is equipped with an indicator light, which glows whenever the heater is plugged in and
turned on. It will continue to glow even if the thermostat has cycled the heating elements off. This
feature is to prevent you from being unaware that the heater is in operation.
1. Before any cleaning, make sure that:
a. The heater is turned OFF
b. Disconnect power supply at source by removing plug from power outlet.
2. Regular cleaning:
a. Interior dust can often be removed by using a vacuum cleaner with a crevice
tool attachment.
b. Do not use cleaning spray-on liquids or other chemicals on the unit
c. To clean enclosure, use a clean, soft and lightly damp cloth to gently wipe off
the dirt from the surface of the unit. Be sure not to wet the heating element
and the switches. Allow the unit to dry completely before using it.
CAUTION: DO NOT ALLOW WATER TO RUN INTO THE INTERIOR OF THE HEATER
AS THIS COULD CREATE A FIRE OR ELECTRIC SHOCK HAZARD.
1. Perform the cleaning procedures described in “CLEANING AND MAINTENANCE”
section.
2. Wipe all parts to dry.
3. Pack the heater in a plastic bag and store it in a cool, dry place.
PROTECTION SYSTEM
S
CLEANING AND MAINTENANCE
STORAGE
6
4.
If your heater fails to operate, please follow these procedures prior to contacting
Customer Service:
PLEASE DO NOT ATTEMPT TO OPEN OR REPAIR THE HEATER YOURSELF, DOING
SO COULD VOID THE WARRANTY AND CAUSE DAMAGE OR PERSONAL INJURY.
Problem Probable Cause Solution
Heater will not
power on
Heater is not plugged into a
120V polarized
outlet/receptacle.
Ensure unit is in OFF position. Plug in unit
and attempt to turn on again.
Thermal Fuse has
permanently disabled the unit's
fuse due to extreme heat.
Do not attempt to fix heater yourself.
Contact customer service for repair
information.
Breaker/Fuse has been
tripped.
Please check your electrical box to confirm
the breaker has not been blown. This may
occur if the unit is sharing a receptacle with
another high power consuming appliance.
Ensure unit is in OFF position. Plug in unit
and attempt to turn on again.
Attempt to plug unit into another
independent output in the house.
The power
indicator light is
illuminated, but
no heat
disperses from
the unit
Room temperature has been
warmed up to thermostat setting To resume heating, adjust thermostat
temperature to a higher setting. Refer to
THERMOSTAT section on page 4 for more
information.
The heater is
creating
a burning smell.
A drop of oil fell on the
heating coil during the
manufacturing process. It
will quickly evaporate and
should not occur again.
Ensure room in which heater is situated is
well ventilated.
Check & ensure there are no
combustible materials
within 3' (0.9 m) of the heater.
Remove the combustible materials
preventing air intake into the heater.
TROUBLESHOOTING
7
Chaufferette oscillante céramique
Guide de l'utilisateur
Modèle : FH102
VEUILLEZ LIRE TOUTES LES INSTRUCTIONS
AVANT D’UTILISER LA CHAUFFERETTE

8
CONSIGNES IMPORTANTESS
VEUILLEZ LIRE TOUTES LES DIRECTIVES AVANT D’UTILISER CETTE
CHAUFFERETTE.
LORSQUE VOUS UTILISEZ DES APPAREILS ÉLECTRIQUES, IL EST IMPORTANT DE
PRENDRE CERTAINES PRÉCAUTIONS DE BASE POUR DIMINUER LE RISQUE
D'INCENDIE, DE CHOC ÉLECTRIQUE, DE BLESSURES CORPORELLES ET DE
DOMMAGES MATÉRIELS, Y COMPRIS CELLES QUI SUIVENT:
Lorsque vous ferez fonctionner l'appareil pour la première fois, laissez-le
fonctionner à pleine puissance pendant environ deux heures pour éliminer l'odeur
désagréable. S'assurer que la pièce dans laquelle se trouve l'appareil est bien
ventilée pendant cette opération. Il est normal que la chaufferette émette de petits
craquements lorsqu'elle est mise en marche pour la première fois.
1. Lire toutes les instructions avant d’utiliser cette chaufferette.
2. Cette chaufferette devient chaude lorsqu’elle fonctionne. Pour prévenir les brûlures,
évitez que la peau nue entre en contact avec les surfaces chaudes. Servez-vous de la
poignée pour déplacer l’appareil. Tenez tout matériau inflammable, tel que meubles,
oreillers, literie, papier, vêtements et draperies à une distance d’au moins 3 pi (0,9 m)
du devant et du dessus de la chaufferette et à l’écart des côtés et du derrière de
l'appareil. Éloignez la grille arrière des murs et draperies pour éviter de boucher
l’entrée d’air.
3. Agissez avec beaucoup de prudence tout en assurant une surveillance adéquate
lorsque la chaufferette doit fonctionner en présence ou à proximité d’enfants ou des
invalides, ou lorsqu'elle est doit fonctionner sans surveillance constante.
4. Toujours débrancher l’appareil lorsqu’il n’est pas utilisé.
5. Ne pas utiliser l'appareil si le cordon ou la fiche est endommagé, s’il ne fonctionne pas
convenablement ou s’il a été échappé ou endommagé de quelque façon que ce soit. Le
cas échéant, arrêter de l’utiliser et l'emmener à un centre de service autorisé pour une
inspection, un réglage électrique ou mécanique ou une réparation.
6. Ne pas utiliser la chaufferette à l’extérieur.
7. Ne pas utiliser cet appareil dans les salles de bain, buanderies et endroits humides. Ne
jamais placer l'appareil à un endroit où il pourrait tomber dans une baignoire ou autre
réservoir d’eau.
8. Ne pas faire passer le cordon sous le tapis. Ne pas couvrir avec des carpettes, tapis de
passage ou articles semblables. Éloigner le cordon des endroits passants où les gens
pourraient trébucher sur le cordon. Passez le cordon de façon à ce que l’on ne marche
pas dessus.
9. Pour débrancher la chaufferette, positionnez les commandes à "OFF " et retirez la fiche
de la prise.
10. Cet appareil est doté d’une fiche polarisée (une lame est plus large que l’autre). Cette
fiche est conçue pour s’insérer dans une prise polarisée que d’une seule façon. Si la
fiche ne s’insère pas dans la prise, inversez la fiche. Si la fiche ne s’insère toujours pas,

9
communiquez avec un électricien qualifié. Ne branchez pas l’appareil à une rallonge
électrique, un protecteur contre la surcharge, une minuterie, un disjoncteur direct ou
une prise où est branché un autre appareil. Risque d’incendie, de surchauffe, de
dysfonction, de blessure ou de mort si cette consigne n’est pas respectée!
11. Branchez l’appareil dans une prise polarisée seulement.
12. Évitez d’insérer ou de laisser pénétrer des objets étranger dans les entrées et sorties
d’air pour prévenir le risque de choc électrique, d’incendie et de dommages.
13. Pour prévenir le risque d’incendie, évitez de boucher les entrées et les sorties d’air de
quelque façon que ce soit. Évitez d’utiliser sur les surfaces moelleuses susceptibles de
boucher les ouvertures, comme un lit par exemple.
14. II se trouve à l’intérieur d’une chaufferette des pièces chaudes pouvant produire des
étincelles et des arcs électriques. Évitez d’utiliser dans des endroits où sont entreposés
ou utilisés de la peinture ou des liquides inflammables.
15. Utilisez cette chaufferette uniquement comme décrit dans le présent manuel. Toute
autre utilisation non conseillée par le fabricant pourrait causer un incendie, un choc
électrique, des blessures corporelles ou des dommages matériels.
16. Cette chaufferette doit être branchée seule à un circuit de 120V, 15 A (ou plus élevé).
Aucun autre appareil ne doit être branché au même circuit électrique. Si vous n’êtes
pas sûr que votre réseau domestique réponde à cette exigence, consultez un
électricien qualifié avant d’utiliser l’appareil. Risque d’incendie, de surchauffe, de
dysfonction, de blessure ou de mort si cette consigne n’est pas respectée!
17. Pour prévenir les surcharges et les fusibles grillés, s'assurer de ne pas brancher un
autre appareil dans la même prise ou dans une autre prise reliée au même circuit.
18. Il est normal pour le cordon et la fiche de dégager un peu de chaleur au toucher. Si par
contre, en touchant, on ressent une chaleur forte ou on constate une déformation de la
fiche ou du cordon, cela pourrait signifier que la prise électrique est usée. Les prises
usées doivent être remplacées avant de réutiliser la chaufferette. Il pourrait se produire
une surchauffe du cordon d'alimentation ou un incendie si la chaufferette est branchée
dans une prise usée.
19. S’assurer que la chaufferette repose sur une surface stable et sécuritaire de façon à
éliminer le risque de chavirement.
20. Branchez toujours la chaufferette directement dans une prise murale appropriée.
N’utilisez jamais de rallonge électrique ou de barre d’alimentation multiprises.
21. S’assurer que la fiche entre complètement dans une prise convenable. Rappelez-vous
que les prises peuvent se détériorer à cause de l'âge et l'usage continu : vérifiez
régulièrement pour des signes de surchauffe et des déformations évidentes de la prise.
Si vous en constatez, évitez d'utiliser la prise et communiquez avec votre électricien.
22. Vérifiez que l'appareil et le cordon d'alimentation n'ont subi aucun dommage durant le
transport.
23. S'assurer qu'aucun morceau de polystyrène ou autre matériel d'emballage n'a été
oublié entre les éléments de l'appareil. Il se peut qu'il soit nécessaire de passer sur
l'appareil avec un aspirateur.

10
24. Cet appareil ne doit pas être utilisé par des personnes (incluant les enfants) ayant des
capacités physiques, sensorielles ou mentales réduites, ou des personnes n’ayant pas
les connaissances nécessaires, à moins qu’elles ne soient supervisées par une
personne responsable de leur sécurité. Les enfants doivent être surveillés afin qu’ils ne
jouent pas avec l’appareil.
MISE EN GARDE : Pour prévenir les chocs électriques, jumelez la grande lame de la fiche
avec la grande fente de la prise et insérez complètement.
VEUILLEZ CONSERVER CES DIRECTIVES
S'assurer de brancher l'appareil dans une prise 120V AC, 60Hz. S'assurer également que
la fiche est insérée à fond dans la prise avant de faire fonctionner l'appareil.
Ce modèle est muni d'un commutateur d’alimentation et d’un thermostat.
COMMANDE DU RÉGLAGE DE LA PUISSANCE :
CE MODÈLE EST ÉQUIPÉ D’UN COMMUTATEUR DE RÉGLAGE DE LA PUISSANCE À
4 NIVEAUX.
Fig.1 Panneau de commande
Symbole Fonction
(OFF) Arrêt
(LOW) Faible chaleur (750 W)
(HIGH) Forte chaleur (1500 W)
Réglez le commutateur de réglage de la puissance à pour réchauffer une pièce
rapidement. Une fois la température idéale obtenue dans la pièce, sélectionnez un niveau
de réglage plus faible pour éviter qu'il ne fasse trop chaud dans la pièce.
MODE D'EMPLOI

11
RÉGLAGE DE LA TEMPÉRATURE (THERMOSTAT) :
Réglez le thermostat au maximum dans le sens horaire ( ), et sélectionnez le niveau de réglage
désiré. Une fois la température idéale obtenue dans la pièce, tournez le thermostat dans le sens
antihoraire jusqu'au symbole , jusqu' à ce que l'appareil s'arrête. Le thermostat maintiendra
alors la température en fonctionnant par cycles d'arrêt et de fonctionnement. Par temps très froid, il
se peut que le faible niveau de réglage soit insuffisant pour répondre aux exigences du thermostat.
Sélectionnez un niveau de réglage plus élevé pendant ces périodes.
MODE D’OSCILLATION
Ce modèle est muni d’un mode de fonctionnement par oscillation. Si vous désirez répartir la chaleur
sur une plus grande surface, appuyez sur le bouton pour activer la fonction d’oscillation.
PROTECTION CONTRE LA SURCHAUFFE
Cette chaufferette est munie d'un système de protection contre la surchauffe qui arrête
l’appareil automatiquement lorsque ses pièces surchauffent. Si une telle situation devait se
produire, éteignez la chaufferette, débranchez-la et vérifiez-la en prenant soin de retirer tout
objet autour de l'appareil pouvant causer des hausses de température.Attendez cinq à dix
minutes pour permettre à l'appareil de refroidir. Branchez-le de nouveau et faites-lui reprendre
son fonctionnement habituel.
COMMUTATEUR DE PROTECTION ANTI-CHAVIREMENT
Votre chaufferette est munie d’un commutateur de protection conçu pour arrêter l’appareil
automatique si l’appareil chavire vers l’avant ou l’arrière. Dès que l’appareil est remis dans sa
position verticale habituelle, il recommencera à produire de la chaleur. II s’agit d’un dispositif de
sécurité conçu pour prévenir le risque d’incendie en cas de chavirement accidentel de
l’appareil.
VOYANT DE MISE EN MARCHE
Cette chaufferette est munie d'un voyant indicateur qui s'illumine dès que l’appareil est branché
et mis en marche. Il restera illuminé même si le thermostat est à l’arrêt et que les éléments
chauffants sont éteints. Cette caractéristique sert à vous signaler que la chaufferette est en
marche.
SYSTÈMES DE PROTECTION

12
1. Avant d'effectuer le nettoyage, s'assurer que:
a. La chaufferette est en position d’arrêt (OFF)
b. Débranchez l'alimentation électrique à la source en retirant la fiche de la
prise.
2. Nettoyage régulier :
a. Les poussières à l’intérieur de l’appareil peuvent souvent être éliminées
à l'aide d'un aspirateur muni d'un suceur plat.
b. Évitez d'utiliser un nettoyant liquide ou d'autres produits chimiques à
vaporiser sur l'appareil.
c. Pour nettoyer le boîtier, servez-vous d'un linge doux et propre
légèrement humide pour nettoyer doucement les surfaces de l'appareil en
essuyant. S'assurer de ne pas mouiller l'élément chauffant et les
commutateurs. Laissez sécher l'appareil complètement avant de le
réutiliser.
MISE EN GARDE : NE PERMETTEZ PAS QUE DE L'EAU PÉNÈTRE À
L'INTÉRIEUR DE LA CHAUFFERETTE, CE QUI POURRAIT CRÉER UN RISQUE
D'INCENDIE OU DE CHOC ÉLECTRIQUE.
1. Effectuez les tâches de nettoyage décrites dans la section « Nettoyage et
entretien »;
2. Asséchez toutes les pièces en les essuyant;
3. Rangez la chaufferette dans un sac de plastique et entreposez-la dans un endroit
frais et sec.
NETTOYAGE ET ENTRETIEN
ENTREPOSAGE

13
VEUILLEZ NE PAS TENTER D’OUVRIR NI DE RÉPARER L’APPAREIL VOUS-MÊME, CE QUI
RISQUERAIT D’ANNULER LA GARANTIE ET CAUSER DES DOMMAGES OU DES BLESSURES
CORPORELLES.
DÉPANNAGE
Table of contents
Languages:
Popular Heater manuals by other brands

Silverline
Silverline Comfort Heater 1200TW Digital IPX4 MC981 quick start guide

EUROM
EUROM SF2007C Usage and maintenance manual

Bionaire
Bionaire BCH9212 instruction manual

iHeater
iHeater mini 500 IH-101 owner's manual

HearthRite
HearthRite HR20EN-1 OWNER'S OPERATION AND INSTALLATION MANUAL

Toyotomi
Toyotomi Kerosun LC-3000 operating manual


Holmes
Holmes AccuTemp Plus owner's guide

DELTACALOR
DELTACALOR KOMPACT 1000 W Operation and installation manual

Somogyi Elektronic
Somogyi Elektronic home FK 11 instruction manual

Jandy
Jandy DP3000 Installation and operation manual

Detroit Radiant Products
Detroit Radiant Products REV Series installation manual

PROAIRA
PROAIRA HTR100 Instructions for use