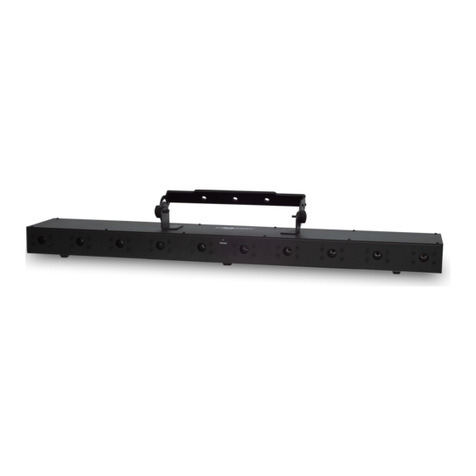
Evolights Laser PRO RGB 3W Animation User manual

LASER PRO RGB 3W ANIMATION
User Manual
Instrukcja Obsługi

Laser PRO RGB 3W Animation
- - 1 - -
ENGLISH
Contents
Introduction------------------------------------------------------------------------------------------------P2
Symbol and Safety instructions-----------------------------------------------------------------------P3
Installation/Technical specification-------------------------------------------------------------------P4
SD control system/Menu--------------------------------------------------------------------------------P4
DMX512 Channel------------------------------------------------------------------------------------------P5
DMX Adress setting/DMX512 connection----------------------------------------------------------P7
Product size-------------------------------------------------------------------------------------------------P8
Installation warnings--------------------------------------------------------------------------------------P8
Cleaning and maintenance/Warning -----------------------------------------------------------------P9

Laser PRO RGB 3W Animation
- - 2 - -
Introduction
Thank you for purchasing this product. To optimize the performance of this product, prior to use, please read
these operating instructions carefully to familiarize yourself with the basic operation of this unit. Please keep
the manual in safe price for future reference.
This unit has been tested at our factory before being shipped to you, there is no assembly required.
Once after received this product , please take and put carefully. And check cautiously that whether the
product was damaged or not during the transportation.
Checking Parts
Please check if the following parts are included:
1 x Laser light
1 x User manual
1 x Power cable
Caution
Symbol Instruction On The Device
CE Certificate
Only indoor use
Environmental protection
The minimum distance from lighted objects(meter)
CAUTION!
Keep this device away from rain and moisture!
Unplug mains lead before opening the housing!
Warning!
Damages caused by the disregard of this user manual are not subject to
warranty. The dealer will not accept liability for any resulting defects or
problems.

Laser PRO RGB 3W Animation
- - 3 - -
Max. Ambient Temp
Max. Housing Temp
Safety caution
Careful burns
Careful electric shock
Not suitable for directly installed on the surface of ordinary combustible materials
Safety Instructions
⚫Please open and check whether break or not for transport once receive this fixture, if yes, not use it
and contact dealer or manufacture as soon as possible.
⚫The Max applicable temperature for the light is 40°C. Do not use the light under or above the
temperature. ta=40℃
⚫The fixture is applicable for many occasions, it should keep clean, and avoid long use in overheating
or dusty environment. To prevent the fixture from the chemical liquid .
⚫User must be careful of fire, heat, electric and fall-off that make heavy or fatal injury. Please read this
user manual carefully before power on and installation, following safety and operation instruction in
it. If still have any questions, please contact dealer or manufacture.
⚫User must following this user manual, do not open fixture by yourself, if any problems, please contact
professional technician, maintenance should by technician.
⚫Do not power on or start the fixture before installation, please stop after working more than 8 hours,
which will longer use life.
⚫Fixed installation, do not by strong shocks.
⚫The minimum distance between light and the illuminated surface must be more than 1 meter.
⚫Never look directly into the light source to avoid hurt to eyes (especially epileptics)!
When dustproof glass at light output breaks, cracks or other visible damage, user should replace with
new glass to continue to use.

Laser PRO RGB 3W Animation
- - 4 - -
Installation
⚫When install this equipment please make sure there's no flammable surfaces (decorated things, etc) and
minimum distance of 0.5M from the equipment to the flammable.
⚫The installation of the effect has to be built and constructed in a way that it can hold 10 times the weight
and without any harming deformation.
⚫The installation must always be secured with a secondary safety attachment, e.g. an appropriate safety
rope. Never stand directly below the device when mounting, removing or servicing the fixture.
Technical Specifications
Input voltage: AC100-240V, 50/60Hz
Fuse: BGDP ¢5x20mm 250VAC F2A
Total power:75W
Light source: 3W RGB (600mW/638nm+600mW/520nm+1800mW/445nm)
Control mode: Auto/Sound/DMX512/ILDA/Master-slave/SD
Channels:17CH
Scanning system: 30Kpps Scanner, ±30º
Surface temp: Tb=45ºC ( this data testing when the environment temp is 30ºC)
Working temp: 10ºC--65ºC
Modulation: Analog modulation
N.W: 4.1Kg
G.W: 5Kg
Carton packing size: 30*25*26cm
SD laser control system
1. MENU operation
Rotate the knob at display’s right side to operate the menu, press knob to enter sub-menu or exit menu,
after operation, Non-stop double-click the knob to save the option and exit the menu, once back DMX
display means success record and setting.(Eg: when setting DMX address should Non-stop Double click the
knob and exit MENU, till back to DMX display, then DMX address can success save)
The potentiometer at display’s left side can adjust the power of laser: Red Current( adjust red laser
power), Green Current(adjust green laser power),Blue Current (adjust blue laser power). Anti-clockwise
rotation the potentiometer is down the power, and clockwise rotation is up the power. Below the display,
safety key location, is closed the laser when the key at OFF, and is open when the key at ON.
2. MENU display
MENU
Display
Function
Dmx Address
1-512
DMX address setting
Show mode
Prg Mode
Display list mode:display PRG file, the 2rd line
displays the current file name
ILDA Mode
ILDA mode,display shows in ILDA file circularly(file’s
expanded-name is ILD)
Sound
Sound activate mode

Laser PRO RGB 3W Animation
- - 5 - -
DMX Channel Instructions
Channel
Value
Function
CH1
control mode
0-49
auto mode
50-99
sound activated mode
100-149
PRG file display orderly
150-199
ILD file display circularly
200-255
DMX Mode
CH2
choose
pattern/file
0-255
DMX Mode
PRG/ILD mode
choose pattern, 1 pattern for 3 digits
choose file
CH3
strobe and display
file
0-10
no strobe
choose display file
11-199
strobe automatically from slow to fast
200-255
strobe via sound activated
CH4
choose color
0-5
laser off
6-16
white
6-10
ILD file's original color
11-16
white
17-33
red
34-50
green
51-67
blue
68-84
yellow
85-101
purple
102-118
cyan
119-135
white,red, green, blue subsection
136-152
blue, yellow, purple, cyan subsection
153-169
white, red, green, blue, yellow, purple, cyan subsection
Auto Mode
Auto mode
Sound sense
0-100
Sound sensitivity setting
SD File
choose SD card file
SIZE
0-100
Set pattern size
Phasic set
X Y
Speed set
Set show speed,set the speed according to the
scanner speed, too high speed will hurt the scanner
DMX STATE
Show mode
When no DMX,the working mode is show mode
Black out
When no DMX,light stands by
HOLD
When no DMX,light holds the last scene
Slave
Master/ slave
Master/slave mode
Fixture Hours
Fixture total working hours
Version
Software version

Laser PRO RGB 3W Animation
- - 6 - -
170-186
white, red, green, blue color flowing
187-203
blue, yellow, purple, cyan color flowing
204-220
white, red, green, blue, yellow, purple, cyan color flowing
221-237
color subsection by pattern break-point
238-255
color change by sound
CH5
display
0-63
normal display
64-127
bright dot display
128-191
subsection display
192-255
dot display
CH6
Horizontal Move
0-125
move with manual adjust
126-225
auto move from left to right circularly
226-245
auto jump randomly
246-255
random jump by sound control
CH7
Vertical
0-125
move with manual adjust
126-225
auto move top-down circularly
226-245
auto jump randomly
246-255
random jump by sound control
CH8
Zoom
0-10
no zoom
11-87
zoom by manual adjust
88-150
zoom out
151-200
zoom in
201-255
zoom circularly
CH9
Horizontal
rotation
0
no rotation
1-128
manual adjust
129-255
auto rotation
CH10
Vertical rotation
0
no rotation
1-128
manual adjust
129-255
auto rotation
CH11
center rotation
0
no rotation
1-128
manual adjust
129-192
auto rotation clockwise
193-255
auto rotation anti-clockwise
CH12
gradual drawing
0-10
no drawing
11-74
gradual drawing by manual adjust
75-104
auto gradual drawing (increasing)
105-144
auto gradual drawing (decreasing)
145-184
auto gradual drawing circularly
185-224
end to end gradual drawing circularly(increasing)
225-255
end to end gradual drawing circularly (decreasing)
CH13
Horizontal wave
0-9
no wave
10-69
small wave
70-129
middle wave
130-189
big wave
190-255
biggest wave
CH14
Vertical wave
0-9
no wave
10-69
small wave

Laser PRO RGB 3W Animation
- - 7 - -
70-129
middle wave
130-189
big wave
190-255
biggest wave
CH15
red dimming
0-255
red dimming from 100%-0%
CH16
green dimming
0-255
green dimming from 100%-0%
CH17
blue dimming
0-255
blue dimming from 100%-0%
DMX-512 connection
DMX In To the fourth
First light (Address 001) Second light (Address 018) Third light(Address 035)
DMX Address setting
Each fixture must set a specific starting address. When receiving signal transmission, fixture will receive
channel control signals which from the starting address.
According to different requirements or easy to use, the user can set many value fixtures to the same
address, also can set up a separate address for every device.
If you set the same address, all the devices will receive from DMX channels signal. All connecting fixtures
are jointly controlled, controller can't separate control a device.
If you set a different address, each device will be separate from its particular set the starting address and
begin accepting DMX512 control signal, so that more convenient separate control one device. Using this
method must be based on channel quantity of device to determine a starting address.
This laser light has 17 channels, you should set the starting address of the first unit to 1, the second unit
to 18(1 + 17), the third unit to 35 (17*2+ 1), and so on.

Laser PRO RGB 3W Animation
- - 8 - -
Product Dimensions
Installation warnings
A).The ambient temperature range is 1°C--45°C, must never be exceeded.
B).The installation of the projector has to be built and constructed in a way that it can hold 10 times the
weight for 1 hour without any harming deformation.
C)).When rigging or servicing the fixture staying in the area below the installation place, on bridges,
under high working places and other endangered areas is forbidden.
D).The operator has to make sure that safety-relating and machine-technical installations are approved
by an expert before taking into operation for the first time and after changes before taking into
operation another time.
E).The operator has to make sure that safety-relating and machine-technical installations are approved
by a skilled person once a year.
F). Sure M8 screws on mounting bracket fixed middle hole ¢12.5mm of handle

Laser PRO RGB 3W Animation
- - 9 - -
Cleaning and maintenance
Maintenance should be performed every 15-day period, by using a sponge which is dipped with alcohol,
rather than wet cloth or other chemical liquid, to clean the mirror.
Always disconnect from the mains when the device is not in use or before cleaning it.
Warning
Make sure power off before cleaning and maintenance!
Caution
Warning!
Never look directly into the light source, as sensitive persons may suffer an epileptic
shock(especially meant for epileptics)!
Warning!
Any power connected must by professional person

Laser PRO RGB 3W Animation
- - 10 - -
POLSKI
Spis treści
Wprowadzenie------------------------------------------------------------------------------------------------P11
Symbole i Instrukcje bezpieczeństwa-------------------------------------------------------------------P12
Instalacja/Specyfikacja techniczna-----------------------------------------------------------------------P13
Kontrola SD/Menu-------------------------------------------------------------------------------------------P13
Struktura DMX------------------------------------------------------------------------------------------------P14
Ustawienia adresu/Połączenia DMX512--------------------------------------------------------------P16
Wymiary-------------------------------------------------------------------------------------------------------P17
Ostrzeżenia instalacji--------------------------------------------------------------------------------------P17
Czyszczenie i konerwacja/Ostrzeżenia ---------------------------------------------------------------P18

Laser PRO RGB 3W Animation
- - 11 - -
Wprowadzenie
Dziękujemy za wybór naszej głowicy. Dla własnego bezpieczeństwa zapoznaj się z instrukcją przed użyciem.
Zawiera ona ważne informacje na temat bezpieczeństwa instalacji i użytkowania. Instrukcję należy zachować
dla przyszłych potrzeb.
Laser został sprawdzony pod względem sprawności po ukończeniu produkcji, sprawdź czy nie uległ
uszkodzeniom w transporcie. Urządzenie zostało zaprojektowane by spełniać standardy CE oraz
współpracować z protokołem DMXX512. Urządzenia można używać pojedynczo lub w większej ilości.
Oświetlenie to bardzo dobrze się sprawdza w wystąpieniach scenicznych.
Zawartość opakowania
Sprawdź czy w zestawie znajdują się następujące elementy:
1 x Laser
1 x Instrukcja obsługi
1 x Przewód zasilający
UWAGA!
Symbole na urządzeniu
Certyfikat CE
Tylko do użytku wewnętrznego
Ochrona środowiska
UWAGA!
Trzymaj urządzenie z dala od deszczu i wilgoci!
Odłącz z zasilania przed czyszczeniem czy konserwacją!
Uwaga!
Uszkodzenia spowodowane przez nieprawidłowe użytkowanie nie podlegają
gwarancji. Sprzedawca nie ponosi odpowiedzialności za szkody spowodowane
nie przestrzeganiem zasad zawartych w instrukcji.

Laser PRO RGB 3W Animation
- - 12 - -
Minimalna odległość od oświetlanych produktów (m)
Maksymalna temperatura otoczenia
Maksymalna temperatura obudowy
Ostrzeżenie bezpieczeństwa
Uwaga oparzenia
Uwaga porażenie prądem
Nie nadaje się do używania w bezpośrednim otoczeniu materiałów łatwopalnych
Instrukcje bezpieczeństwa
∙Upewnij się, że urządzenie nie zostało uszkodzone podczas transportu.
∙Nigdy nie patrz bezpośrednio w źródło światła, może to spowodować uszkodzenie wzroku.
∙Urządzenie nie powinno być narażone na silne wstrząsy podczas transport lub przenoszenia
∙Nie podnoś głowicy chwytając za elementy ruchome, może to spowodować uszkodzenie części
mechanicznych.
∙Nie narażaj urządzenia na przegrzanie, wilgoć i duże zakurzenie otoczenia. Nie powinno się również kłaść
przewodów zasilających na ziemi, aby uniknąć porażenia prądem
∙Upewnij się, że miejsce instalacji spełnia wszelkie normy bezpieczeństwa.
∙Stosuj linkę bezpieczeństwa i upewnij się, że wszystkie śruby zostały odpowiednio dokręcone.
∙Utrzymuj soczewki w czystości i dobrym stanie, jeśli pojawią się jakieś uszkodzenia lub poważniejsze
zadrapania, należy ją wymienić.
∙Upewnij się, że urządzenie jest obsługiwane przez odpowiednio wykwalifikowany personel.
∙Zachowaj oryginalne opakowanie w razie potrzeby transportu w przyszłości.
∙Urządzenia nie należy modyfikować i dokonywać prób własnoręcznych napraw.

Laser PRO RGB 3W Animation
- - 13 - -
Instalacja
∙Podczas instalacji upewnij się, że w pobliżu nie ma żadnych materiałów łatwopalnych, a pozostałe obiekty
znajdują się w odległości minimum 0,5m od urządzenia.
∙Miejsce instalacji powinno być w stanie wytrzymać dziesięciokrotność wagi produktu bez widocznych
deformacji.
∙Instalacja musi być zabezpieczona za pomocą dodatkowej linki bezpieczeństwa.
∙Nigdy nie stój bezpośrednio pod miejscem montażu.
Specyfikacja techniczna
Zasilanie: AC100-240V, 50/60Hz
Bezpiecznik: BGDP ¢5x20mm 250VAC F2A
Maksymalne zużycie energii: 75W
Źródło światła: 3W RGB (600mW/638nm+600mW/520nm+1800mW/445nm)
Tryby pracy: Auto/Sound/DMX512/ILDA/Master-slave/SD
Kanały DMX: 17CH
System skanowania: 30Kpps Scanner, ±30º
Temperatura obudowy: Tb=45ºC ( sprawdzono w temperaturze otoczenia 30ºC)
Temperatura pracy: 10ºC--65ºC
Modulacja: Analogowa
Waga netto: 4,1kg
Waga brutto: 5kg
Wymiary opakowania: 30*25*26cm
Kontrola SD
1. Praca w menu
Aby przejść przez strukturę menu przekręć pokrętło po prawej stronie wyświetlacza, wciśnij pokrętło
aby wejść lub wyjść z submenu. Aby zapisać i wyjść wciśnij szybko pokrętło dwukrotnie, powrót do ekranu
DMX oznacza sukces zapisu (np. W momencie ustawienia adresu DMX wciśnij pokrętło dwukrotnie, aż
powrócisz do menu DMX, adres zostanie poprawnie zmieniony)
Potencjometr po lewej stronie wyświetlacza reguluje moc lasera: Red Current (reguluje moc
czerwonego), Green Current (reguluje moc zielonego), Blue Current (reguluje moc niebieskiego). Obrót
przeciwnie do ruchu wskazówek zegara zmniejsza moc lasera. Poniżej wyświetlacza znajduje się kluczyk
bezpieczeństwa, laser nie funkcjonuje jeśli przełącznik jest w pozycji OFF, a jest włączony gdy przełącznik jest
w pozycji ON.
2. Struktura MENU
MENU
Wyświetlacz
Funkcja
Dmx Address
1-512
Ustawienie adresu DMX
Show mode
Prg Mode
Tryb programowania, na wyświetlaczu jest plik PRG
druga linia pokazuje aktualną nazwę pliku

Laser PRO RGB 3W Animation
- - 14 - -
Struktura DMX
Kanał
Wartość
Funkcja
CH1
Tryb kontroli
0-49
Tryb auto
50-99
Sterowanie dźwiękiem
100-149
Odtwarzanie plików PRG
150-199
Odtwarzanie plików ILD
200-255
Tryb DMX
CH2
Wybór
wzoru/pliku
0-255
Tryb DMX
Tryb PRG/ILD
Wybór wzoru, 1 wzór na 3 cyfry
Wybór pliku
CH3
Stroboskop i
wyświetlany plik
0-10
Brak strobo
Wybór pliku
11-199
Częstotliwość wolno-szybko
200-255
Stroboskop aktywowany dźwiękiem
CH4
Wybór koloru
0-5
Wyłączenie lasera
6-16
Biały
6-10
Oryginalny kolor z ILD
11-16
Biały
17-33
Czerwony
34-50
Zielony
51-67
Niebieski
68-84
Żółty
ILDA Mode
Tryb ILDA mode, wyświetla plik ILDA (rozszerzenie
pliku to ILD)
Sound
Sterowanie dźwiękiem
Auto Mode
Tryb auto
Sound sense
0-100
Ustawienie czułości mikrofonu
SD File
Wybiera plik z karty SD
SIZE
0-100
Rozmiar wzoru
Phasic set
X Y
Speed set
Wybór szybkości wzorów, ustaw szybkość
odpowiednią dla skanera, zbyt duża szybkość może
go uszkodzić
DMX STATE
Show mode
Przy braku DMX odpalany jest tryb Show
Black out
Przy braku DMX światło gaśnie
HOLD
Przy braku DMX uruchomiona jest ostatnia scena
Slave
Master/ slave
Tryb Master/slave
Fixture Hours
Godziny pracy urządzenia
Version
Wersja oprogramowania

Laser PRO RGB 3W Animation
- - 15 - -
85-101
Magenta
102-118
Cyjan
119-135
Kolejno biały, czerwony, zielony, niebieski
136-152
Kolejno niebieski, żółty, magenta, cyjan
153-169
Kolejno biały, czerwony, zielony, niebieski, żółty, magenta,
cyjan
170-186
Przechodzenie biały, czerwony, zielony, niebieski
187-203
Przechodzenie niebieski, żółty, magenta, cyjan
204-220
Przechodzenie biały, czerwony, zielony, niebieski, żółty,
magenta, cyjan
221-237
Kolory kolejno zgodnie z punktem wzoru ‘break-point’
238-255
Zmiana koloru pod wpływem dźwięku
CH5
Wyświetlanie
0-63
Normalne
64-127
Jasne kropkowy
128-191
Z podziałem
192-255
Kropkowe
CH6
Ruch horyzontalny
0-125
Ruch regulowany ręcznie
126-225
Ruch automatyczny lewo-prawo
226-245
Ruch skokowy losowo
246-255
Ruch skokowy losowo kontrolowany dźwiękiem
CH7
Ruch wertykalny
0-125
Ruch regulowany ręcznie
126-225
Ruch automatyczny góra-dół
226-245
Ruch skokowy losowo
246-255
Ruch skokowy losowo kontrolowany dźwiękiem
CH8
Zoom
0-10
brak
11-87
Regulowany ręcznie
88-150
Zoom out
151-200
Zoom in
201-255
Zoom zapętlony
CH9
Rotacja
horyzontalna
0
Brak rotacji
1-128
Ręczna regulacja
129-255
Auto rotacja
CH10
Ruch wertykalny
0
Brak rotacji
1-128
Ręczna regulacja
129-255
Auto rotacja
CH11
Rotacja centralna
0
Brak rotacji
1-128
Ręczna regulacja
129-192
Rotacja automatyczna
193-255
Odwrócona rotacja automatyczna
CH12
Stopniowe
rysowanie
0-10
Brak rysowania
11-74
Stopniowe rysowanie sterowane ręcznie
75-104
Automatyczne rysowanie (wzrastające)
105-144
Automatyczne rysowanie (zmniejszające)
145-184
Automatyczne rysowanie (zapętlone)
185-224
Zapętlone rysowanie koniec-koniec (wzrastające)
225-255
Zapętlone rysowanie koniec-koniec (zmniejszające)

Laser PRO RGB 3W Animation
- - 16 - -
CH13
Fala horyzontalna
0-9
no wave
10-69
small wave
70-129
middle wave
130-189
big wave
190-255
biggest wave
CH14
Fala wertykalna
0-9
no wave
10-69
small wave
70-129
middle wave
130-189
big wave
190-255
biggest wave
CH15
Czerwony dimmer
0-255
100%-0%
CH16
Zielony dimmer
0-255
100%-0%
CH17
Niebieski dimmer
0-255
100%-0%
Połączenia DMX 512
DMX In Do czwartego
Pierwszy laser (Adres 001) Drugi laser (Adres 018) Trzeci laser (Adres 035)
Ustawienie adresu DMX
Każde urządzenie powinno mieć indywidualny adres DMX. Gdy otrzymuje sygnał, protokół będzie
sterował funkcjami zaczynając od adresu początkowego.
W zależności od potrzeb konfiguracji, lub wygody użytkowania, użytkownik może ustawić kilka urządzeń
na ten sam adres. Wtedy urządzenia będą reagować jednakowo na polecenia wysyłane przez sterownik. W
tym przypadku nie ma możliwości kontroli pojedynczego urządzenia niezależnie.

Laser PRO RGB 3W Animation
- - 17 - -
Ten laser posiada 17 kanałów. W związku z tym przykładowo należy ustawić pierwsze urządzenie na
adres DMX 001, kolejne na DMX 018 (17+1), trzecie urządzenie na adres DMX 035 (17*2+1), i tak dalej.
Wymiary
Ostrzeżenia instalacji
A) Maksymalna temperatura otoczenia 1°C--45°C, nie może być przekroczona
B) Miejsce instalacji powinno wytrzymać dziesięciokrotność wagi urządzenia przez 1 godzinę bez widocznych
deformacji
C) Zabrania się stawania pod miejscem montażu czy konserwacji
D) Nadzorujący instalację powinien upewnić się, że całość została wykonana prawidłowo i urządzenie jest
zabezpieczone linką bezpieczeństwa, przed rozpoczęciem pracy
E) Instalacje stałe powinny być sprawdzone pod kątem bezpieczeństwa przynajmniej raz w roku
F) Upewnij się, że śruby M8 klamry montażowej są w środkowym otworze uchwytu ¢12.5mm

Laser PRO RGB 3W Animation
- - 18 - -
Czyszczenie i konserwacja
Czyszczenie powinno być przeprowadzone średnio dwa razy w miesiącu, za pomocą miękkiej ścierki lub gąbki
zanurzonej w alkoholu, należy unikać mocnych detergentów i środków chemicznych. Przed czyszczeniem
luster należy odłączyć urządzenie z zasilania.
UWAGA
Upewnij się, że urządzenie jest wyłączone przed konserwacją
Uwaga!
Uwaga!
Nigdy nie patrz bezpośrednio w źródło światła, może to uszkodzić wzrok i/lub
wywołać wstrząs epileptyczny.
Uwaga!
Wszelkie połączenia zasilania powinny być wykonane przez profesjonalistę
Other manuals for Laser PRO RGB 3W Animation
1
Table of contents
Languages:
Other Evolights Dj Equipment manuals
Popular Dj Equipment manuals by other brands

Chauvet Professional
Chauvet Professional Maverick Force 1 Spot user manual
ADJ
ADJ VF FLURRY user manual
American DJ
American DJ Quad Gem DMX User instructions
Chauvet DJ
Chauvet DJ Cumulus HP Quick reference guide
Numark
Numark MixTrack Pro FX Service manual

GLOBAL SPECIAL EFFECTS
GLOBAL SPECIAL EFFECTS Magic Lamp LITE Evaporative Snow user manual
