6
LIFTKIT-UR
6
2.0 Safety
This section provides safety aspects supplementary to the
safety aspects described in the relevant operating manuals
of the included devices. Failure to comply with the guide-
lines and safety instructions contained in this manual may
result in serious hazards that could cause possible serious
injury or death, or damage to the device or equipment.
The listed safety aspects must be reviewed and taken into
account in the nal application risk assessment prior to the
use of LIFTKIT.
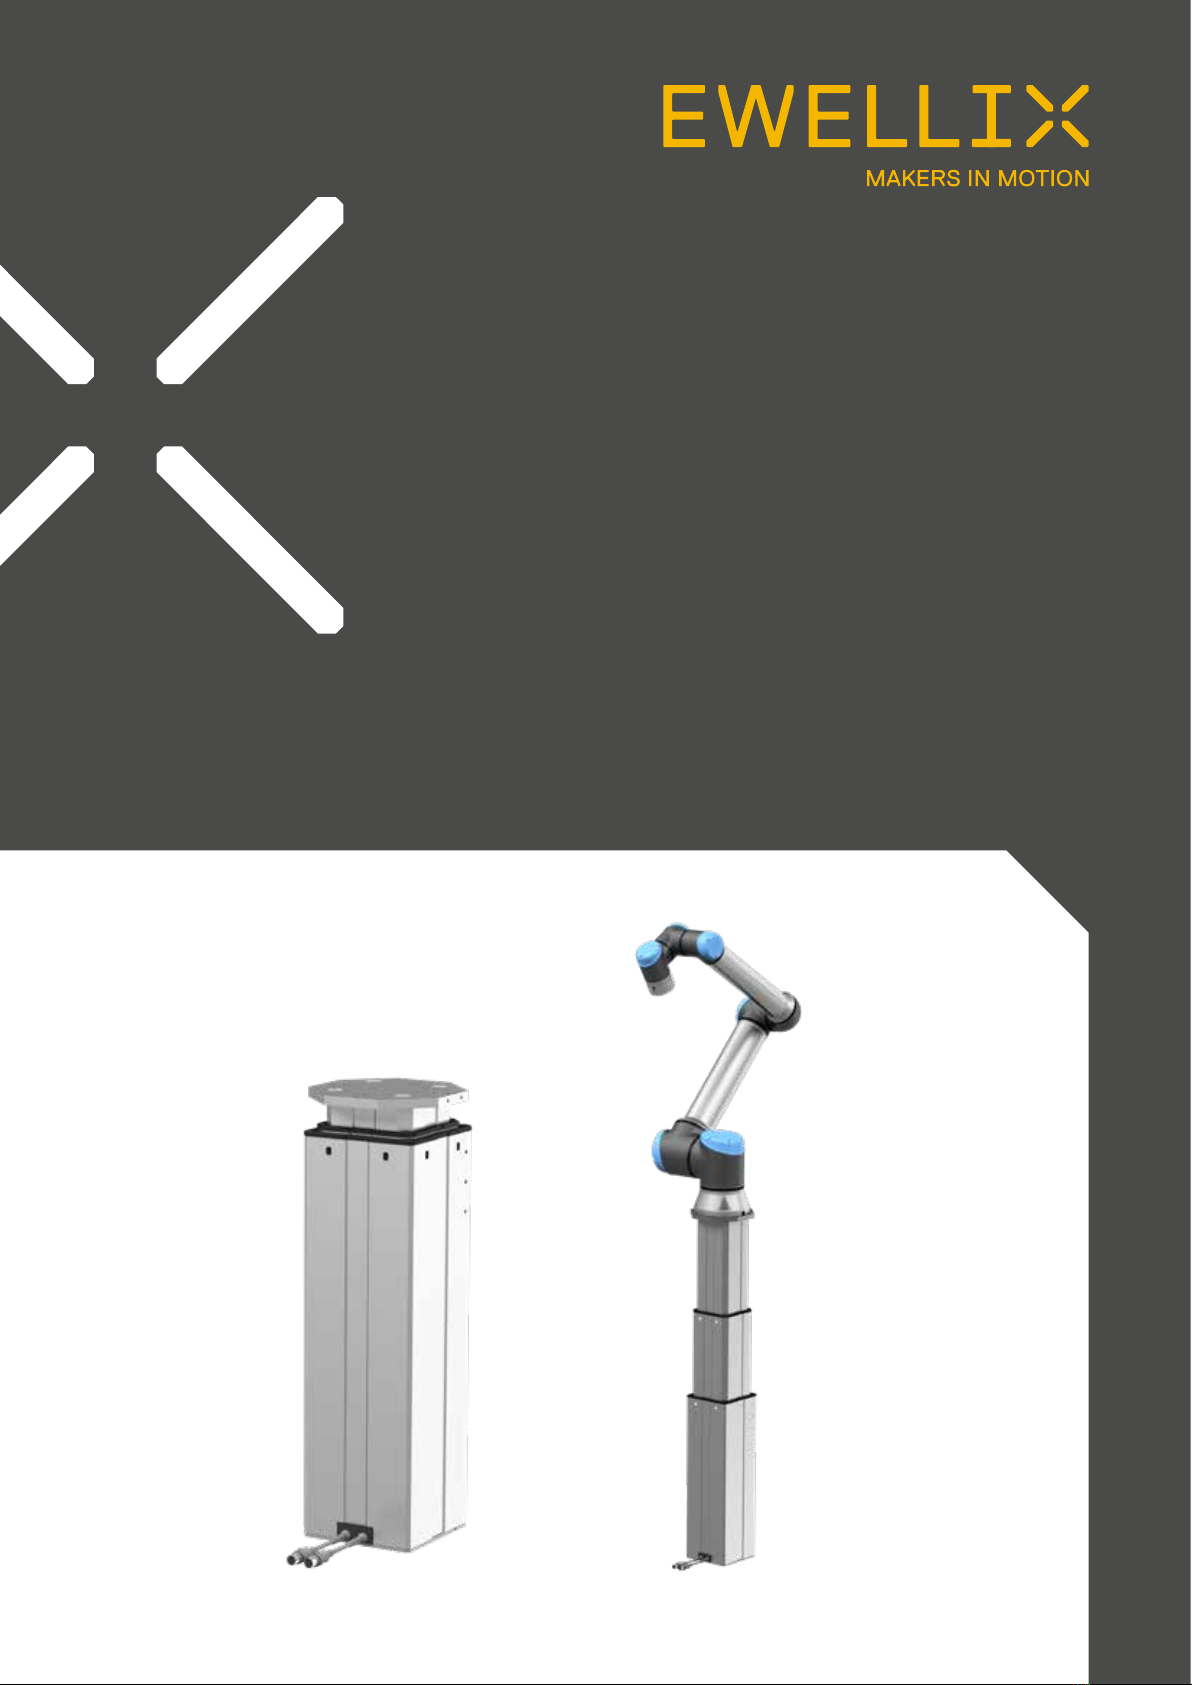
2.1 Intended use
LIFTKIT has been designed and built for the intended use as
described in the operating manual of the pillar, with addi-
tional intended use dened as
• Lifting of a robot to extend its operating range.
Any use that extends beyond the intended use or a use dif-
ferent than the one described above is deemed misuse.
Any type of claims resulting from damage caused by misuse
are excluded.
2.2 Functional safety
The LIFTKIT system and its components TLT and SCU, are
not functional safety systems compliant with EN ISO
13489-1 or IEC 62061. To integrate LIFTKIT into a functional
safety chain, external safety devices have to be added to the
overall system.
2.3 Safety mechanisms
The following measures have been integrated in LIFTKIT to
reduce the risk of harm or damage
• The individual components have been designed and UL
certied according to IEC 60601-1 – Safety of medical de-
vices.
• The pillar has an integrated mechanical brake that pre-
vents back-driving of the pillar in case of power loss or
motor failure.
• A backup nut is installed to prevent a sudden collapse of
the pillar in case of failure or wear of the nut.
• Pinching risk between the tube sections of the pillar and
the UR attachment plate is minimized. In retracted posi-
tion, the minimum gap is 40 mm.
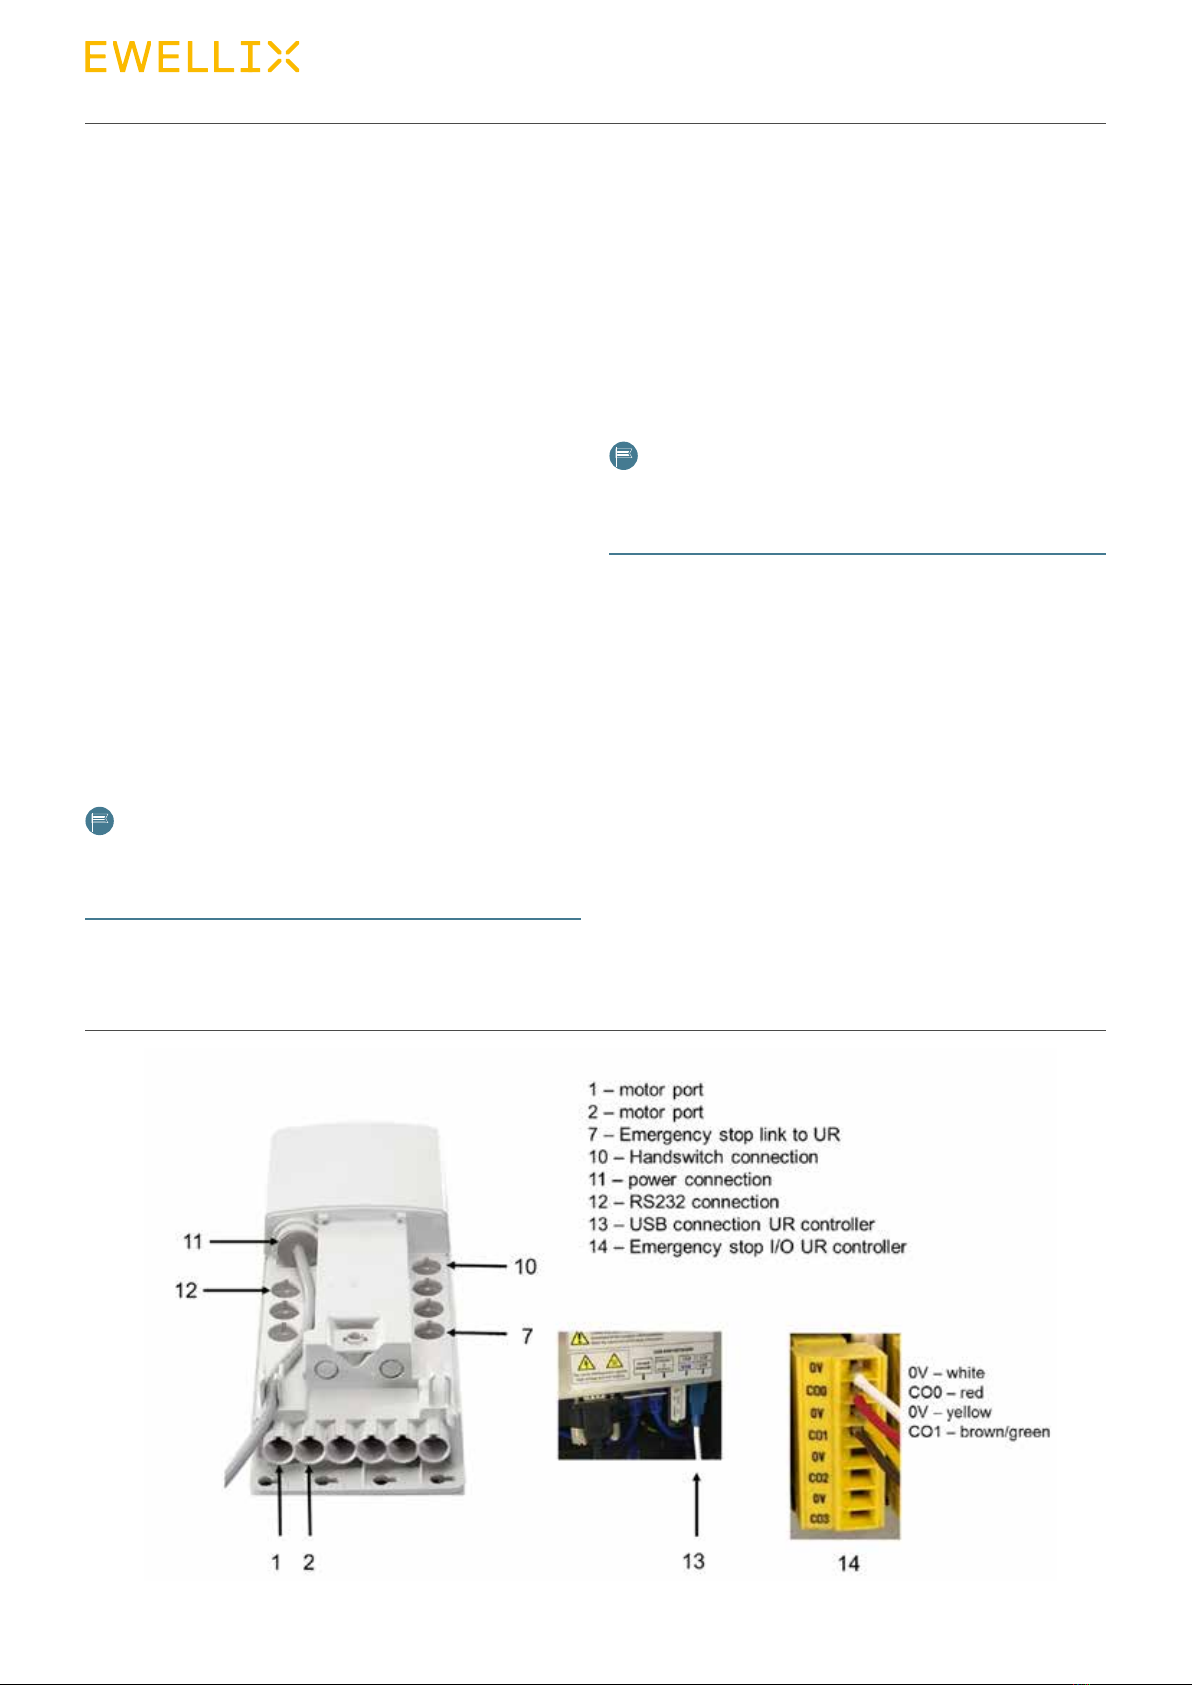
• The LIFTKIT's SCU controller has to be connected to the
Universal Robot (UR) safety I/O connection to operate. Ac-
tivation of the UR emergency stop will trigger a stop of the
LIFTKIT's SCU controller. If the UR system is turned o,
LIFTKIT cannot be operated.
• The LIFTKIT's controller checks the RS232 connection to
the UR controller. If this connection is lost, the pillar move-
ment is automatically stopped.
• Stopping or failure of the UR software triggers a stop sig-
nal to the LIFTKIT's controller.
2.4 Application notes
• Integration with an emergency-stop is required for its in-
tended use.
• Install emergency stop functions for the pillar and integrate
them into the safety chain of the complete system prior to
operating LIFTKIT.
• The emergency stop function has to be connected in such
a way that a disruption of the power supply or the activa-
tion of the power supply after a power disruption cannot
cause a hazardous situation for persons and objects.
• The emergency-stop systems must always be freely ac-
cessible.
• To integrate LIFTKIT into a functional safety system with a
STO (Safe Torque O) safe condition, an external safety re-
lay has to be connected to the LIFTKIT controller power
supply, triggered by a functional safety function, such as
the UR safety I/O.