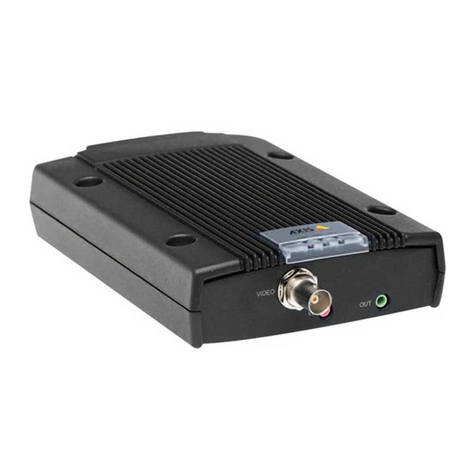
Exacq exacqVision E Series User manual

Digital Encoder
E-Series User Manual
(updated June 29, 2014)
Information in this document is subject to change without notice.
© Copyright 2006-2014, Exacq Technologies, Inc. All rights reserved.
Exacq Technologies is a trademark of Exacq Technologies, Inc. Other trademarks and trade names may be used in
this document to refer to either the entities claiming the marks and names or their products. Exacq Technologies,
Inc., disclaims any proprietary interest in trademarks and trade names other than its own.
Exacq Technologies makes no warranty of any kind with regard to this material, including, but not limited to, the
implied warranties of merchantability and fitness for a particular purpose. Exacq Technologies shall not be liable
for errors contained herein or for incidental or consequential damages in connection with the furnishing,
performance, or use of this manual.
Exacq Technologies, Inc.
11955 Exit Five Parkway, Bldg 3
Fishers, IN 46037 USA

www.exacq.com
+1.317.845.5710
+44.1438.310163
USA (Corporate Headquarters)
Europe/Middle East/Asia
2

www.exacq.com
+1.317.845.5710
+44.1438.310163
USA (Corporate Headquarters)
Europe/Middle East/Asia
3
TABLE OF CONTENTS
1 Introduction................................................................................................................5
2 Encoder Overview......................................................................................................7
E-ADE1C FRONT PANEL........................................................................................................................................ 7
E-ADE4C FRONT PANEL........................................................................................................................................ 8
E-ADE1C REAR PANEL.......................................................................................................................................... 9
E-ADE4C REAR PANEL........................................................................................................................................ 10
Alarm Input Connections ..................................................................................................................................... 11
Alarm Output Connections .................................................................................................................................. 11
3 Network Parameters ................................................................................................12
Searching Online Devices.................................................................................................................................... 12
Modifying Network Parameters............................................................................................................................ 13
Restoring Default Password ................................................................................................................................ 13
4 Connecting to an exacqVision System...................................................................14
Initiating the Connection...................................................................................................................................... 14
Verifying the Connection...................................................................................................................................... 15
5 Encoder Configuration Page...................................................................................16
Installing Web Components................................................................................................................................. 16
Main Page.............................................................................................................................................................. 18
6 Live View ..................................................................................................................19
Starting Live View................................................................................................................................................. 19
Capturing a Picture............................................................................................................................................... 20
Operating PTZ Controls........................................................................................................................................ 21
Configuring Video Parameters............................................................................................................................. 24
7 Device Configuration...............................................................................................25
Local Configuration.............................................................................................................................................. 25
Configuring Time Settings................................................................................................................................... 26
8 Network Settings......................................................................................................27
Configuring TCP/IP Settings................................................................................................................................ 27
Configuring SNMP Settings ................................................................................................................................. 28
Configuring Port Settings .................................................................................................................................... 30
Configuring PPPoE Settings................................................................................................................................ 31
Configuring QoS Settings.................................................................................................................................... 32
Configuring SOCKS Settings............................................................................................................................... 33
Configuring NAT/UPnPTM Settings....................................................................................................................... 34
Configuring HTTPS Settings................................................................................................................................ 36

www.exacq.com
+1.317.845.5710
+44.1438.310163
USA (Corporate Headquarters)
Europe/Middle East/Asia
4
Configuring Bonjour Settings.............................................................................................................................. 38
Configuring IP Address Filter .............................................................................................................................. 39
Configuring IEEE 802.1x Settings........................................................................................................................ 40
Configuring Advanced Settings........................................................................................................................... 41
9 Camera Settings.......................................................................................................42
Configuring Display Settings............................................................................................................................... 42
Configuring Video Settings.................................................................................................................................. 44
Configuring Motion Detection.............................................................................................................................. 45
Configuring a Video Loss Alarm.......................................................................................................................... 49
Configuring a Privacy Mask................................................................................................................................. 50
Configuring Video Tampering.............................................................................................................................. 51
Configuring Text Overlay..................................................................................................................................... 52
Configuring Holiday Settings............................................................................................................................... 53
10 RS-232 and RS-485 Settings..................................................................................54
Configuring RS-232 .............................................................................................................................................. 54
Configuring RS-485 Settings................................................................................................................................ 55
11 Alarm Input/Output ................................................................................................56
Configuring the External Alarm Input.................................................................................................................. 56
Configuring the External Alarm Output............................................................................................................... 58
12 Exceptions..............................................................................................................59
13 User Management..................................................................................................60
Adding a User ....................................................................................................................................................... 61
Modifying a User................................................................................................................................................... 62
Deleting a User...................................................................................................................................................... 63
14 Log Search and Maintenance................................................................................64
Log Search............................................................................................................................................................ 64
Viewing Device Information ................................................................................................................................. 65
Maintenance.......................................................................................................................................................... 66
A Technical Support...................................................................................................68
B Regulatory Notice....................................................................................................69
C Warranty...................................................................................................................70

www.exacq.com
+1.317.845.5710
+44.1438.310163
USA (Corporate Headquarters)
Europe/Middle East/Asia
5
1 Introduction
exacqVision E-Series 1- and 4-channel encoders capture analog video and audio signals; encode the content using H.264,
MJPEG, and G.711 compression technologies; and transmit the data to exacqVision video servers for recording. E-Series
encoders are a cost-effective way to migrate to IP video when legacy analog CCTV equipment and infrastructure must be
used.
E-Series encoders are fully compatible with exacqVision and support configuration of motion detection, image quality,
streaming profiles, and digital inputs and outputs directly from exacqVision.
Encoding
Supports H.264 and MJPEG formats
Supports encoding video at up to 4CIF resolution
Supports dual-stream encoding.
Allows selection of compound stream encoding (with audio and video synchronization) or video stream encoding
Network
One 10M/100Mbps adaptive Ethernet interface (PoE)
Accessible by multiple web browsers, including Internet Explorer, Firefox, Chrome, and Safari
Remote web browser access by HTTPS, ensuring high security
Netfilter builds internet firewalls based on packet filtering
QoS protocol enhances the data transmission performance.
Supports SNMPv1/v2c/v3 simple network management protocol
mDNS-based Apple’s Bonjour protocol, which enables automatic discovery of devices
Zero configuration networking (Zeroconfig), which automatically obtains the IPv4 link-local IP addresses (range:
169.254.1.0~169.254.254.255).
Auto/manual port mapping by UPnP™
Discoverable by exacqVision or E-Series IP Configuration Utility
Automatically obtains IP address by DHCP protocol
RTSP/RTP standard stream media protocol, which allows user to view live by unicast
Transmission via RS-232 and RS-485 transparent channel (four-channel encoders only)
Access to Internet by PPPoE method; supports Peanut Hull, DynDNS, and more
Sets time by NTP
PTZ Control
Support multiple PTZ protocols; different channels can be configured with protocol type, RS-485 address, baud
rate, data bit, stop bit, even/odd parity, stream control method, and more; support for remote configuration of
presets, patrols, and patterns.
Relay input alarm can be responded to with PTZ linkage actions, such as presets, patrols, or patterns.

www.exacq.com
+1.317.845.5710
+44.1438.310163
USA (Corporate Headquarters)
Europe/Middle East/Asia
6
Alarm
Relay alarm input; normally open or normally closed; four configurable alarm arming periods; triggering of
corresponding alarm handling methods, relay alarm output, buzzer alarm, upload to control center, PTZ linkage,
presets/patrols/patterns, and more.
Relay Alarm Output; can be connected with alarm devices for alarm handling within arming period.
Exceptions
Exception alarm handling; includes network disconnect alarm, IP address conflict alarm, illegal access alarm, and
more; multiple alarm handling methods supported, relay alarm output, buzzer alarm, and more.
Exception reboot; software watchdog for inspecting important threads and system resources of device; device
automatically restarted if exceptions are detected.
Firmware watchdog for inspecting the firmware of device; device automatically restarted in case of exceptions in
system task scheduling.
Logs
Can be classified into the operation logs, alarm logs, exception logs, and information logs; searchable and
viewable by date or type; exportable in text format over network.

www.exacq.com
+1.317.845.5710
+44.1438.310163
USA (Corporate Headquarters)
Europe/Middle East/Asia
7
2Encoder Overview
E-ADE1C FRONT PANEL
Item
Description
1
POWER LED Indicator
Red when the device is powered on; orange when the SD card is
inserted.
2
VIDEO IN
BNC connector for video input.
3
LINE IN
3.5mm interface for two-way audio input or audio input; connect to
audio input device or active pick-up, microphone, etc.
4
AUDIO OUT
3.5mm interface; connect to audio output device such as loudspeaker.
5
microSD
microSD interface for log storage.
6
RESET
Hold button for more than 15 seconds after power is turned on to
restore factory-default settings.
1
2
3
4
5
6

www.exacq.com
+1.317.845.5710
+44.1438.310163
USA (Corporate Headquarters)
Europe/Middle East/Asia
8
E-ADE4C FRONT PANEL
Item
Description
1
POWER LED Indicator
Red when the device is powered on; orange when the SD card is inserted.
2
LINE IN
3.5mm two-way audio input interface; connect to active pick-up,
microphone, etc.
3
AUDIO OUT
3.5mm interface; connect to audio output device, such as loudspeaker.
4
VIDEO IN
BNC interface for video input.
5
AUDIO IN
Line input interface for audio input.
1
2
3
4
5

www.exacq.com
+1.317.845.5710
+44.1438.310163
USA (Corporate Headquarters)
Europe/Middle East/Asia
9
E-ADE1C REAR PANEL
Item
Description
1
ALARM IN /OUT
Relay alarm input/output. (JP2 pin not available on output.)
2
RS-485
RS-485 serial interface; connect to pan/tilt unit, speed dome, etc.
3
LAN
10M/100Mbps adaptive Ethernet interface (PoE). Right LED indicator
lights in green when the network cable is connected; left LED
indicator blinks in orange when data is transmitting/receiving.
4
DC12V
12V DC power supply.
5
GND
Grounding.
1
2
3
4
5

www.exacq.com
+1.317.845.5710
+44.1438.310163
USA (Corporate Headquarters)
Europe/Middle East/Asia
10
E-ADE4C REAR PANEL
Item
Description
1
ALARM IN
Relay alarm input.
2
ALARM OUT
Relay alarm output.
3
RS-232
Serial interface for configuration of device’s parameters; or used as
transparent channel.
4
RS-485
RS-485 serial interface; connect to pan/tilt unit, speed dome, etc.
5
RESET
Hold button for more than 15 seconds after the device is turned on to
restore factory-default settings.
6
microSD
microSD interface for data storage.
7
LAN
10M/100Mbps adaptive Ethernet interface (PoE). Right LED indicator
lights in green when the network cable is connected; left LED indicator
blinks in orange when data is transmitting/receiving.
8
DC12V
12V DC power supply.
9
GND
Grounding.
1
2
3
4
5
6
7
8
9

www.exacq.com
+1.317.845.5710
+44.1438.310163
USA (Corporate Headquarters)
Europe/Middle East/Asia
11
Alarm Input Connections
The encoder supports the open/close relay input as the alarm input mode. For the alarm input signal not in open/close
relay signal mode, follow the connections shown as below:
Alarm input connections for Emerson Alarm:
Alarm input connections for Normal Alarm:
Alarm Output Connections
The encoder supports the open/close relay input as the alarm output mode. The alarm input can be selected to NO or NC.
Different alarm output connection methods are applied to the AC or DC load:
NOTE: The one-input encoder does not have a JJ1 relay. Please note the different connections of JJ1 shown here.
For DC load, JJ1can be safely used both in NC and NO modes, and it is recommended within the limit of 12V/1A. For
external AC input, JJ1 must be open. The motherboard provides two jumpers, each corresponding to one alarm output.
Both jumpers are connected by default.
Encoder
Note: The relay input port of the Encoder should be set to NC mode.
Encoder

www.exacq.com
+1.317.845.5710
+44.1438.310163
USA (Corporate Headquarters)
Europe/Middle East/Asia
12
3Network Parameters
There are two ways an IP address can be assigned to the encoder:
If a DHCP server is available, an IP address will be assigned to the encoder automatically. You can then locate the
encoder in exacqVision using the Find IP Cameras feature (see section 6 of this document for more information).
If a DHCP server is not available, the encoder will default to a link-local address.
In either case, you can use the E-Series IP utility to find and configure the IP address and other network parameters.
Searching Online Devices
Click to run the IP utility. It automatically searches online devices every 15 seconds on the computer’s subnet. It
displays the total number of located devices in the Online Devices interface. Device information such as device type, IP
address, port number, and gateway are displayed.
Click to refresh the online device list manually. Any newly searched devices are added to the list. Devices can
be searched and displayed in the list within 15 seconds of connection, and they are removed from the list within 45
seconds after going offline.

www.exacq.com
+1.317.845.5710
+44.1438.310163
USA (Corporate Headquarters)
Europe/Middle East/Asia
13
Modifying Network Parameters
1. Select the device to be modified in the device list.
2. Network parameters of the selected device are displayed in the Modify Network Parameters panel. Edit the
modifiable network parameters as needed.
3. Enter the password of the admin account of the device in the Password field and click to save the
changes.
NOTE: To modify the network parameters of multiple devices simultaneously, select all the devices to be
modified before editing the parameters. The IP address entered is incremented by one for the additional
selected devices; that is, if you enter 10.13.6.43 for the first selected device, the next device will be assigned
10.13.6.44, and so on until each selected device is assigned an address.
Restoring Default Password
It is recommended that you change the admin password. Default credentials for the encoder are as follows:
Username: admin
Password: admin256
If you need to restore the default password, contact technical support to obtain a security code. Enter the security code
and click OK.
1
2
3

www.exacq.com
+1.317.845.5710
+44.1438.310163
USA (Corporate Headquarters)
Europe/Middle East/Asia
14
4Connecting to an exacqVision System
NOTE: The latest version of exacqVision Client can be downloaded from https://exacq.com/support/downloads.php.
Initiating the Connection
To add the encoder to the exacqVision system using exacqVision Client, complete the following steps:
1. Open exacqVision Client and select the Config (Setup) page.
2. In the site tree, find the exacqVision server that the encoder will be associated with. Expand the server until you
can select Add IP Cameras.
3. Click Rescan Network to ensure all cameras and encoders are displayed in the Find IP Cameras list.
4. Locate the encoder in the Find IP Cameras list (4a). To narrow the list, type information about the encoder, such
as “E-Series” or the IP address, in the search box (4b).
5. Select the encoder entry in the list to display the encoder in the IP Camera Information section (5a). Enter the
username and password (5b), and then click Apply (5c).
NOTE: Alternatively, you can select Add (5d) next to the encoder’s entry, click Add Selected (5e), enter the
username and password of the encoder in the pop-up box, and click OK.
6. Verify that the encoder has been added to the IP Camera List.
7. Look at the Status column to ensure the encoder is detected and connected.
1
2
4a
5d
6
7
4b
5e
5a
5b
5c
3

www.exacq.com
+1.317.845.5710
+44.1438.310163
USA (Corporate Headquarters)
Europe/Middle East/Asia
15
Verifying the Connection
To verify that the encoder is transmitting video and audio from its cameras to the exacqVision server, complete the
following steps:
1. Open the exacqVision Client live page.
2. Expand the server in the site tree.
3. Select an encoder/channel combination to display video from the camera in the playback window.
4. If audio is connected, drag an audio channel into the playback window to verify the audio connection and
transmission.
For complete information about exacqVision Client, click the Help button or download the user manual from
https://exacq.com/support/specsheets.php?perma=exacqVision+User+Manuals.
1
2
3
4

www.exacq.com
+1.317.845.5710
+44.1438.310163
USA (Corporate Headquarters)
Europe/Middle East/Asia
16
5Encoder Configuration Page
NOTE: Many common settings on the encoder, such as motion configuration and video settings, can be configured in
exacqVision Client. The camera’s web configuration page should be used primarily to configure features that cannot be
changed using exacqVision Client.
The following web browsers can be used for access to the encoder’s web configuration page:
Internet Explorer 6 and later
Firefox 3.5 and later
Chrome 8 and later
Safari 5.0.2 and later
Windows XP SP1 and later (32-bit)
You will need the following for access to the encoder’s web configuration page:
The network settings of device, as configured in the “Network Parameters” chapter of this document.
A connection to the LAN for the encoder and a client computer.
The username of the encoder (default: admin) and its password (default: admin256).
Installing Web Components
1. In the web browser, open the IP address of the encoder (such as http://192.0.0.64) and then press Enter to
display the login interface.
NOTE: When the HTTPS feature is enabled, the system will use the HTTPS login mode (https://ipaddress) by
default. You can alternatively enter http://ipaddress/index.asp to use HTTP instead.

www.exacq.com
+1.317.845.5710
+44.1438.310163
USA (Corporate Headquarters)
Europe/Middle East/Asia
17
2. Enter the User Name (default: admin) and Password (default: admin256), and then click Login.
3. Download and install the plug-in if prompted.
4. Click on the live view panel by following the onscreen prompts.
5. Click Run or Save on the pop-up warning message box.
6. Click Next on the pop-up Setup dialog box.
7. When the installation completes, click Finish to complete the installation of Web Components.

www.exacq.com
+1.317.845.5710
+44.1438.310163
USA (Corporate Headquarters)
Europe/Middle East/Asia
18
Main Page
After successful login, the main page opens automatically.
The following features are available on this page:
1. Menu Bar: Enter the Live View, Log, and Configuration pages.
2. Device List: Display the connected encoder and its channels.
3. Live Video Window: Display the live video of the current camera.
4. Window-division: Choose a Live View display mode.
5. Toolbar: Control functions in live view mode, such as live view, audio on/off, two-way audio, and more.
6. PTZ Control: Control pan/tilt/zoom and the lighter and wiper controls.
7. Preset Setting/Calling: Set and call the preset for the camera (supports PTZ functions).
8. Video Parameters menu: Configure the brightness, contrast, hue, and saturation of live video. (Click the Video
Parameters button to display the options.)
1
2
4
3
5
6
7
8
8

www.exacq.com
+1.317.845.5710
+44.1438.310163
USA (Corporate Headquarters)
Europe/Middle East/Asia
19
6Live View
Live View shows you the video image transmitted from the connected camera in real time. After successful login, the
system will open Live View automatically.
Starting Live View
1. In the Live View window, select a video window.
2. Double-click a camera from the device list to start the Live View.
1
2
3

www.exacq.com
+1.317.845.5710
+44.1438.310163
USA (Corporate Headquarters)
Europe/Middle East/Asia
20
3. Click the button to start the Live View for all cameras on the device list. Additional toolbar buttons:
Icon
Description
Select the window-division mode.
/
Start/stop Live View.
Capture pictures in Live View.
/
Manually start/stop recording.
Enable e-PTZ.
Previous page.
Next page.
/
Audio on/off.
/
Start/stop two-way audio (Stream Type must be
configured).
TIP: To display full-screen mode, double-click a live video window. To switch to the previously selected mode, double-
click the live video window again.
Capturing a Picture
Click the button on the toolbar to capture live pictures in JPEG format. When the picture is captured, the following
pop-up message box will appear at the lower right corner. The location where the picture is saved can be configured
using the Local Configuration option on the Configuration page.
Table of contents
