eXact PipeCut P400 User manual

PipeCut P400 Plastic
EN Operating Instructions 5-16
FR Conseils d'emploi 17-28
ES Instrucciones de manejo 29-40
Pat. pending

Exact PipeCut P400
Blade information for Exact PipeCut saws
There are two types of blades for Exact PipeCut P400 pipe saw:
1) TCT P150 blade is designed for cutting plastic pipes with P400 pipe saw. TCT blades
can be reshapened few times.
2) Cut Bevel blade is designed to cut and bevel plastic pipes in one process.
The bevelling tips can be turned around for to get new sharp cutting edge. There is also an
upgrade kit available to Cut Bevel blade . It contains one cutting blade and 8 pcs bevelling
blades and the screws needed to fix these blades to the blade body. By changeing these
one gets a blade that works like a new.
Informations concernant la lame des scies Exact PipeCut
Il existe deux types de lames pour la scie à tuyaux Exact PipeCut P400 :
1) La lame TCT P150 est conçue pour découper des tuyaux en plastique avec la scie à
tuyaux P400. Les lames TCT nécessitent peu d’affûtage.
2) La lame de coupe chanfreinée est conçue pour couper et chanfreiner les tuyaux en
plastique en une seule opération. Les pointes de chanfreinage peuvent être inversées
lorsqu’elles sont usées pour obtenir un nouveau bord de coupe affûté. Un kit est également
disponible pour améliorer la lame de coupe chanfreinée. Il comprend une lame de coupe
et 8 pointes de chanfreinage, ainsi que les vis nécessaires pour fi xer cette lame et les
pointes au corps de la lame. Ce kit d’amélioration fournit à l’utilisateur une lame de coupe
chanfreinée comme neuve.
Información de cuchilla para las sierras Exact PipeCut
Existen dos tipos de cuchillas para la sierra de tubos Exact PipeCut P400:
1) La cuchilla TCT P150 está diseñada para el corte de tubos de plástico con la sierra de
tubos P400. Las cuchillas TCT pueden afi larse varias veces.
2) La cuchilla CutBevel está diseñada para realizar cortes normales y de bisel de tubos
de plástico en un solo proceso. Las puntas de bisel pueden invertirse cuando están gastadas
para obtener un nuevo borde de corte afi lado. También se encuentra disponible un equipo
para actualizar la cuchilla de corte de bisel. Está formado por una cuchilla de corte y 8
puntas de bisel y los tornillos necesarios para fi jar esta cuchilla y las puntas al cuerpo de
la hoja. Este equipo de actualización ofrece al operador una cuchilla de corte de bisel tan
buena como una nueva.
2

A
3
20.
21.

4
120 V 25 ft 50 ft 100 ft 150 ft
7,6 m 15,2 m 30,5 m 45,7 m
240 V 50 ft 100 ft 200 ft 300 ft
15,2 m 30,5 m 61,0 m 91,4 m
AWG AWG AWG AWG
0-6 A 18 16 16 14
6-10 A 18 16 14 12
10-12 A 16 16 14 12
12-16 A 14 12
Total length of chord
Longueur totale de la rallonge
Longitud total del cable
Not recommended
Non recommandé
No recomendado
Ampere rating
Courant
Amperios
Extension chord sets minimum gauge
Calibre (gauge) minimal pour les cordons de rallonges
Calibre (gauge) mínimo para juegos de cables
1.
2.
3. 4.
5.
6.
7.

Contents
5
english
Contents
Technical data
Package contents
Safety
Safety instructions
Operation
Functional description
Product features
Before operating the tool
Connection to the mains power supply
Precise setting of the cutting point
Setting the pipe on supports
Attaching the pipe saw to the pipe
Piercing the pipe wall
Sawing around a pipe
Overload protection
Straightness of cut and adjusting wheel
Installing and changing the saw blade
Service and maintenance instructions
Environment /Disposal
Guarantee/Guarantee conditions
Tips for users
Exploded view (separate attachment)
6.
6.
7.
10.
10.
11.
11.
11.
11.
12.
12.
12.
13.
13.
14.
14.
16.
16.
16.
Definitions: Safety guidelines
The definitions below describe the level of severity for each signal word. Please read the manual and pay
attention to these symbols.
DANGER: Indicates an imminently hazardous situation which, if not avoided, will result in death or
serious injury.
WARNING: Indicates a potentially hazardous situation which, if not avoided, could result in death or
serious injury.
CAUTION: Indicates a potentially hazardous situation which, if not avoided, may result in minor or
moderate injury.
NOTICE: Indicates a practice not related to personal injury which, if not avoided, may result in
property damage.
Denotes risk of electric shock.
The label on your tool or this manual may include symbols. The symbols and their definitions are
listed on page 41.

Operating, safety, and servicing instructions
Please read this operating, safety, and servicing instructions carefully before
using the pipe saw. Also store this instruction book somewhere accessible to
everyone using the pipe saw. In addition to these instructions, always follow
the official work, health and safety regulations. The Exact PipeCut is meant for
professional use only.
Technical data
Kuva A
Information
6
Model
Voltage
Current
Power
No-Load speed
Intermittent operation
Blade diameter
Mounting bore
Weight
Range of use Ø
Max. pipe wall cutting
Max. pipe wall bevel cut
Protection class
Spindle lock
Speed preselection
Constant electronic control
Overload Protection
Reduced starting current
english
Pipecut P400
120 V / 60 Hz
8,4 A
950 W
4000 /min
2,5 min ON / 7,5 min OFF (S3 25%)
5,8”-5,9” (148 /150 mm)
2,44” (62 mm)
12 lbs (5,7 kg)
4”- 16” (100 mm – 400 mm)
0,9” (23 mm)
0,8” (20 mm)
/ II
YES
NO
NO
YES
NO
Exact PipeCut P400 pipe saw
Package contents:
Please check the package contains the following items (page 4):
1. PipeCut System shoulder bag
2. Exact PipeCut P400 pipe saw
3. Pipe holders 1+2
4. Operating instructions
5. Allen key 5 mm
6. TCT P150 blade fitted on the machine
7. Cut Bevel blade (in the bag)

7
Safety
General power tool safety
warnings
WARNING: Read all safety warnings and
all instructions. Failure to follow the
warnings and instructions may result in
electric shock, fire and/or serious injury
Save all warnings and instructions for future
reference.
The term “power tool” in the warnings refers to your
mains-operated (corded) power tool or battery-
operated (cordless) power tool.
1. Work area safety
a) Keep work area clean and well lit. Cluttered
or dark areas invite accidents.
b) Do not operate power tools in explosive
atmospheres, such as in the presence of
flammable liquids, gases or dust. Power tools
create sparks which may ignite the dust or fumes.
c) Keep children and bystanders away while
operating a power tool. Distractions can cause
you to lose control.
2. Electrical safety
a) Power tool plugs must match the outlet. Never
modify the plug in any way. Do not use any
adapter plugs with earthed (grounded) power
tools. Unmodified plugs and matching outlets
will reduce risk of electric shock.
b) Avoid body contact with earthed or grounded
surfaces, such as pipes, radiators, ranges
and refrigerators. There is an increased risk of
electric shock if your body is earthed or grounded.
c) Do not expose power tools to rain or wet
conditions. Water entering a power tool will
increase the risk of electric shock.
d) Do not abuse the cord. Never use the cord
for carrying, pulling or unplugging the power
tool. Keep cord away from heat, oil, sharp
edges and moving parts. Damaged or entangled
cords increase the risk of electric shock.
e) When operating a power tool outdoors, use
an extension cord suitable for outdoor use.
Use of a cord suitable for outdoor use reduces
the risk of electric shock.
f) If operating a power tool in a damp location
is unavoidable, use a residual current device
(RCD) protected supply. Use of an RCD reduces
the risk of electric shock.
NOTE: The term "residual current device (RCD)"
may be replaced by the term "ground fault circuit
interrupter (GFCI)" or "earth leakage circuit breaker
(ELCB)
3. Personal safety
a) Stay alert, watch what you are doing and use
common sense when operating a power tool.
Do not use a power tool while you are tired
or under the influence of drugs, alcohol or
medication. A moment of inattention while
operating power tools may result in serious
personal injury.
b) Use personal protective equipment. Always
wear eye protection. Protective equipment such
as dust mask, non-skid safety shoes, hard hat,
or hearing protection used for appropriate
conditions will reduce personal injuries.
c) Prevent unintentional starting. Ensure the
switch is in the off-position before connecting
to power source, picking up or carrying the
tool. Carrying power tools with your finger on
the switch or energising power tools that have
the switch on invites accidents.
d) Remove any adjusting key or wrench before
turning the power tool on. Awrench or a key
left attached to a rotating part of the power tool
may result in personal injury.
e) Do not overreach. Keep proper footing and
balance at all times. This enables better control
of the power tool in unexpected situations.
f) Dress properly. Do not wear loose clothing
or jewellery. Keep your hair, clothing and
gloves away from moving parts. Loose clothes,
jewellery or long hair can be caught in moving
parts.
g) If devices are provided for the connection of
dust extraction and collection facilities, ensure
these are connected and properly used. Use
of dust collection can reduce dust-related hazards.
4. Power tool use and care
a) Do not force the power tool. Use the correct
power tool for your application. The correct
power tool will do the job better and safer at the
rate for which it was designed.
b) Do not use the power tool if the switch does
not turn it on and off.Any power tool that cannot
be controlled with the switch is dangerous and
must be repaired.
c) Disconnect the plug from the power source
from the power tool before making any
adjustments, changing accessories, or storing
power tools. Such preventive safety measures
reduce the risk of starting the power tool
accidentally.
d) Store idle power tools out of the reach of
children and do not allow persons unfamiliar
with the power tool or these instructions to
operate the power tool. Power tools are
dangerous in the hands of untrained users.
e) Maintain power tools. Check for misalignment
or binding of moving parts, breakage of parts
and any other condition that may affect the
power tool’s operation. If damaged, have the
power tool repaired before use. Many accidents
are caused by poorly maintained power tools.
english

8
Safety
f) Keep cutting tools sharp and clean. Properly
maintained cutting tools with sharp cutting edges
are less likely to bind and are easier to control.
g) Use the power tool, accessories and tool bits
etc. in accordance with these instructions,
taking into account the working conditions
and the work to be performed. Use of the
power tool for operations different from those
intended could result in a hazardous situation.
5. Service
Have your power tool serviced by a qualified
repair person using only identical
replacement parts. This will ensure that the
safety of the power tool is maintained.
Safety warnings for circular
saws
a) DANGER: Keep hands away from
cutting area and the blade. Keep your
second hand on motor housing. If
both hands are holding the saw, they cannot be
cut by the blade.
NOTE: For circular saws with 140 mm or smaller
diameter blades, the "Keep your second hand on
auxiliary handle, or motor housing" may be omitted.
b) Do not reach underneath the workpiece. The
guard cannot protect you from the blade below
the workpiece.
c) Adjust the cutting depth to the thickness
of the workpiece. Less than a full tooth of the
blade teeth should be visible below the workpiece.
d) Never hold the workpiece being cut in your
hands or across your leg. Secure the
workpiece to a stable platform. It is important
to support the work properly to minimize body
exposure, blade binding, or loss of control.
e) Hold the power tool only by the insulated
gripping surfaces when performing an
operation where the cutting tool may contact
hidden wiring or its own cord. Contact with a
“live” wire will also make exposed metal parts of
the power tool “live” and shock the operator.
f) When ripping always use a rip fence or
straight edge guide. This improves the accuracy
of cut and reduces the chance of blade binding
g) Always use blades with correct size and shape
(diamond versus round) of arbour holes.
Blades that do not match the mounting hardware
of the saw will run eccentrically, causing loss of
control.
h) Never use damaged or incorrect blade
washers or bolt. The blade washers and bolt
were specially designed for your saw, for optimum
performance and safety of operation.
i) Do not reach into the saw dust ejector with
your hands. They could be injured by rotating
parts.
j) Do not work overhead with the saw. In this
manner you do not have sufficient control over
the power tool.
k) Do not operate the power tool stationary. It
is not designed for operation with a saw table.
l) Do not use high speed steel (HSS) saw blades.
Such saw blades can easily break.
m)When working with the machine, always hold
it firmly with both hands and provide for a
secure stance. The power tool is guided more
secure with both hands.
n) Secure the workpiece. A workpiece supported
by pipe holders is held more secure than by
hand.
o) Always wait until the machine has come to
a complete stop before placing it down. The
tool insert can jam and lead to loss of control
over the power tool.
p) Never use the machine with a damaged cable.
Do not touch the damaged cable and pull
the mains plug when the cable is damaged
while working. Damaged cables increase the
risk of an electric shock.
Further safety instructions for
all saws
Causes and operator prevention of kickback:
- Kickback is a sudden reaction to a pinched,
bound or misaligned saw blade, causing an
uncontrolled saw to lift up and out of the workpiece
toward the operator;
- When the blade is pinched or bound tightly by
the kerf closing down, the blade stalls and the
motor reaction drives the unit rapidly back toward
the operator;
- If the blade becomes twisted or misaligned in
the cut, the teeth at the back edge of the blade
can dig into the top surface of the wood causing
the blade to climb out of the kerf and jump back
toward the operator.
Kickback is the result of saw misuse and/or incorrect
operating procedures or conditions and can be
avoided by taking proper precautions as given below:
a) Maintain a firm grip with both hands on the
saw and position your arms to resist kickback
forces. Position your body to either side of
the blade, but not in line with the blade.
Kickback could cause the saw to jump backwards,
but kickback forces can be controlled by the
operator, if proper precautions are taken.
NOTE: For circular saws with 140 mm or smaller
diameter blades, the words "with both hands" may
be omitted.
b) When blade is binding, or when interrupting
a cut for any reason, release the trigger and
hold the saw motionless in the material until
the blade comes to a complete stop. Never
attempt to remove the saw from the work or pull
the saw backward while the blade is in motion
or kickback may occur. Investigate and take
corrective actions to eliminate the cause of blade
binding.
english

9
Safety
c) When restarting a saw in the workpiece,
centre the saw blade in the kerf and check
that saw teeth are not engaged into the
material. If saw blade is binding, it may walk up
or kickback from the workpiece as the saw is
restarted.
d) Support large panels to minimise the risk of
blade pinching and kickback. Large panels
tend to sag under their own weight. Supports
must be placed under the panel on both sides,
near the line of cut and near the edge of the
panel.
e) Do not use dull or damaged blades.
Unsharpened or improperly set blades produce
narrow kerf causing excessive friction, blade
binding and kickback.
f) Blade depth and bevel adjusting locking
levers must be tight and secure before making
cut. If blade adjustment shifts while cutting, it
may cause binding and kickback.
g) Use extra caution when making a "plunge
cut" into existing walls or other blind areas.
The protruding blade may cut objects that can
cause kickback.
Safety instructions for plunge
type saws
a) Check guard for proper closing before each
use. Do not operate the saw if guard does not
move freely and enclose the blade instantly.
Never clamp or tie the guard with the blade
exposed. If saw is accidentally dropped, guard
may be bent. Check to make sure that guard
moves freely and does not touch the blade or
any other part, in all angles and depths of cut.
b) Check the operation and condition of the
guard return spring. If the guard and the spring
are not operating properly, they must be
serviced before use. Guard may operate
sluggishly due to damaged parts, gummy deposits,
or a build-up of debris.
c) Assure that the guide plate of the saw will
not shift while performing the “plunge
cut” when the blade bevel setting is not at
90°. Blade shifting sideways will cause binding
and likely kick back.
d) Always observe that the guard is covering
the blade before placing saw down on bench
or floor. An unprotected, coasting blade will
cause the saw to walk backwards, cutting
whatever is in its bath. Be aware of the time it
takes for the blade to stop after switch is released.
Additional specific safety rules
The pipe saw must never be used in the following
cases, if:
• There is water or another liquid, explosive gases
or poisonous chemicals inside the pipe to be cut.
• The power switch is faulty.
• The power cable is faulty,
• The blade is bent.
• The blade is blunt or in poor condition.
• The plastic components are cracked or have parts
missing.
• The gripper unit is not properly tightened around
the pipe or if it is warped.
• The blade guard cover or moving blade guard
has been damaged or removed from the machine.
• The locking mechanisms do not work properly
(UNLOCK-button).
• The pipe saw has become wet.
When using the pipe saw, the following factors
must always be taken into consideration:
• Support tubes to minimise the risk of blade
pinching.
• Ensure that the pipe to be cut is empty.
• Ensure that the blade is correctly installed.
• Ensure that the diameter and thickness of the
blade are suitable for the pipe saw and that the
blade is suitable for the rpm-range of the machine.
• Never use sideways force to stop the blade, always
allow the blade to stop freely.
• Check the attachments of the blade guards.
• Never use excessive force when using the pipe
saw.
• Never use the pipe saw to lift the pipe while it is
still attached to the pipe.
• Avoid overloading the electric motor.
• Always follow the safety and operating instructions
and current regulations.
Air vents often cover moving parts and should
be avoided. Loose clothes, jewellery or long hair
can be caught in moving parts.
Accessories must be rated for at least the speed
recommended on the tool warning label.Accessories
running over rated speed can fly apart and cause
injury. Accessory ratings must always be above tool
speed as shown on tool nameplate.
WARNING: ALWAYS wear proper
personal hearing protection that
conforms toANSI S12.6 (S3.19) during use. Under
some conditions and duration of use, noise from
this product may contribute to hearing loss. When
working with various materials, the sound level may
vary and at times exceed the 85 dB(A) limit.Always
use ear protectors to protect yourself.
WARNING: ALWAYS use safety glasses.
Everyday eyeglasses are NOT safety
glasses.Always use safety goggles to prevent injury
to your eyes from particles thrown up when using
the pipe saw. Also use face or dust mask if cutting
operation is dusty (cast iron cutting). ALWAYS
WEAR CERTIFIED SAFETY EQUIPMENT:
• ANSI Z87.1 eye protection (CAN/CSA Z94.3),
• ANSI S12.6 (S3.19) hearing protection,
• NIOSH/OSHA/MSHA respiratory protection.
english

10
Safety, Operation
WARNING: ALWAYS use safety gloves
as the edges of cut pipes are sharp and
can cause cuts.
WARNING: Some dust created by power
sanding, sawing, grinding, drilling, and
other construction activities contains chemicals
known to cause cancer, birth defects or other
reproductive harm. Some examples of these
chemicals are:
• lead from lead-based paints,
• crystalline silica from bricks and cement and other
masonry products, and
• arsenic and chromium from chemically-treated
lumber (CCA).
Your risk from these exposures varies, depending
on how often you do this type of work. To reduce
your exposure to these chemicals: work in a well
ventilated area, and work with approved safety
equipment, such as those dust masks that are
specially designed to filter out microscopic particles.
Avoid prolonged contact with dust from power
sanding, sawing, grinding, drilling, and other
construction activities.
Wear protective clothing and wash exposed
areas with soap and water. Allowing dust to get
into your mouth, eyes, or lay on the skin may
promote absorption of harmful chemicals.
WARNING: Use of this tool can generate
and/or disbursedust, which may cause
serious and permanent respiratory or other injury.
Always use NIOSH/OSHA approved respiratory
protection appropriate for the dust exposure.
Direct particles away from face and body.
Extension cords
An extension cord must have adequate wire
size (AWG or American Wire Gauge) for safety.
The smaller the gauge number of the wire, the
greater the capacity of the cable, that is 16 gauge
has more capacity than 18 gauge. An undersized
cord will cause a drop in line voltage resulting in
loss of power and overheating. When using more
than one extension to make up the total length, be
sure each individual extension contains at least the
minimum wire size. The following table shows the
correct size to use depending on cord length and
nameplate ampere rating. If in doubt, use the next
heavier gauge. The smaller the gauge number, the
heavier the cord.(see page 4).
Motor
Be sure your power supply agrees with nameplate
marking. As little as 10% lower voltage can cause
loss of power and can result in overheating. All
Exact Tools products are factory-tested; if this tool
does not operate, check the power supply.
WARNING: Accessories must be rated
for at least the speed recommended on
the tool warning label. Accessories
running over rated speed can fly apart and cause
injury. Accessory ratings must always be above
tool speed as shown on tool nameplate.
DANGER: Avoid contact with the blade
teeth to prevent personal injury.
Functional Description
Read all safety warnings and all instructions.
Failure to follow the warnings and instructions may
result in electric shock, fire and/or serious injury.
Intended Use
PipeCut P400:
The Exact Pipe Cut P400 is intended for professional
use at any kind of construction sites.
The Exact PipeCut P400 is designed to be used
only for plastic pipes with dimensions 100 mm (4’)
- 400 mm (16”).The maximum wall thickness that
the Exact Pipe Cut P400 can cut through is 25 mm
(1”). With a Cut Bevel blade the maximum wall
thickness is 22 mm ( 0,9”) With the Exact PipeCut
P 400 you can cut pipes made from the different
plastic materials, such as PP, PE, PVC, etc.
PipeCut P400 pipe saw is intended for short,
intermittent use. The machine may be loaded for
2,5 minutes during a 10-minute period (S3 25 %).
PipeCut P400 pipe saw is not intended for use in
industrial serie production.
Product Features
While reading the operating instructions, unfold the
graphics page for the machine and leave it open.
This page is folded under the cover of this manual
(page 4). The following numbering of the product
features refers to this illustration.
Figure A
1. UNLOCK button
2. Power switch
3. Power switch locking lever
4. Motor unit
5. Moving blade guard lever
6. Blade guard cover
7. Setting points
8. Straight adjustment screw
9. Moving blade guard
10. Operating handle
11. Blade guard screw
12. Spindle lock button
13. Allen key
14. Rating plate
15. Overload protection
16. Manufacturing date (mmyy)
17. Straight adjustment screw inicator
18. Steering unit
19. Safe for the steering unit
20. Adjustment knob for the steering unit
21 Steering unit indicator
english

Exact P400
pipecutting system
operating instructions
Before operating the Exact P400 please do as
follows
Check that the motor unit is in the upright position
so that the yellow mark on the
UNLOCK button is visible.
Check that the there is correct blade in the machine.
Check that the blade is correctly in place and that it
is in good condition.
Check that the guide wheels are rotating.
Check that the support wheels are rotating.
Check that the lower blade guard is moving correctly.
Check that the pipe intended to be cut is empty.
Connecting the Exact P400 to the main power
supply
Ensure that the mains voltage is the same as
indicated on the rating plate (Figure A/14)
Connect the Exact P400 to the power outlet only
after having checked the list above.
Setting the supports for the pipe to be cut.
Always use Exact pipe supports when sawing. The
supports maximise safety and optimise the cutting
result. The cutting should always be done on a flat
surface. Place the pipe on the sawing support so
that the cutting point is between the wheel pairs.
Place the single supports underneath both ends of
the pipe. Make sure that all of the wheels are in
contact with the pipe. If necessary wedge the holders
with a piece of wood. (Fig. B) Shorter sections (under
25cm/10”) can be cut with two supports placed so
that the cutting point is outside the supports. (Fig.
C) By sawing in the correct order you prevent the
saw blade from jamming in the pipe in the final stage
of the cutting process.
Setting and marking the cutting point
Use a marker to mark the cutting point. There are
two setting points on the moving blade-guard of the
saw. One is for the blade that only cuts the pipe off
(Fig. D/1) while the other is for the blade that cuts
and provides a bevel on the end of the pipe. (Fig.
D/2)
To start sawing
Open the safety screw (Fig. E1) and adjust the wheel
pairs in the Exact P400 steering device according
to the diameter of the pipe by rotating the adjustment
knob on the back of the Exact P400 (Fig. E2). The
scale on the saw is approximate. User can fine tune
the length of the bevel with the adjustment knob.
Please notice that the smaller the diameter of the
pipe the more sensitive the adjustment of the depth
of the bevel will be.
11
Operation english
Fig. C
Fig. B
Fig. D
Fig. E
Cutting point
Cutting point

It is most important that the base of the steering
device does not touch the pipe but rather that the
wheel pairs support the saw (Fig. E3). Finally lock
the adjustment with the safety screw (Fig. E1) so
that the adjustments do not alter during the sawing.
Pull the lever on the moving bladeguard to an
towards you. (Fig. F and A/5) Place the Exact P400
horizontally on top of the pipe so that a suitable
setting mark for the blade that is in the machine is
positioned at the cutting point (Fig F). Hold the pipe
in place and ensure that the Exact P400 moves
freely in the direction the pipe is fed. To ensure
safety the Exact P400 leads should be to the left
and front of the pipe. The Exact P400 is now ready
for use.
Piercing the pipe wall
Strive to keep the P400 in a horizontal position on
top of the pipe during the entire sawing process.
Take a firm hold of the operating handle with your
right hand, start the motor by releasing the locking
lever on the power switch (Fig. G/1) and push the
power switch all the way down(Fig. G/2). Before
starting to saw wait until the blade reaches full
speed. Pierce the pipe wall by pressing the operating
handle down slowly until the blade has cut through
the pipe wall (at this stage the pipe must not rotate)
and the motor unit has locked into sawing position.
When the UNLOCK button is locked, i.e. the yellow
mark disappears (Fig. H), the Exact P400 is locked
and you can safely start sawing around the pipe.
When using a CutBevel blade piercing must be
performed especially calmly.
Sawing around the pipe
Start sawing by rotating the pipe with your left
hand towards yourself (Fig. I) and keep the Exact
P400 stable and in a horizontal position in relation
to the pipe (Fig. J). Continue sawing by rotating
the pipe calmly and at the most even speed
possible towards yourself until the pipe is cut off.
If you use a CutBevel blade continue sawing
approximately 5 cm after the pipe has been cut
off. This will ensure an even bevel around the
entire pipe. If you bevel an additional round you
will get even better result.
The saw can also be steered manually if the
blade does not coincide with the initial cut. When
you see the starting point of the cut, turn the saw
at a gentle angle towards the initial cut until the
pipe is cut off (Fig. L)
12
Operation english
suomi
Fig. F
Fig. G
Fig. H
Fig. I

When the pipe is cut off, push the UNLOCK button
forward until the yellow mark is visible and the locking
is released (Fig. L). Now raise the motor unit to starting
position. Release the power switch. After the saw is
lifted away from the pipe ensure that the moving blade
guard has turned into safety position (Fig. M).
Select the feeding speed as per the material and the
thickness of the wall. Too high speed can damage
the blade, overload the Exact P400 and give a poor
sawing result. Especially when using a CutBevel blade
the feed rate should be fairly slow to ensure a quality
bevel finish.
The Exact P400 can also be used for making only a
bevel to the end of plastic pipe. First position the saw
on top of the pipe so that the cutting blade of the
CutBevel blade is at the end of the pipe. (Fig. N) Now
you can work the pipe as previously described.
Should there be problems during piercing or sawing,
abnormal sounds or vibrations due to which you have
to interrupt sawing before the pipe is cut through,
release the blade by pushing the UNLOCK button
forward until the UNLOCK button is released and lift
the motor unit up. Once the problem is cleared, start
sawing again.
Never start the motor when the motor unit is locked
in sawing position or the teeth of the blade are in
contact with the sawn pipe.
Always clean the steering device and the guide wheels
after use. This will ensure that plastic chips caught in
the wheels do not skew the unit and cause a lobsided
cut.
The Exact P400 is equipped with overload protection.
When the blade is dull or the cutting speed is too
high, the overload protection cuts power automatically.
Restore the power by pushing the overload protection
switch (Fig. A/15).
Straightness of the cut and the adjustment
The cut is affected by many factors, e.g. the size of
the pipe, the material, the wall thickness, the quality
of the pipe’s surface, the roundness, blade condition,
feed rate, the operator’s experience. The cutting result
may vary and a gap may result on the cutting surface
either to the right or left i.e. the difference between
the start and end point of the cut (Fig. O).
There is a feature in the steering device of the Exact
P400 (Fig. A/8) which, if needed, can improve the
sawing result and facilitate to reach the placement of
the initial cut.
13
Operation english
Fig. J
Fig. K
Fig. L
Fig. M

Loosen the locking screw (Fig.P/1) with the M5 allen
key on the handle of the Exact P400. There is an
adjustment wheel on the right hand side of the
steering device (Fig. P/2). Turn the wheel with your
finger either clockwise or anti clockwise. The direction
depends on the direction of the misalignment. This
adjustment turns the entire motor unit in relation to
the steering unit. There is also an arrow and a dial
on the steering unit. (Fig. P/2) These will help to
gauge the extent of the adjustment.Adjust the motor
unit to the desired direction to correct the sawing
error. The extent of the adjustment depends on the
extent of the error, pipe diameter as well as the
strength and material of the pipe wall. Tighten the
locking screw (Fig. P/1) after the adjustment.
Installing and changing the
saw blade
WARNING: To reduce the risk of injury,
turn unit off and disconnect it from power
source before installing and removing
accessories, before adjusting or when making
repairs. An accidental start-up can cause injury.
Remove the power plug from the socket. Check that
the motor unit is locked in the upper position.
Remove the blade guard cover (Fig. Q/1) by opening
the screw (Fig. Q/2). Press the spindle-lock button
(Fig. A/12) and simultaneously rotate the blade by
hand until the spindle-lock button drops a further
distance of about 4 mm. Now the rotation of the
blade is prevented. Use the blade key to open the
blade attachment bolt. Remove the securing bolt
(Fig. Q/3), the washer (Fig.Q/4), the blade flange
(Fig. Q/5), and the blade (Fig. Q/6).
Before installing a new blade, check that both blade
flange discs are clean. Place a new or sharpened
blade on the lower blade flange (Fig. Q/7), so that
the marked side of the blade is facing outwards and
the arrows on the blade are facing in the same
direction as the rotation direction markings on the
inside of the blade case. Ensure that the new blade
goes right to the bottom in the lower blade flange.
Put the blade flange, the washer, and the securing
bolt back in place. Press the spindle lock button and
tighten the blade securing bolt. Put the blade guard
cover back in place and tighten the screw.
14
Operation, Maintenance english
Fig. O
Fig. P
Fig. Q
Fig. N

15
Maintenance and servicing
instructions
WARNING: To reduce the risk of injury,
turn unit off and disconnect it from power
source before installing and removing
accessories, before adjusting or when making
repairs. An accidental start-up can cause injury.
WARNING: To reduce the risk of injury, DO
NOT TIE, TAPE, OR OTHERWISE LOCK
THE ON/OFF SWITCH ON while “running in”. HOLD
BY HAND ONLY.
Cleaning
WARNING: Periodically blowing dust and
chips out of the motor housing using clean, dry
compressed air is a suggested maintenance
procedure. To reduce the risk of serious personal
injury, ALWAYS wear ANSI Z87.1 safety glasses
while using compressed air.
WARNING: When cleaning, use only mild
soap and a damp cloth on plastic parts. Many
household cleaners contain chemicals which could
seriously damage plastic.Also, do not use gasoline,
turpentine, lacquer or paint thinner, dry cleaning
fluids or similar products which may seriously damage
plastic parts. Never let any liquid get inside the tool;
never immerse any part of the tool into a liquid.
Steering unit
Clean the steering unit regularly with compressed
air and after every cut wipe out the chips with a
brush.
Blade guard
Make it a rule to clean the blade guard regularly,
and pay special attention to keep the moving blade
guard movement from becoming hampered.
Motor
Keep the motors cooling vents clean.
Power cable
WARNING: Check the condition of the power
cable regularly. A faulty power cable should
always be replaced at an approved service
center.
Correct use and regular servicing and cleaning will
ensure the continued operation of the pipe saw.
Accessories
WARNING: Since accessories, other than
those offered by Exact Tools, have not been
tested with this product, use of such
accessories with this tool could be hazardous. To
reduce the risk of injury, only Exact Tools,
recommended accessories should be used with this
product.
Recommended accessories for use with your tool
are available at extra cost from your local dealer or
authorized service center. If you need assistance in
locating any accessory, please visit our website
www.exacttools.com.
Blades
WARNING: VISUALLY EXAMINE CARBIDE
BLADES BEFORE USE. REPLACE IF
DAMAGED
WARNING: To minimize the risk of eye injury,
always wear ANSI Z87.1 approved eye
protection. Carbide is a hard but brittle
material. Foreign objects in the work piece such as
wire or nails can cause tips to crack or break. Only
operate saw when proper saw blade guard is in
place. Mount blade securely in proper rotation before
using, and always use a clean, sharp blade.
A dull blade will cause inefficient cutting, overload
on the saw motor.
Change blades when it is no longer easy to push
the saw through the cut, when the motor is straining,
or when excessive heat is built up in the blade. It is
a good practice to keep extra blades on hand so
that sharp blades are available for immediate use.
Dull blades can be sharpened in most areas; see
SAWS-SHARPENING in the yellow pages.
Your PipeCut pipe saw is designed for use with 5,9”
(150 mm) diameter blades that have a 2.44" (62
mm) diameter bore. Blades must be rated for 4200
RPM operation (or higher). DO NOT use any abrasive
wheels.
See blade selection on page 2
Repairs
To assure product SAFETY and RELIABILITY,
repairs, maintenance and adjustments should be
performed by a authorized service center or other
qualified service personnel. Always use identical
replacement parts.
Maintenance english

16
Environment, Guarantee, Tips
Environment
Separate collection. This product must
not be disposed of with normal household
waste. When your Exact PipeCut
170/170E machine is worn out, do not
dispose of it with normal household waste. This
product must be recycled separately. Separate
recycling of used products and packaging facilitate
recycling and recovery of materials. Reusing of
recycled materials helps prevent pollution of
environment. According to local regulations it is
possible to deliver household appliances to municipal
rubbish depositories or to the dealer when buying
a new product.
Guarantee
If the Exact PipeCut pipe saw becomes unusable
due to material or manufacturing faults within 24
months of the date of purchase, we will replace the
damaged parts with new ones or supply an entirely
new or factory-reconditioned pipe saw to replace
the damaged one.
The guarantee is only valid if:
The guarantee card or a dated purchase receipt is
returned to the manufacturer or retailer.
The pipe saw has not been misused.
No attempt has been made by non-approved persons
to repair the saw.
The pipe saw has been used in accordance with
these operating, safety, and servicing instructions.
The guarantee does not apply to blades or the
overload protection.
Tips for using Exact PipeCut
saws
All these tips may not consern all Exact models.
Diamond blade should only be used for cutting cast
iron pipe. It is not recommended to cut cast iron with
TCT or Cermet blades.
Clean the inside of the blade guards after cutting
plastic pipe.
Smaller pipe is easily cut by rotating the pipe by
hand either on a table or on the floor. Please note:
rotate pipe towards you when rotating by hand and
be careful not to rotate too fast.
Check the condition of the blade regularly.
The cutting procedure is divided into two stages;
first saw through the pipe wall, then complete the
cut by sawing around it.
Do not overload the saw by cutting continuously.
The saw will be overheated and the metal parts can
become burning hot. This will also damage the motor
and the blade. The rule is 2.5 minutes in use and
7.5 minutes rest.
Keep the feeding speed constant. This will extend
the lifetime of the blade.For example cutting time
for a steel pipe diameter of 6’’ (170mm), and a wall
thickness of 1/5’’ (5mm), is 15-20 seconds, and for
a cast-iron pipe diameter of 4’’ (110mm), with a wall
thickness of 1/6’’ (4mm) is 20 to 25 seconds.
Always keep the motor unit in the upright position.
The yellow mark of the unlock button is then visible.
Never place the Pipe Cut Saw on the pipe in the
locked / cutting position.
Factors that affect the lifetime of the saw blade:
• material of the pipe
• correct blade type for material being cut
• correct motor speed setting
• wall thickness of the pipe
• feeding speed
• smoothness of the pipe
• user’s general skills
• cleanness of the pipe
• rust on the pipe
• welded seam in the pipe
• blade speed
Factors that affect the straightness of the cut:
• condition of the saw blade
• wall thickness of the pipe
• feeding speed
• smoothness of the feed
• user’s general skills
• cleanness of the pipe
• roundness of the pipe
• gripper unit too loose or too tight
• blade assembled too tight
Due to continuous product development, the
information in this instruction manual may
change. We do not give separate notification of
changes.
english

Sommaire
17
français
Sommaire
Données techniques
Contenu du kit
Sécurité
Précautions d'emploi
Opération
Description du fonctionnement
Usage prévu
Avant de mettre en marche l'outil
Relier l'outil à l'alimentation
Régler le point de coupe avec précision
Placer le tuyau sur les supports
Attacher la scie au tuyau
Percer la paroi du tuyau
Scier autour du tuyau
Protection anti-surcharge
Précision de coupe et roulette de réglagel
Installer et changer la lame de la scie
Dépannage et conseils d'entretien
Environnement / Recyclage
Garantie / Conditions de la garantie
Trucs pour les utilisateurs
Vue éclatée (voir document séparé)
18.
18.
19.
22.
22.
23.
23.
23.
23.
24.
24.
24.
25.
25.
26.
27.
28.
28.
28.
Définitions: consignes de sécurité
Les définitions ci-dessous décrivent le niveau de gravité pour chaque mention d’avertissement. Veuillez lire
attentivement ce manuel en portant une attention particulière à ces symboles.
DANGERÊ: Indique une situation au danger imminent qui, si elle n’est pas évitée, entraînera la mort
ou des blessures graves.
AVERTISSEMENTÊ: Indique une situation potentiellement dangereuse qui, si elle n’est pas évitée,
pourrait entraîner la mort ou des blessures graves.
ATTENTIONÊ: Indique une situation potentiellement dangereuse qui, si elle n’est pas évitée, peut
entraîner des blessures mineures ou peu graves.
AVISÊ: Indique un énoncé non relié à un dommage corporel qui, s’il n’est pas évité, peut causer
des dommages à la propriété.
Dénote un risque de choc électrique.
L'étiquette apposée sur votre outil ou de ce manuel peuvent inclure des symboles. Les symboles
et leurs définitions sont énumérées à la page 41.

Mode d'emploi, consignes de sécurité et de
dépannage
Veuillez lire attentivement ce mode d'emploi et les consignes de sécurité
et de dépannage avant d'utiliser la scie. Assurez-vous de conserver ce
manuel à un endroit accessible à toute personne qui souhaiterait utiliser
la scie. Indépendamment de ces consignes, respectez les directives
concernant le travail, la santé et la sécurité. L'utilisation de la scie Exact
PipeCut est exclusivement réservée aux professionnels.
Caractéristiques techniques
Information
18
Modèle
Tension
Courant
Alimentation
Vitesse si déchargée
Fonctionnement discontinu
Diamètre de la lame
Trou de fixation de la lame
Poids
Plage d'utilisation Ø
Épaisseur max. en coupe,
Épaisseur max. en coupe chanfreinée
Classe de protection
Verrouillage
Présélection de la vitesse
Contrôle électronique constant
Protection de surcharge
Courant de démarrage réduit
français
Pipecut P400
120 V / 60 Hz
8,4 A
950 W
4000 /min
2,5 min ON / 7,5 min OFF (S3 25%)
5,8”-5,9” (148 /150 mm)
2,44” (62 mm)
12 lbs (5,7 kg)
4”- 16” (100 mm – 400 mm)
0,9” (23 mm)
0,8” (20 mm)
/ II
OUI
NON
NON
OUI
NO
Scie à tuyaux Exact PipeCut P400
Contenu du kit:
Veuillez contrôler que l’emb allage contienne les éléments suivants:
1. Sac de transport PipeCut
2. Scie à tuyaux Exact PipeCut P400
3. Supports de tuyau : 1 double et 2 simples
4. Mode d’emploi
5. Clé Allen de 5 mm fi xée à la poignée
6. Lame TCT 150 x 62 montée sur la machine
7. Lame de coupe chanfreinée dans le sac

19
Sécurité
Règles générales de sécurité
pour les outils électriques
Lire toutes les règles de sécurité et toutes les
instructions. Le non respect de ces consignes et
instructions peut provoquer choc électrique, incendie et/ou
blessures graves.
Conserver toutes les consignes et instructions pour
référence ultérieure.
Le terme “outil électrique” dans les consignes désigne vos
outils électriques alimentés sur secteur (avec cordon) ou
sur batterie (sans fil).
1. Sécurité de la zone de travail
a) Garder la zone de travail propre et bien éclairée. Les
établis mal rangés et les zones sombres invitent aux
accidents.
b) Ne pas utiliser les outils électriques dans une
atmosphère explosive, telle qu’en présence de
liquides inflammables, de gaz ou de poussières. Les
outils électriques créent des étincelles qui risquent
d’enflammer la poussière ou les vapeurs.
c) Tenir les enfants et les spectateurs éloignés, lors
de l’utilisation de l’outil électrique. Une distraction
peut faire perdre le contrôle de la machine.
2. Sécurité électrique
a) La fiche de secteur de l’outil électrique doit être
appropriée à la prise de courant. Ne modifier en
aucun cas la fiche. Ne pas utiliser de fiches
d’adaptateur avec des outils avec mise à la terre.
Les fiches non modifiées et les prises de courant
appropriées réduisent le risque de choc électrique.
b) Éviter le contact physique avec des surfaces mises
à la terre telles que tuyaux, radiateurs, fours et
réfrigérateurs. Il y a un risque élevé de choc électrique
au cas où votre corps serait relié à la terre.
c) Ne pas exposer l’outil électrique à la pluie ou à
l’humidité. La pénétration d’eau dans un outil électrique
augmente le risque d’un choc électrique.
d) Ne pas utiliser le câble à d’autres fins que celles
prévues Ne pas utiliser le câble pour porter l’outil,
pour l’accrocher ou encore pour le débrancher de
la prise de courant. Maintenir le câble éloigné des
sources de chaleur, des parties grasses, des bords
tranchants ou des parties de l’outil en rotation. Un
câble endommagé ou torsadé augmente le risque d’un
choc électrique.
e) En cas d’usage à l’extérieur, utiliser une rallonge
autorisée homologuée pour les applications
extérieures. L’utilisation d’une rallonge électrique
homologuée pour les applications extérieures réduit le
risque d’un choc électrique.
f) Si l’usage d’un outil dans un emplacement humide
est inévitable, utiliser un disjoncteur de fuite à la
terre. L’utilisation d’un disjoncteur de fuite à la terre
réduit le risque de choc électrique.
3. Sécurité personnelle
a) Être vigilant, surveiller le travail effectué et faire
preuve de jugement lors de l’utilisation d’un outil
électrique. Ne pas utiliser un outil en état de fatigue
ou sous l’influence de drogues, d’alcool ou de
médicaments Un moment d’inattention lors de l’utilisation
de l’outil électrique peut entraîner des dommages
corporels graves.
b) Utiliser un équipement de protection personnel.
Toujours utiliser des lunettes de sécurité L’utilisation
d’équipements de protection tels que les masques anti-
poussière, les chaussures de sécurité antidérapantes,
les casques ou les protections auditives dans des
conditions appropriées réduisent les risques de blessures.
c) Empêcher tout démarrage accidentel. S’assurer que
l’interrupteur se trouve à la position d’arrêt avant
de relier l’outil à la source d’alimentation électrique,
de ramasser ou de transporter l’outil. Transporter un
outil électrique alors que le doigt repose sur l’interrupteur
ou brancher un outil électrique dont l’interrupteur est à
la position de marche risque de provoquer un accident.
d) Retirer toute clé de réglage ou clé avant de démarrer
l’outil. Une clé qui est laissée attachée à une partie
pivotante de l’outil électrique peut provoquer des
dommages corporels.
e) Ne pas trop tendre les bras. Garder en permanence
une position et un équilibre corrects. Cela permet de
mieux maîtriser l’outil électrique dans des situations
imprévues.
f) S’habiller correctement. Ne pas porter des vêtements
larges ou des bijoux. Tenir ses cheveux, vêtements
et gants éloignés des parties mobiles. Les vêtements
larges, les bijoux et les cheveux longs peuvent se prendre
dans les parties mobiles.
g) Lorsque un dispositif de connexion à un système
de dépoussiérage ou d’élimination est fourni,
s’assurer qu’il est relié et utilisé correctement.
L’utilisation d’un dispositif de dépoussiérage peut réduire
les risques engendrés par les poussières.
4.Utilisation et entretien des outils
électriques
a) Ne pas forcer un outil électrique Utiliser l’outil
approprié au travail en cours. L’outil approprié
effectuera un meilleur travail, de façon plus sûre et à la
vitesse pour laquelle il a été conçu.
b) Ne pas utiliser un outil électrique dont l’interrupteur
est défectueux. Tout appareil dont l’interrupteur est
défectueux est dangereux et doit être réparé.
c) Débrancher la fiche de la source d’alimentation de
l’outil électrique avant de faire tout réglage ou
changement d’accessoire, ou avant de ranger ce
dernier. Ces mesures préventives réduisent les risques
de démarrage accidentel de l’appareil.
d) Après usage, ranger les outils électriques hors de
la portée des enfants, et ne permettre à aucune
personne n’étant pas familière avec un outil électrique
ou les présentes instructions d’utiliser ce dernier.
Les outils électriques sont dangereux entre les mains
des novices.
e) Entretenir les outils électriques. Vérifier les pièces
mobiles pour s’assurer qu’elles sont bien alignées
et tournent librement, qu’elles sont en bon état et
ne sont affectées d’aucune condition susceptible
de nuire au bon fonctionnement de l’outil. En cas
de dommage, faire réparer l’outil électrique avant
toute nouvelle utilisation. Bien des accidents sont
causés par des outils mal entretenus.
f) Maintenir tout outil de coupe bien aiguisé et propre.
Les outils de coupe bien entretenus et affûtés sont moins
susceptibles de se coincer et sont plus faciles à contrôler.
g) Utiliser un outil électrique, ses accessoires, mèches,
etc., conformément aux présentes instructions et
suivant la manière prévue pour ce type particulier
d’outil électrique, en tenant compte des conditions
de travail et du travail à effectuer. L’utilisation d’un
outil électrique pour toute opération autre que celle pour
laquelle il a été conçu est dangereuse.
français

20
Sécurité
5. Entretien
Faire entretenir les outils électriques par un
réparateur qualifié en n’utilisant que des pièces de
rechange identiques. Cela permettra d’assurer l’intégrité
de l’outil électrique et la sécurité de l’utilisateur.
Consignes de sécurité pour les
scies circulaires
a) DANGERÊ: Ne pas approcher les mains de
la zone de coupe ni de la lame. Mettre la
seconde main sur le carter moteur. Si les deux mains
tiennent la lame, elles risquent d’être coupées par la
lame.
b) Ne pas passer la main sous la pièce. La protection ne
protégera pas l’opérateur de la lame sous la pièce.
c) Ne jamais tenir la pièce à couper avec les mains ou
sur le genou. Maintenir la pièce à usiner sur une
plate-forme stable. Il est important de soutenir la pièce
correctement pour éviter tout risque d’exposition du
corps, tout voilage de la lame et toute perte de contrôle
de l’outil.
d) Tenir l’outil par ses surfaces de saisie isolées lors
d’un travail dans un endroit où la lame risque d’entrer
en contact avec des fils cachés ou son propre cordon.
Tout contact avec un fil sous tension transmettra du
courant dans les parties métalliques de l’outil et
électrocutera l’utilisateur.
e) Toujours utiliser des lames avec des orifices
d’alésage de la taille et de la forme correctes (carrés
ou ronds). Des lames ne correspondant pas au système
de montage de la scie auront une rotation excentrée, ce
qui provoquera une perte de contrôle de l’outil.
f) Ne jamais utiliser de rondelles ni de boulons de lame
endommagés ou incorrects. Les rondelles et le boulon
de lame ont été spécialement conçus pour la scie, et ils
garantiront les performances et la sécurité maximales.
g) Si la lame est voilée, ou si la coupe est interrompue
pour une raison ou pour une autre, relâcher la
gâchette et tenir la scie sans bouger dans le matériau
jusqu’à ce que la lame arrive à un arrêt complet. Ne
jamais tenter de retirer la scie du matériau ni tirer la
scie vers l’arrière si la lame tourne. Rechercher la
cause du voilage de la lame et corriger le problème.
h) Lorsqu’on remet la scie en marche alors que la lame
est enfoncée dans la pièce, centrer la lame sur le
plateau de découpe et vérifier que les dents ne sont
pas engagées dans le matériau. Si la lame est voilée,
elle risque de se relever lorsque la scie sera remise en
marche.
i) Ne pas utiliser de lame émoussée ou endommagée.
Une lame non affûtée ou incorrectement montée
engendrera des traits de scie étroits, provoquant une
friction excessive et un voilage de la lame.
j) Faire particulièrement attention lors d’une “coupe
en plongée” dans une paroi existante ou tout autre
endroit aveugle. La lame pourrait couper des objets,
ce qui risque de provoquer un retour de lame.
k) Vérifier que la protection inférieure se referme bien
avant chaque utilisation. Ne pas faire fonctionner la
lame si la protection inférieure ne se déplace pas
librement et ne se referme pas instantanément. Ne
jamais fixer ni attacher la protection inférieure en
position ouverte. Si la lame tombe accidentellement,
la protection inférieure risque de se voiler. Relever la
protection inférieure avec la poignée de rétraction et
s’assurer qu’elle se déplace librement et qu’elle ne
touche pas la lame ni aucune autre pièce à tous les
angles et toutes les profondeurs de coupe.
l) Si la protection fonctionnent pas correctement, il
faudra les faire réparer avant de les utiliser. Le
fonctionnement de la protection inférieure risque d’être
lent s’il y a des pièces endommagées, des dépôts gluants
ou une accumulation de débris.
m)Ne pas mettre les mains dans l’éjecteur de sciure.
Elles pourraient être blessées par les parties pivotantes.
n) Ne pas travailler la scie au dessus de la tête. Cela
ne donnerait pas de contrôle suffisant sur l’outil.
o)Ne pas faire fonctionner l’outil électrique immobile.
Il n’est pas conçu pour fonctionner avec une table d’appui.
p) Ne pas utiliser de lames en acier à coupe rapide. De
telles lames peuvent casser facilement.
q) L’opérateur utilisant la machine doit toujours la tenir
fermement des deux mains et adopter une position
stable. Le guidage de l’outil électrique est plus sûr à
deux mains.
r) Fixer la pièce. Une pièce maintenue par des porte-
tubes est plus stable que tenue avec les mains.
s) Avant de déposer l’outil électrique, toujours attendre
que celui-ci soit complètement à l’arrêt. L’outil risque
de se coincer, ce qui entraîne une perte de contrôle de
l’outil électrique.
t) Ne jamais utiliser une machine dont le câble est
endommagé. Ne pas toucher à un câble endommagé
et retirer la fiche du câble d’alimentation de la prise
du courant, au cas où le câble serait endommagé
lors du travail. Un câble endommagé augmente le
risque d’un choc électrique.
Consignes de sécurité
supplémentaires pour toutes les
scies
Causes et prévention du rebond pour l’utilisateur :
- Le rebond est une réaction soudaine d’une lame pincée,
coincée ou mal alignée, entraînant un soulèvement
incontrôlé de la scie hors de l’ouvrage vers l’utilisateur ;
- Lorsque la lame est pincée ou coincée par la fente de
coupe qui se referme, la lame se bloque et la réaction
du moteur entraîne rapidement l’appareil en arrière vers
l’utilisateur ;
- Si la lame se tord ou n’est plus alignée dans la coupe,
les dents sur le bord arrière de la lame peuvent
s’accrocher dans la surface supérieure du bois et
entraîner une remontée de la lame hors de la fente, la
faisant sauter en arrière vers l’utilisateur.
Le rebond est le résultat d’une mauvaise utilisation de
la scie et/ou de procédures ou conditions d’utilisation
incorrecte et il peut être évité en prenant les précautions
nécessaires indiquées ci-dessous :
a) Maintenez une prise ferme avec les deux mains
sur la scie et placez vos bras de manière à résister
aux forces de rebond. Positionnez votre corps d’un
côté ou de l’autre de la lame, mais pas dans son
alignement. Le rebond pourrait entraîner un saut vers
l’arrière de la scie, mais les forces de rebond peuvent
être contrôlées par l’utilisateur, si des précautions sont
prises.
REMARQUE : Pour les scies circulaires avec une lame d’un
diamètre maximum de 140 mm, la mention « avec les deux
mains » peut être omise.
Sécurité français
Other manuals for PipeCut P400
2
Table of contents
Languages:
Other eXact Saw manuals

eXact
eXact Pro Series User manual

eXact
eXact PipeCut 220 Pro Series User manual

eXact
eXact PipeCut 220E User manual

eXact
eXact Pipecut 280 Pro Series User manual
eXact
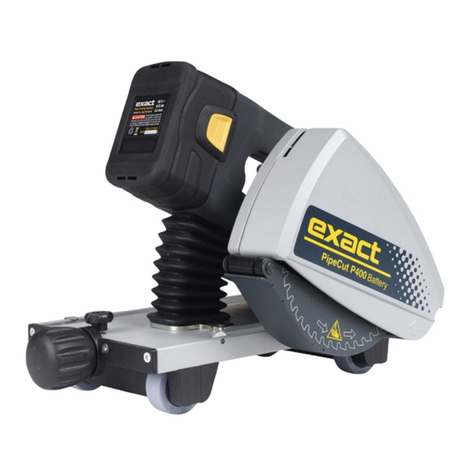
eXact PipeCut P400 User manual

eXact
eXact PipeCut 280E System User manual

eXact
eXact PipeCut 170 User manual

eXact
eXact PipeCut 360 AIR User manual

eXact
eXact Pipecut 360 INOX Series User manual

eXact
eXact PipeCut V1000 User manual
