Excelltel PH202 User manual

Table of Contents
Table of Contents.......................................................................................................1
Chap 1 Specification...............................................................................................2
Chap 2 Panel Illustration........................................................................................3
Chap 3 Installation..................................................................................................8
Chap 4 Using Guide .............................................................................................10
1) Intercom Call....................................................................................................10
2) Outgoing Call...................................................................................................10
3) Redial................................................................................................................10
4) Speed Dial........................................................................................................11
5) Call Transfer.....................................................................................................11
6) Call Hold...........................................................................................................11
7) Restore the holding call..................................................................................11
8) Multi-party Conference...................................................................................11
9) Function Key(for PH202).............................................................................11
10) Alarm Clock Setting(for PH202)................................................................12
11) Call Forwarding(for PH202).........................................................................12
12) Boss/Secretary(for PH202)..........................................................................12
13) DND Key(for PH202)....................................................................................12
14) Paging.............................................................................................................13
15) Auto Answer(for PH202)............................................................................14
16) Mute Key (for PH202)...................................................................................14
17) Call Booking(for PH202)............................................................................14
Chap 5 Using Setting............................................................................................15
Chap 6 DSS Setting..............................................................................................17
Chap 7 Speed Dialing...........................................................................................18
Chap 8 How to set multiple DSS to connect with key phone..........................19

P2
Chap 1 Specification
1.Wiring Length : Please use twisted pair (TP) upon CAT5. (The length of
connecting 1 key phone should be < 250m ; Connecting 2 key phones should
be <150m ; Connecting 4 key phones should be <50m .
2.Working Current : less than 100mA
3.Environment humidity: 10%~95%, noncondensing
4.Weight : 0.8kg
5.Size : 22.8mm*18.3mm*12mm
P3
Chap 2 Panel Illustration
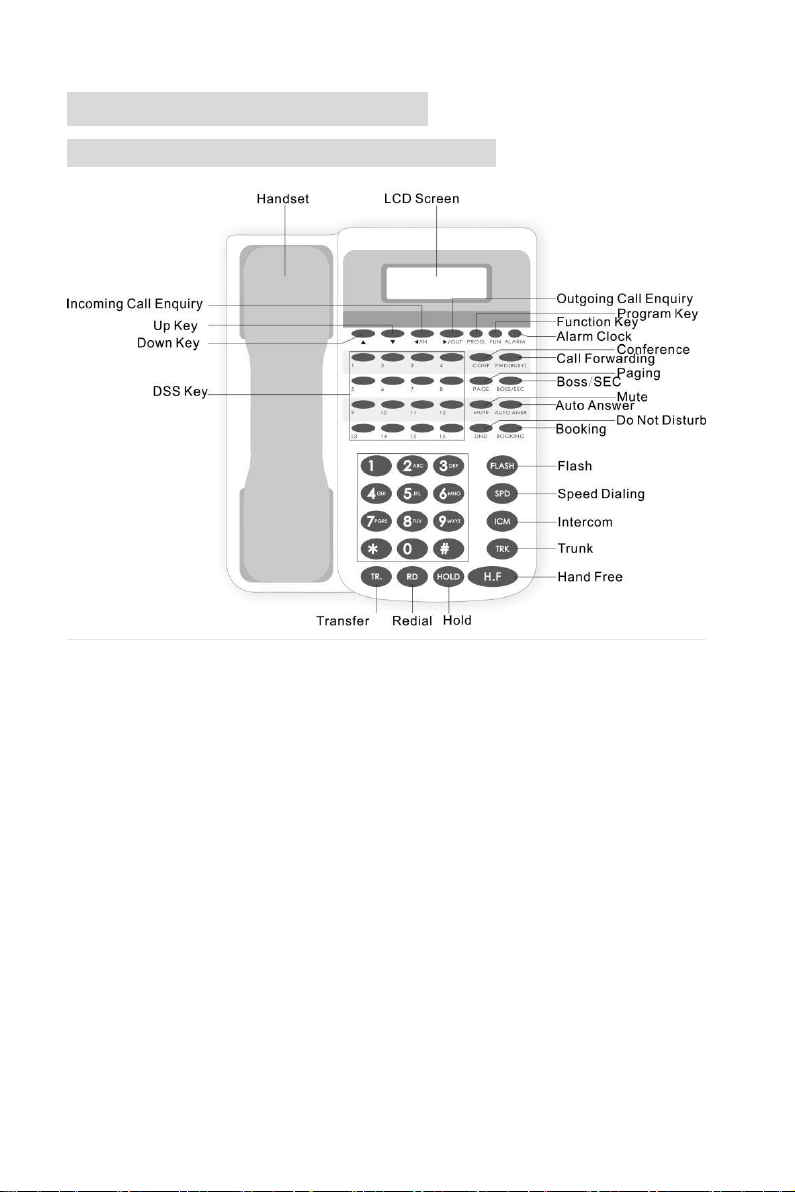
2.1. Shortcut key Definition for PH202
(PH202 Outlook)
1. DSS: Direct Station Selection keys, PH202 with 16 DSS keys, on default,
DSS1 -12 corresponding to CO line 1-12, DSS 13-16 corresponding to Ext port
1-4. On hook status, press DSS key, to call corresponding extension or access
corresponding CO line.
2. Direction key: used to configure parameter. On hook status, the left and right
arrow key are used for entering incoming/outgoing call query interface, the up
arrow key is used for adjusting ring volume, the down arrow key is used for
adjusting speaker volume
3. PROG: enter menu setting interface, including using setting, programming,
DSS setting, Speed Dialing setting, press H.F key to exit menu.
4. FUN: fast enter operator setting, equal to the operation of off hook + #, end
with H.F key
5. ALARM: set the alarm clock

P4
6. CONF: During the call with CO line, press this key to hold this call as
conference status
7. FWD(BUSY): when extension is busy, forward the incoming call to another
extension, press this key, input extension number, prompt “operation succeed”,
meanwhile the indicator is on. Press again this key, input #, to cancel this setting.
8. PAGE: press this key + (0, broadcast by extension / 8, call all extension)
9. BOSS/SEC: auto forward the incoming call to another extension
10. MUTE: press this key, the microphone of key phone is closed, the light of
keys is on, press again, cancel MUTE function, the light is off.
11. AUTO ANSR: press this key, when any call is coming, system will auto
answer in speaker, press again, to cancel this function.
12. DND: press this key, the extension is in Do Not Disturb status, press again,
to cancel this function.
13. BOOKING: press this key, equal to press #0, when booking is succeed, key
light is on, after booking is performed, key light is off.
14. Flash : used in call switch for the call with CO line. Equal to flash the hook
and dial #8 during the conversation with CO line .
15. SPD: on hook status, press this key, and input speed dialing group number,
to make speed dialing function. Off hook status, press this key, input system
speed dialing group number, to make peed dialing function.
16. ICM: press this key, system is in intercom status, the light is on
17. TRK: press this key, system is in CO line access status, the light is on, equal
to off hook + 9
18. TR.: press this key, and input another extension number, to transfer the call
to another extension.
19. HOLD: during the call with C.O line, press this key, to hold the current call,
after finish the call with another C.O line, press corresponding DSS key, to
continue with previous call
20. RD: off hook, press this key, system will auto call the last dialed number. You
can select incoming/outgoing call records to press redial.
P5
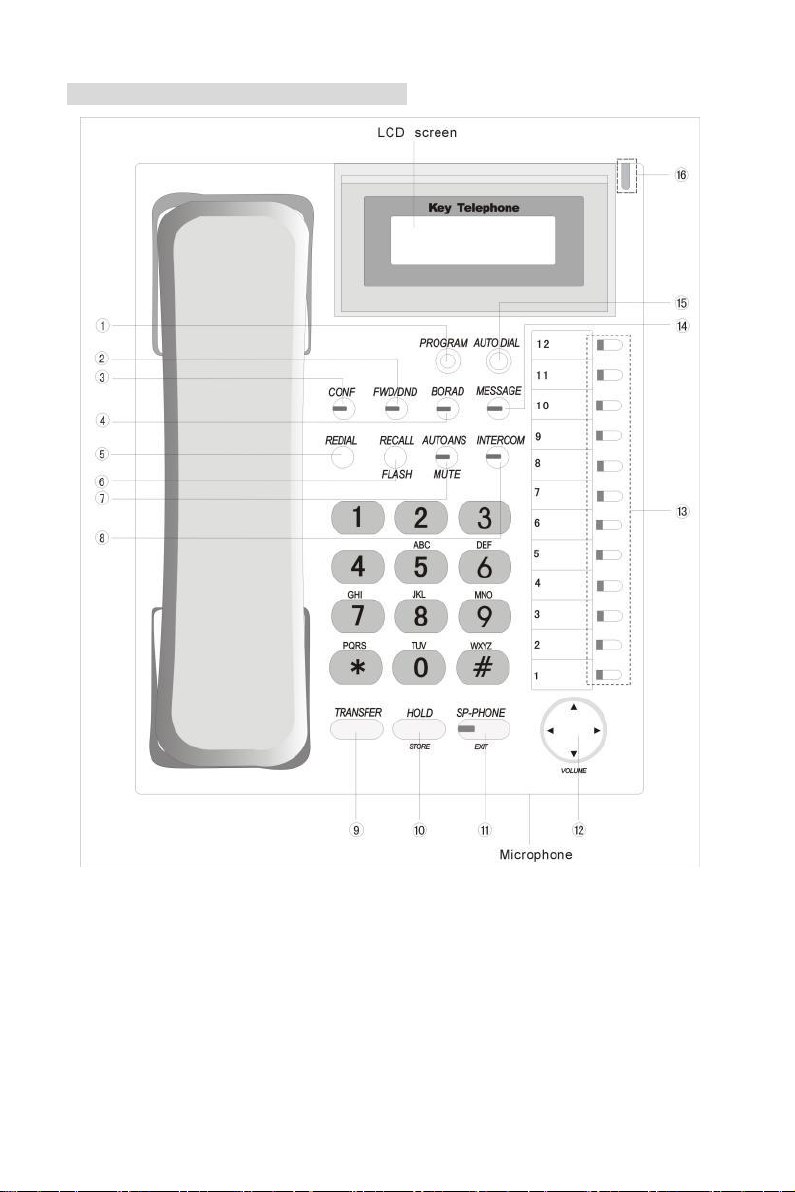
2.2. Shortcut key Definition for PH201-D
(PH201-D Outlook)
1. PROGRAM ---Enter using setup, system program setup, DSS key setup, and
auto-dial number setup status.
2. FWD/DND(red light) ----FWD: Forward the call to different EXT;
DND(Do-not-disturb)function can be used to restrict call when you are busy.
3. CONF (red light) ---- For conference talking

P6
4. BROAD ---- For external broadcasting system and key phone system,
including paging and monitoring function.
5. REDIAL ---- For CO line redial.
6. RECALL/ FLASH ---- For incoming calls recalling; or flash operation during
conversation.
7. AUTO ANS / MUTE (red light) ----Enable the auto answer mode; press to mute
the microphone in talking mode.
8. INTERCOM(ICM) (red light) ---- Making or answer internal call.
9. TRANSFER—Transfer the call to the other EXT in talking state
10. HOLD/STORE----For holding calls (including extension line and CO line); and
store the settings in programming setup mode
11. SP-PHONE / EXIT (red light) ---- With SP-PHONE, dial numbers or talking
without picking up the handset is possible; for exit in programming setup mode.
12. Navigation key / volume adjustment key ---- 4 direction keys, the normal
state up and down keys for ringing volume adjustment and sp-phone volume
adjustment, left right keys for dialed and incoming calls checking. In
programming state, 4 direction keys are menu choosing keys.
13. DSS key -------total twelve from NO1 to NO12 with green and red indicator;
on default setting, the 12 DSS setting as below:
NO1-8 is CO keys, correspond to NO1 to NO 8 CO lines------ display the status
of Co line ;press it for calling or answer of the CO. line show working status of
each CO line. Press key to make corresponding single key operation of CO line,
such as make or answer calls.
NO9-12 is EXT keys, correspond to EXT601 to EXT604(default NO) -------
display the status of EXT; press it for calling or answer of the EXT
Notice: 12 DSS key can be flexible set to corresponding different extensions or
CO. line, the detail see “DSS SETTING” sections.
14. MESSAGE (green light) ----For CO line access.
15. AUTO DIAL-----For auto dial
16. RUN/Ringer indicator ----the lamp flashing when this telephone is ringing;
also it can indicate the day/night mode, PBX is in night mode where lamp is
always on.
P7
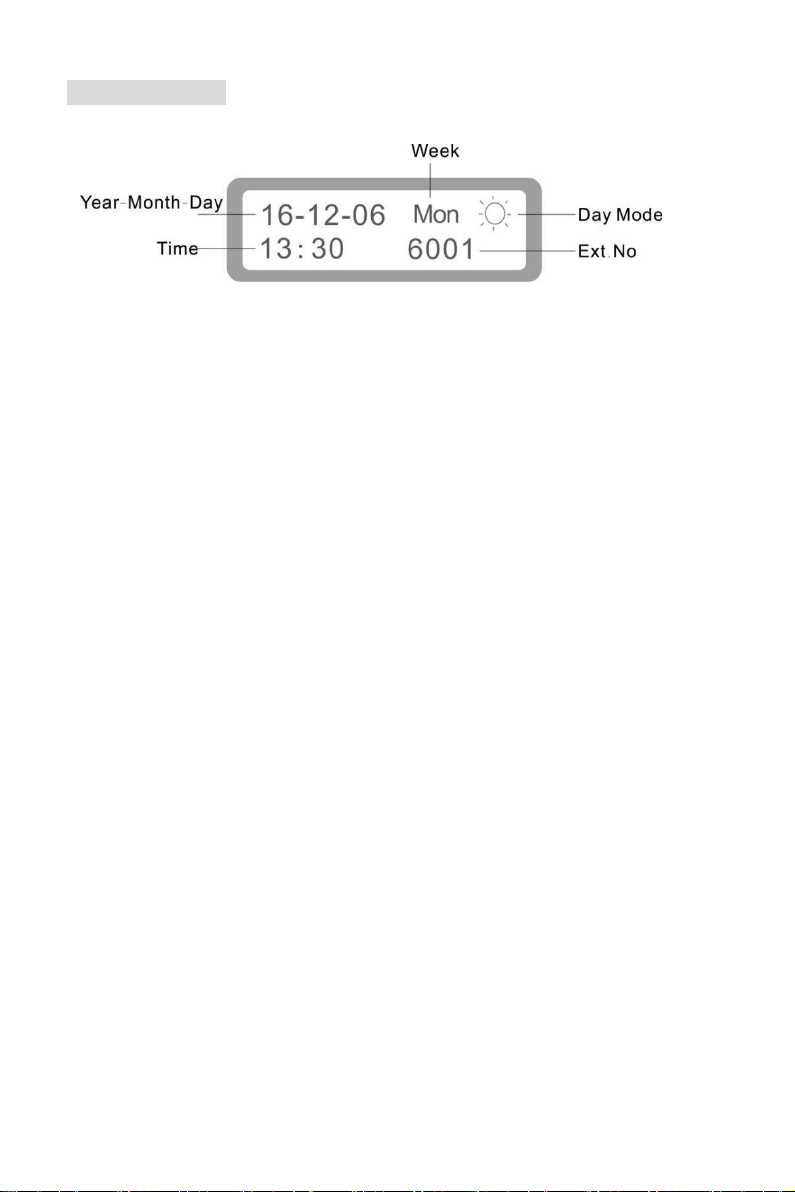
2.3 LCD Display

P8
Chap 3 Installation
Attention!!!: When customer need to lengthen(extend) the cable or make a 4
wire cable by himself, he should be attention to the correct wire sequence of
cable: the two wires on middle(wire 2,3) are for voice transmission. wire 1,4 are
for power supply. If wrong connection, the key phone will not work, even
destroy PABX system. Furthermore make sure good contact and correct line
sequence when make the RJ11 crystal head.
In order to prevent interference between power supply and voice transmission,
the network twisted-pair wire is highly recommended to be used for making the
key phone cables.(power supply is two wires, voice is two wires)
3.1 The making method for the cable are both 6P4C RJ11 crystal heads on
two ends.
Wire sequence diagram:
Twisted-pair wire diagram:

P9
If customer use 4 wires telephone co rd to make the cable,
probably will cause noise problem during call co nversation. So
we suggest network twisted -pair wire(for example:.use
white-blue, and two blue wires to connect wire 1, 4. Use
white-brown, and two brown wires to connect wire 2,3)
3.2 The making method for the RJ45 network cable are split with two 6P4C
RJ11 crystal heads.
One RJ45 port can be connected with two key phones.
We suggest customer make the cable as per following color sequence:
Wires 1-8 of RJ45 corresponding to colour as: white-brown, white-blue, blue,
brown, white-green, white-orange, orange, green)
Wire sequence diagram:
Twisted-pair wire diagram:
P10
Chap 4 Using Guide
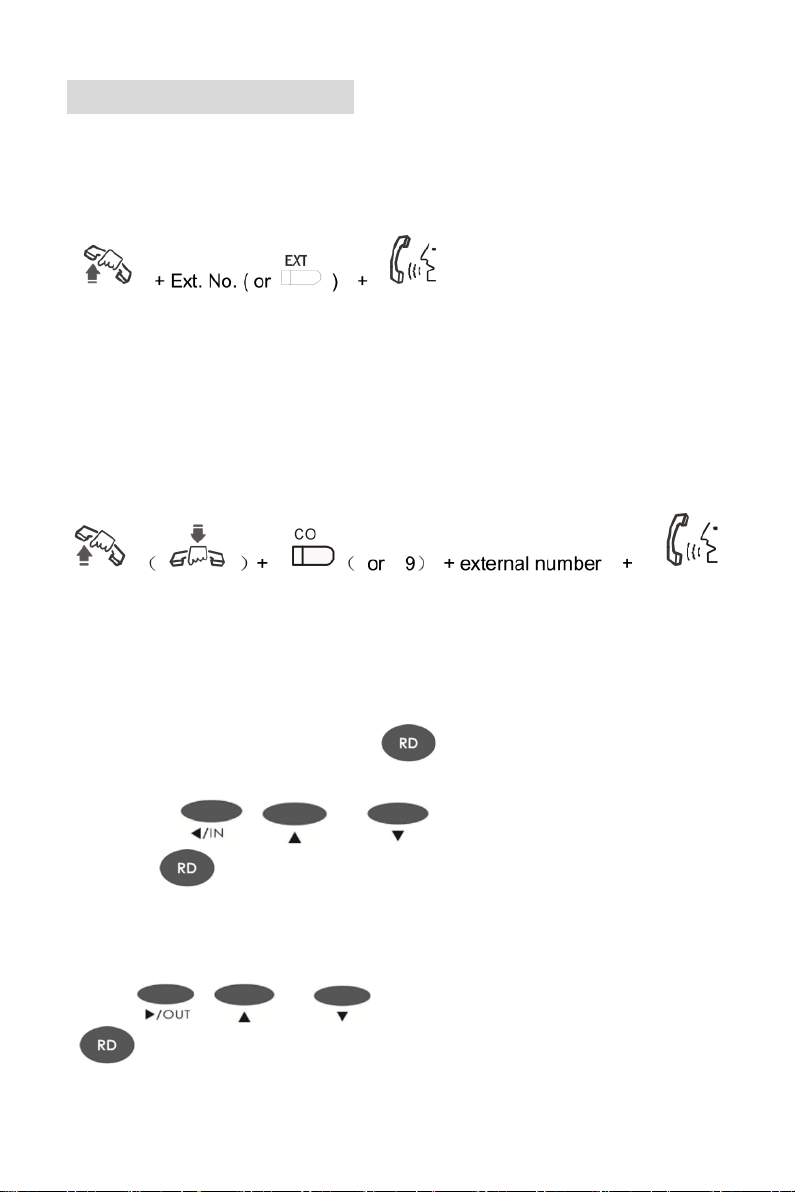
1) Intercom Call
①off hook + Ext.No + talking
②dial DSS key directly
③dial ICM key + Ext.No + talking
2) Outgoing Call
①off hook+ CO. DSS key + external number + talking
②dial DSS key directly
③dial TRK key + external number + talking
3) Redial
①Incoming call redial : press + talking
②Press + or to query the incoming
number + +talking
③Outgoing call redial
Press + or to query the outgoing call number
+ +talking
P11
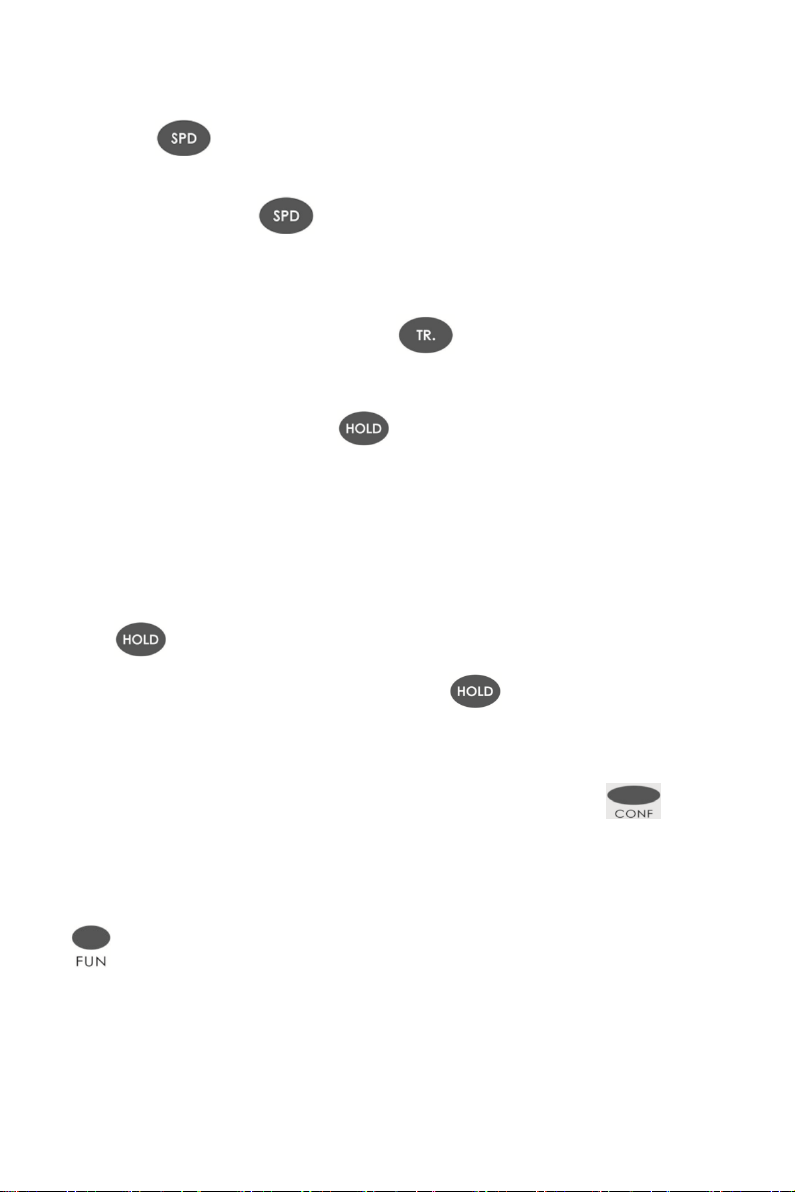
4) Speed Dial
①Press +the group number of speed dialing stored on key phone
(01-32)
②off hook + Press +the group number of speed dialing stored on the
PBX (01-96)
5) Call Transfer
When talking with CO line or Extension + + Ext.No or DSS key + on hook
6) Call Hold
During the conversation and dial key to hold the conversation.Then key
phone can enter intercom call status .
When hold the call from CO line , the CO LED will slow-flash .And when hold the
call from intercom, if key phone don’t hang up , the light of ICM key will be on .
7) Restore the holding call
Restore the holing call from CO.line : press the certain CO line key or press
press
Restore the holding call from extension : press directly
8) Multi-party Conference
During the conversation with CO line ,after press the
key ,system will enter in conference status.
9) Function Key(for PH202)
+ programming code
Function key means your dial *# . It works for the programming code
without enter programming status .
Eg. Setting the system time to 12:30:20 am
P12
+01 ( time setting code ) +123030(time)
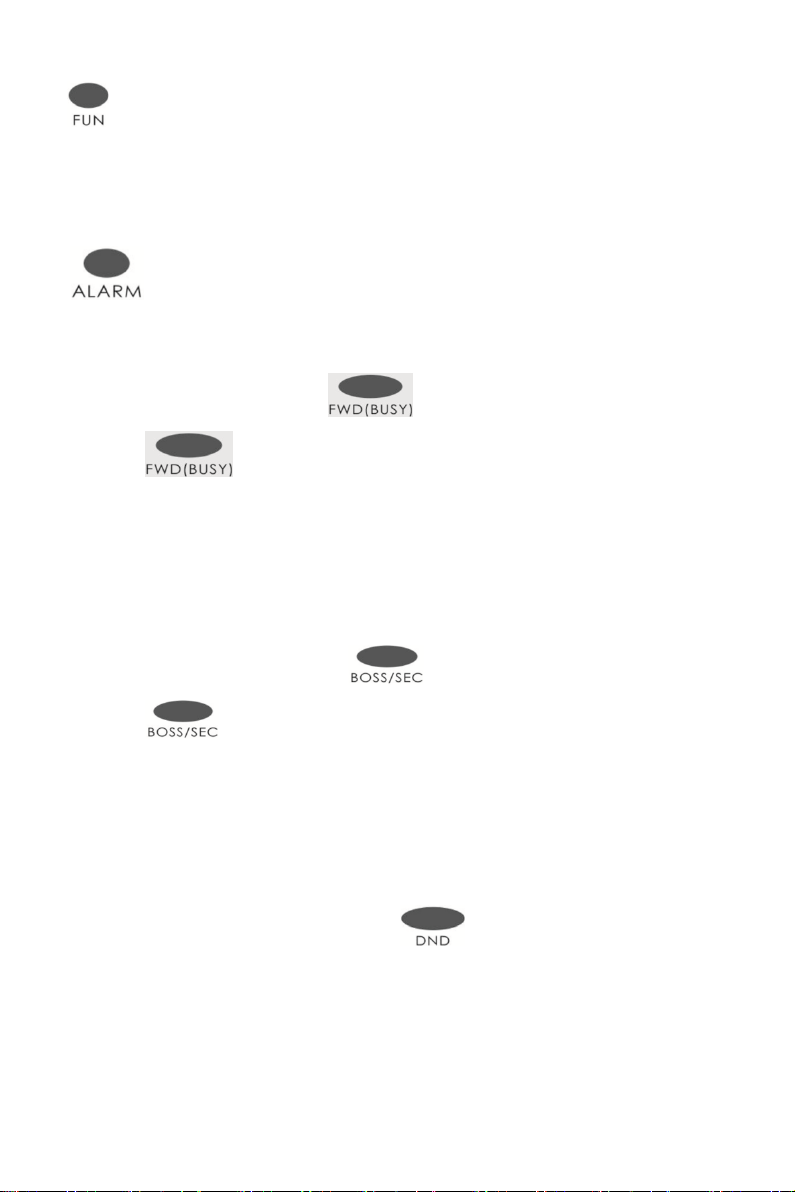
10) Alarm Clock Setting(for PH202)
+ time
11) Call Forwarding(for PH202)
When Ext is busy or no answer : + Ext.number
Cancel : + #
Noted : Press this key, and dial the Extension number , it will display “ operation
OK”,and the LED will be on . After cancel it , the LED will be off .
12) Boss/Secretary(for PH202)
Forward the call to Ext.N directly : + Ext.number
Cancel : + #
Note: press this key, and input an extension number, will display “operation
OK”,and the LED will be on . After cancel it, the LED will be off.
13) DND Key(for PH202)
DND(Do not Disturb) : After press this key ,it will enter DND status . If
press again, it will cancel .
DND Key(for PH201-D)

P13
1. Set Call Forward: +1 + Ext. Number(or corresponding DSS key)
(red light slow flash)
Cancel Call Forward: +1 + # (red light off)
2. Set busy/no answer forward: + 2 + Ext. Number(or corresponding
DSS key) (red light quick flash)
Cancel busy/no answer forward: + 2 + # (red light off)
3. Set DND: + 3 (red light always on)
Cancel DND: + 3 (red light off)
DND: press the key to set Do Not Disturb status, and key light on, press again,
cancel DND status.
14) Paging
External Broadcast : +0 ( equal to #86)
Monitor CO line: +1+ CO line port (equal to #71+CO line port)
Monitor extension : +2+extensions number (equal to #72+extension
number)
Notes : If you want to monitor the intercom and external line from key phone, you
need to set the key phone as operator .
Key phone Broadcast : +3( all key phone will ring
together and auto answer)
Emergency broadcast: +8 ( all extension will ring
together and all key phone will auto answer )

P14
15) Auto Answer(for PH202)
Auto Answer : the LED will be on
Cancel : the LED will be off
16) Mute Key (for PH202)
Mute : the LED will be on
Cancel: the LED will be off
17) Call Booking(for PH202)
Call Booking : the LED will be on
Cancel : the LED will be off

P15
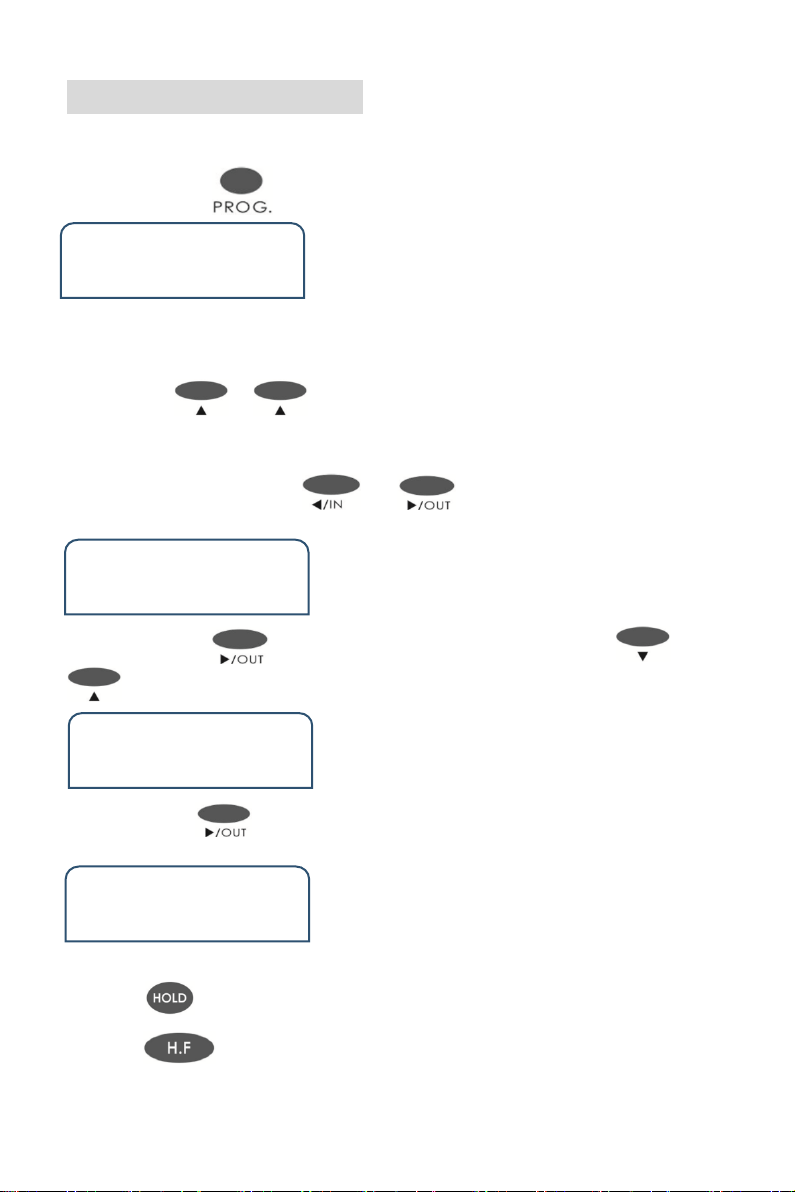
Chap 5 Using Setting
Press one time, then system will enter USING SETTING status. LCD
shows as follow :
User Set
Language
1)You can press the key or to select the items .Like “Language”,
“Backlight Setting”, “Ext Ring”, “CO.Ring”, “Door phone Ring”, “Alarm Ring”,
“System Query “ , “ Reset Keyphone” etc.
2)You can press the key or to set the selected item.
Eg.: when you select “ Language ”, you can select English ,Italiano,Turkish,中
文.After finish, press to save
3)Pressing one time ,will back to the current status . And pressing
twice , will back to home page.
Take an example for how to set the 16 DSS keys corresponding to CO line
◆Step 1: Press one time and enter setting status .
User Set
Language
◆Step 2: Press 7 times or press one time .Show as below:
User Set
Reset Keyphone

P16
◆Step 3:Press one time. Show as below :
Reset Keyphone
01
Input 16 and press , then you will hear beep and it means save
successfully .
The Option of User Setting and its suboption as below:
1)Language
Option: Chinese / English / Italiano /TURKISH
2)Backlight Setting
Option : Auto / On / Off
3)Ext Ring
Option : 01 to 16
4)CO. Ring
Option : 01 to 16
5)Door phone Ring
Option : 01 to 16
6)Alarm Ring
Option : 01 to 16
7)System Query
You can see the version number and outgoing mode
8)Reset Key phone
Option : 00 to 32 ( CO.Line)
P17
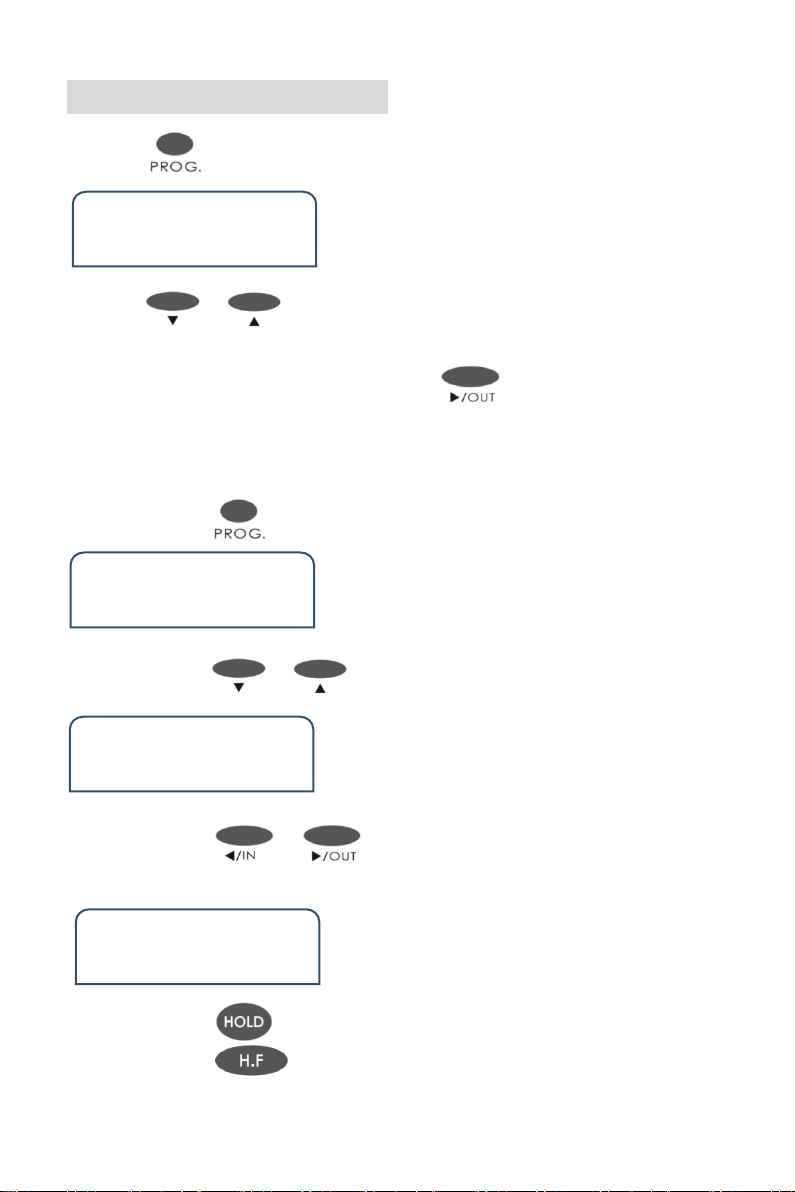
Chap 6 DSS Setting
Take an example for how to set DSS12 to Ext. Port 008
◆Step 1 : Press three times and enter DSS status . Show as below
DSS
001 TRU 01
Remark :
001, it means the number of the DSS button (001 means it is the first DSS
button) . TRU means it was set for CO line (It has two options , TRU and EXT .
You can use or to select it .) 01 ,means it is the port number of CO
line and Extension ( and it means the first CO line port). All that means it is the
first DSS button corresponding to the first CO line port
◆Step 1 : Pressing the key or to select the number of DSS
and input 012 Or dial the No.12 DSS on the keyphone .
DSS
012 TRU 012
◆Step 3 :Press and go the second part TRU . You can use or
to select to EXT . Show as below
DSS
012 EXT 012
◆Step 4:Press to go to the third part 001 and input 008 on the keyphone .
Show as below.
DSS
012 EXT 008
◆Press to save and will hear beep tone .
◆Press to back to the home page.
P18
Chap 7 Speed Dialing
Pressing 4 times , and show as below .
Speed Dial 01
Pressing or to select the group number of speed dialing . It is
range from 01 to 32 . Or it can dial the two digit group number .
After selecting the group number , then press to input the number you
want.
Take an example for how to set the number 008618923238930 to group No.20 of
speed dialing.
◆Step 1 : press four times to enter speed dial status .
Speed Dial 01
◆Step 2 : Press or to set the number to 20 . Or input 20 directly .
Speed Dial 20
◆Step 3 : Press or to enter input status and input the number
directly “008618923238930”.
Speed Dial 20
008618923238930
◆Step 4 : Press to save.
◆Step 5 : Press to back to home page.

P19
Chap 8 How to set multiple DSS to connect
with key phone
1)Setting a DSS to No.2 DSS . Programming as below
①Connect key phone with PBX
②Always-press the second button of No.DSS
③At the same time, remove the cable between No.1 DSS and key phone then
connect again .
④Don’t loosen the second,until the first and second green LED of No.2 DSS
light .
⑤Re-connect the PBX and key phone again .When the first and second green
LED of No.2 DSS light together , that means it is the No.2 DSS
2)If you want to No.3 and No.4 DSS , repeat the last step . But when setting No.3
DSS , you should always-press the third button . And when setting No.4 DSS,
you should always-press the forth button .
3)How to distinguish the DSS number .
When connect the PBX and key phone , if the DSS is No.1 DSS , the LED light of
first button will be on . If it is No.2 DSS , the first and second light will be working
together . If it is No.3 DSS , the first , second and third light will be on together . If
it is No.4 DSS , the first, second, third and forth light will be on together.
Other manuals for PH202
1
This manual suits for next models
1
Table of contents
Other Excelltel Telephone manuals


Popular Telephone manuals by other brands


Plantronics
Plantronics EIRCOM DB30 (EXL30 OEM Declaration of conformity

Grandstream Networks
Grandstream Networks GXV3480 Quick installation guide

france telecom
france telecom 4038IP user guide

BELGACOM
BELGACOM DDS 100 user manual

Phoenix
Phoenix DUET EXECUTIVE user manual

Yealink
Yealink SIP-T41S quick start


