Exile XTec65 User manual

XTec65 Component Manual
Manuel du haut-parleur XTec65 Component
ENG
FR
Model: XT65
© 2006 Exile Car Audio • www.exileaudio.com XTec65 Component Speaker Manual
25mm NEODYmIUm SILK DOmE TWEETER:
The tweeter has been specifically designed with an FEA optimized motor assembly and hand
doped dome. The result is transparent tonal and spectral clarity without delivering overly bright or
fatiguing high frequencies commonly found in most car audio tweeters.
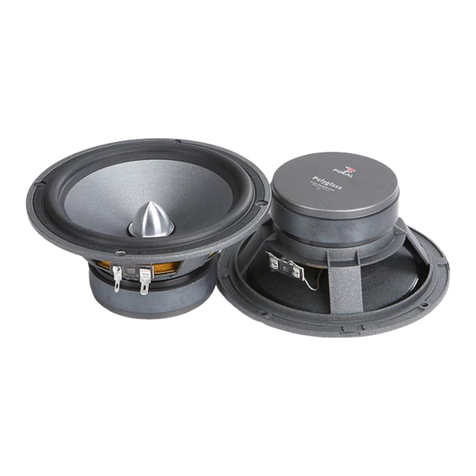
6.5 INch cONVERTIBLE mIDRANGE DRIVERS:
The Xtec65 can be used as a component or coaxial speaker system for installation flexibility. The
midrange drivers are engineered to provide outstanding dynamic range and pure reproduction of
critical musical material. The cone is injection molded polypropylene that is ultra light, but rigid.
The heavy duty cast aluminum basket acts as a heatsink for the FEA optimized motor structure.
This allows for outstanding thermal power handling, it also features woven tinsel leads and large
spring style speaker posts.
24DB PER OcTAVE cOmPUTER AND REAL WORLD OPTImIZED PASSIVE
cROSSOVER NETWORK:
Having just a great tweeter and midrange is not enough to guarantee excellent sound quality. The
Xtec65 passive crossovers are computer modeled and then real world (in car tested and further
tweaked) to provide a seamless transition from the midrange to tweeter. Its impossible to perfectly
tune the crossover for every car and installation, however we have come close. Rest assured you
will have a smile on your face when you listen to this speaker system.
TURBINE TEchNOLOGY:
TURBINE technology is our commitment to making our products ultra reliable to the end user. Heat
kills speakers. So removing heat from the speaker’s motor is essential. Critical thermal analysis
of the motor structures have allowed Exile engineers to design the venting of the speaker’s motor
to work in conjunction with the heatsinking of the basket design. The end result is heat is wicked
away from the motor structure this improves power handling and reliability.
FORcE TEchNOLOGY:
Exile’s proprietary three stage tweeter protection circuitry makes its nearly impossible for a hard
clipping or broken amplifier to damage your tweeters. While most component speakers off er none
or a simple poly cell for protection. Our overbuilt design contains one poly switch circuit, a primary
light bulb, and an auxiliary light bulb that allows the crossover network to adapt to the dynamic
listening conditions of the demanding user without allowing the tweeters to be damaged. Most
other complex tweeter protection circuits require the signal to run through these components,
however what they don’t tell you is these components degrade tweeter performance. Our
protection circuit is constantly monitoring the signal without actually running the signal through
these components until the protection circuit is engaged. The result is the tweeter performs at its
purest level, until something bad happens and only then the FORCE circuit engages to prevent
damage to your tweeter.
hAUT-PARLEUR D’AIGUS À DÔmE EN SOIE EN NÉODYmE 25 mm :
Le haut-parleur d’aigus a été spécifiquement conçu avec un ensemble moteur optimisé par analyse des
effets des défaillances et un dôme dopé manuellement. Le résultat obtenu est une clarté spectrale et
des tonalités transparente sans production de fréquences excessivement nettes ou élevées, ce que l’on
trouve souvent dans la plupart des haut-parleurs d’aigus pour voiture.
cIRcUITS D’ATTAQUE DE PLAGE mOYENNE cONVERTIBLES 6,5 POUcES :
Le XTec65 peut être utilisé comme un système de haut-parleurs de type composant ou coaxial pour
une meilleure flexibilité lors de l’installation. Les circuits d’attaque de plage moyenne sont conçus
pour fournir une exceptionnelle plage dynamique et une reproduction pure des morceaux de musique
critiques. Le cône est en polypropylène moulé par injection, un matériau extrêmement léger mais rigide.
L’enceinte en aluminium coulé résistante agit comme un radiateur pour la structure moteur optimisée
par analyse des effets des défaillances. Cela permet un traitement exceptionnel de la puissance
thermique ; le système comprend également des conducteurs métalliques tissés et de grandes bornes
de haut-parleur à ressort.
RÉSEAU DE FILTRES PASSIFS OPTImISÉS PAR ORDINATEUR ET
mANUELLEmENT À 24 DB PAR OcTAVE :
Avoir un superbe haut-parleur d’aigus et une magnifique plage moyenne n’est pas suffisant pour
garantir une excellente qualité de son. Les filtres passifs Xtec65 sont modelés par ordinateur puis
manuellement (testés dans des voitures puis réajustés) afin de fournir une transition sans défaut entre la
plage moyenne et le haut-parleur d’aigus. Il est impossible d’ajuster à la perfection le filtre passif pour
chaque voiture et installation mais nous nous en approchons. Soyez sûr que vous aurez le sourire aux
lèvres lorsque vous écouterez de la musique sur ce système de haut-parleurs.
TEchNOLOGIE TURBINE :
La technologie TURBINE est notre engagement à rendre nos produits extrêmement fiables pour
l’utilisateur final. La chaleur tue les haut-parleurs. Il est donc essentiel de supprimer la chaleur du
moteur du haut-parleur. L’analyse thermique critique des structures du moteur a permis aux ingénieurs
Exile de concevoir un système de ventilation du moteur du haut-parleur qui s’associe au système
radiateur du concept d’enceinte. Le résultat final est que la chaleur est éliminée de la structure du
moteur ce qui améliore la puissance admissible comme la fiabilité.
TEchNOLOGIE FORcE :
Le circuit de protection de haut-parleur d’aigus à trois niveaux élaboré par Exile empêche presque dans
toutes les situations que vos haut-parleurs d’aigus soient endommagés par un écrêtage agressif ou
un amplificateur cassé. La plupart des haut-parleurs à composants n’offrent pas de protection ou une
simple polycellule comme protection. Notre système suréquipé comprend un circuit de commutation,
une ampoule principale et une ampoule secondaire qui permettent au réseau de filtres passifs de
s’adapter aux conditions d’écoute dynamiques de l’utilisateur exigeant sans risquer l’endommagement
des haut-parleurs d’aigus. La plupart des autres circuits de protection de haut-parleur d’aigus
complexes nécessitent que le signal passe par tous ces composants, mais les fabricants ne vous
disent pas que ces composants dégradent les performances du haut-parleur d’aigus. Notre circuit
de protection surveille en permanence le signal sans faire réellement passer le signal à travers ces
composants avant que le circuit de protection ne soit enclenché. Ainsi, le haut-parleur d’aigus offre son
niveau de son le plus pur jusqu’à ce qu’un problème arrive et ce n’est qu’alors que le circuit FORCE
s’enclenche pour éviter l’endommagement de votre haut-parleur d’aigus.

XTEc65 cOmPONENT mANUAL
mANUEL DU hAUT-PARLEUR XTEc65 cOmPONENT
© 2006 Exile Car Audio • www.exileaudio.com XTec65 Component Speaker Manual 12/06 Rev B
cONVERTING FROm A “cOmPONENT” TO “cOAXIAL” SYSTEm
The Xtec65 is shipped as a component system, where the tweeter and midrange are installed
separately in the vehicle. To offer even more install flexibility the tweeter can also be mounted
to the midrange to create a coaxial system for easier replacement of factory speakers. See the
following steps to “convert” the Xtec65 from a component to coaxial system.
1. Thread the tweeter’s speaker wire through the tweeter
post.
2. Notice there is a small knockout in the tweeter post. This is
where you should route the tweeter wire, before attaching the
post in step 3.
3. Attached the post to the tweeter by using the small Phillips
head screw.
4. Remove the phase bullet by turning it
COUNTERCLOCKWISE.
5. Thread the speaker wire through the midrange. The wire
will come out the center pole piece on the back of the
midrange.
6. Attach the tweeter post to the midrange by turning it
CLOCKWISE. Becareful to NOT OVERTIGHTEN.
XTEc65: “TEc” STANDS FOR TEchNOLOGY
The XTec65 is designed using state of the art engineering, technology and materials that are avail-
able today. The “TEC” is short for technology, because this speaker system is loaded with it. Here
a just a few more examples:
1. Convertible to Coaxial or Component System
2. Cast Aluminum Basket provides heatsinking for the motor structure - TURBINE Technology
3. 24dB crossover is engineered for real world performance and features lightbulb tweeter
protection - FORCE Technology
4. Basket features EURO mounting holes to fit new model vehicles
5. Rubber surround is smoothly terminated to the cone to minimize distortion, and maximize
protection against the elements
6. Tinsel leads are woven into the spider
7 Nickel plated and spring loaded speaker terminals
1. Faites passer le fil du haut-parleur d’aigus à travers la
borne du haut-parleur d’aigus. 2. Veuillez noter qu’il y a une petite alvéole défonçable dans la
borne du haut-parleur d’aigus. C’est là que vous devez faire
passer le fil du haut-parleur d’aigus avant de fixer la borne
à l’étape 3.
3. Fixez la borne au haut-parleur d’aigus en utilisant la petite
vis cruciforme.
4. Retirez le point de phase en le tournant dans le SENS
INVERSE DES AIGUILLES D’UNE MONTRE. 5. Faites passer le fil du haut-parleur à travers la plage
moyenne. Le fil sortira du pôle central à l’arrière de la
plage moyenne.
6. Fixez la borne du haut-parleur sur la plage moyenne en
tournant dans le SENS DES AIGUILLES D’UNE MONTRE.
Faites attention de NE PAS TROP SERRER.
cONVERSION D’UN SYSTèmE «cOmPOSANT» EN UN SYSTèmE «cOAXIAL»
Le XTec65 est livré comme un système de type composant, avec le haut-parleur d’aigus et la plage
moyenne installés séparément dans le véhicule. Pour offrir une plus grande flexibilité d’installation, le
haut-parleur d’aigus peut également être monté sur la plage moyenne pour créer un système coaxial qui
simplifie le remplacement des haut-parleurs d’usine. Voir les étapes suivantes pour “convertir” le XTec65
d’un système composant en un système coaxial.
1. Convertible en système coaxial ou composant
2. L’enceinte en aluminium coulé offre une fonction de radiateur pour la structure du moteur – Tech-
nologie TURBINE
3. Le filtre passif 24 dB est fabriqué pour offrir d’excellentes performances en conditions réelles
d’utilisation et comprend une protection du haut-parleur d’aigus par ampoule – Technologie FORCE
4. L’enceinte comprend des trous de montage EURO pour s’adapter aux nouveaux modèles de
véhicule
5. Le pourtour en caoutchouc est raccordé au cône de manière lisse pour minimiser la distorsion et
maximiser la protection contre les éléments
6. Les conducteurs métalliques sont tissés dans la suspension
7. Bornes de haut-parleur à ressort et plaquées au nickel
XTEc65 : «TEc» SIGNIFIE TEchNOLOGIE
Le XTec65 est conçu en utilisant les techniques de fabrication, la technologie et les matériaux les plus
performants sur le marché. «TEC» est l’abréviation de technologie car ce système de haut-parleurs peu
encombrant en est bourré. Voici quelques exemples supplémentaires :

XTEc65 cOmPONENT mANUAL
mANUEL DU hAUT-PARLEUR XTEc65 cOmPONENT
© 2006 Exile Car Audio • www.exileaudio.com
XTec65 Component Speaker Manual 12/06 Rev B
ENG
FR
NORmAL cROSSOVER WIRING
Nearly all installations will use the Normal wiring as shown below. A two-channel amplifier
will power the speaker system, only one channel is shown for clarity. Note the third and fourth
terminals from the left are not used in this setup.
BIAmP cROSSOVER WIRING
For the tweaky, audiophiles we offer the ability to BIAMP the speakers. Be sure to change the
switch inside the crossover to the BIAMP position. For this wiring, two seperate two-channel
amplifiers or one four-channel amplifier will power the speaker system. So the tweeter and
midrange are powered by different amplifier channels.
cROSSOVER DESIGN AND TEchNOLOGY
The XTec65 passive crossovers are computer modeled to provide a seamless transition from the
midrange to tweeter. After we have optimized this “on paper” response, we then begin extensive
listening tests that emphasize real world performance in a vehicle. Simply looking on a graph of
the frequency response doesn’t guarantee the system will sound correct in your vehicle. We then
make additional design tweaks to take into account the mounting locations and possible surface
reflections the speakers will experience in the car. Its impossible to perfectly tune every crossover
since each car and installation are different, however you can rest assured we have come as
close as possible with this speaker system. We always recommend you use the passive network
provided for all applications as it optimizes the frequency response of the speakers and contains
our proprietary FORCE tweeter protection circuity.
For the extreme audiophiles, we offer the ability to BIAMP the speaker systems. Separate tweeter
and midrange amplifier channels will power the speaker system but this still utilizes the Exile Pro
crossovers’. The benefits of BIAMPING are improved dynamic range and being able to control the
signal level of the tweeter and midrange separately.
There are two switches located in the crossover housing. Simply remove the top of the housing to
access the following switches:
TWEETER LEVEL SWITch: Allows the tweeter’s output to be adjusted to +3db, 0dB, or
-3dB. Factory setting is 0dB.
INPUT SELEcT SWITch: Used to select wiring configurations shown below. Factory setting
is Normal.
câBLAGE NORmAL DU FILTRE PASSIF
Presque toutes les installations utiliseront le câblage Normal indiqué ci-dessous. Un amplificateur
bi-canaux alimentera le système de haut-parleurs, seul un canal est représenté à des fins de
clarté. Veuillez noter que les troisième et quatrième bornes en partant de la gauche ne sont pas
utilisées dans cette configuration.
câBLAGE DU FILTRE PASSIF BIAmP
Pour les audiophiles bricoleurs, nous offrons la possibilité d’effectuer un câblage BIAMP pour
les haut-parleurs. Assurez-vous de mettre l’interrupteur se trouvant dans le filtre passif sur la
position BIAMP. Pour ce câblage, deux amplificateurs bi-canaux séparés ou un amplificateur à
quatre canaux alimenteront le système de haut-parleurs. Ainsi, le haut-parleur d’aigus et la plage
moyenne sont alimentés par des canaux amplificateur différents.
cONcEPTION ET TEchNOLOGIE DE FILTRE PASSIF
Les filtres passifs XTec65 sont modelés par ordinateur pour fournir une transition sans défaut
entre la plage moyenne et le haut-parleur d’aigus. Après avoir optimisé cette réponse «sur
papier», nous commencons des tests d’écoute extensifs qui s’occupent en particulier des
performances réelles dans un véhicule. Se contenter de regarder un graphique de la réponse
en fréquence ne garantit pas que le système aura un son adéquat une fois installé dans votre
véhicule. Nous apportons ensuite des ajustements supplémentaires à notre conception pour
prendre en compte les emplacements de montage et les possibles réflexions de surface que les
haut-parleurs rencontreront une fois installés dans le véhicule. Il n’est pas possible de régler
chaque filtre passif à la perfection car chaque voiture et chaque installation sont différentes
; cependant, vous pouvez être sûrs que nous sommes allés aussi loin que possible avec ce
système de haut-parleurs. Nous vous recommandons toujours d’utiliser le réseau de filtres
passifs fourni pour toutes les applications car il optimise la réponse en fréquence des haut-
parleurs et inclut notre circuit de protection de haut-parleur d’aigus propriétaire FORCE.
Pour les audiophiles extrêmes, nous offrons la possibilité d’effectuer un câblage BIAMP pour les
systèmes de haut-parleurs. Des canaux d’amplificateur de plage moyenne et de haut-parleur
d’aigus distincts alimenteront le système de haut-parleurs mais ce câble utilise tout de même
les filtres passifs Exile Pro. Les avantages du câblage BIAMP sont une plage dynamique
améliorée et la possibilité de contrôler le niveau de signal du haut-parleur d’aigus et de la plage
moyenne séparément. Il y a deux interrupteurs situés dans le boîtier du filtre passif. Retirez
simplement la partie supérieure du boîtier pour accéder aux interrupteurs suivants :
INTERRUPTEUR DU NIVEAU DU hAUT-PARLEUR D’AIGUS : permet
d’ajuster la sortie du haut-parleur d’aigus sur +3 dB, 0 dB ou -3 dB. Le réglage usine est 0 dB.
INTERRUPTEUR DE SÉLEcTION DE L’ENTRÉE : sert à sélectionner les
configurations de câblage indiquées ci-dessous. Le réglage usine est Normal.
NORmAL cROSSOVER WIRING
câBLAGE NORmAL DU FILTRE PASSIF
BIAmP cROSSOVER WIRING
câBLAGE DU FILTRE PASSIF BIAmP
Not Used
Pas utilisé

LIMITED WARRANTY
Exile warrants this product to be free from defects in material and workmanship under normal use for a period of two years from date of original purchase when purchased from an Authorized Exile Dealer. If the product is labeled
B Stock/Refurbished and purchased from an Authorized Exile Dealer, it is warranted for 90 days from date of purchase, regardless of place of installation. Should service be necessary under this warranty for any reason due to
manufacturing defect or malfunction during the warranty period, Exile will replace or repair (at its discretion) the defective merchandise with equivalent merchandise at no charge. Warranty replacements on B-Stock merchandise may
have cosmetic scratches and blemishes. Discontinued products may be replaced with more current equivalent products. This warranty is valid only for the original purchaser and is not extended to owners of the product subsequent
to the original purchaser. Any applicable implied warranties are limited in duration to a period of the express warranty as provided herein beginning with the date of the original purchase at retail, and no warranties, whether express
or implied, shall apply to this product thereafter. Some states do not allow limitations on implied warranties, therefore these exclusions may not apply to you. This warranty gives you specific legal rights; however you may have other
rights that vary from state to state. This warranty is only valid within the USA, for warranties outside of the USA consult the appropriate international distributor.
EXILE CAR AUDIO
PORTLAND, OR USA
WWW.EXILECARAUDIO.COM
XTEc65 cOmPONENT mANUAL
mANUEL DU hAUT-PARLEUR XTEc65 cOmPONENT
ENG
FR
© 2006 Exile Car Audio • www.exileaudio.com XTec65 Component Speaker Manual 12/06 Rev B
DESIGNED AND ENGINEERED IN THE USA
XT65
mIDRANGE:
Mounting Depth 2.4 in - 62mm
Mounting Diameter 6.0 in - 152mm
TWEETER:
Mounting Depth .65 in - 16mm
Mounting Diameter 1.75 in - 44mm
Overall Diameter 2.0 in - 52mm
RMS Power Handling 175 Watts
Peak Power Handling 350 Watts
Frequency Response 60Hz to 20kHz
Nominal Impedance 4 ohm
Crossover Slope 24dB Acoustical
SPL 90dB
Specifications subject to change.
mIDRANGE/cOAXIAL INSTALLATION INSTRUcTIONS:
Remove the old speakers and put in the new ones. Sometimes this sounds easier than it is.
Actually, removing the door panels or factory grilles without damaging them will be your most
difficult challenge. If it doesn’t come loose with a firm pull, then there is most likely a screw
hiding somewhere or the panel may have to slide in a specific direction to be removed. Find a dry
location to mount the crossover in the door or behind a panel. Be sure to take into account the
wire length needed to run to the tweeter and midrange. Remove the old speaker, attach the wires
to the new speaker and install it into the door. Make sure to roll down the windows and check that
other items are not in the way. Turn on the radio and to check that everything works great before
you reassemble the door panel. Open a cold beverage of your choice and enjoy listening to your
new speakers. We can’t cover the installation details of every vehicle in this manual, so if you get
stumped we recommend you contact us or your local dealer for help. One email or phone call
could save you from getting in over your head, or completing that last step of your DIY install.
TWEETER INSTALLATION INSTRUcTIONS:
Find a mounting location for the tweeter taking into account running wires from the passive
crossover. Carefully select a location for cutting the mounting hole. Once the hole is cut, place the
tweeter in the mounting hole, screw the threaded post into the back of the tweeter and attach the
mounting bracket. Tighten the nut on the screw until the tweeter is securely mounted to the panel.
The bracket clamps the tweeter to the door panel. Note: Double check everything before you cut
the hole for the tweeter, especially if its your wife’s or girlfriend’s car. We all know the results if you
screw this one up.
INSTRUcTIONS D’INSTALLATION DU hAUT-PARLEUR D’AIGUS :
Trouvez un emplacement de montage pour le haut-parleur d’aigus en prenant en compte le
positionnement des fils depuis le filtre passif. Sélectionnez avec attention un emplacement pour
découper le trou de montage. Une fois le trou percé, placez le haut-parleur d’aigus dans le trou de
montage, vissez la tige filetée à l’arrière du haut-parleur d’aigus et fixez le support de montage. Serrez
l’écrou sur la vis jusqu’à ce que le haut-parleur d’aigus soit monté fixement sur le panneau. Le support
fixe le haut-parleur d’aigus sur le panneau de la porte. Remarque : Vérifiez tous les éléments avant de
découper le trou pour le haut-parleur d’aigus, en particulier si c’est la voiture de votre femme ou de
votre petite amie. Nous savons tous ce qui va se passer si vous vous trompez !
1. DOOR PANEL LOcATION:
The door panel is clamped from the rear by the mounting
bracket and from the tweeter’s housing in the front
2. mOUNTING BRAcKET:
Clamps the tweeter to the door panel
3. mOUNTING ScREW AND NUT:
Screw the threaded screw/post into the back of the tweeter.
Then tighten this nut until the tweeter is securely mounted to
the door panel
1. SUPPORT DE mONTAGE :
Fixe le haut-parleur d’aigus sur le panneau de la porte.
2. VIS ET BOULON DE mONTAGE :
Vissez la vis/la tige filetée à l’arrière du haut-parleur d’aigus.
Serrez ensuite cet écrou jusqu’à ce que le haut-parleur d’aigus
soit monté fermement sur le panneau de la porte.
3. EmPLAcEmENT DU PANNEAU DE LA PORTE :
Le panneau de la porte est fixé depuis l’arrière par le support
de montage et depuis le boîtier du haut-parleur d’aigus à
l’avant.
INSTRUcTIONS D’INSTALLATION TYPE cOAXIAL/PLAGE mOYENNE :
Retirez les anciens haut-parleurs et installez les nouveaux. Parfois, c’est plus simple à dire qu’à faire. En
fait, retirer les panneaux de porte ou les grilles montées en usine sans les endommager sera la tâche la
plus difficile. S’ils ne s’enlèvent pas en tirant fermement dessus, il y a sûrement une vis cachée quelque
part ou le panneau peut devoir glisser dans un sens donné pour être retiré. Trouvez un emplacement
sec pour monter le filtre passif dans la porte ou derrière un panneau. Assurez-vous de prendre en
compte la longueur de fil nécessaire pour le positionner jusqu’au haut-parleur d’aigus et jusqu’à la plage
moyenne. Retirez l’ancien haut-parleur, fixez les fils sur le nouveau haut-parleur et installez-le dans la
porte. Assurez-vous de baisser les fenêtres et de vérifier qu’il n’y a pas d’autres éléments qui bloquent.
Allumez la radio et vérifiez que tout fonctionne correctement avant de remonter le panneau de la porte.
Ouvrez une boisson fraîche de votre choix et détendez-vous au son de vos nouveaux haut-parleurs.
Nous ne pouvons pas aborder les détails de l’installation pour chaque véhicule dans ce manuel. Si vous
vous retrouvez coincé, nous vous recommandons donc de nous contacter ou de demander l’aide de
votre concessionnaire le plus proche. Un courriel ou un coup de téléphone pourra vous éviter bien de
l’énervement et vous aider à terminer cette dernière étape de l’installation.
1.
2.
3.
XT65
PLAGE mOYENNE :
Profondeur de montage 2.4 po - 62mm
Diamètre de montage 6.0 po - 152mm
hAUT-PARLEUR D’AIGUS :
Profondeur de montage 0,65 po - 16mm
Diamètre de montage 1,75 po - 44mm
Diamètre global 2,0 po - 52mm
Puissance R.M.S admissible 175 Watts
Puissance de crête admissible 350 Watts
Réponse en fréquence 60Hz à 20kHz
Impédance nominale 4 ohm
Pente du filtre passif 24dB acoustique
Niveau de pression acoustique 90dB
Sous réserve de modifications.
Other Exile Car Speakers manuals

