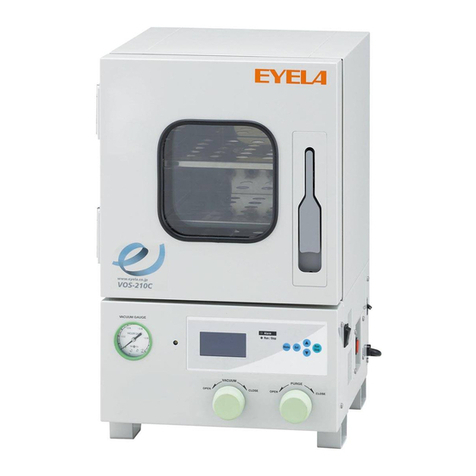
EYELA VOS-201SD User manual

R0
0
R0
0
VOS-201SD, -301SD,
451SD, -601SD
VOC-301SD, -401SD
Tokyo Rikakikai Co., Ltd.
Key Operation manual
Vacuum Oven

Thank you for choosing products.
Introduction
Table of contents
This key operation manual describes the
procedure of key operations for Vacuum oven
model VOC-301SD, 401SD, VOS-201SD,
301SD, 451SD, 601SD.
Read this manual carefully before operation.
1 Descriptions and functions of panel key
2 Operation
2-1 Program mode
2-2 Adjustment mode
2-3 Alarm function
2-4 Display
3 Setting and executing of program
3-1 Program 1 (Continuous operation)
3-2 Program 2 (Auto start)
3-3 Program 3 (Auto stop)
3-4 Program 4 (Step A)
3-5 Program 5 (Stop B)
3-6 Program 6 (24 hours cycle)
3-7 Program 7 (8 steps)
4 Setting and executing of adjustment
4-1 Auto-tuning
4-2 Temperature indication compensation
4-3 Upper limit temperature alarm (Over shoot)
4-4 Lower limit temperature alarm (Under shoot)
4-5 Adjustment data lock
Remar
k
Contents o
f
1
2
5
6
9
10
14
18
22
27
33
38
46
48
50
52
55
Setting characters
Repetition times
Steps
Temperature prior contro
l
Time prior control
LED indications
Release of alarm
Zero clear
Program No. indications
Temperature setting rang
e
Recovery after power failure
Set value (SV) indication while setting
Measured value (PV) indication while setti
n
Set value (SV) and measured value (PV)
indication while controlling
Terminal step
1
3
3
3
3
6
8
8
10
10
12
12
12
13
42

1
SS
SSHH
HHIIIIFF
FFTT
TT
UU
UUPP
PP
SS
SS
EE
EETT
TT
MM
MM
OO
OO
DD
DDEE
EE
DD
DDIIIISS
SSPP
PPLL
LLAA
AAYY
YY
RR
RRUU
UUNN
NN
SS
SSTT
TTOO
OOP
P
P
P
RUN/STOP
HEATING
AUTO.TUNING
ALARM
TEMP.
TIMER
PP
PPVV
VV
SS
SSVV
VV
PROGRAM
SS
SSHH
HHIIIIFF
FFTT
TT
SS
SS
EE
EETT
TT
UU
UUPP
PP
DD
DD
OO
OO
WW
WWNN
NN
MM
MM
OO
OO
DD
DDEE
EE
RR
RRUU
UUNN
NN
SS
SSTT
TTOO
OOP
P
P
P
DD
DDIIIISS
SSPP
PPLL
LLAA
AAYY
YY
DD
DD
OO
OO
WW
WWNN
NN
1 Panel key
s
1 Descriptions and functions of panel key
* Descriptions and functions except panel keys are shown in the chapter [Control panel] on the pag
e
of instruction manual.
Descriptio
n
Functio
n
Shift ke
y
UP key
DOWN ke
y
Set ke
y
Mode ke
y
Moves the setting digit.
It is active while setting
Increases +1 the active digit.
Or changes the set character indicatio
n
It is active while setting.
Decreases +1 the active digit.
Or changes the set character indicatio
n
It is active while setting.
Enters the set value and goes to the next set parameter.
Changes to the set mode while controlling.
It is not accepted while changing indications by [DISP] key.
Switches between program mode and adjustment mode.
It is not accepted while changing indications by [DISP] key
Display ke
y
Switches indication during the control, releases alarm, and
clears the input data. Some alarms cannot be released by this
key. Refer the releasing alarm on the page 8. It is not accepte
d
while setting and displaying the adjust ment mode.
RUN/STOP ke
y
Starts and stops controlling
.
Remar
k
Set character
It shows that the set value indication is characte
r
or mark not number. It is indicated when the
setting after power failure or set indication of
adjustment mode is displayed.
Recovery after power failure : PoFF, Repetitio
n
time : n, Step No. : St-*, Auto tuning : Auto
* is the number of step.

• Auto stop
A certain period of time and temperature can be s
e
and when the unit attains to the set point, the
operation continues during the set time (t). Whe
n
the set time has elapsed, the operation stops
automatically.
To start or stop operation, press
key.
Refer to the section program 3 on the page 18.
• Continuous operation
A certain temperature is set and the temperatur
e
is kept while operating. To start and stop
operation, press
Refer to the section program 1 on the page 10.
Program1
2
t
RR
RR
UU
UU
NN
NN
SS
SSTT
TTOO
OO
PP
PP
2-1Programmode
RR
RR
UU
UU
NN
NN
SS
SSTT
TTOO
OO
PP
PP
RR
RR
UU
UU
NN
NN
SS
SSTT
TTOO
OO
PP
PP
2 Operation
2-1 Program mode
s
This unit has 7 patterns of program mode and adjustment mode. You can set temperature, time,
repetition time and recovery after power failure in control mode, and in adjustment mode you can
s
compensation of temperature display, auto tuning, upper and lower limit of temperature alarm, an
d
control data lock.
ke
y
Temp.
Tim
e
Temp.
Tim
e
Program2
• Auto start
A certain period of time and temperature can be s
e
and when the set time has elapsed, the operation
starts automatically at the set point.
To start or stop operation, press
key.
Refer to the section program 2 on the page 14.
Program3
t
Temp.
Tim
e

3
RR
RR
UU
UU
NN
NN
SS
SSTT
TTOO
OO
PP
PP
RR
RR
UU
UU
NN
NN
SS
SSTT
TTOO
OO
PP
PP
t1 t2
T1
T2
T1
T2
t1 t2
T1
T2
T1
T2
RR
RRUU
UUNN
NN
SS
SSTT
TTOO
OOP
P
P
P
2-1 Program mod
e
Remar
k
Remar
k
Remar
k
Remar
k
Program4
Program5
Temp.
Tim
e
Temp.
Tim
e
Step
Step
Step operation A (Temp prior control)
You set 2 steps and they are repeated.
You can set one pair of temperature and time
in one step. (When the unit attains to the set
temperature, the operation continues during
the set time.) To start or stop operation, press
key.
Refer to the section program 4 on the page 2
2
Step operation B (Time prior control)
You set 2 steps and they are repeated.
You can set one pair of temperature and time
in one step. (Heat up time and cool down tim
e
are included in the set time (t).) To start or
stop operation, press
key.
Refer to the section program 5 on the page 2
7
Repetition times
You can set operating times of program.
Set and run times are shown as below.
• Only one time operation (Not repeated)
Repetition time --> 1
• 2 ~ 99 times operation
Repetition time --> 2 ~ 99
• Repeating until key is pressed.
Repetition time --> 0
Steps
Temperature prior control
Time prior control
Step means a process of program. Operation is
started from the step 1. After the unit attains to the s
e
temperature and controls during the set time, the
operation goes to the next step.
In the temperature prior control, the temperature is ke
p
for the set time after the unit attains to the set
temperature.
In the time prior control, when the set time has elapse
d
the operation goes to the next step. Heat up time and
cool down time are included in the set time.
Repeating
RepeatingFirst operation
First operation

4
RR
RR
UU
UU
NN
NN
SS
SSTT
TTOO
OO
PP
PP
271 8 271
RR
RR
UU
UU
NN
NN
SS
SSTT
TTOO
OO
PP
PP
t
T T
t
Program6
Program7
2-1 Program mode
s
Temp.
Time
Step
Repeating
24-hours
Temp.
Time
Step
Repeating
Pattern
• 24 hours cycle operation (Time prior operation)
You can set one pair of time and temperature,
and the operation is repeated at these set time a
n
temperature by 24 hours cycle.
To start or stop operation, press
key.
Refer to the section program 6 on the page 33.
• 8 steps operation (Temperature prior operation)
You can set 8 steps. One pair of time and
temperature can be set in one step.
Steps are combined each other, and they can be
repeated. To start or stop operation, press
key.
Refer to the section program 7 on the page 38.

• Lower limit temperature alarm (Under shooting)
Set upper limit temperature alarm. Press
key
to switch to the adjustment mode.
And then press
keys.
Refer to the section [Setting lower limit alarm]
on the page 52.
• Upper limit temperature alarm (Over shootin
g
Set upper limit temperature alarm. Press
key
to switch to the adjustment mode.
And then press
keys.
Refer to the section [Setting upper limit alar
m
on the page 50.
• Auto tuning
This unit is controlled by a built-in
microprocessor based on PID control. The
most suitable PID constant is set before
shipment. If the temperature accuracy
becomes low, PID constant is tuned
automatically.
To set auto-tuning, press
key to switch to the adjustment
mode. And then press
keys.
Refer to the section [Auto-tuning] on the
page 46.
5
2-2 Adjustmentmode
SS
SS
EE
EETT
TT
UU
UUPP
PP
DD
DD
OO
OO
WW
WWNN
NN
SS
SSHH
HHIIIIFF
FFTT
TT
MM
MM
OO
OO
DD
DDEE
EE
SS
SS
EE
EETT
TT
UU
UUPP
PP
DD
DD
OO
OO
WW
WWNN
NN
MM
MM
OO
OO
DD
DDEE
EE
SS
SSHH
HHIIIIFF
FFTT
TT
MM
MM
OO
OO
DD
DDEE
EE
SS
SS
EE
EETT
TT
UU
UUPP
PP
DD
DD
OO
OO
WW
WWNN
NN
MM
MM
OO
OO
DD
DDEE
EE
SS
SSHH
HHIIIIFF
FFTT
TT
SS
SS
EE
EETT
TT
UU
UUPP
PP
DD
DD
OO
OO
WW
WWNN
NN
MM
MM
OO
OO
DD
DDEE
EE
SS
SS
EE
EETT
TT
UU
UUPP
PP
DD
DD
OO
OO
WW
WWNN
NN
2-2 Adjustment mod
e
Auto Sns
AL-H AL-L
Loc
• Locking adjustment data
Data of adjustment mode is locked.
Press
key
to switch to the adjustment mode.
And then press
keys.
Refer to the section [Setting data lock]
on the page 55.

2-3 Alarmfunction
2-3 Alarm functio
n
6
RUN/STOP
HEATING
AUTO.TUNING
ALARM
TEMP
.
TIME
R
PP
PPVV
VV
SS
SSVV
VV
PROGRAM
RUN/STOP
HEATING
AUTO.TUNING
ALARM
TEMP
.
TIME
R
PP
PPVV
VV
SS
SSVV
VV
PROGRAM
RUN/STOP
HEATING
AUTO.TUNING
ALARM
TEMP
.
TIME
R
PP
PPVV
VV
SS
SSVV
VV
PROGRAM
RUN/STOP
HEATING
AUTO.TUNING
ALARM
TEMP
.
TIME
R
PP
PPVV
VV
SS
SSVV
VV
PROGRAM
RUN/STOP
HEATING
AUTO.TUNING
ALARM
TEMP
.
TIME
R
PP
PPVV
VV
SS
SSVV
VV
PROGRAM
This unit has the following alarm functions
The buzzer is heard for 10second
s
The control operation stops.
Indications and action
s
Alarm descriptions and cause
s
• Setting error alarm
Occurs when you set any data out of its range.
The set data (SV indication) blinks for 3 second
s
• Door alarm
Occurs when you start control when the door is
left opening, or when you open the door while
controlling.
[door] is displayed on SV indicator and it blinks.
• Upper limit temperature alarm (Over shooting)
Occurs when the chamber temperature exceeds
the upper limit value. In this function the
detection starts after the measured temperature
attains to the upper limit alarm range.
The set value (SV indication) blinks.
• Lower limit temperature alarm (Under shootin
g
Occurs when the chamber temperature is lowe
r
than the upper limit value. In this function the
detection starts after the measured temperature
attains to the lower limit alarm range.
The set value (SV indication) blinks.
• Power failure alarm
Detects power failure while controlling, and the
alarm occurs when power recovers.
The operation depends on settings for recoverin
g
from power failure.
[oFF] is displayed on SV indicator and it blinks.
The control
stops by
setting for
recovering
from power
failure.
Remar
k
LED indications
Indicate
s
Illumination
.
Blinking.
Darkness

• Watch-dog system
Detects over running of CPC by extreme noise,
and reset the unit.
When this system functions, any key operation is
not accepted, and displays have not meaning.
All output are turned off. If causes are solved, th
e
unit can recover by turning on the switch.
Yet backup data may be damaged.
If you restart the unit, press and hold
key, and turn on the
mains switch to execute zero clear operation.
All set data of program mode and adjustment
mode are cleared.
7
RUN/STOP
HEATING
AUTO.TUNING
ALARM
TEMP
.
TIME
R
PP
PPVV
VV
SS
SSVV
VV
PROGRAM
RUN/STOP
HEATING
AUTO.TUNING
ALARM
TEMP
.
TIME
R
PP
PPVV
VV
SS
SSVV
VV
PROGRAM
RUN/STOP
HEATING
AUTO.TUNING
ALARM
TEMP
.
TIME
R
PP
PPVV
VV
SS
SSVV
VV
PROGRAM
RUN/STOP
HEATING
AUTO.TUNING
ALARM
TEMP
.
TIME
R
PP
PPVV
VV
SS
SSVV
VV
PROGRAM
TEMP
.
TIME
R
PP
PPVV
VV
RUN/STOP
HEATING
AUTO.TUNING
ALARM
TEMP
.
TIME
R
PP
PPVV
VV
SS
SSVV
VV
PROGRAM
RUN/STOP
HEATING
AUTO.TUNING
ALARM
TEMP
.
TIME
R
PP
PPVV
VV
SS
SSVV
VV
PROGRAM
DD
DD
II
II
SS
SSPP
PP
2-3 Alarm functio
n
The buzzer is heard for 10second
s
The control operation stops.
Indications and action
s
Alarm descriptions and cause
s
• Cover heat alarm
Occurs when the SSR is broken which turns on
and off the heater.
[ovHt] is displayed on SV indicator.
• Heater alarm
Occurs when the heater is disconnecte
d
[HEAr] is displayed on SV indicator.
• Sensor alarm
Occurs when the sensor is disconnected.
The measured value (PV indication) is 400 and
i
blinks.
[SEnS] is displayed on SV indicator.

Upper and lower limit temperature alarm
-> Press key to release alarm.
Or the unit recovers automatically, when the
measured value attains to the upper or lower
limit band.
Other alarms
-> Press key to release alarm.
Though alarm occurs again if the cause is no
t
solved.
If you press and hold
key, and turn on the mains switch,
all settings of program mode and adjustment
mode are cleared. And all set data return to initi
a
data before shipment.
All set data of program mode and adjustment
mode are cleared.
Watch-dog system
-> Turn off the mains switch once, and
turn
on it again to release alarm.
Power failure alarm
-> Press key to release alarm
.
Setting error alarm
-> The set value blinks for 3 seconds, and
the unit recovers automatically.
Door alarm
-> When the door is closed, the unit
recovers automatically. Or stop
controlling operation to release alarm.
If you start operation when the door is
left opening, door alarm occurs again.
8
DD
DDIIIISS
SSPP
PPLL
LLAA
AAYY
YY
DD
DDIIIISS
SSPP
PPLL
LLAA
AAYY
YY
DD
DDIIIISS
SSPP
PPLL
LLAA
AAYY
YY
DD
DDIIIISS
SSPP
PPLL
LLAA
AAYY
YY
2-3 Alarm functio
n
Remar
k
Releasing alarm
Remar
k
Zero clear

2-4 Display
9
TEMP
.
TIME
R
PP
PPVV
VV
SS
SSVV
VV
PROGRAM
TEMP
.
TIME
R
PP
PPVV
VV
SS
SSVV
VV
PROGRAM
TEMP
.
TIME
R
PP
PPVV
VV
SS
SSVV
VV
PROGRAM
TEMP
.
TIME
R
PP
PPVV
VV
SS
SSVV
VV
PROGRAM
TEMP
.
TIME
R
PP
PPVV
VV
SS
SSVV
VV
PROGRAM
TEMP
.
TIME
R
PP
PPVV
VV
SS
SSVV
VV
PROGRAM
TEMP
.
TIME
R
PP
PPVV
VV
SS
SSVV
VV
PROGRAM
2-4 Displa
y
Temp. indication LE
D
Time indication LE
D
Program No. indicatio
n
Second colo
n
PV (Measured value
)
indication
SV (Set value) indicatio
n
Displa
y
Conten
t
Temperature indication
Temperature indication LED illuminates, the
measured temperature (in the program 7, step No.
St-*) is displayed on PV indicator and the set
temperature is displayed on SV indicator.
Time indication
Time indication LED illuminates, the measured ti
m
(in the program 3, step No.:St-*) is displayed on
PV indicator and the set time is displayed on SV
indicator. The 2 digits of left side indicate the hour
the 2 digits of right side indicate the minute.
Repetition time indication (while setting)
Temperature and time indication LED darken, the
repetition character (n) is indicated on PV indicat
o
and the set repetition time is indicated on SV
indicator.
Repetition time indication (while controlling)
Temperature and time indication LED darken, the
current repeating times is indicated on PV indicat
o
and the set repetition time is indicated on SV
indicator.
Power failure indication
Temperature and time indication LED darken, th
e
recovering character (PoFF) is indicated on PV
indicator and the set recovering character from
power failure (oFF, On, or Cont) is indicated on
SV indicator.
Power failure indication
(Only when "On" is set in the program 5)
Temperature and time indication LED darken, th
e
recovering character (On) is indicated on PV
indicator and the set temperature for recovering
operation is indicated on SV indicator.

VOS-201, 301, 451SD : 40 ~ 240°C
VOS-601, VOC-301, 401SD : 40 ~ 200°C
Press or key
to indicate the program No. [1].
Setting and executing program3
10
RUN/STOP HEATING AUTO.TUNING ALARM
TEMP.
TIMER
PV
SV
PROGRAM
RUN/STOP HEATING AUTO.TUNING ALARM
TEMP.
TIMER
PV
SV
PROGRAM
UP DOWN
RUN/STOP HEATING AUTO.TUNING ALARM
TEMP.
TIMER
PV
SV
PROGRAM
SET
(150°C)
3-1 Program 1 (Continuous operation) Temp.
Ambient
Time
Setting
Program 1 is operated at a set temperature.
(Example) The unit controlled at 150°C constantly.
After recovering from power failure,
the control operation is continued.
Setting Program 1
Procedure Key operation Indication
Turning on the
mains switch
When the switch is turned on, all
digits indicate [8] and all LED lamp
illuminate. Then each [8] changes to
the previous program No, set value
and the current measured value.
Turn on the mains switch.
Selecting
program No.
Program No. indication blinks.
If the previous program No. is [1], the
[1] is indicated without any key
operation.
Remark Remark
Entering
program No. 1
and switching to
temperature
setting mode
Press key.
The most right digit of SV indicator
blinks.
Temperature setting range Program No. indication
You can set by 1 °C (in all programs).
The previous program No. is indicated. In initial
operation or after zero clear operation, [1] is indicated.
3-1 Program 1

Press or key to
indicate set character [Cont].
Press key to be active the
second digit.
Press or key to
display [5].
11
RUN/STOP HEATING AUTO.TUNING ALARM
TEMP.
TIMER
PV
SV
PROGRAM
RUN/STOP HEATING AUTO.TUNING ALARM
TEMP.
TIMER
PV
SV
PROGRAM
SET
RUN/STOP HEATING AUTO.TUNING ALARM
TEMP.
TIMER
PV
SV
PROGRAM
UP DOWN
RUN/STOP HEATING AUTO.TUNING ALARM
TEMP.
TIMER
PV
SV
PROGRAM
SET
RUN/STOP HEATING AUTO.TUNING ALARM
TEMP.
TIMER
PV
SV
PROGRAM
SHIFT
UP DOWN
3-1 Program 1
Setting Program 1
Procedure Key operation Indication
Input of set
temperature
The active digit blinks.
Input of set
temperature Press key to be active the
third digit.
Press or key to
display [1].
SHIFT
UP DOWN
The active digit blinks.
Entering the set
temperature and
switching to
setting mode of
recovering after
power failure.
Press key.
The set character blinks.
Input of
recovering after
power failure
Entering
recovery after
power failure
And then
settings are
completed.
Press key.
The program No. indication blinks.
To be continued to the next page.

RUN/STOP HEATING AUTO.TUNING ALARM
TEMP.
TIMER
PV
SV
PROGRAM
RUN/STOP HEATING AUTO.TUNING ALARM
TEMP.
TIMER
PV
SV
PROGRAM
RUN
STOP
RUN
STOP
12
3-1 Program 1
Remark Remark
Remark
Starting and stopping control operation of Program 1
Procedure Key operation Indication
Press key.
Starting
controlling.
[RUN/STOP] LED blinks and control
operation starts.
If the heater works, [HEATING]
LED illuminates.
Press key.
Starting
controlling.
[RUN/STOP] LED darkens and
control operation stops.
Program No. indication blinks.
How to use the setting of
recovering from power failure SV indication while setting
PV indication while setting
You can select a control operation for when
the unit recovers from power failure in case it
occurs while controlling.
• [oFF]
After the unit recovers, the control operation
stops.
• [On]
It cannot be set in the program 1 and 2.
After the unit recovers, the set point control
starts at a temperature you set.
• [Cont]
After the unit recovers, the control operation
starts again from the stopping point.
The current set temperature, set time and set
character are displayed. If the unit is left for a
minute without any key operation, the display
returns to [Selecting Program No.] automatically
and the previous program No. is displayed.
If the unit is under controlling operation, the
current program No. is displayed.
While setting, the current measured temperature,
time and set character are displayed.

SET
TEMP.
TIMER
PV
SV
PROGRAM
TEMP.
TIMER
PV
SV
PROGRAM
DISPLAY
DISPLAY
DISPLAY
13
3-1 Program 1
Remark
Changing set value while
controlling of Program 1 Changing indication while
controlling of Program 1
Press key. Even if the control is active,
the display can be changed to the mode of
[Selecting program No.]
If you change program No. in [Selecting
Program No.], the other program setting can be
changed.
Refer to the section [Setting of Program * ].
* : Program No.
Press key. Even if the control is active,
the display can be changed, and can check set values.
Displays change as follows.
If the unit is left for a minute without any key
operation, the display changes to the previous
indications automatically.
Temp. indication
Press key.
Setting recovery
from power failure.
Press key.
SV and PV indication while setting
Control
Temp. control Time
setting
SV indicator PV indicator
During heat-up or
cool-down
While controlling at
a set point
While controlling at
a set point
Nil
Nil
The current set temperature
is indicated.
The current set temperature
is indicated.
The current set time
is indicated.
The current measured
temperature is indicated.
The current measured
temperature is indicated.
The current measured time
(additive time) is indicated. *1
*1 In the time prior control, the display changes to time indication after the temperature attains to set point
(when the unit start the set point control operation). The display indicates aggregated measured time.

Press or key
to indicate the program No. [2].
14
RUN/STOP HEATING AUTO.TUNING ALARM
TEMP.
TIMER
PV
SV
PROGRAM
RUN/STOP HEATING AUTO.TUNING ALARM
TEMP.
TIMER
PV
SV
PROGRAM
UP DOWN
RUN/STOP HEATING AUTO.TUNING ALARM
TEMP.
TIMER
PV
SV
PROGRAM
SET
3-2 Program 2
(100°C)
3-2 Program 2 (Auto start)
Temp.
Ambient Time
Setting
You set time and temperature. When the set time
has elapsed, the operation starts automatically at the
set temperature. The waiting time before starting
operation can be set within 1 ~ 99 hours and 59
minutes by 1 minute.
(Example) Temperature is set at 100°C, and the
operation start after 10 hours. If power
failure occurs while controlling, it stops
after the unit recovers.
Setting Program 2
Procedure Key operation Indication
Turning on the
mains switch
When the switch is turned on, all
digits indicate [8] and all LED lamp
illuminate. Then each [8] changes to
the previous program No, set value
and the current measured value.
Turn on the mains switch.
Selecting
program No.
Program No. indication blinks.
If the previous program No. is [2], the
[2] is indicated without any key
operation.
Entering
program No. 2
and switching to
time setting
mode
Press key.
The setting digit (first digit) blinks.
The most right digit of SV indicator
blinks.
10 hours
To be continued to the next page.

Press key to be active the
third digit.
Press or key to
display [1].
Input of set
temperature
The active digit blinks.
Press key to be active the
second digit.
Press or key to
display [1].
15
RUN/STOP HEATING AUTO.TUNING ALARM
TEMP.
TIMER
PV
SV
PROGRAM
RUN/STOP HEATING AUTO.TUNING ALARM
TEMP.
TIMER
PV
SV
PROGRAM
SET
RUN/STOP HEATING AUTO.TUNING ALARM
TEMP.
TIMER
PV
SV
PROGRAM
SET
RUN/STOP HEATING AUTO.TUNING ALARM
TEMP.
TIMER
PV
SV
PROGRAM
SHIFT
UP
RUN/STOP HEATING AUTO.TUNING ALARM
TEMP.
TIMER
PV
SV
PROGRAM
SHIFT
UP
SET
DOWN
DOWN
3-2 Program 2
Setting Program 2
Input of set
time
The active digit blinks.
Entering the set
temperature and
switching to
setting mode of
recovering after
power failure.
Press key.
The set character blinks.
Entering the set
time and
switching to
temperature
setting mode.
Press key.
The most right digit of SV indicator
blinks.
Entering
recovery after
power failure
And then
settings are
completed.
Press key.
The program No. indication blinks.
Procedure Key operation Indication
To be continued to the next page.

RUN/STOP HEATING AUTO.TUNING ALARM
TEMP.
TIMER
PV
SV
PROGRAM
RUN/STOP HEATING AUTO.TUNING ALARM
TEMP.
TIMER
PV
SV
PROGRAM
RUN
STOP
RUN
STOP
SET
16
3-2 Program 2
Procedure Key operation Indication
Starting and stopping control operation of Program 2
Press key.
Starting
controlling.
[RUN/STOP] LED blinks and control
operation starts.
The measured value indication
changes to the time indication, and
[Second colon] LED blinks.
If the heater works, [HEATING]
LED illuminates.
Press key.
Starting
controlling.
[RUN/STOP] LED darkens and
control operation stops.
Program No. indication blinks.
Changing set value while
controlling of Program 2
Press key. Even if the control is active,
the display can be changed to the mode of
[Selecting program No.]
If you change the set time during count up of the
time, it is not accepted. (It is accepted after the
control stops.)
If you change program No. in [Selecting
Program No.], the other program setting can be
changed.
Refer to the section [Setting of Program * ].
* : Program No.

DISPLAY
TEMP.
TIMER
PV
SV
PROGRAM
TEMP.
TIMER
PV
SV
PROGRAM
TEMP.
TIMER
PV
SV
PROGRAM
TEMP.
TIMER
PV
SV
PROGRAM
TEMP.
TIMER
PV
SV
PROGRAM
17
DISPLAY
DISPLAY
DISPLAY
DISPLAY
DISPLAY
3-2 Program 2
Changing indication while
controlling of Program 2
Press key. Even if the control is active,
the display can be changed, and can check set
values.
Displays during count up of time is changed as
follows. If the unit is left for a minute without any
key operation, the display changes to the previous
indications automatically.
Temp. indication
Press key.
Setting recovery
from power failure.
Press key.
Press key.
Press key.
Press key.
Temp. indication
Setting recovery
from power failure.
Time indication
Displays after count up of time is changed
as follows. If the unit is left for a minute
without any key operation, the display
changes to the previous indications
automatically.

18
RUN/STOP HEATING AUTO.TUNING ALARM
TEMP.
TIMER
PV
SV
PROGRAM
RUN/STOP HEATING AUTO.TUNING ALARM
TEMP.
TIMER
PV
SV
PROGRAM
UP DOWN
RUN/STOP HEATING AUTO.TUNING ALARM
TEMP.
TIMER
PV
SV
PROGRAM
SET
3-3 Program 3
Press or key
to indicate the program No. [3].
(200°C)
3-3 Program 3 (Auto stop)
Temp.
Ambient Time
Setting
You set time and temperature. When the set time
has elapsed, the operation starts automatically at the
set temperature. The waiting time before starting
operation can be set within 1 ~ 99 hours and 59
minutes by 1 minute.
(Example) Temperature is set at 200°C, and the
operation stops after 5 hours. If power
failure occurs while controlling, the
unit continues after the unit recovers.
Setting Program 3
Procedure Key operation Indication
Turning on the
mains switch
When the switch is turned on, all
digits indicate [8] and all LED lamp
illuminate. Then each [8] changes to
the previous program No, set value
and the current measured value.
Turn on the mains switch.
Selecting
program No.
Program No. indication blinks.
If the previous program No. is [3], the
[3] is indicated without any key
operation.
Entering
program No. 3
and switching to
time setting
mode
Press key.
The setting digit (first digit) blinks.
The most right digit of SV indicator
blinks.
5 hours
To be continued to the next page.
This manual suits for next models
5
Table of contents
Other EYELA Oven manuals