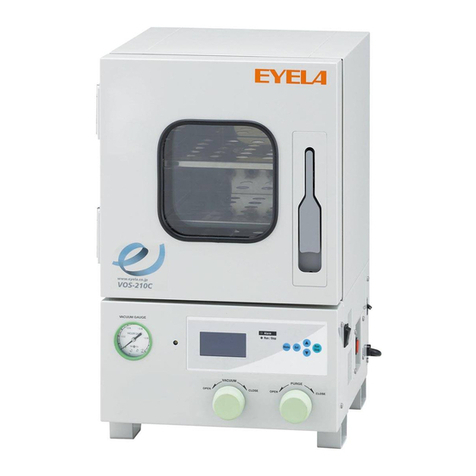
EYELA VOS-452SD User manual

Model VOS-452SD
Model VOS-602SD
Panel key
operation manual
R00
TOKYO RIKAKIKAI CO., LTD.
This manual is designed to use this unit safely with the best performance.
Keep this instruction manual beside the unit.
Important
Please read this manual carefully, especially
on “Safety precautions” before use.
Vacuum constant
temperature
dryer
Vacuum dry oven

Introduction
This panel key operation manual describes the panel key operation procedures for
Vacuum dry oven
VOS-452SD
VOS-602SD.
Read through and understand the instructions contained in this manual before using the unit.
Thank you for choosing
Product.
TABLE OF CONTENTS
TABLE OF CONTENTS
1. Names and Functions of Panel Keys・・・・ 1 4. Interface
1-1 Control panel ・・・・・・・・・・・・ 14-1 Look & feel・・・・・・・・・・・・・ 15
1-2 Display ・・・・・・・・・・・・・・・ 24-2 Alarm output ・・・・・・・・・・・・ 16
1-3 Operation ・・・・・・・・・・・・・・ 44-3 Analog output ・・・・・・・・・・・ 17
1-4 Operation lock ・・・・・・・・・・・・ 6 5. Alarm Functions
2. Temperature Control ・・・・・・・・・・ 75-1 Types of alarms to be detected ・・・・ 18
2-1 Fixed value operation ・・・・・・・ 75-2 Actions in the event of alarms ・・・・ 19
2-2 Program operation ・ ・・・・・・・・・ 95-3 Door alarm・・・・・・・・・・・・・ 20
2-3 24-Hour cycle operation ・・・・・・・ 11 5-4 Temperature alarm ・・・・・・・・・ 21
2-4 Auto-start ・・・・・・・・・・・・・・ 12 5-5 Temperature control alarm ・・・・・・ 23
3. Display Correction 5-6 Other alarms ・・・・・・・・・・・・ 24
3-1 Temperature display correction・・・・・ 13 6. Power Restoration Function ・・・・・・・ 25
3-2 Pressure display correction ・・・・・・ 14 7. Data Initialization・・・・・・・・・・・・ 27
8. List of Setting Items and Initial Values・・・ 28
Step・・・・・・・・・・・・・・・・・・・ 3
Number of repetitions ・・・・・・・・・・・ 3
Alarm code・・・・・・・・・・・・・・・・ 3
Temperature priority control・・・・・・・・・ 3
Time priority control ・・・・・・・・・・・・ 3
Termination of temperature control・・・・・・ 3
Set temperature range ・・・・・・・・・ 3
Reset setting ・・・・・・・・・・・・・・・ 5
Auto-stop・・・・・・・・・・・・・・・・・ 10
Look & Feel・・・・・・・・・・・・・・・・ 15
※The control programs are subject to be updated without notice for the improvement of the product.
memo

Names and Functions of Panel Keys
1
1
No. Name Function
①Display Display information according to operations.
[Main Screen] is displayed in the figure shown above.
②
Dial Key
Turn
Press
[When selecting]
By turning: Items to be selected are changed.
By pressing: The selected item is fixed.
[When changing]
The value is changed by turning it.
The selected value is fixed by pressing it.
[When an alarm message is displayed]
The message is cleared by pressing it.
③
[Menu] Key [When the main screen is displayed]
Display the menu screen by pressing the key.
[When selecting]
Return to the previous screen by pressing the key.
[When changing] (before pressing the key)
Return to the previous value by pressing the key.
④
[Run/Stop] Key If this key is pressed while the main screen is displayed, temperature
control starts or stops.
Temperature control does not start when an alarm occurs.
①
②
④③
1-1 Control panel

1-2 Display
No. Name Function
①Operating status icon Display an icon according to operating status of the unit. ※1
②Heater icon Display it when the heater is on.
③Measured temperature
Temp.PV
Display the current internal temperature.
The color of the text changes depending on the status.
White: When temp. control is stopped (Stop) or paused (Pause)
Red: When an alarm occurs.
Yellow: When the displayed temp. does not reach the set temp. after starting temp.
control.
Green:When the displayed temp. reaches the set temp. after starting temp. control.
④Auto-start icon
The display changes according to temperature control status.
Lighting display: When Auto-start is enabled while temp. control is stopped.
Blinking display: Auto-start is running.
Nothing is displayed in cases other than the above-mentioned status.
⑤Timer display
(Counting display)
During Auto-start: Display the remaining time until the operation starts. (hr: min: sec)
Fixed value operation: Display the elapsed time.
24-hour cycle operation: Display the elapsed time (cleared after elapsing 24 hours).
Program operation: Display the remaining time of the current step.
⑥Priority control display Display the priority control (temperature priority/time priority) of the current step when
Program operation is set.
⑦Set temperature
Temp.SV
Display the set temperature which is currently set.
The range of the set temperature varies depending on models.
⑧Measured pressure
Prss.PV
Display the current internal pressure.
Normally it is displayed in white characters, and in red when an error occurs.
⑨Operation lock icon Indicate the status that the operation is locked.
⑩Temperature control mode
Status display
Display the temperature control mode which is currently set.
Display the status of error detection, etc. ※2
⑪Step display
Display the number of the running step and the total number of steps when Program
operation or 24-hour cycle operation is set.
0 is displayed for the running step when temperature control is stopped.
⑫Display of number of runs
Display the number of runs in temperature control mode and the number of
repetitions when Program operation or 24-hour cycle operation is set.
0 is displayed for the number of runs during standby.
The maximum number for displaying is 99. 99 is displayed even when the number of
runs exceeds 99 times.
2
※Two types of language, [English] and [Japanese] are available for display.
In this manual, all instructions are explained using the [Japanese] screen.
Main Screen

Step
“Step” means a process of the program, which
are executed in order from Step 1.
After the temperature is controlled at the set
temperature and the time condition is satisfied,
it proceeds to the next step.
Temperature priority control
Temperature priority control is a control which
enables to keep the set temperature for a set time
after the measured temperature reaches the set
temperature.
Time priority control
Time priority control is a control which enables to
switch to the next step after elapsing the set time.
The temp. is controlled to keep the set temp. during
the period of the set time, and the set time includes
the time for rising and falling of temp. until reaching
the set temp.
Alarm code
Alarm codes means codes which are assigned
to each alarm type.
For details, refer to [5. Alarm Function].
The number of runs can be set in Program
operation and 24-hour cycle operation.
The relationship between the set number of
repetitions and the number of runs is as
follows:
・Run once (no repetition)
Set number of repetitions → 1
・Run between 2 and 99 times
Set number of repetitions → 2 to 99
・Repeat until the control is stopped by
key
Set number of repetitions → ∞
Number of repetitions
3
Termination of temp. control
This means that temp. control are finished after
the actual number of runs reaches the number of
repetitions set in Program operation or 24-hour
cycle operation.
Set temperature range
The lower and upper limits of the set temperature
range vary depending on models.
Stop :
①Operation status icon (*1)
Pause :
[Pause] is displayed in the following cases:
・Auto-start is running.
・Door is opened during controlling
temperature.
・Temperature control is paused.
→step sections for which no target
temperature to be controlled is set
Run :
⑩Temperature control mode & Status display (*2)
[Temperature control mode]
Fixed value
operation
Fixed value operation:
Program operation: Program *
24-hour cycle operation: 24-hour
operation
[Status]
During Auto-start: Auto start
Door is open during
controlling temp. Door open
Temperature control
is paused: Pause
Alarm occurrs: F-0
When the unit is in the above-mentioned state,
“temperature control mode” or “state” is displayed
alternately.
When an alarm occurs, “operation mode” or
“alarm code” is displayed alternately.
Finish
Temperature control
finished:
Program* :
Eight sets (programs 1 to 8) can be set in Program
operation.

1-3 Operation
Here, how to change the settings of the unit is explained using ”Change the display language to [Japanese]”
as an example.
Other settings can be changed in the same way.
[Setting to Japanese]
CHECK/OPERATION DISPLAY
①
Press Menu key while the main screen is
displayed.
The menu screen is displayed.
The selected [Item] is surrounded by a black
frame and displayed in [Text Color:
Black]/[Background Color: Light blue].
[Setting] is selected in the picture on the right.
If any items other than [Setting] are selected,
turn the Dial key to select [Setting].
②
Press the Dial key to display the
setting screen.
The selected [Set value] is surrounded by a
black frame and displayed in [Text color:
Black]/[Background color: Light blue].
[Language:English] is selected in the picture on
the right.
If any items other than [Language] are selected,
turn the Dial key to select
[Language].
③
Press the Dial key to change the
[Language] setting.
The set value which can be changed is
surrounded by black frame and displayed in
[Text color: Yellow]/[Background color: Black].
Turn the Dial key to display
[Japanese].
4
Language: English
Language: Japanese

CHECK/OPERATION DISPLAY
④
Press Dial key to change the
[Language] setting from [English] to [Japanese].
※The changed setting, [Japanese] in this case,
is reflected from the next display.
⑤
Press Menu key to display the menu
screen in Japanese.
⑥
Press Menu key again to display the
main screen.
5
Reset setting
Even after you turn Dial key and change the set value,
If you do not press Dial key,
The set value returns to the value before the change by
pressing Menu key.

1-4 Operation lock
Operation lock function is possible to prevent misoperation.
The setting can be checked even while the operation lock function is on.
[Setting of operation lock]
CHECK/OPERATION DISPLAY
①
You can know whether the operation lock is ON
or OFF in [Main Screen].
Display in the lower left of [Main
screen].
The above icon is displayed when
the operation lock is ON.
②
To set or cancel the operation lock, while [Main
Screen] is displayed,
Pressing and holding Menu key,
Turn Dial key.
[Operation Lock Setting Screen] is displayed.
③
Turn Dial key
to change the operation lock setting.
In the figure on the right,
the setting is changed from [Free (Unlocked)] to
[Lock (Locked)].
Press Dial key, and
Fix the operation lock setting and display [Main
Screen].
※If no operation is performed for about 60
seconds, the operation lock setting is not
reflected, and the screen returns to [Main
Screen].
6
※Even if the operation lock is ON,
Run/Stop key operation can be performed.

Temperature control
2
2-1 Fixed value operation
This product has three kinds of temperature control modes:
- Fixed value operation
- Program operation
- 24-hour cycle operation,
as well as Auto-start function.
Any temperature to be controlled can be set, and
continuous operation is performed at the preset
temperature.
To start or stop the operation,
Press the Run/Stop key
while [Main Screen] is displayed.
The set temperature can be also changed during
controlling temperature.
Time
Temperature
7
CHECK/OPERATION DISPLAY
①
In [Main screen] check whether the
temperature control mode is set to [Fixed
value operation].
If any screens other than [Main screen] are
displayed,
Press Menu key until [Main
screen] appears.
If the temperature control mode is set to any
modes other than Fixed value operation,
change it to [Fixed value operation] through
the procedure ②.
Display in the lower left of [Main screen].
②
Press Dial key while the
main screen is displayed.
[Temperature control mode selecting screen]
appears.
The temperature control mode which is
currently set is indicated with .
In the figure on the right, [Program operation]
is set and selected.
③
Turn Dial key to select [Fixed
value operation].
[Setting of Fixed value operation]
Fixed value
operation
オートスタート
定値運転
プログラム運転1
24時間運転
オートスタート
定値運転
プログラム運転1
24時間運転

CHECK/OPERATION DISPLAY
④
Press Dial key.
[Fixed value operation] is indicated with ,
and the operation mode changes from
[program] to [Fixed value operation].
⑤
Press Menu key to return to
[Main screen] and confirm that the
temperature control mode is [Fixed value
operation].
Display in the lower left in [Main screen].
⑥
Turn Dial key while the main
screen is displayed.
The display of the set temperature changes
from [text color in WHITE/background color in
BLACK] to [text color in BLACK/background
color in YELLOW], and then temperatures can
be set.
Text color: White
Background color: Black
Text color: Black
Background color: Yellow
After that, turn Dial key to the
temperature to which you want to set.
Numerical values increase by turning it to the
right and decrease to the left.
The faster you turn it , the more the value
increase or decrease.
The figure on the right shows the result of
changing the temperature from 40.0°C to
100.0°C.
If the temperature to which you want to set is
displayed,
Press Dial key.
The set temperature is updated.
Text color: White
Background color: Black
SV: 40.0℃
SV:100.0℃
SV: 40.0℃
SV:100.0℃
8
Fixed value
operation
SV: 40.0℃
オートスタート
定値運転
プログラム運転1
24時間運転

2-2 Program operation
[Program operation setting]
Temperature control is performed in a combination
with temperature and time using 8 steps at a
maximum. Priority control (for temperature and time)
can be set for each step.
The preset program is operated repeatedly as many
times as the preset number of times (up to 99 times).
Eight programs can be saved at a maximum.
Those programs can be referred but cannot be
changed during Auto-start or controlling temperature.
(1)(3):Temperature priority
(2)(4):Time priority
9
Time
35~8
1 2 4
Pattern Repeating
Temperature
31 2 4
CHECK/OPERATION DISPLAY
①
Press Menu key while [Main Screen] is
displayed.
[Temperature control mode selecting screen] is
displayed.
※When temperature control is in progress
under Program operation, the active
[⑤Program operation checking screen] is
displayed.
②
Select [Program operation *] and
press Dial key.
[Program selecting screen] is displayed.
In the figure on the right, [Program 1] is set and
selected.
③
Turn Dial key and select a
Program operation No. to be run, and then
Press Dial key.
[Program setting screen] is displayed.
[Program 2] is selected in the figure on the right.
Set the following items.
※When the number of repetitions is set to [∞],
temperature control continues until
Run/Stop key is pressed.
Press Menu key or select [Back],
[②Program selecting screen] of the previous s
Turn Dial key and select [Next], and
オートスタート
定値運転
プログラム運転1
24時間運転
The number of the preset Program operation
Item Setting
Number of steps 1~8
Number of repetitions 01~99
∞
プログラム2
プログラム3
プログラム4
プログラム5
プログラム6
プログラム1
and then press Dial key to return to
press Dial key to move to the next setting.
screen.

CHECK/OPERATION DISPLAY
④
[Step Setting Screen] is displayed.
Set the following items for each step.
Item Setting
SV(℃)
Set temp.
40.0~: Set temp. range
for each model
--: No setting
T(HH:MM)
Set time
00:00 to 99:59 (hr: min)
Priority
control
Temp:Give priority to temp.
Time: Give priority to time
※Temperature control is not performed (paused)
in the section where the set temperature is set to
[--] (pause).
In this case, temp. is controlled giving the priority
to time.
Press Menu key, or select [Back] and
press Dial key
to return to the previous screen, [③Program
setting screen].
Repeat this process until [Main screen] comes out.
⑤
Press Dial key while temperature
control is in progress under Program operation to
check the current setting of the active Program
operation.
If Menu key or Dial key is
pressed, or after 60 seconds elapse, the screen
returns to [Main Screen].
※The setting cannot be changed while
Program operation is active.
10
Auto-stop
Auto-stop operation is possible under setting
as shown below.
Number of steps : 1
Number of repetitions: 1
Time
Step 1
Temperature

11
2-3 24-hour cycle operation
When a temperature and time is set in Section 1 and
a temperature is also set in Section 2, the operation
is repeated under the setting of Section 1 and
Section 2 in 24-hour cycle. (up to 99 times)
The time until the temp. inside the chamber reaches
the set temp. is also included in the set time (time
priority).
Those settings can be referred but cannot be
changed during Auto- start or controlling temp.
[24-hour cycle operation setting]
CHECK/OPERATION DISPLAY
①
Press Dial key while [Main
Screen] is displayed.
The active [②24-hour cycle operation setting
screen] is displayed while 24-hour cycle
operation is running.
[Temperature control mode selecting screen] is
displayed when the operation is stopped.
②
After [Temperature control mode selecting
screen] is displayed, select [24-hour operation]
and press Dial key.
[24-hour cycle operation setting screen] is
displayed.
Set the following items.
Item Description Setting
Section 1 (℃)Set temperature
for Section 1
40.0~:Set temperature range for each model
-- :No setting for temperature
Section 2 (℃)Set temperature
for Section 2
40.0~:Sett temperature range for each model
-- : No setting for temperature
Time for Section
1 (hour: minute)
Set time for
Section 1
00:00~23:59
Number of
repetitions
01~99
∞
※
・The setting cannot be changed while 24-hour cycle operation is running.
・Temperature control is not performed (paused) in the sections where the set temperature is set to [--].
・The time for Section 2 is calculated by (24 hours minus time for Section 1).
・Temperature control is performed giving the priority to time.
・When the number of repetitions is set to [∞], temperature control continues until
Run/Stop key is pressed.
01
区間1時間(時:分):
繰り返し回数:
40.0
--
12:00
24時間運転
区間1(℃):
区間2(℃):
オートスタート
定値運転
プログラム運転1
24時間運転
温
度 24時間
区間1 区間2 時間
Temperature
Time
24 hours
Section 2
Section 1

2-4 Auto-start
Time
t
Temperature
When the time until starting the operation (t) is set, the
operation starts after the preset time elapses.
If the internal pressure is still high even after the preset
time elapses, the operation does not start until the internal
pressure becomes normal (almost same as atmospheric
pressure or less).
Auto-start can be combined with all the other temperature
control modes.
[Auto-start setting]
CHECK/OPERATION DISPLAY
①
The setting of Auto-start can be checked from
[Main Screen].
[During stopping temp. control]
・Auto-start setting: Disable/Enable
・Auto-start time: 00:00 to 23:59(Hr: Min)
[During Auto-start]
・Time until starting temperature control
※The setting of Auto-start cannot be checked
while temperature control is in progress.
Display in the upper right of [Main screen].
①Auto-start setting: When the temperature
control setting is enabled,
・Lighting display while temperature control is
stopped
・Blinking display during Auto-start
②Auto-start time (hr: min: sec)
When temperature control setting is enabled,
・Auto-start time while temperature control is
stopped
・The remaining time before starting
temperature control during Auto-start
②
Press Dial key while
[Main Screen] is displayed to change the
setting of Auto-start.
[Temperature control mode selecting screen]
comes out.
※The setting of Auto-start cannot be changed
during Auto-start or controlling temperature.
③
Select [Auto START] and press
Dial key.
[Auto start setting screen] is displayed.
Set the following items.
Press Menu key
to return to the previous screen, [②
Temperature control mode selecting screen].
定値運転
プログラム運転1
24時間運転
オートスタート
Item Setting
Auto start Off: Disabled
On : Enabled
Time (Hr:Min) 00:00~99:59
01:00
時間(時:分):
Onオートスタート:
12

Display Correction
3
Temperature display correction function allows to correct
the display of the temperature measured by temperature
sensor through inputting two points.
The setting of temperature display correction cannot be
changed but the preset values can be checked during
controlling temperature or locking the operation.
3-1 Temperature display correction
Example)
Here, the correction method is explained using an
example described below:
When the temp. measured by this unit is 21.2°C,
and the temp. measured by a reference
thermometer is 22.8°C, and the temp. measured by
this unit is 60.5°C, and the temp. measured by a
reference thermometer is 63.9°C.
補正前
補正後
補正値①
補正値②
[Temperature display correction setting]
CHECK/OPERATION DISPLAY
①
Press Menu key while [Main
Screen] is displayed.
[Menu] screen is displayed.
②
Select [Correct] and
press Dial key.
[Correction selecting screen] is displayed.
③
Select [Temperature 2-point correction]
and press Dial key.
[Temperature 2-point correction setting
screen] is displayed.
In the example, set each value as follows:
・”Before-correction” for “Correction 1”
[40.0] → [21.2]
・”After-correction” for “Correction 1”
[40.0] → [22.8]
・”Before-correction” for “Correction 2”
[120.0] → [60.5]
・”After-correction” for “Correction 2”
[120.0] → [63.9]
13
After correction
Before correction
Correction value ②
Correction value ①

14
Pressure display correction function allows to
correct the display of the pressure measured by
pressure sensor through inputting two points.
The setting of pressure display correction cannot be
changed but the preset values can be checked
during controlling temperature or locking the
operation.
3-2 Pressure display correction
Example)
Here the correction method is explained using an
example described below:
When the pressure measured by this unit is 10 hPa,
and the pressure measured by a reference pressure
gauge is 8 hPa, and the pressure measured by this
unit is 980 hPa, the pressure measured by a
reference pressure gauge is 979 hPa.
[Pressure display correction setting]
CHECK/OPERATION DISPLAY
①
Press Menu key while [Main
Screen] is displayed.
[Menu] screen is displayed.
②
Select [Correct] and
press Dial key.
[Correction selecting screen] is displayed.
③
Select [Pressure 2-point correction] and
press Dial key.
[Pressure 2-point correction setting
screen] is displayed.
In the example, set each value as follows:
・”Before-correction” for “Correction 1”
[0] → [10]
・”After-correction” for “Correction 1”
[0] → [8]
・”Before correction” for “Correction 2”
[1000] → [980]
・”After correction” for “Correction 2”
[1000] → [979]
補正前
補正後
補正値①
補正値②
After correction
Before correction
Correction value ②
Correction
value ①

Interface
4
The setting of “Look and Feel” can be changed, such
as display language, LCD brightness, and the
presence or absence of a buzzer.
The setting cannot be changed but the set values can
be checked during controlling temperature or locking
the operation.
4-1 Look & feel
[Look & Feel Setting]
Look & Feel
The overall impression of the appearance (look)
such as the design, color, layout and typeface on
the operating screen and the feeling of operation
(feel) such as menus, buttons and responses, is
called “Look & Feel”.
CHECK/OPERATION DISPLAY
①
Press Menu key while [Main Screen] is displayed.
[Menu Screen] is displayed.
②
Select [SETTING] and press Dial key.
[Look & Field Setting Screen] is displayed.
Set the following items.
Item Description Setting
Language Language to be
displayed on LCD
English/
Japanese
Decimal
point
position
for
temperatu
re
Decimal point
position for
temperature
display
0: Not display
numerical
figures after
decimal point
1:Display up to
the first decimal
place
(※1) How to set the duration of
sounding the buzzer
・1 to 99 seconds
・[--]: The buzzer does not
sound.
・[∞]: Press
Dial key to stop the
buzzer.
(※2) If no operation is performed for
approximately 120 seconds, the
brightness of LCD backlight shifts
from “Brightness 1” to “Brightness 2”.
After that, if the operation is
performed or the temperature control
setting is changed, the brightness of
the LCD backlight shifts from
“Brightness 2” to “Brightness 1”.
Temperat
ure unit
Unit for
temperature
display
: Celsius
°F: Fahrenheit
Pressure
unit
Unit for pressure
display
hPa
Torr
Buzzer
Time
Duration of
sounding buzzer
(※1)
Operating
sound
Presence or
absence of switch
operating sounds
On
Off
LCD
brightness
1
LCD backlight
brightness during
normal use (*2)
5~100%
LCD
brightness
2
LCD Backlight
brightness during
standby (*2)
5~100%
15

CHECK/OPERATION DISPLAY
①
Press Menu key while [Main Screen] is
displayed.
[Menu Screen] is displayed.
②
Select [Output Settings] and
press Dial key.
[Output Setting Selecting Screen] is displayed.
③
Select [Alarm Output] and
press Dial key.
[Alarm Output Setting Screen] is displayed.
Set the following items.
When safety functions, etc. is activated, errors can be output as alarm output to external devices. The
alarm output is a relay contact output and is operated by latching operation. (Rated 250V/2A) The logic
(short-circuit/open) of alarm output and the presence or absence of alarms can be set for each
alarm type. Press and hold Dial key for 3 seconds or longer to cancel the alarm output
which is activated after an alarm occurs.
4-2 Alarm output
e.g.) When a lamp (DC24V) is connected as a load to the alarm
[Alarm output setting]
16
Alarm Status of lamp
Normal mode When the relevant
alarms occur
Short circuit [Close] Light off Lighting
Opening [Open] Lighting Light off
Item Description Setting
Alarm output logic The logic of alarm output
(See the above example.)
Close: Short circuit
Open : Open
Temperature
alarm H2
Alarm output when temperature upper limit alarm
2 occurs
Disable: Output disabled
Enable : Output enabled
Temperature
alarm H1
Alarm output when temperature upper limit alarm
1 occurs
Disable: Output disabled
Enable : Output enabled
Temperature
alarm L1
Alarm output when temperature lower limit alarm
1 occurs
Disable: Output disabled
Enable : Output enabled
Temperature
alarm L2
Alarm output when temperature lower limit alarm
2 occurs
Disable: Output disabled
Enable : Output enabled
Uncontrollable
temp. alarm
Alarm output when the uncontrollable temperature
alarm occurs
Disable: Output disabled
Enable : Output enabled
Door alarm Alarm output when the door alarm occurs Disable: Output disabled
Enable : Output enabled
Alarm output terminal
Lamp
24V
This product
・Refer to [5. Alarm functions] for the details of each alarm.
・If any alarms which are not listed on the above table occur, the alarm output is always enabled.

4-3 Analog output
Voltage corresponding to either the measured
temperature or the measured pressure can be output.
The voltage range is 0 to 8000 mV.
These settings cannot be changed but the setting
values can be checked during controlling temperature
or locking the operation.
[Analog output setting]
CHECK/OPERATION DISPLAY
①
Press Menu key while [Main Screen] is displayed.
[Menu Screen] is displayed.
②
Select [Output Settings] and press
Dial key.
[Output Setting Selecting Screen] is displayed.
③
Select [Analog Output] and press
Dial key.
[Analog Output Setting Screen] is displayed.
Set the following items.
Item Description Setting
Output interlock
Interlocking
measured
values
Temp./
Pressure/
----(※)
Min. output Ymin 0~8000mV
Max. output Ymax 0~8000mV
Min. temp. Xmin 0.0~600.0℃
Max. temp. Xmax 0.0~600.0℃
Min. pressure Xmin 0~1500hPa
Max. pressure Xmax 0~1500hPa
※When the output interlock is [---], the analog
output is always 0 mV.
Example)
・Output interlock : Temperature
・Minimum temperature (Xmin) : 40.0℃
・Maximum temperature (Xmax): 200.0℃
・Minimum output (Ymin) : 0 mV
・Maximum output (Ymax) : 8000 mV
With this setting, 0 mV is output when the temperature
is 40°C or less, or 8000 mV is output when the
temperature is 200°C or higher, and the voltage
proportional to the temperature of 50 mV/°C is output in
the range of 40°C to 200°C.
17
Measured value
on the display
(℃/hPa)
Ymax
Ymin
Xmin Xmax
Analog output (mV)

Alarm Functions
5
This unit has the following alarm functions. Codes are allocated to each alarm.
Temperature control cannot be started while alarms occur.
5-1 Types of alarms to be detected
18
Alarm name & code Cause of alarm Factor for cancelling alarm
Door alarm*1
A-2
・When the door is open for a
longer time than the set time during
controlling temperature.
・When temperature control is
started with the door open.
・Automatically cancelled when it is
detected that the door is closed.
・Press Dial key when temperature
control is stopped.
Temperature alarm*2
A-0(H2):
Upper limit 2
A-0(H1):
Upper limit 1
A-0(L1):
Lower limit 1
A-0(L2):
Lower limit 2
After the measured temperature
(PV) reaches the set temperature
(SV) during controlling temperature,
・Upper limit temperature alarm
When the state of PV>SV+H1 or
PV>SV+H2 continues.
・Lower limit temperature alarm
When the state of PV < SV-L1 or
PV < SV-L2 continues.
・Press Dial key while temperature
control is stopped.
・Temperature control is restarted
after temperature control is paused.
・Change the set temperature.
・Upper limit temperature alarm
When the state of PV ≦SV+H1 or
PV≦SV+H2 continues.
・Lower limit temperature alarm
When the state of PV≧SV-L1 or
PV≧SV-L2 continues.
Heater short-circuit, F-6 ・Heater cannot be turned OFF. ・Turn OFF the power. ※3
Heater burnout, F-0 ・Heater cannot be turned ON. ・Turn OFF the power. ※3
Error in temperature
sensor, F-1
When the temperature sensor
detects a temperature which is out
of the display range
When the temperature sensor
detects a temperature which is in the
display range
Uncontrollable
temperature, A-1
When the measured temperature
cannot reach the set temperature
even after temperature control
starts and then a certain period of
time elapses.
・Press Dial key while temperature
control is stopped.
・Temperature control is restarted
after temperature control is paused.
・Change the set temperature.
・PV reaches SV.
Power restoration,
A-4
When the power is restored after a
power shutdown during controlling
temperature.
Only indicate that the power is
restored after a power shutdown and
then temperature control is restarted.
Pressure error, A-16
When the pressure sensor detects
abnormally high pressure
When the pressure sensor doesn’t
detect abnormally high pressure
anymore.
Memory error, F-85 Failed to read or save the internal
memory.
Turn OFF the power. ※3
Circuit board error, F-98 ・Failure in LCD
・Failure in control board of the unit
Turn OFF the power. ※3
※1 Temperature control is paused when “Door open" is detected during controlling temperature.
Temperature control is restarted when it is detected that the door is closed.
If the duration of "Door Open" exceeds the set time for the door alarm, the door alarm occurs.
※2 There are two types of temperature alarm, “Upper limit temperature alarm (overshoot)” and “Lower limit
temperature alarm (undershoot)”, each of which has two levels.
※3 If the same alarm is displayed after the power is turned on again, please contact our service center.
This manual suits for next models
1
Table of contents
Other EYELA Oven manuals
Popular Oven manuals by other brands

Hotpoint
Hotpoint DU4 541 J C IX Instructions for installation and use

Whirlpool
Whirlpool SBIOOPED Use and care guide

Miele
Miele DGC 7845 X Operating and installation instructions

Cres Cor
Cres Cor 120-PH Series Operating and maintenance instructions

AGA
AGA GC3 (P/F) User instructions

Heta
Heta SCAN-LINE 80XL Operating and installation instructions