7
For more information go to www.ez-dock.com.
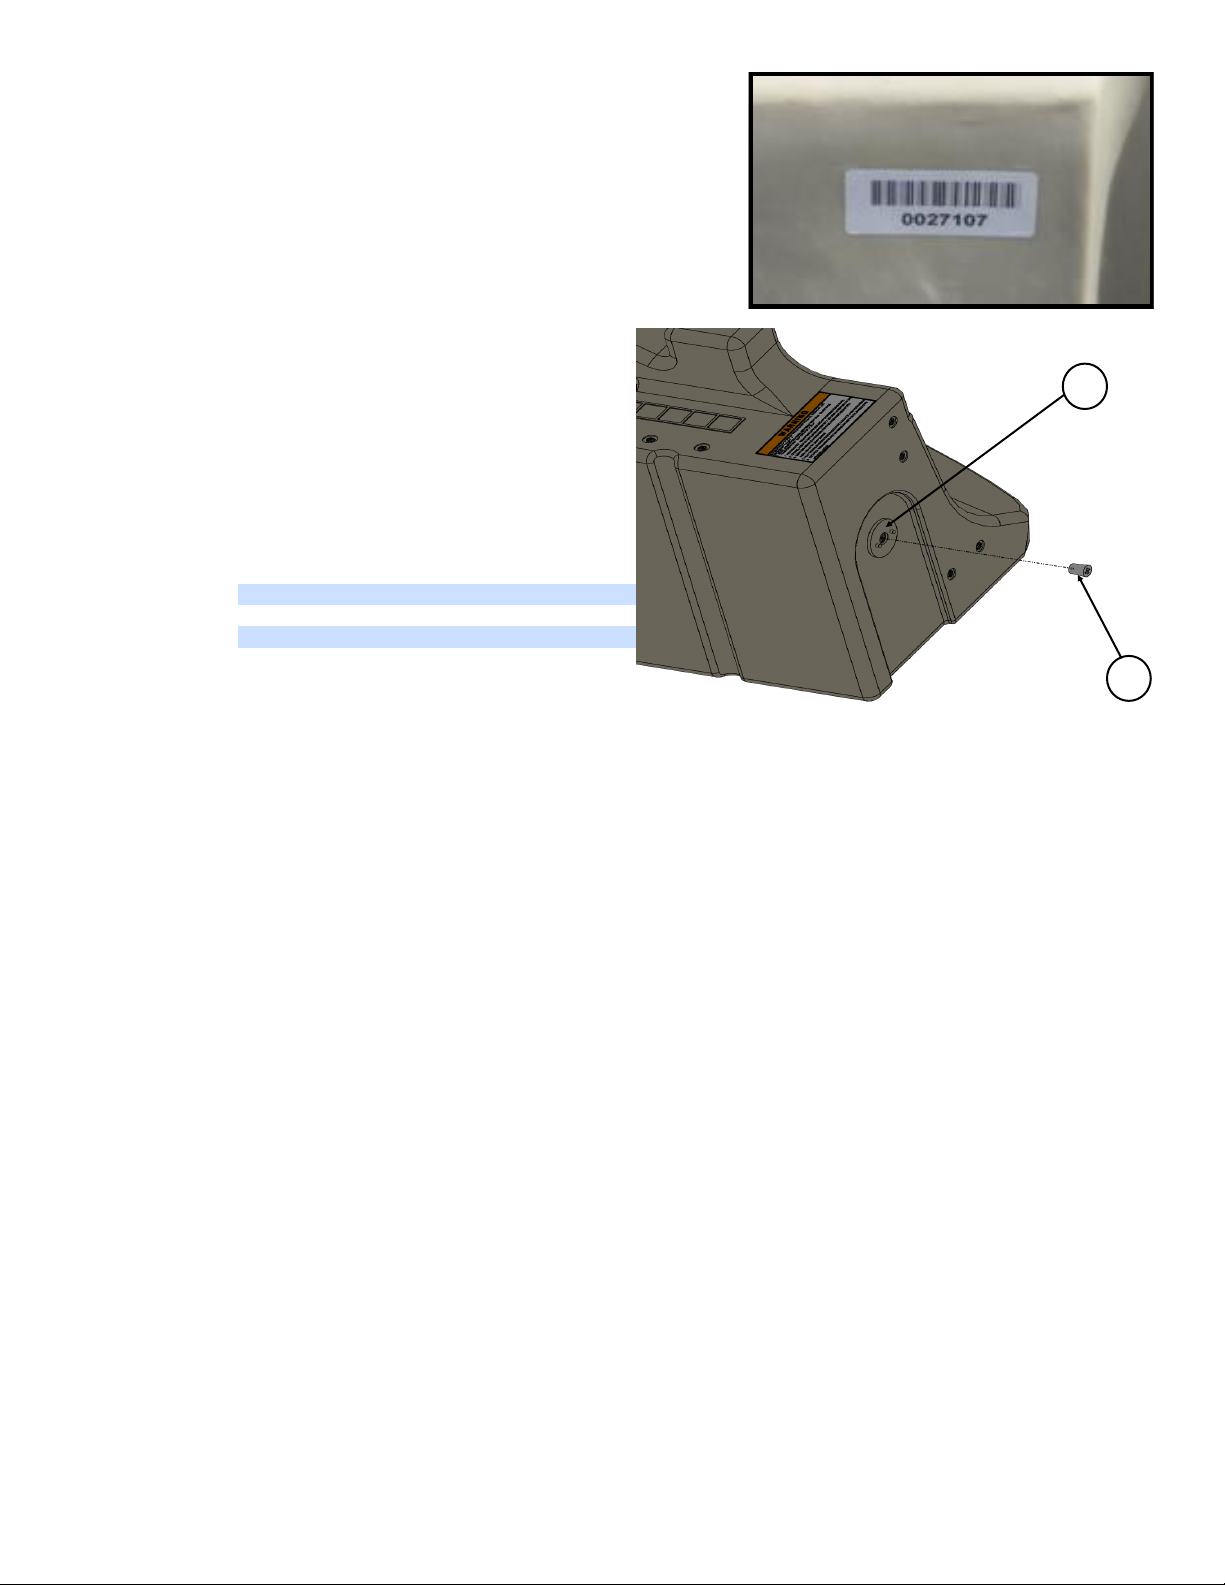
Model/Serial Number
You should register your EZ Dock product to ensure proper warranty
coverage. The location of the serial number may be difficult or
impossible to see once installed, so we suggest that you create a
record of your serial numbers and corresponding dock sections prior to
installation to insure proper identification when filing a warranty claim.
The serial numbers can be found on the vertical side wall on the logo
end of the dock sections (Figure 1).
Every EZ Kayak Launch section has a hydrophobic
venting insert. The vent is located in one of the front
hand hold areas (Figure 2). These vents are designed to
reduce the amount of water that may enter the dock, but
still allow the dock section to breathe with temperature
variation. When possible, these vents should be
positioned towards shore and away from prevailing
wind/current direction.
Hydrophobic Vent
Figure 2.
Figure 1.
EZ Dock distributors and dealers can provide assistance with:
Features and specifications of EZ Dock’s full line of products
Installation information
Use and maintenance procedures
Accessory and repair part sales
Referrals to local dealers
Maintaining your EZ Dock System
Care and Maintenance
Cleaning: Your new EZ Kayak Launch can be easily cleaned using a brush, mild cleaning agent, and water. For
stubborn stains, use a diluted bleach solution. A power washer can be used when convenient. Algae growth at the
waterline on the product is normal and will not harm the port.
Ice: The EZ Kayak Launch floats high enough so that normal ice pressure will not harm the product. However,
if the shoreline area has ice pressure pushes, wind blown ice, or other ice flows, the dock needs to be removed or
disconnected from the moorings. In these circumstances, pipes or piles should be removed to prevent bending due to
ice pressure.
Removal: If the EZ Kayak Launch is removed at anytime for storage, it should not be dragged over rough gravel
or other sharp objects. The EZ Kayak Launch may be stored outside without any special care when stored on edge or
with the walking surface facing up.
Customer Service Assistance:
When calling for service assistance, please know the purchase date, model and/or serial number of your EZ Kayak
Launch. You will also need your serial number for product registration. This information will help us to better respond to
your request. If you need replacement parts, contact your dealer to obtain only genuine parts. These parts will fit right
and work correctly because they are made with the same precision used to build your EZ Kayak Launch. To locate
replacement parts in your area, call 1-800-654-8168 (US and Canada), 1-417-235-2223 (Africa, Asia or Central or
South America), or +46 (0) 380 47 300 in Europe. French speaking residents in Quebec should call 1-800-654-
8168. These numbers will put you in contact with your nearest distributor/dealer. You may also locate your
nearest distributor or dealer by logging onto our website at www.ez-dock.com.
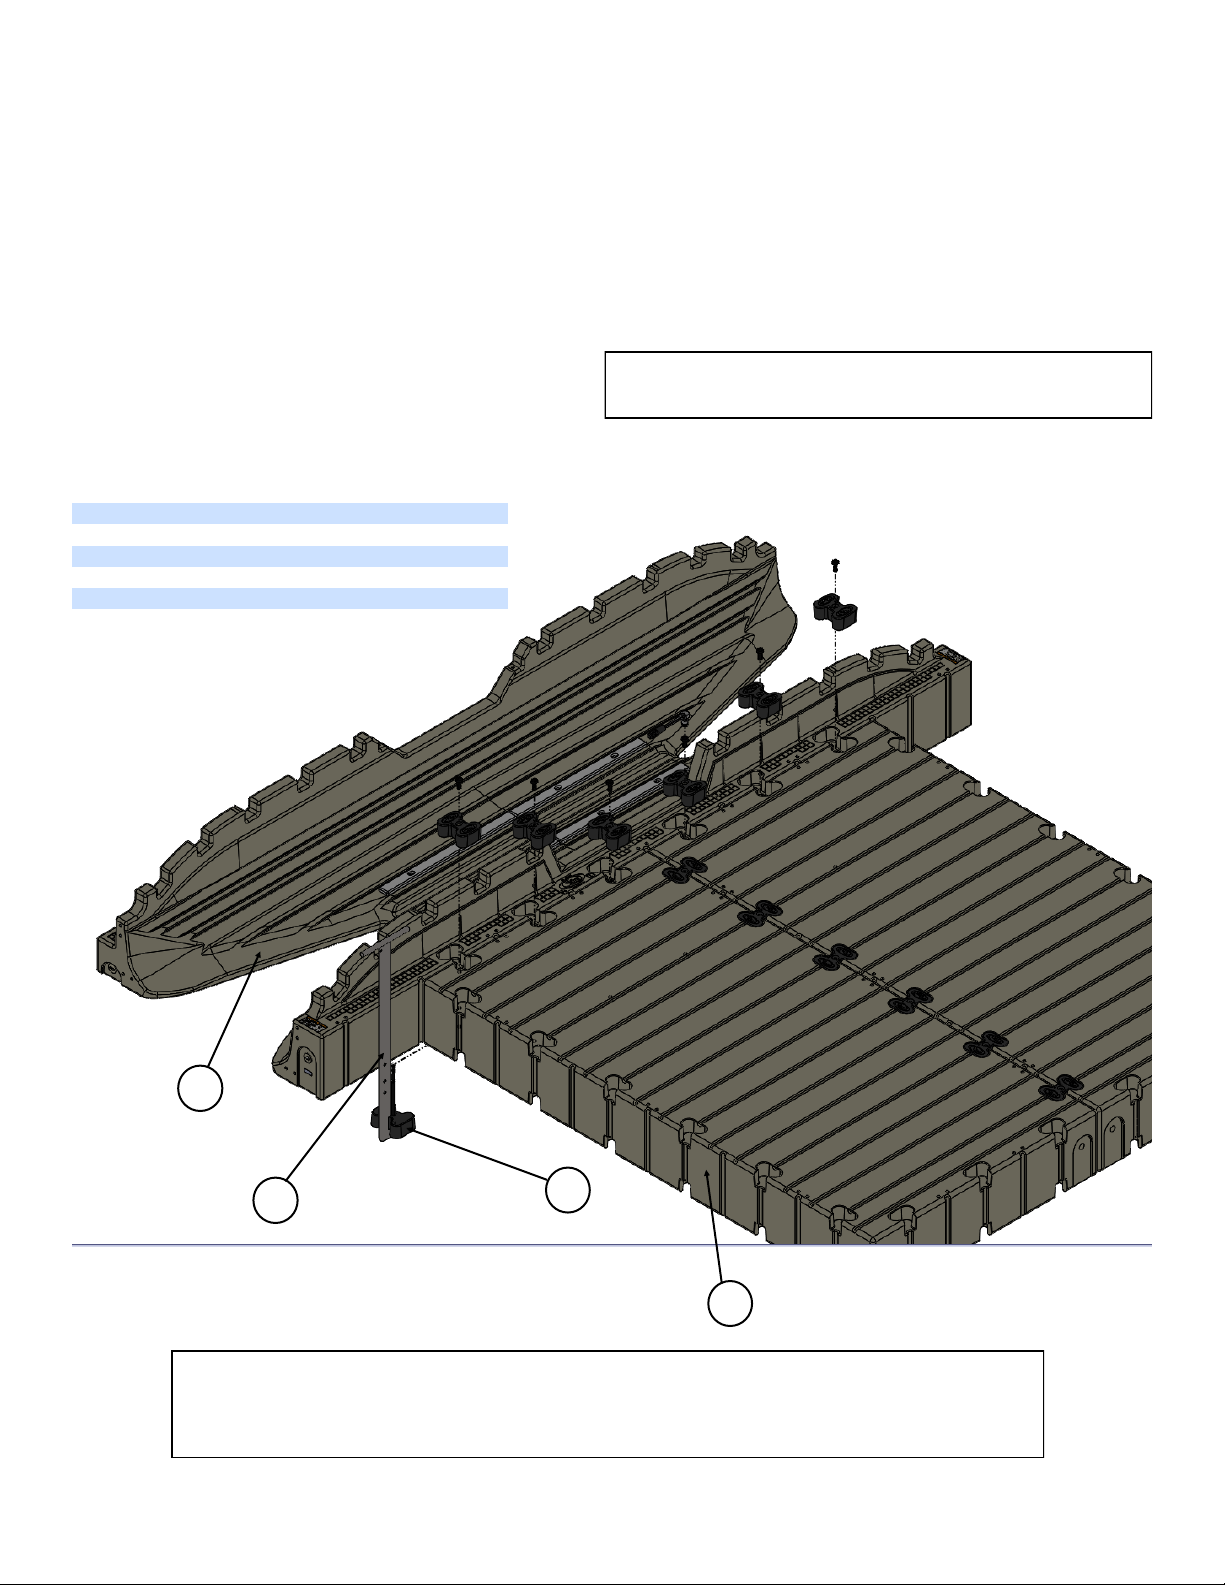
1
2
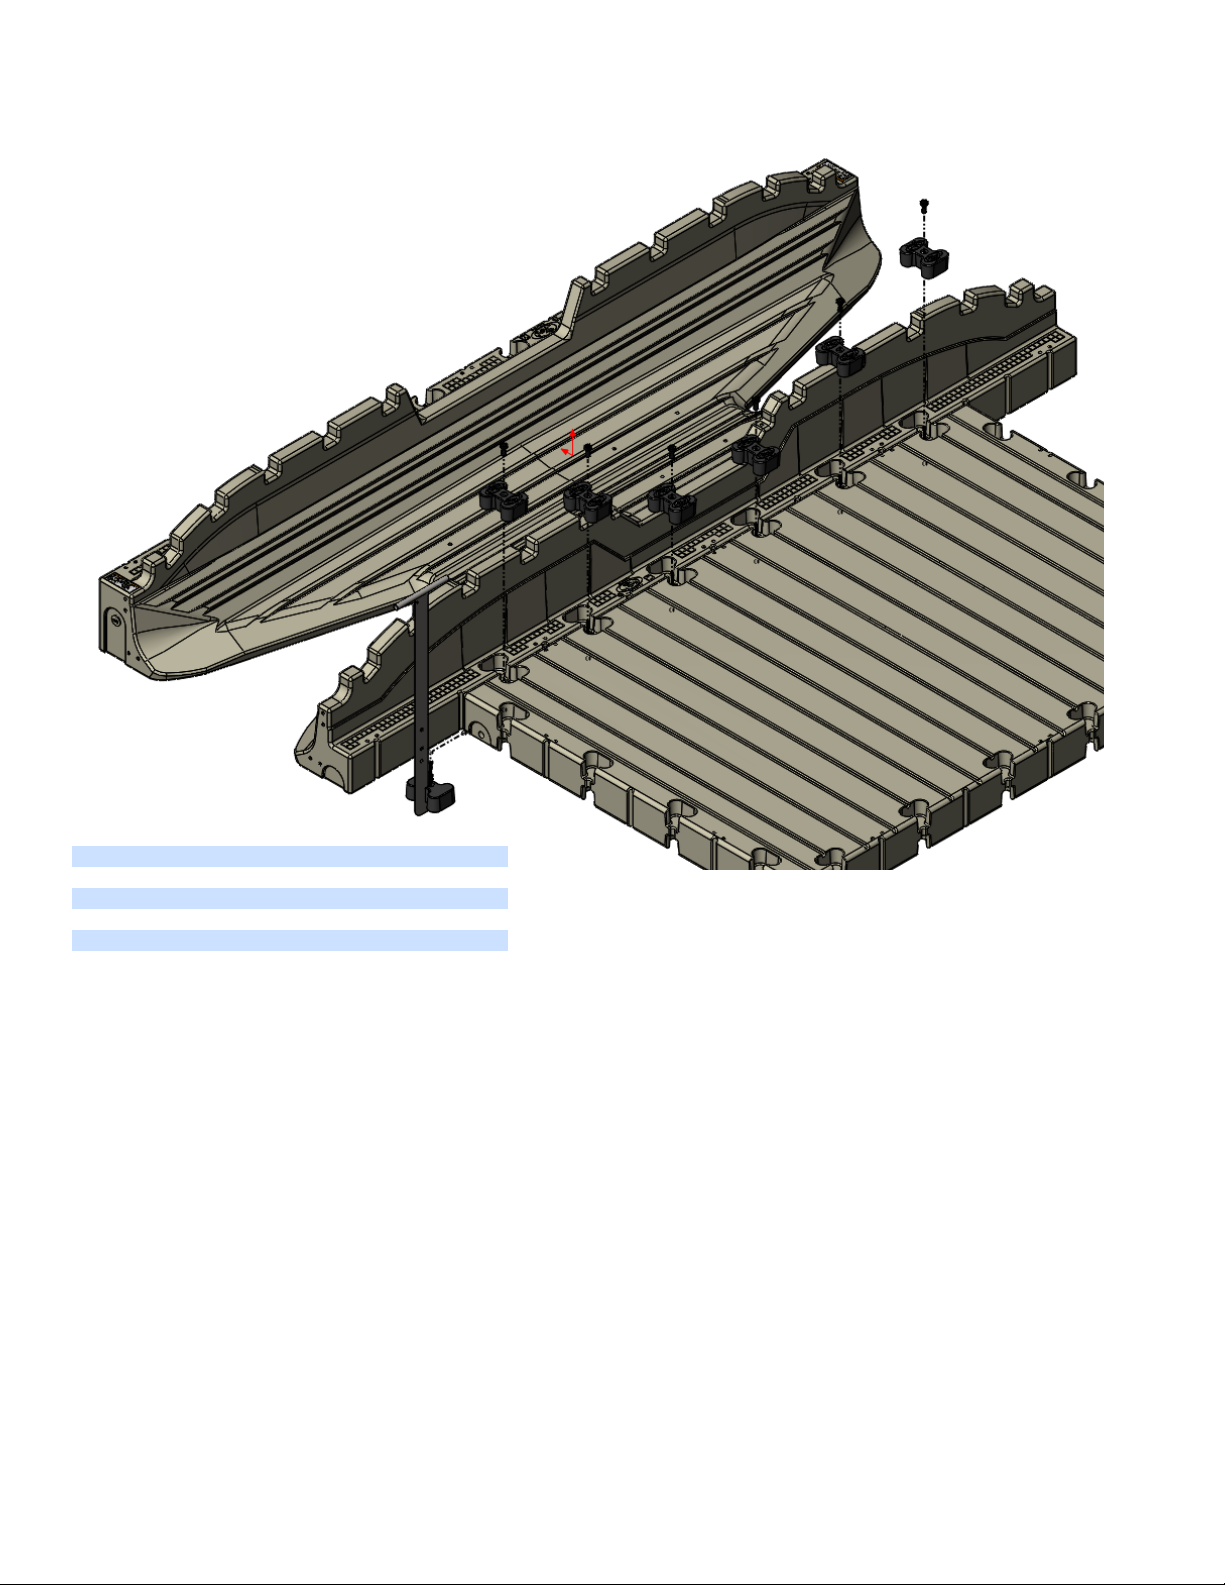
ITEM QTY PART NUMBER DESCRIPTION
11103565 Spinweld 1.9”-1/4” FPT Flush
219000028 Hydrophobic Vent 1/4” NPT