A
B
C
E
D
1
2
3
4
5
Operation
Filling The Tank
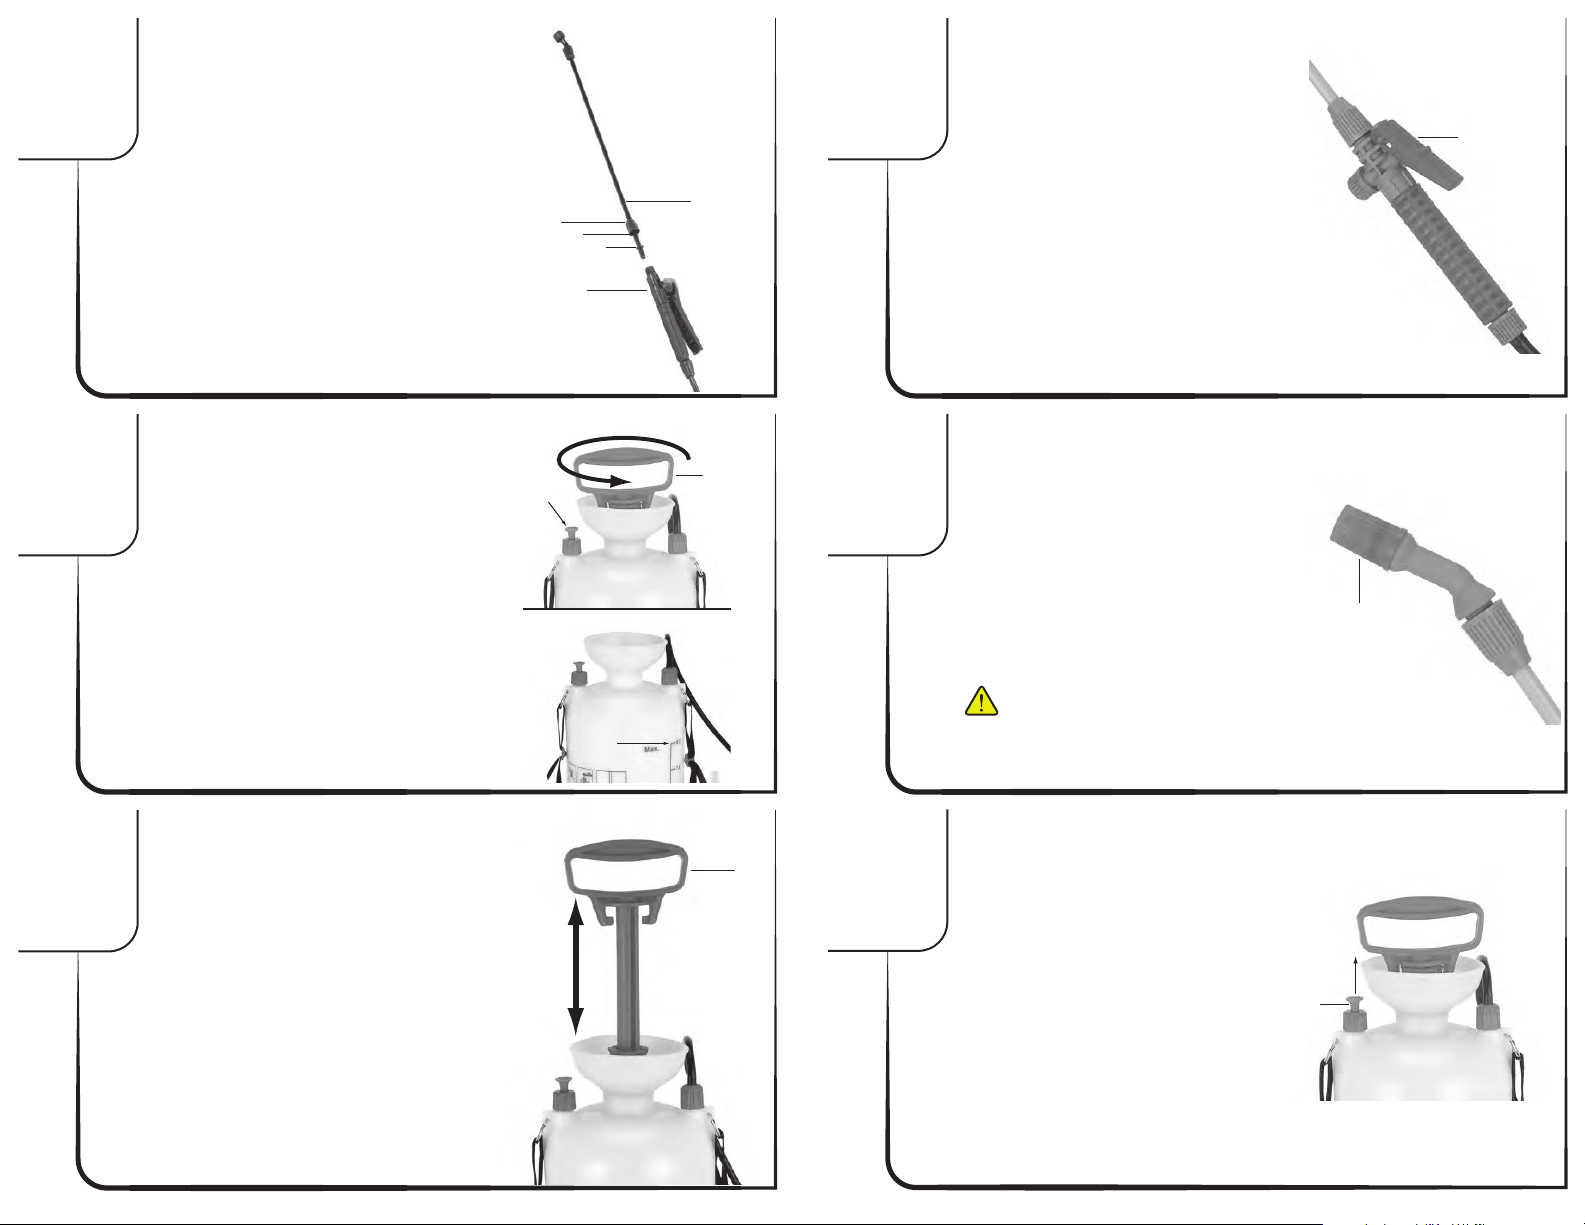
1. With the pump handle (A) in the down position, rotate
counterclockwise to loosen. Remove the pump.
Warning: Do not open bottle until pressure has been
released.
2. Fill tank according to the manufacturer’s instruction for
the chemical being used.
Caution: Do not exceed “Max Fill” line.
3. Replace the pump. Rotate handle clockwise to tighten.
Pump Handle Installation
1. To release the pump, rotate handle (A) to the central
"unlock" position and lift up.
Note: use caution not to loosen the pump from the tank.
2. Pump the handle up and down approximately 20-30
times to pressurize the tank.
3. Lower the pump handle and rotate to the
"locked" position.
Spraying
1. To start spraying, depress the thumb lever (A) on the
controller.
2. To stop spraying, release the thumb lever.
3. For continuous operation, depress and slide the thumb
lever forward to lock-on position. The sprayer will
continue to operate until thumb lever is pulled backward
and released.
Nozzle Adjustment
1. To adjust the spray pattern, rotate the nozzle (A):
Clockwise = Jet Counterclockwise = Fine Mist
6Pressure Release
1. To Release pressure, lift up on the top of the pressure
release valve (A).
CAUTION: Do not adjust the nozzle with the thumb lever depressed. Do
Not unscrew the nozzle completely.
A
Pressure
Release
Valve
Max. Fill
A
A
A
A
Attach the Wand
Rotate wand nut (A) counter clockwise to loosen.
Insert the wand shaft (B) through the nut (A), collet (C),
O-ring (D) and into the handle (E) until it bottoms.
Rotate wand nut clockwise to secure wand.