INSTALLATION
)5
6
35(3$5$7,21
1. Il est conseille de nettoyer les surfaces en email et en verre a l’aide d’un chiffon doux et humide.
2. Il est conseille de nettoyer le four et l’équipement de four (la grille, la plaque, etc.) a l’aide d’une solution
chaude imbibee d’un produit nettoyant.
3. Avant de mettre en marche pour la première foi la cuisinière, il est conseille de faire chauffer les
plaques pendant env. 3 minutes, exceptionnellement dans ce cas sans casserole.
4. Faire fonctionner le four pendant environ 1 heure en réglant le sélecteur sur la température la plus
élevée. L’odeur et la fumée présentes pendant ces actions ne sont pas gênantes si on ventile bien la
cuisine, par exemple en ouvrant la fenêtre.
,167$//$7,21
%5$1&+(0(17
/DFXLVL L¼UH HSRVV¼GHSDVGHF¶EOHGmDOLPH WDWLR /HEUD FKHPH WGHODFXLVL L¼UH
GRLW ¾WUH HIIHFWXH SDU X L VWDOODWHXU KDELOOH RX X WHFK LFLH DXWRULVH SDU OH
FR VWUXFWHXUH DFFRUGDYHFODORLH YLJXHXUGD VFKDTXHSD\V,OHVWL WHUGLWGHIDLUH
GHVPRGLILFDWLR VGD VOmL VWDOODWLR ½OHFWULTXHGHODFXLVL L¼UH
•
Dans la partie arrière de la cuisinier il y a une latte de connexion avec 6 bornes rayées dont 3 bornes de
phase signées L1 — L2 — L3 et 2 bornes de câble neutre, signées N — N (dessin 7), qui doivent être
compactes. Il y a trois éléments qui sont joints a la latte de connexion. La borne de terre est signée par
.
•
La cuisinière est approprié a l’alimentation de courant alternatif, monophasé de la tension 230V ~50Hz
(dessin 7b). On peut la adopter a l’alimentation de triphase 400V ~3N, 50Hz (dessin 7a). Pour ça il faut
quitter les éléments des bornes L1 - L2 - L3.
•
L’installation électrique qui alimente la cuisinière devrait être munie d’un interrupteur de secours
permettant de couper le courrant en cas de panne. La distance entre les éléments de contact de
l’interrupteur devra être de 3 mm au minimum.
a) b)
Dessin 7 Dessin 8
•
Câble d’alimentation 1(dessin 8) brancher a la latte de connexion 2en accord avec la plaque des
connexion (dessin 7). Fixer le câble dans l’attache 4. Les fissures situées sous les trous 6rendent
possibles l’accès aux vis de câble 1dans l’attache 4.
•
Apres le branchement de la cuisinière il faut assurer la latte de connexion.
•
Pour le faire il faut desserrer les vis 5qui fixent la couverture de protection 3de cote gauche de la
cuisinière 7. Tourner la couverture de protection 3de 180’ autour de l’axe verticale et après par les
étriers 8le poser dans les trous 6, le serrer avec la cuisinière 7et le visser par les vis 5.
L1 L2 L3
N
230V
230V
230V
PE
L1 L2 L3 NN
400V 50Hz3N ~
5 x 1,5 mm2
L1 N
230V
PE
L1 L2 L3 NN
230V ~ 50Hz
3x6mm
2
14662
3
8
7
5
180
OVEN
GB
11
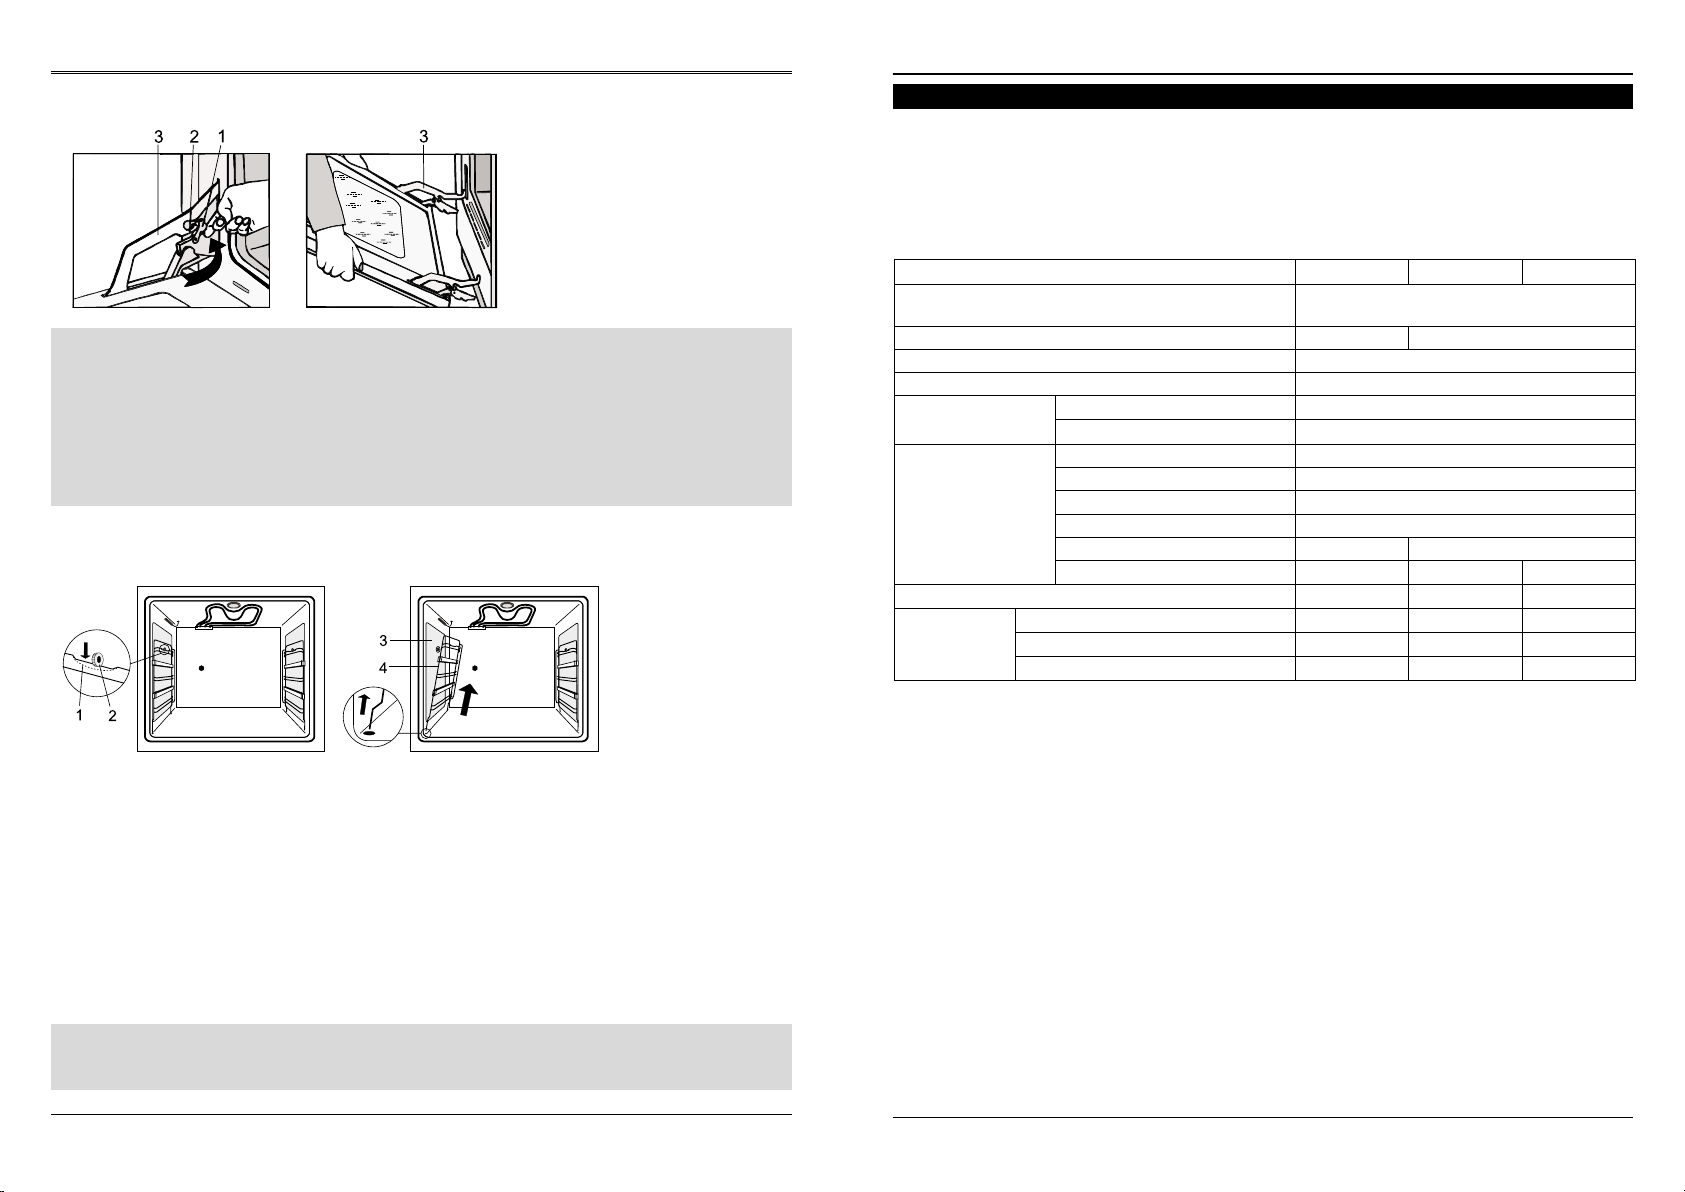
Grilling with roasting-spit
Roasting-spit is used to rotary grilling such dishes as poultry, sausages, shashliks etc.
Operating the oven:
−remove all unnecessary outfit from the oven,
−slide in the roasting-spit frame on the appropriate level,
−slide one fork onto the spit and stick meat onto it while paying attention it is symmetrical along the
stick; then slide in the second fork and secure it in its position be tightening the set screw,
−insert the pointed end of spit into the roast-spit drive connection, push it home and rest the other
end of spit on the frame,
−screw out the handle and close the door,
−turn on the oven, adjust the temperature and, possibly, set the time of grilling,
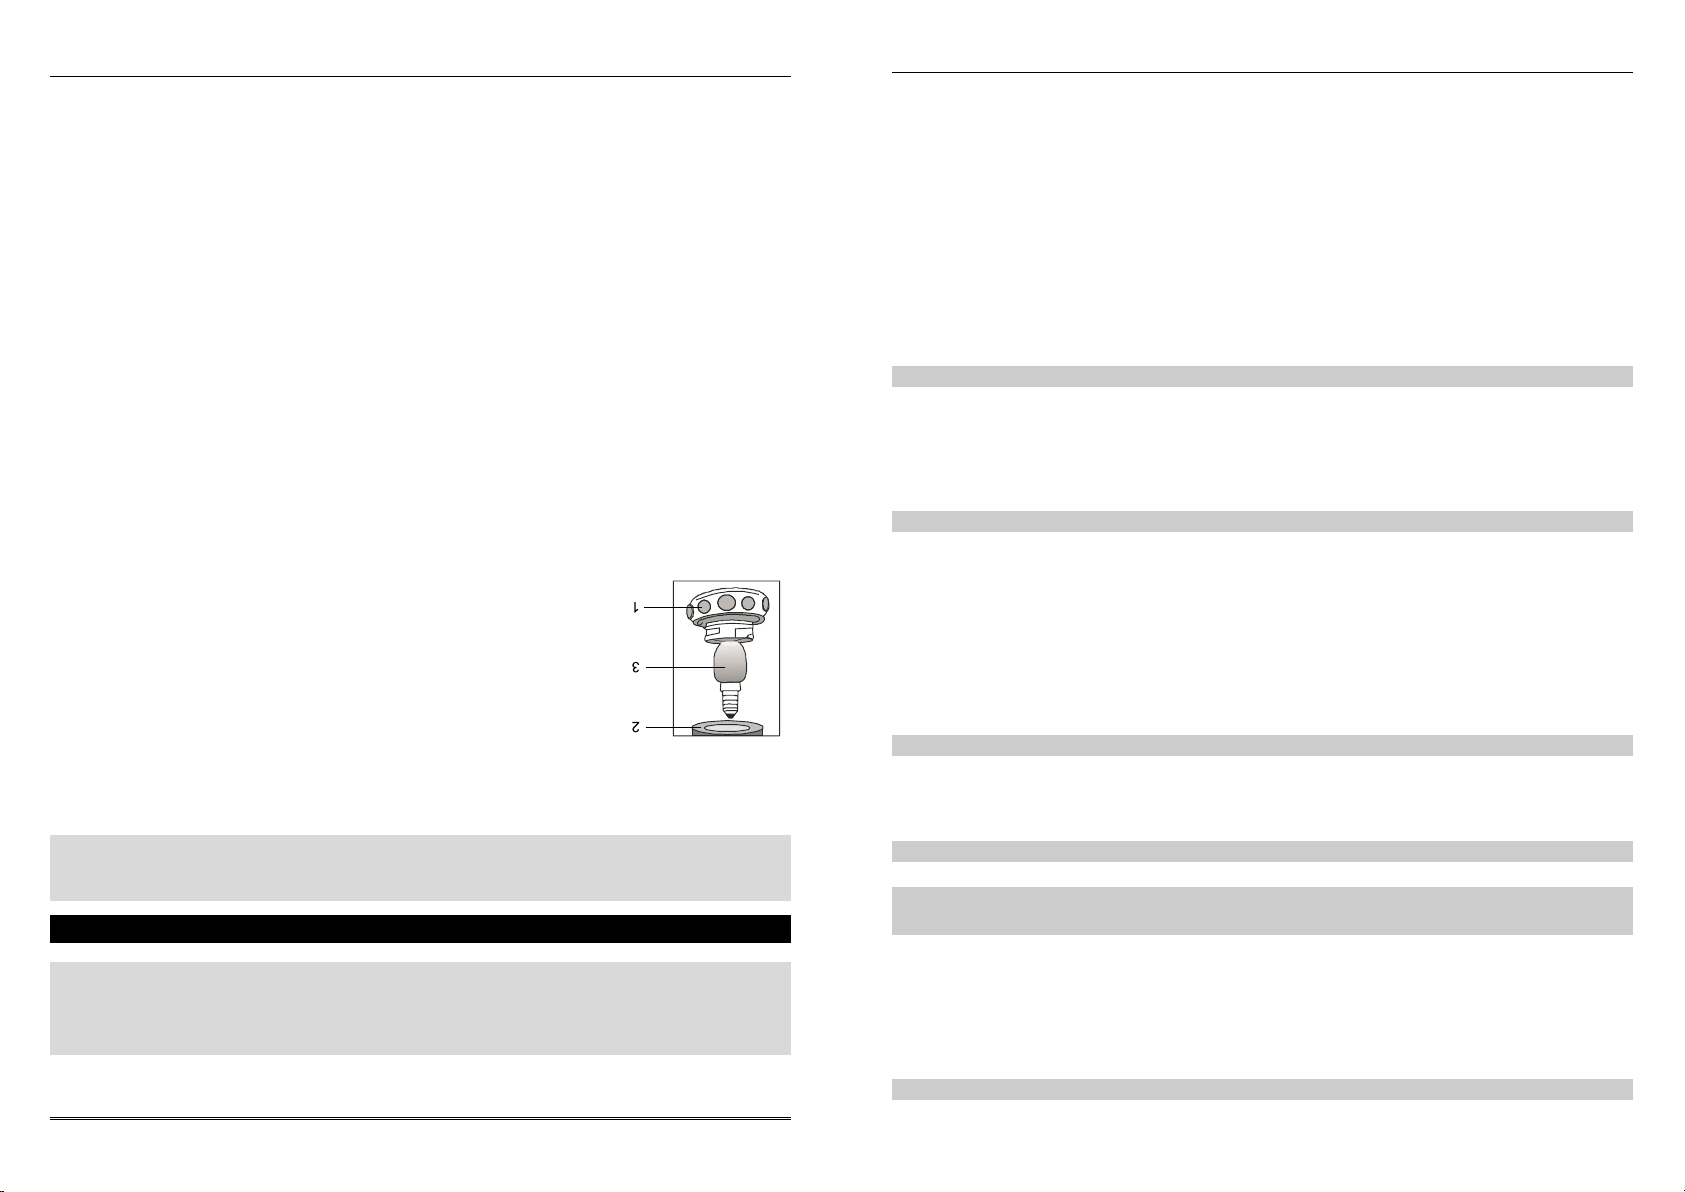
Fig. 19
1 – grill heater
2 – roasting-spit drive
3 – forks
4 – spit
5 – baking tray (drip tray)
6 – roasting-spit tray
7 – handle
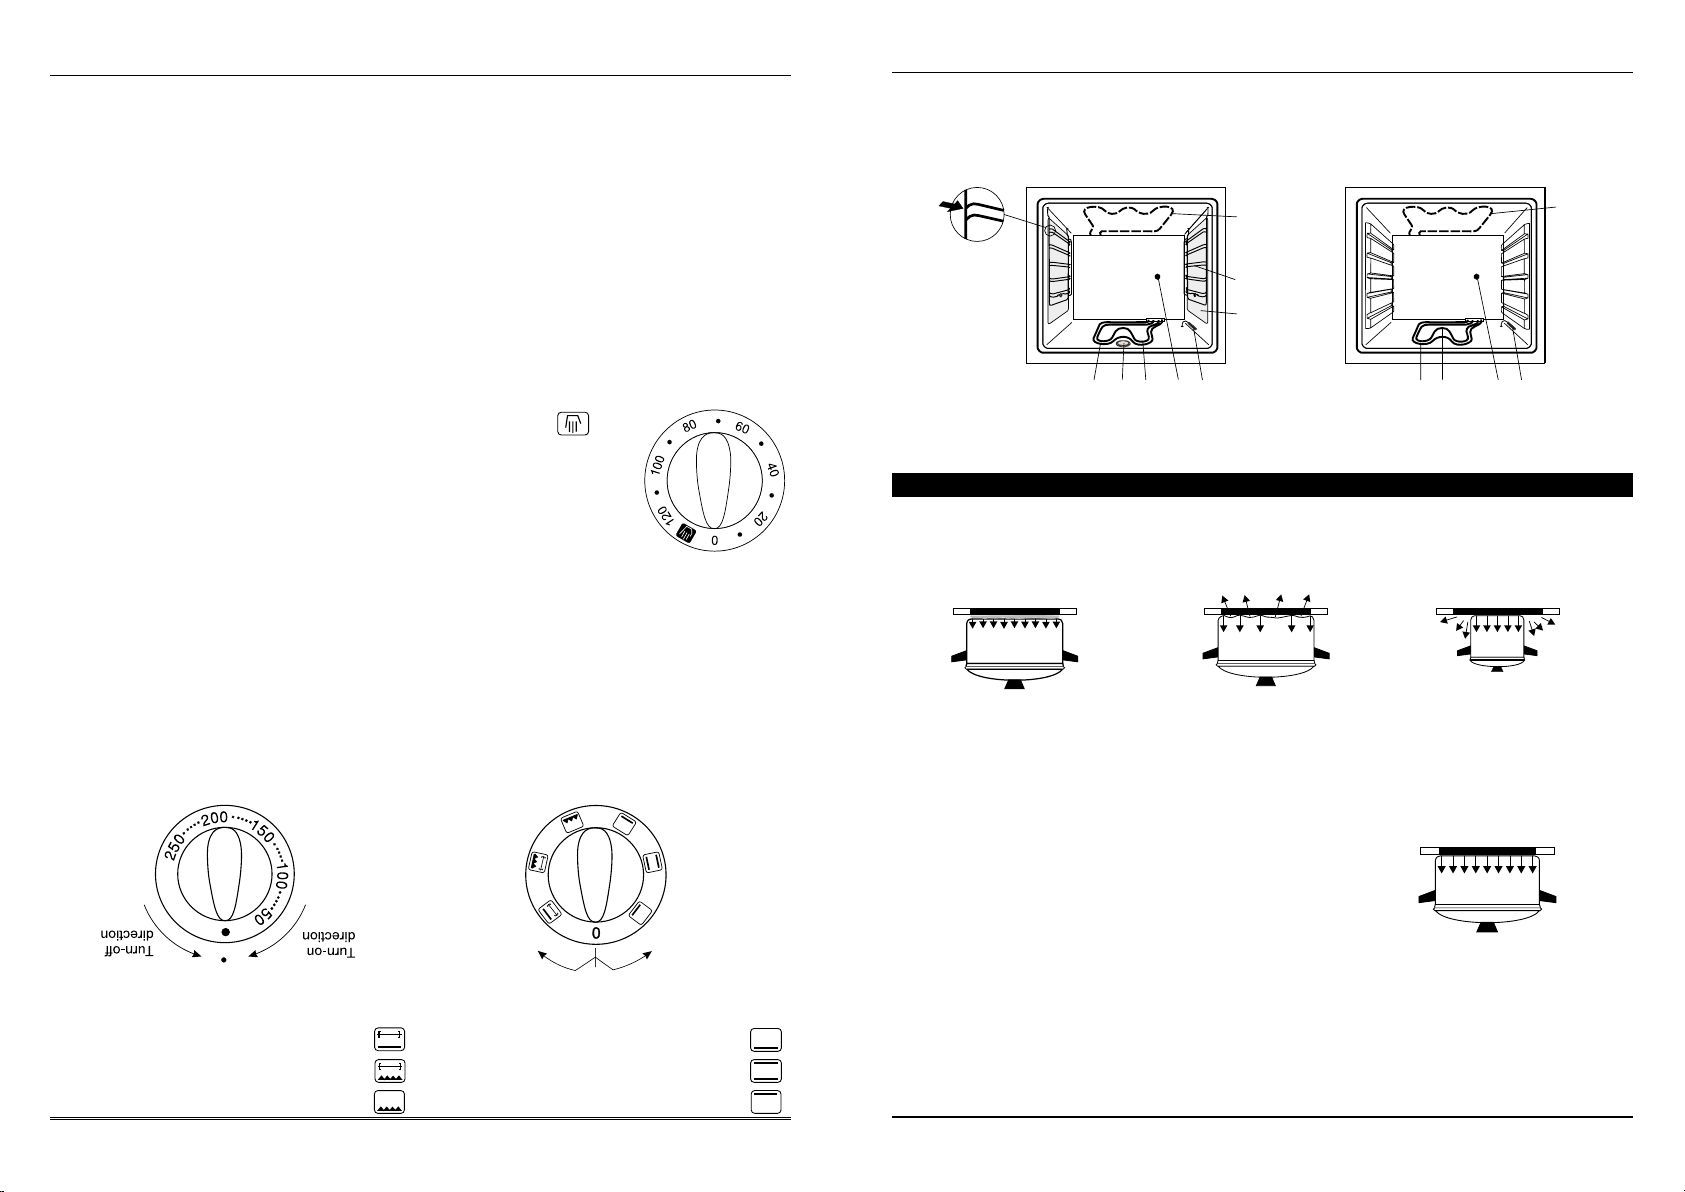
Grilling with upper heater
This function allows for slower grilling of dishes on a roasting spit. While using this function proceed as
above.
5.5 GENERAL HINTS ON PREPARING DISHES
•When the red pilot lamp goes off, it means the oven has reached the temperature required.
•For baking cakes you can use traditional tin trays and also Teflon covered trays, ceramic and glass
trays and aluminium foil. New tin tray should be baked in a strongly heated oven before first use.
•Trays should be filled with dough up to 2/3 of their height to leave enough place for the dough to rise..
Baking tins should be placed in the centre of the wired shelf.
•Follow closely the instructions on preheating the oven since different cakes have different
requirements. Usually cakes are baked in temperature about 160 – 200
0
C. While baking the door
should be kept closed, opening can make cake fall.
•When selecting the temperature of baking, consider the following rules:
– dough rolled out to thin cake – high power, short baking time,
– thick and liquid dough – lower power, longer baking time.
•While baking the cake should be heated evenly. This requirement if fulfilled when function is
chosen.
•In order to check if the baking is ready, a few minutes before switching off the oven, a wooden rod
should be put into the cake. If pastry does not stick to the rod – the baking is ready. After the baking,
the cake should be preferably left in the oven for approximately 5 more minutes.
•For roasting meat you can use ceramic pots, glass, enamel and stainless steel pots, and cast-iron pots
with heat resistant handles. We recommend using function . The roasting temperature is mainly
dependent on type and size of meat. Typically, the roasting temperature is from 200 – 250
0
C.
•Below, tables summarize approximate cooking timings for dough and meat. These are indicative
values, which in practice may vary up and down. The best solution is to make several tries for a
particular dish and then note down the optimum time and temperature.