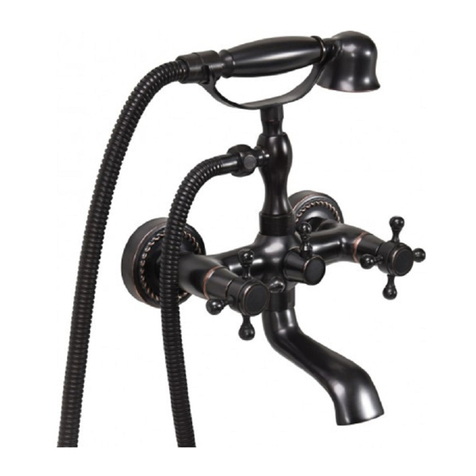
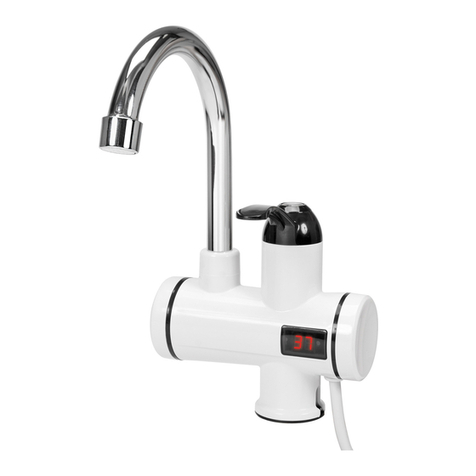
Fala Alicante 75774 Owner's manual

INSTRUKCJA MONTAŻU I EKSPLOATACJI BATERII
INSTALATION AND OPERATION OF FAUCET INSTRUCTION
INSTRUCȚIUNI DE INSTALARE ȘI FUNCȚIONARE PENTRU BATERIE
PL
GB
RO
INSTRUKCJA OBSŁUGI 1
MONTAŻBATERII NAŚCIENNEJ
FAUCETS MOUNTING ON VERTICAL SURFACES
MONTAREA BATERIEI PE SUPRAFEȚE VERTICALE
MONTAŻBATERII SZTORCOWEJ
FAUCETS MOUNTING ON HORIZONTAL SURFACES
MONTAREA BATERIEI PE SUPRAFEȚE ORIZONTALE
III IV
II
I
VIV
VII VIII

INSTRUKCJA OBSŁUGI
2
CZYNNOŚCI SERWISOWE
MAINTENANCE
ÎNTREȚINERE
IX X
XI
XIV
XIIIXII

INSTRUKCJA OBSŁUGI 3
UWAGA! Przed rozpoczęciem montażu, demontażu, serwisowania i
eksploatacji produktu należy przeczytaćcałą instrukcję. Instrukcjęna-
leży zachowaćna czas eksploatacji produktu.
UWAGA! Przed rozpoczęciem montażu, demontażu, serwisowania pro-
duktu należy odłączyćdopływ wody do baterii. W baterii oraz części
instalacji pomiędzy zaworem, a bateriąmoże pozostaćwoda. Należy
zabezpieczyćotoczenie przed skutkami jej wycieku.
Wskazówki dotyczące montażu
UWAGA! Wężyki do baterii sztorcowych należy dokręcaćbez użycia narzędzi.
Zbyt mocne dokręcenie wężyków może uszkodzićuszczelki i doprowadzić
do utraty szczelności połączenia.
Wymagane jest, aby wszelkie czynności związane z montażem i demon-
tażem oraz pracami serwisowymi dokonywałspecjalista z odpowiednimi
kwalifikacjami. Producent nie bierze odpowiedzialności za szkody powstałe
wskutek nieumiejętnego montażu lub montażu przez specjalistębez wyma-
ganych kwalifikacji.
Montażbaterii należy przeprowadzaćz należytąstarannością, dbając o to,
aby nie uszkodzićbaterii oraz akcesoriów będących na wyposażeniu baterii.
Podczas dokręcania połączeńgwintowanych należy stosowaćtylko taką
siłę, jaka jest niezbędna do uzyskania szczelności połączeńwodnych. Na-
leży uważać, żeby zbyt mocnym dokręcaniem nie doprowadzićdo uszko-
dzenia gwintu i / lub uszczelek. Uszkodzenie gwintu zniszczy bezpowrotnie
połączenie.
Rozstaw średnic otworów montażowych baterii naściennych wynosi 150
mm. Baterie naścienne wyposażono w złącza mimośrodowe, ich użycie nie
jest konieczne do montażu baterii, ale w razie potrzeby pozwala dopasować
średnicęi rozstaw otworów wlotowych baterii do wylotów rur z ciepłą i zimną
wodą.
Do baterii dołączono narzędzie pomocne przy montażu i większości prac
serwisowych. Zaleca siępodłożyćkartkępapieru pomiędzy klucz, a po-
wierzchnie chromowanej nakrętki. Pozwoli to zmniejszyćryzyko powstania
zarysowańchromowanych powierzchni.
Przed rozpoczęciem eksploatacji baterii należy sięupewnić, że wszystkie połą-
czenie wodne sąszczelne.
UWAGA! W przypadku pogorszenia działania przełącznika prysznic / wanna
w baterii wannowej. Należy sprawdzićczy nie zostałw nim nagromadzony
osad wapienny. Po zdemontowaniu przełącznika należy go umieścićw 2%
roztworze octu z wodą. Należy wziąć pod uwagę, że podczas eksploatacji
przełącznika zamontowane w nim uszczelki mogąulec odkształceniu i po-
nowne ich zastosowanie może prowadzićdo utraty szczelności połączenia.
W przypadku wystąpienia wycieków po montażu przełącznika należy go
zdemontowaći wymienićwszystkie uszczelki na nowe.
UWAGA! W przypadku pogorszenia jakości strumienia wody z baterii, np.
spadek przepływu, ciśnienia, zmiana kształtu lub rozdzielenie strumienia
wody należy sprawdzićczy aerator nie zostałzanieczyszczony. Po demon-
tażu należy aerator przepłukaćpod strumieniem bieżącej wody, a osady
kamienne należy usnąć przez umieszczenie aeratora w 2% roztworze octu
z wodą.
Jeżeli aerator zostałwykonany w technologii „SMARTclean” (informacja na
opakowaniu), pocieranie palcem wylotu wody, usuwa osad kamienia wa-
piennego i przywraca strumieńjak w nowej baterii. Do tej czynności nie jest
wymagany demontażaeratora.
Wskazówki dotyczące eksploatacji i konserwacji baterii
Wypływ wody z baterii następuje po uniesieniu uchwytu. Obrót do oporu w
kierunku oznaczonym kolorem niebieskim pozwala uzyskaćstrumieńtylko
zimnej wody, obrót do oporu w kierunku oznaczonym kolorem czerwonym,
pozwala uzyskaćstrumieńtylko wody ciepłej. Pozycje pośrednie pozwalają
dobraćtemperaturęstrumienia wody. Zamknięcie strumienia wody następu-
je po opuszczeniu uchwytu.
Baterie wyposażone w głowicęwykonanąw technologii „ECOstart” (infor-
macja na opakowaniu) podczas podniesienia uchwytu umieszczonego na
wprost następuje wypływ tylko wody zimnej. W przypadku takiej głowicy
zakres ruchu w kierunku oznaczonym kolorem czerwonym jest większy niż
zakres ruchu w kierunku oznaczonym kolorem niebieskim.
Czyszczenie powierzchni baterii wolno przeprowadzaćtylko przy pomocy
PL neutralnych środków czyszczących, nanoszonych tylko za pomocąmiękkiej
ściereczki. Zabronione jest stosowanie agresywnych detergentów. Nie wol-
no używaćśrodków ściernych, a także środków czyszczących zawierających
alkohole, kwasy (za wyjątkiem 2% roztworu octu z wodą) i rozpuszczalniki.
Po wyczyszczeniu baterii należy dokładnie opłukaćjej powierzchnięczystą,
letniąwodą, po czym wytrzećdo sucha.
Niewielkie zabrudzenia należy czyścićwodąz mydłem, zabronione jest
czyszczenie baterii na sucho.
Woda zasilająca baterięmusi byćoczyszczona ze wszelkich zanieczyszczeń
mechanicznych i chemicznych. Producent nie bierze odpowiedzialności
za uszkodzenia baterii spowodowane zanieczyszczeniami wody.
UWAGA! Niektóre elementy baterii mogąsięróżnićwyglądem od elemen-
tów przedstawionych na ilustracjach w instrukcji, jednak sposób montażu,
demontażu, serwisowania oraz ich funkcja sąidentyczne jak elementów
wchodzących w skład zakupionego produktu.
Producent: TOYA SA, ul. Sołtysowicka 13-15, 51-168 Wrocław, Polska
Parametry techniczne sieci wodociągowej zgodne z EN 817:
Zalecane ciśnienie dynamiczne wody: 0,1 – 0,5 MPa
Graniczne ciśnienie dynamiczne wody: ≥0,05 MPa
Graniczne ciśnienie statyczne wody: ≤1,0 MPa
Temperatura wody: ≤65OC (maks. ≤90OC)
ATTENTION! Before you start the assembly, disassembly, maintenance
and operation of the product, be sure to read the entire manual. The
manual must be kept for the whole time of product usage.
ATTENTION! Before you start the assembly, disassembly, or mainte-
nance of the product, you should disconnect the water supply to the
mixer tap. In the mixer faucet, and in the sections of the installation
between valve and faucet, some water may remain. You must secure
the environment from the effects of its leak.
Installation guidance
ATTENTION! Small hoses for the pillar faucets should be tighten without the
use of tools. Too strong tightening of the small hoses can damage gaskets
and lead to loss of the connection tightness.
It is required that all activities relating to the assembly and disassembly, and
also to the maintenance works, be performed by a specialist with appropri-
ate qualifications. The manufacturer accepts no responsibility for damages
caused as a result of the unprofessional assembly or disassembly by a spe-
cialist without the required qualifications.
Mixer tap installation should be carried out with due diligence, ensuring that the
mixer faucet and accessories, which are equipment of it, are not damaged.
While tightening the threaded connections, use only such force as it is nec-
essary to obtain the tightness of water connections. You should take care
that too strong tightening should not damage the threads and / or gaskets.
Thread damage will destroy irreparably the connection.
Diameters spacing of the assembly holes is 150 mm in the wall-mounted mix-
er taps. Wall-mounted mixer taps are equipped with eccentric joints, usage
of these joints is not necessary to mount the taps, but if it is necessary, they
allow you to adjust the diameter and spacing of faucets inlet holes to the
outlet pipes with hot and cold tap water.
The mixer faucet is supplied with the tool, which can be helpful with the as-
sembly and most of the maintenance works. It is recommended to put a piece
of paper between the key, and nut chrome surfaces. This will reduce the risk
of scratching the chrome surfaces.
Prior to the start of mixer faucet operation, you shoud make sure that all water
connections are tight.
ATTENTION! In the case when operation of the switch for shower/bath in
the bathtub faucet is deteriorated you should check whether limescale is col-
lected in it. After removing the switch, you should put it in the 2% solution of
vinegar and water. Consider that during operation of the switch, the gaskets,
which are mounted in it, can deform and their use can lead to loss of tight-
ness of the connection. In the event of leakage after the switch assembly it
should be dismantled and you should replace all gaskets with new ones.
GB

INSTRUKCJA OBSŁUGI
4
ATTENTION! In the event of a deterioration in the quality of the water
stream from mixer faucet, for example, when the flow pressure decreases ,
or when the shape of the water stream changes, or its separation changes
, you should check whether the aerator is not dirty. After dismantling rinse
the aerator under running water and remove stone sediment by placing the
aerator in a 2% sol
If the aerator is made with “SmartClean” technology (information about it is
located on the packaging), rubbing finger across the water outlet removes
limestone and restores the stream as in a new mixer faucet. For this proce-
dure the disassembly of aerator is not required.
Guidance for operation and maintenance of the mixer faucet
Water flow from the mixer faucet occurs after lifting its handle. Turning in the
direction of color blue until it stops can get you a stream of cold water only,
turning in the direction of color red until it stops can get you a stream of warm
water only. Middle positions allow you to choose the temperature of the wa-
ter stream. After the handle is lowered the water stream is cut off.
If the mixer faucet is equipped with a head made in technology “Ecostart”
(information about it is located on the package), lifting up the handle placed
in front of the outflow starts only cold water stream. In the case of such a head
the range of motion in direction of the red color it is greater than the range
of movement in the direction of blue color.
Cleaning the surfaces of the mixer faucet must be carried out only with a
neutral cleaner, applied only with a soft cloth. It is forbidden to use aggres-
sive detergents. It is forbidden to use abrasives, as well as cleaning agents
containing alcohols, acids (except for the 2% solution of white vinegar with
water) and solvents.
After cleaning the batteries, you should thoroughly rinse its surface with
clean, tepid water, then wipe it dry.
A small dirt should be cleaned with soap and water, it is prohibited to clean
the mixer faucet dry.
Water supplied to the mixer faucet must be cleaned from all mechanical and
chemical impurities . The manufacturer accepts no responsibility for mixer
faucet damages due to contamination of water.
ATTENTION! Some elements of the batteries may vary in appearance from
the elements shown in the illustrations in the manual, but the method of
assembly, disassembly, maintenance, and their function are identical to the
elements included in the purchased product.
Manufacturer: TOYA S.A. Sołtysowicka 13-15, 51-168 Wrocław, Poland
Technical parameters of the water mains in accordance with EN 817:
Recommended dynamic pressure of water: 0.1 – 0.5 bar
Maximum dynamic pressure of water: ≥0.05 MPa
Maximum static pressure of water: ≥1.0 MPa
Water temperature: ≤65 O(C) (max. ≤90OC)
RO
ATENȚIE! Înainte de a începe activitățile de montare, demontare, întreținere
și operare a produsului, citiți întregul manual. Manualul trebuie păstrat pe
întreaga perioadăde utilizare a produsului.
ATENȚIE! Înainte de a începe activitățile de montare, demontare, întreținere
și operare a produsului, trebuie sădeconectați alimentarea cu apăla baterie.
În baterie și unele secțiuni ale instalației între robinetul de închidere și baterie
poate rămâne apă. Trebuie săprotejați zona față de efectul scurgerii apei
Instrucțiuni de instalare
ATENȚIE! Racordurile mici spre baterie trebuie strânse fărăa folosi scule.
Strângerea lor excesivăpoate duce la deteriorarea garniturilor și și pierde-
rea etanșării.
Toate activitățile de montare, demontare, întreținere a produsului trebuie
efectuate de un instalator calificat corespunzător. Producătorul nu acceptă
nicio responsabilitate pentru daune produse prin montarea sau demontarea
necorespunzătoare de către o persoanăfărăcalificarea necesară.
Instalarea bateriei trebuie făcutăcu grijăasigurând căbateria și accesoriile
nu sunt deteriorate. La strângere trebuie sănu se deterioreze filetele și/sau
garniturile. Deteriorarea filetelor duce la distrugerea conexiunii.
Distanța între diametrele găurilor de montaj este de 150 mm la bateriile mon-
tate pe perete. Bateriile montate pe perete sunt livrate cu piese de îmbinare
excentrice. Utilizarea lor nu este obligatorie dar, dacăeste necesar, ele vă
permit săajustați diametrul și distanța între găurile de intrare la cele ale
țevilor de apăcaldăși rece.
Bateria este livratăcu o sculăcare poate fi utilăla montaj și majoritatea
lucrărilor de întreținere. Se recomandăsăpuneți o bucatăde hârtie între
cheie și suprafața cromatăa piulițelor. Astfel se reduce riscul de zgâriere a
suprafețelor cromate.
Înainte de utilizarea bateriei, asigurați-văcătoate conexiunile de apăsunt
etanșe.
ATENȚIE! În cazul în care comutatorul duș/cadăde la bateria de cadă
nu funcționeazăbine, verificați dacăs-a acumulat piatrăîn interior. După
scoaterea comutatorului, puneți-l în soluție 2% oțet în apă. Rețineți că, prin
utilizare, garniturile montate pe comutator se pot deforma, ducând la pier-
derea etanșeității. În cazul unor scurgeri dupăremontarea comutatorului,
demontați-l și înlocuiți toate garniturile cu unele noi.
ATENȚIE! În cazul deteriorării jetului de apăde la baterie, de exemplu redu-
cerea presiunii sau modificarea formei jetului, trebuie săverificați dacăsita
aerator este murdară. Dupădemontare, clătiți sita aerator sub jet de apăși
îndepărtați depunerile prin cufundare în soluție 2% de oțet.
Dacăsita aerator este produsăprin tehnologie „SmartClean” (v. informațiile
de pe ambalaj), prin frecarea cu degetul a zonei de ieșire a apei se îndepăr-
teazăpiatra și se readuce jetul la calitatea inițială. Pentru aceastăprocedură
nu este necesarădemontarea sitei aerator.
Ghid de utilizare și întreținere a bateriei
Curgerea apei de la baterie are loc la ridicarea manetei. Rotind-o spre cu-
loarea albastrăpânăla refuz, curge doar apărece. Rotind-o spre culoarea
roșie pânăla refuz, curge doar apăcaldă. Pozițiile intermediare văpermit
săreglați temperatura jetului. Dupăce maneta este apăsată, curgerea apei
este oprită.
Dacăbateria este echipatăcu cap produs prin tehnologie „Ecostart” (v.
informațiile de pe ambalaj), prin ridicarea manetei din față se pornește doar
apa rece. În cazul unui asemenea cap, domeniul de mișcare spre culoarea
roșie este mai mare decât domeniul de mișcare spre culoarea albastră.
Curățarea suprafețelor bateriei trebuie făcutăcu un agent de curățare neu-
tru, aplicat doar cu o cârpămoale. Este interzis săfolosiți detergenți agresivi.
Este interzis săfolosiți abrazivi și agenți de curățare cu alcooli sau acizi (cu
excepția soluției 2% oțet în apă) sau solvenți.
Dupăcurățarea bateriei, clătiți bine suprafața cu apăcurată, călduță, apoi
ștergeți-o.
Murdăria se poate curăța cu apăși săpun, dar este interzis căcurățați ba-
teria în stare uscată.
Apa alimentatăla baterie trebuie sănu conțin impurități mecanice sau chi-
mice. Producătorul nu acceptănicio responsabilitate pentru deteriorarea
bateriei din cauza contaminării apei.
ATENȚIE! Unele elemente ale bateriei pot diferi ca aspect de elementele
ilustrate în acest manual, dar metodele de montare, demontare, întreținere
și utilizare sunt identice pentru toate elementele acestui produs.
Producător: TOYA S.A. Soltysowicka 13-15, 51-168, Wroclaw, Polonia
Parametrii tehnici ale apei de la rețea trebuie săfie în conformitate cu stan-
dardul EN 817:
Presiunea dinamicărecomandatăa apei: 0,1-0,5 bar
Presiunea dinamicămaximăa apei: >/= 0,05 bar
Presiunea static[ maximăa apei: >/= 1,0 bar
Temperatura apei: </= 65°C (max. 90°C)
Other Fala Plumbing Product manuals
Popular Plumbing Product manuals by other brands

American Standard
American Standard Fixture-Mounted Bidet Fitting 2581 parts list

Bristan
Bristan N2 SHCDIV G (D7) Installation instructions & user guide

Spectrum Brands
Spectrum Brands Pfister Rancho 8P8-WS2-RCH Quick installation guide

KWC
KWC 10.061.154.000 Features

Fleurco
Fleurco ABT4836-3 installation manual

Danze
Danze D301056 quick guide