F&U DMV9783KUC User manual

Instruction Manual
DMV9783KUC

Warnings
Important safeguards
Package contents
Disc information
Front panel
Rear panel
Remote control
Remote control functions
Function buttons
FM Function
Connections
Connections continued
Getting started
MP3 discs
Kodak picture disc
CD ripping
Copying files
Setup menu
Language
Audio
Video
Speaker setup
Digital setup
Contents
1
2
3
4-5
6
7
8
9-10
11
11
12
13-14
15-16
17
17
18
18
19-21
21-22
22-23
23-25
25
26-29

1
Do not share the same power socket unit
with other electrical appliances.
Do not dismantle, repair or re-assemble the
machine yourself.
Pull out the powerplug when not using the
machine to save electricity.
order to ensure your safety, do not pinch,
twist, pull, lengthen or subject the cord to
pressure or abuse.
Do not wet the machine or use it in a
bathroom or other humid environments
so as to avoid an accident or damage to
the machine.
Do not use the machine either below 100V
or above 240V.
When the voltage is below 100V, the
machine maynot work and its longevity will
be adversely affected. When the voltage is
above 240V, the machine may explode or
cause a fire.
Warnings
1
“The normal function of the product may be disturbed by strong Electro-Magnetic
Interference. If so, simply reset the product to resume normal operation by
following the instruction manual. In case the function could not resume,
please use the product in other location.”

2
Important safeguards
Please read though this manual before connecting and operating this product.
Do not open the cabinet of this unit.There are no user-serviceable parts inside.Refer servicing
to qualified personnel only.
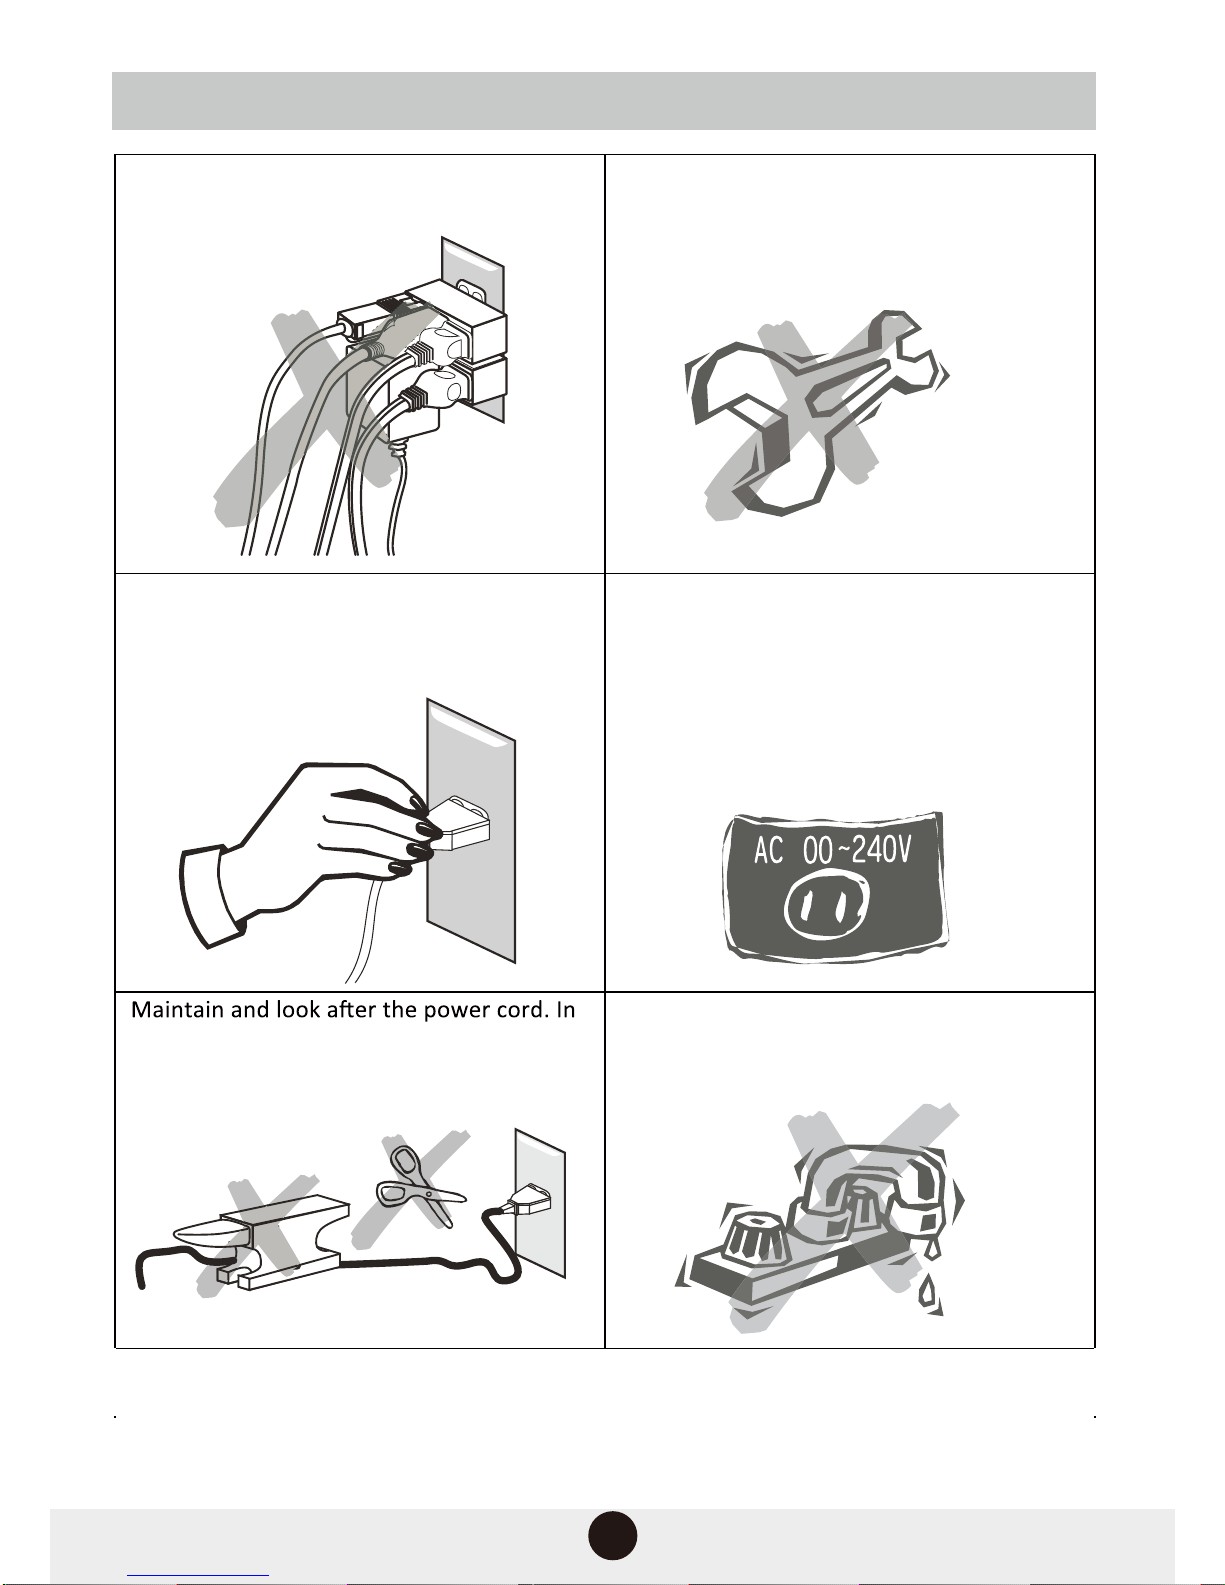
Switch the unit off when not in use. Disconnect it from the AC power supply when it is not
being used for a long time.
Do not install the unit in a place exposed to heating sources or direct sunshine.
Always keep the unit dry. Do not place it where it will be exposed to moisture or rain. It should
not be exposed to dripping or splashing liquids, and any object filled with liquid(such as a
vase) should not be placed no top of it.
Install the unit on a horizontal, flat and firm surface with good ventilation. Never block the
vents.This will cause overheating which will lead to malfunction.
Use a soft, clean cloth to clean the outside of the unit, Never clean it with chemicals
or detergent.
This manual is only a guide for user’s operation, not a criterion for configuration.
Only use attachments or accessories specified by the manufacturer.
Children should be supervised to ensure that they do not tamper with the unit.
This appliance is not intended for use by persons (including children) with reduced physical,
sensory or mental capabilities,or lack of experience and knowledge, unless they are under
supervision or instruction concerning use of the appliance by a person responsible for their
safety.
This home theatre system has been designed for use in households and similar environments,
including(but not limited to) areas such as staff kitchens in shops and offices, hotel and B&B
rooms, farmhouse, etc. Note: This product is not intended for use in industrial settings.
WARNING: Do not expose batteries to excessive heat such as sunlight or fire.
CAUTION: Always ensure that you replace the batteries in the unit with the correct type
as the wrong kind of batteries may cause an explosion.
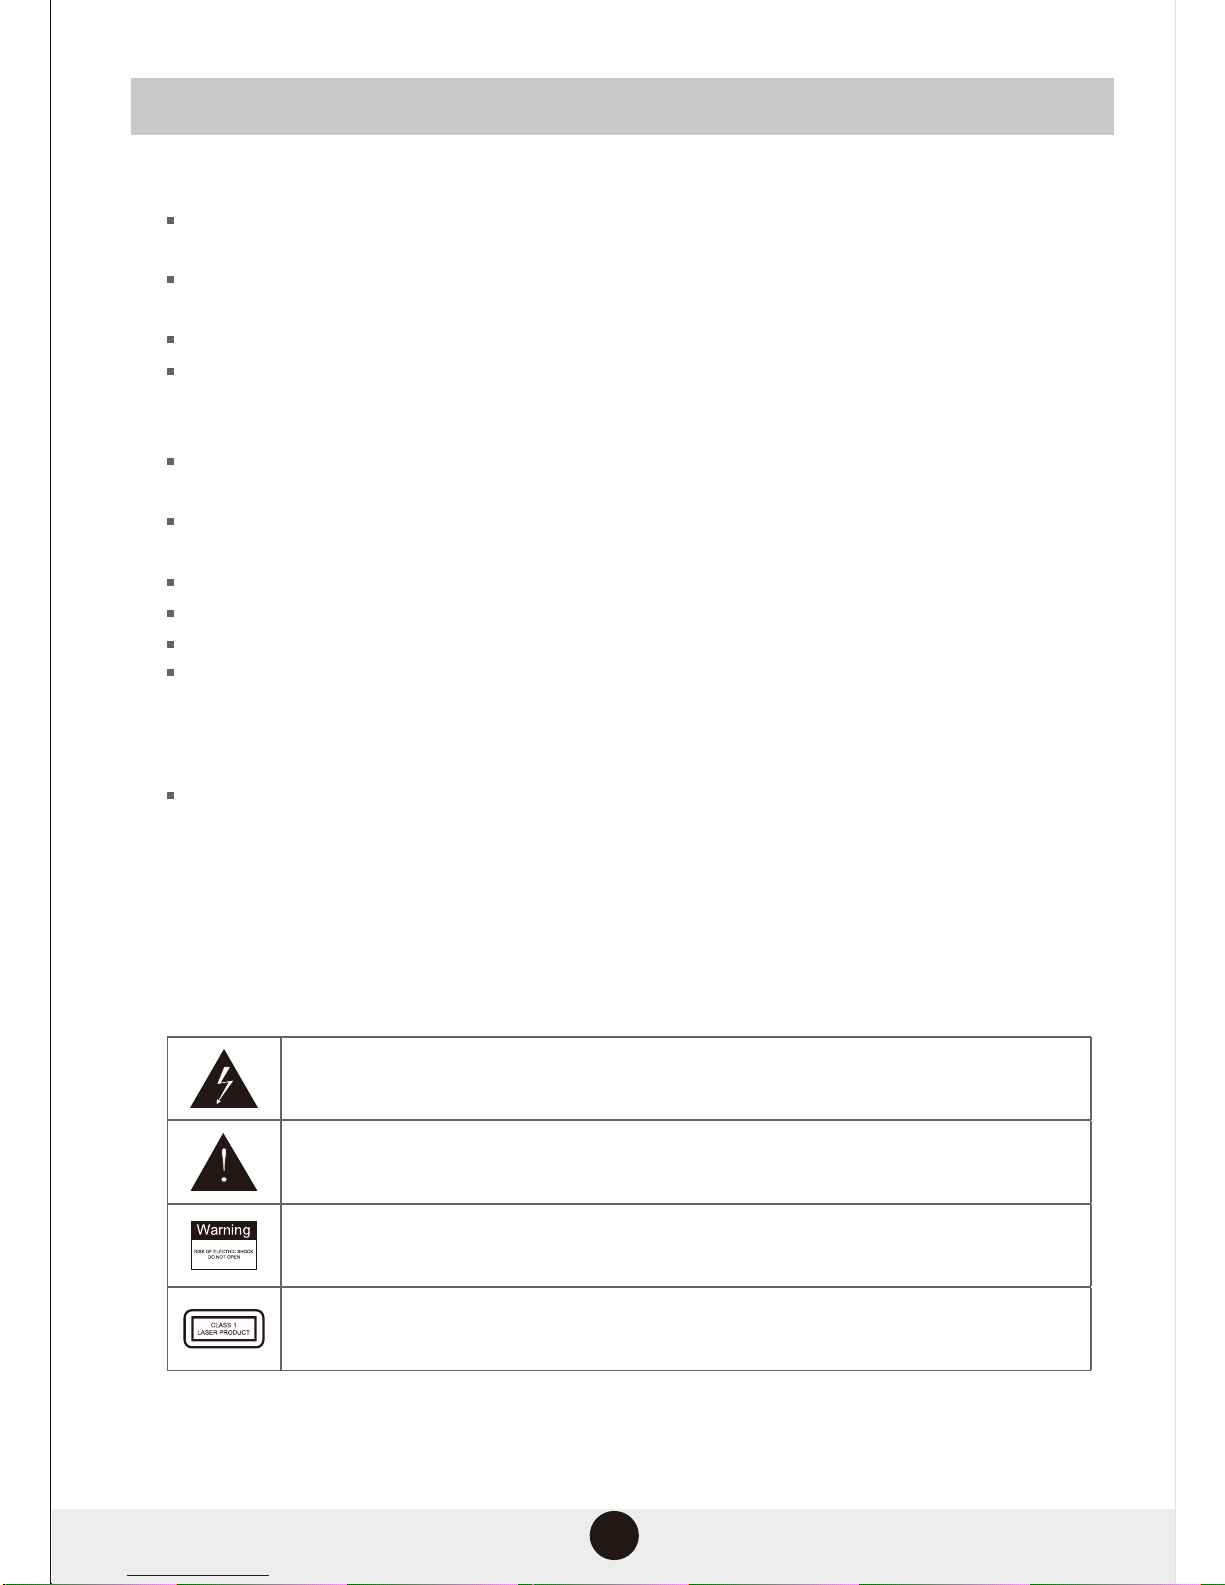
The lightning flash symbol alerts the user to the presence of dangerous voltage within
the product’s enclosure. Touching the internal components may result in electric shock.
The exclamation mark symbol denotes the presence of important operating and
maintenance or service instructions.
To reduce the risk of electric shock or fire, do not open the cover of the unit. Please
contact qualified service personnel if you need assistance.
This is the symbol for a Class 1 laser product. Do not touch the laser beam as it will
expose you to harmful radiation.

Introduction
DVD(or Digital Versatile Disc) is a digital video medium that utilises the MPEG2 format, capable
of storing a variety of digital data. The video compression technology is based on a minimum of
500 lines per image, up to 8 language soundtracks, up to 9 different camera angles and up to 32
subtitle languages.
This unit can play the following types of discs:
The following buttons are used in tuner mode.
3
SOURCE : Press this button ,switch to bluetooth mode.
PLAY/PAUSE: Press this button ,play and pause bluetooth song.
Press"PLAY/PAUSE"button and hold will dis-connect
Bluetooth function with your mobile phone.
Next : Press this button to play next bluetooth song.
PREV: Press this button to play previous bluetooth song.
STOP: Press this button to stop play bluetooth song.
BLUETOOTH FUNCTION
Package Contents

4
The player has built-in copyright protection that prevents copying from a DVD to
any other media.
If a video recorder is connected to the player, the image produced will be
distorted during recording.
Disc information
Note: Some features are related to the encoding on the disc, not the player. If the feature was not
encoded on the disc, it may not be available to the user. Check the disc’s features as printed on its
original packaging.

Prevent exposure to:
1 direct sunlight
2 the heat form other appliances like stoves or heaters
3 extreme humidity
DVD region code
DVDs and DVD player are manufactured in accordance with the internaonally set DVD Regional
Code System, which states that a player will only operate with discs manufactured using the same
regional code.
Canada, USA
Europe, Japan, Middle East, Africa
East Asia, South-East Asia
Australia, Central&South America Mexico, New Zealand
Africa, Former Soviet Union, India, North Korea, Pakistan
China
1
2
3
4
5
6
Disc care
Video discs contain high-density, compressed data that requires proper handing.
Hold the disc using the outer edge and/or the centre spindle hole. Never touch the
disc surface.
Do not bend or put pressure on the disc. Do not expose the disc to direct sunlight or
heat sources.
Store discs vercally in dry, cool place.
5
When necessary, clean the disc surface with a so, dry cleaning cloth. Wipe the disc surface
gently in a circular moon from the centre towards the outer edge.
Never use chemicals or detergents as these may permanently damage the disc surface.
Code Region

1 Digital display
2 Remote sensor
3 PREV
4 Next
5 Power
6 Play/pause
7 SOURCE
8 Open/close
9 DVD tray
6
Front panel

1 Video output
2 L(DVD out)
3 L(audio in)
4 R(audio in)
5 R(DVD out)
6 Coaxial digital audio output
7 FM antenna input
8 Speaker output
9 Power
7
Rear panel

01. POWER
02.NUMBER KEY
03.SETUP
04.NAVAGATION
05.TITLE
06.REV
07.SOURCE
08.PREV
09.EQ
10.STOP
11.LANGUAGE
12.L/R
13.SUBTITLE
14.ANGLE
15.PROG
16.CLEAR
17.OPEN/CLOSE
18.A/B
19.REPEAT
20.PBC
21.GOTO
22.SLOW
23.ZOOM
24.OK
25.MENU
26.FWD
27.NEXT
28.VOL+/-
29.PLAY/PAUSE
30.RETURN
31.N/P
32.OSD
33.USB
34.RIP/COPY
35.MUTE
Remote control surface
8
Remote control
Notes
1.The remote control transmits a directional infrared beam. Be sure to aim the remote control directly at the infrared sensor during
operation. When the sensor is covered or there is a large object between the remote control and the sensor, the sensor cannot
receive signals. The sensor may not be able to receive signals properly when it is exposed to direct sunlight or a strong artificial
light (such as a fluorescent or strobe light).In this case, change the direction of the light or reposition the unit to avoid direct lighting.
2.In case of colorless rolling screen of TV happened, press the “N/P” button to change back to “PAL”

9
EQ
SOURCE
Press to switch the unit on. Press again to put the unit into standby mode.
Press to open or close the disc tray.
Press to turn the volume up or down.
Press to switch between sources(DVD/FM/AUX/Bluetooth)
Press to switch the equalizer modes
Press once to repeat a single track, press twice to repeat the enre album.
Press to skip to the next track.
Press to return to the previous track.
Press to temporarily pause a playback. Press it again to resume the playback.
Press to fast forward playback, press[PLAY/PAUSE] buon to resume
playback.
Press to fast rewind playback, press[PLAY/PAUSE] buon to resume
playback.
Press once to stop the track and press twice to stop the album.
Press to switch from DVD to USB during DVD mode.
Press[PROGRAM] to access the program mode. Press the numeric keys
directly to select the desired track and press( PROGRAM) again to confirm
your selecon.Press[PLAY/PAUSE] to start program playback.
The digit keys can be used to input numbers or to select a track.
For example, press[2] to select track 2;press [10+] twice, then
press [1] to select track21.
Remote control functions

10
A/B
SLOW
GOTO
ZOOM
MENU
LANGUAGE
SUBTITLE
L/R
TITLE
OSD
PBC
Press to repeat playback of a specific secon of a disc. Press the A-B buon at
the starng point of the desired secon, CA” will display on the screen. Press
the A-B buon again at the end of the desired secon, “CA” will display on
screen. The selected secon from A to B will be played back repeatedly unl
the funcon is cancelled. To cancel the funcon, press the A-B buon again
to return to normal play.
NOTE: Some discs may not allow A-B funcon.
Press to return to the START menu when playing a VCD disc.
Press to play in slow moon. Press once to play at 1/2 of the normal playing
speed;press twice to play at 1/3 of the normal playing speed; press three
mes to play at 1/4 of the normal playing speed; press four mes to play at
1/5 of the normal playing speed; press five mes to play at 1/6 of the normal
playing speed; press six mes to play at 1/7 of the normal playing speed; press
seven mes or press the (Play/Pause) buon to return to normal playing
speed.
Press to search for a desired Title,Chapter or Track. Press once to choose the
desired tle. Press twice to choose the desired chapter. Press three mes to
choose the desired track. Press [OK] to execute the search.
Press to zoom in/out. Press once to zoom in at 2x normal screen size. Press
twice to zoom in at 3x normal screen size. Press three mes to zoom in at 4x
normal screen size. Press four mes to zoom out at 1/2 normal screen size.
Press five mes to zoom out at 1/3 normal screen size. Press six mes to zoom
out at 1/4 normal screen size.Press seven mes to resume to normal screen
size.
Press to return to the beginning of the DVD disc.
Press to return to the start menu of the DVD disc.
Press to display On-Screen display.
In the DVD disc start menu or in setup menu, press the DIRECTION buon to
highlight funcon icons.Press the [OK] buon to confirm selecon.
Press to switch between L MONO/R MONO and Stereo when reading a VCD
disc.Press to choose the audio language(e.g. Chinese, Portuguese, Spanish,
English, etc) when reading DCD discs.
Press to switch between different subtles(e.g.Chinese, Portuguese, Spanish,
English,etc)
Press to switch between audio channels(mono le channel/mono right
channel/stereo) when playing a VCD disc.

11
Function buttons
FM Function
INSTRUCTION MANUAL FOR RADIO FUNCTION
*SOURCE- Exchange to RADIO condition
Press this key to exchange between DVD and RADIO condion when the DVD player
in the STOP condion and without any disc in the tray.
Below operation under the radio condition.
PLAY/PAUSE
Press PLAY/PAUSE to search radio channel automacally(save 40 programs to the maximum).
Previous/Next
Press PREV( ) to the previous channel
Press NEXT( ) to the next channel
Stop
Press this key, the display can show the current frequency、FM condion
Previous / Next
Press NEXT( ) for 3 seconds the unit will forward search next channel and
save it automacally.
Press PREV( ) for 3 seconds the unit will backward search next channel and
save it automacally.
Mute: PROG:
Press this key to keep silence. Press this key to save the channel.
Menu: REV/FWD:
Press this key to change MO/ST. Press REV/FWD for frequency point 0.1 fine-tuing
Press to select desired camera angle.
Note: This funcon is DVD dependent. Some DVD’s do not have this funcon.
Press to cancel entry during program mode.
Press to switch between TV systems(NTSC/PAL60/PAL/AUTO).
Press to mute.
Press to return to the main menu in USB mode.
Note: Press to return to start menu in DVD mode
Press to enter setup menu.
Press to enter copy/ripping mode.

12
Connections

13
Connections continued
The player is equipped with composite
A/V outputs on the rear panel. Your
television will require at least one set of
A/V inputs to connect to your player
using the included A/V cord.
Please remember to select the correct
input setting on your television( VIDEO,
AV, AUX) to view the signal from the
player. Depending on your brand of
television, this function and the button
on its remote may differ.
Select only ONE of the following connections:
Connect the player’s audio L&R and
composite video outputs to the television’s
audio L & R and video inputs.
Note:
Connect one video output only to avoid picture distortion.
The player is equipped for stereo playback.
For the full two-channel effect, please
use a stereo television or A/V receiver in
conjunction with the player.
For mono televisions, please input only one
of the audio cables from the player(either
left or right)

14
Connections continued

15
Point the remote control at the remote sensor on the front panel of the home theatre system.
The remote control will remain effective for a distance of 8 metres from the sensor, and within an
angle of 30°.
Getting started
Unpack the unit.
Read this owner’s manual thoroughly before connecting the player.
Load the batteries into the remote control.
Connect all the cables and cords, making sure the connections are secure.
Finally, connect the power plug to an AC power outlet.
Battery installation
1 Remove the battery compartment cover on the back of the remote control.
2 Load the batteries into the battery compartment making sure that the batteries have been inserted
with the correct polarities matching the symbols+ - as indicated inside the battery compartment.
3 Replace the cover.
Remove the batteries from the remote when not in use for a long period of time.
Do not mix old and new batteries, or different types of batteries.
Weak batteries can leak and damage the remote control.
Do not expose the remote control sensor or batteries to direct sunlight.
Note:
Remote control operation
Note:
The remote control transmits a directional infrared beam. Be sure to aim the remote control
directly at the infrared sensor on the unit when in use. Keep the sensor clear of obstruction and
interference. The sensor may also operate intermittently when exposed to direct sunlight or
strong artificial light.

16
Press the main power button on the unit or on the remote control. Switch on the television, as
well as the amplifier(if connected)
Select the correct setting on the television(AV1,AV2,S-Video, DVD,etc). If an amplifier is
connected, select the corresponding output setting on that unit.
Press Open/close on the remote control or on the front panel of the main unit to open the tray.
Load a disc (label side up) onto the tray and press Open/close again.
The unit will take a few seconds to load the disc’s initial data, display the disc type logo in the
upper left corner of the television screen and then start automatic playback.
Note: MP3 discs usually take a little longer to load than video or music discs.
If a DVD disc menu appears on screen:
the Play button on the remote control or on the unit to start playback,
or use the directional keys to select the desired menu option, and press Enter to confirm.
Error messages and possible solutions.
Wrong regional disc
The loaded disc’s regional code does not match the player’s regional code.
Wrong password
The rating level of the loaded disc is higher than the rating level set for the player. The player will
not play the disc until the correct password is provided.
Wrong disc
The player has automatic disc quality detection software installed. When the player detects a
damaged disc, it will automatically play the encoded data at a lower level or not play the
disc at all, depending on level of damage.
Note: The production quality of discs vary. Some incorrectly formatted discs may load, but the
quality of the audio and video produced may be of a lower quality.
If the player is not used for an extended period, please unplug the power plug.
Switch on the player
System setup
Loading a disc
Automatic playback
Disc error messages
Power management

17
Insert a disc and it will load automatically. Press button to move to the folder to the left. Then
press ▼or ▲ to move the cursor to the file you wish to view. Move the cursor to the right to view
or press the Play button to start a sideshow. Press next or Previous to skip between images. Press
the Zoom button repeatedly while viewing images to zoom in and out at various levels.While
zoomed in, use the direction keys to move around the image. To cancel playback and go back to
the main menu, press Return.Once a file has been selected, use the PBC button to view six images
on screen at the same time.Press the Play button to start a six-image sideshow, or use Next and
Previous to skip though to the next or previous page of six images, Press the Return button to go
back to the main menu.During image playback, press the Program button to view 17 images on
screen at the same time.
MP3 discs
The screen below is displayed when an MP3 disc is loaded. Use the direction keys to select the
desired file.
Press the Enter button to confirm your selection.
Press left or right to switch between directories(folders).
it is badly scratched, damaged of dirty.
it is not finalised.
the recorded format is not supported by the player.
Note: The player will not load a disc if:
Kodak picture disc

18
CD ripping copies audio files from a CD/HDCD disc and saves them as MP3 files. With this function,
you can copy the tracks on a CD/HDCD disc to a USB drive that is connected to the system.
Place a CD or HDCD disc in the disc tray and insert a USB drive into the USB port on the front panel
of the unit. While the disc is playing press Ripping on the remote control to display the CD ripping
menu on the system’s display screen. Use the direction keys to navigate the cursor through the
menu. Select the tracks to copy then press Enter to begin the ripping process.
This feature allows for the copying of files from a disc to a USB drive.
Place the disc to be copied in the disc tray and insert a USB drive tin to the USB port on the front
panel of the unit. Once the files have been read and loaded on the screen, press the Copy button
on the remote control. Select the appropriate files to copy and press Enter.
The following file types are supported by this feature: MP3, JPG, VCD, MP4, DIVX and AVI.
CD ripping
Copying files
Table of contents