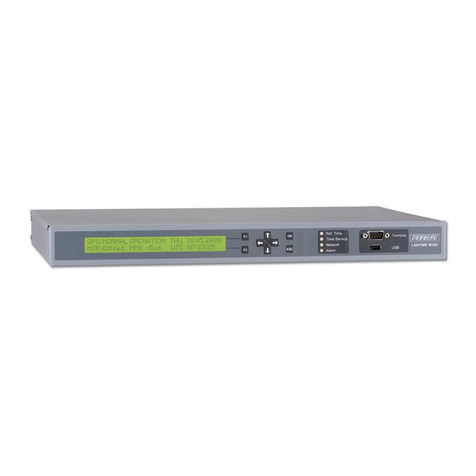
Far south networks Com.X1 PBX User manual

Com.X1
Getting Started
http://www.farsouthnet.com
Version 1.01, July 26, 2010
Welcome to the world of Comma intelligent Asterisk™ solutions! This leaflet will hel you to get
started with your new Com.X1 solution. This getting started guide addresses networking and
installation of the Com.X1 unit and should be read in conjunction with the Com.X1
Administrator's guide.
For further information see htt ://farsouthnet.com/mediawiki
Description
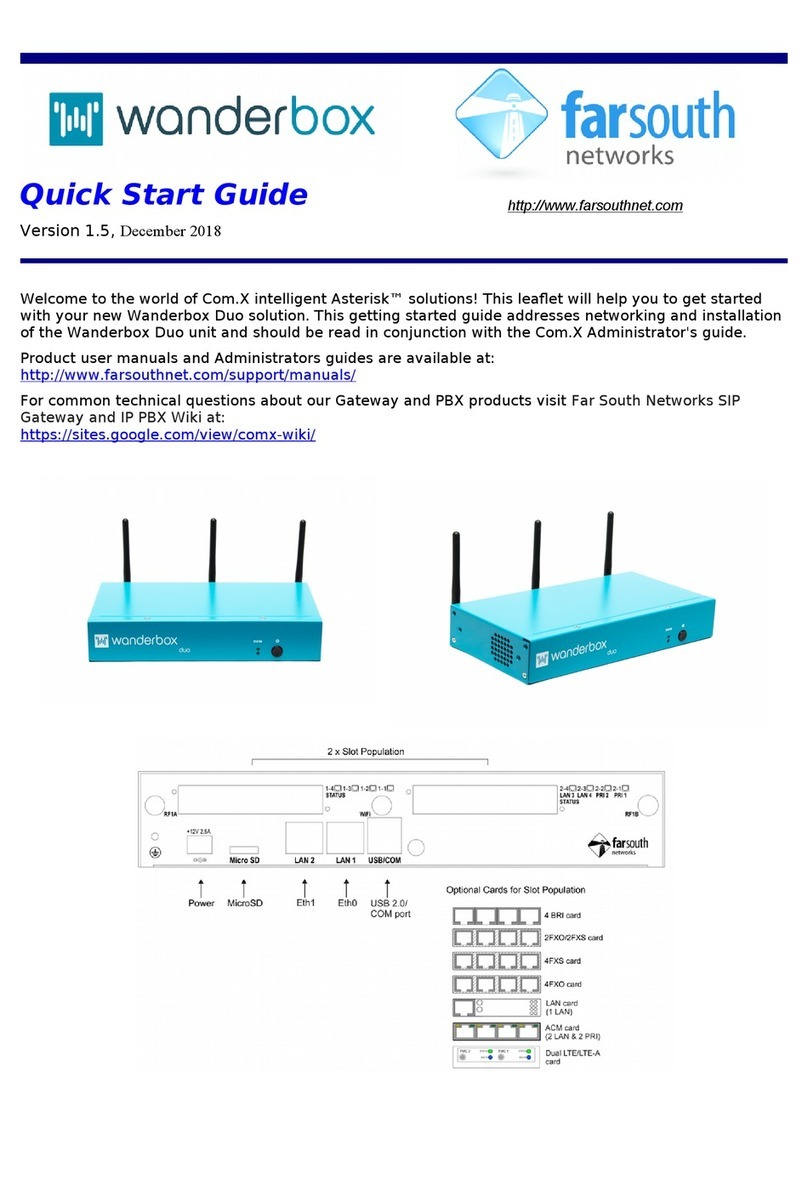
The figure above shows a ty ical Com.X1. The BRI and FXS/FXO ositions are modular and
may or may not be resent, de ending on model.
The available slots for analogue interfaces are numbered a1 & a2. Each a1 & a2 slot may be
installed with octal FXO, octal FXS or 4FXS/4FXO card, roviding eight RJ11 orts, numbered
1 to 8. Thus each analogue RJ11 interface is designated a1-1 to a1-8 and a2-1 to 8.
A single slot is available for Basic Rate ISDN (BRI) interfaces, it is numbered d1. The d1 slot
may be installed with a quad BRI card, roviding four RJ45 orts, numbered 1 to 4. Thus
each BRI interface is designated d1-1 to d1-4.
A single Primary Rate ISDN (E1 PRI) interface is rovided.
Three 100Base-T LAN interfaces are rovided, designated LAN1 (Eth0), LAN2 (Eth1) & LAN3
(Eth2).
The remaining connectors are Earth, Power, USB0 & USB1, as shown.
The front anel LED (not shown) dis lays basic diagnostic information as follows:
Code Description
Flashing red No network
Solid yellow Boot state
Flashing green/red Manager or stream error (check software
configuration)
Solid green K
Copyright © 2008-2010 Far South Networ s (Pty) Ltd

Hardware Installation
1. The Com.X1 server is owered using the 12VDC ower ada ter included with your unit.
Connect the ower ada ter to the server and to mains su ly and turn the server on.
2. Connect any Comma iTA units to the second and third LAN orts via crossed-over
Ethernet cables.
3. Connect the Com.X1 server to the LAN switch using the first Ethernet ort using and a
standard cable.
4. Connect FXS orts to tele hones, fax machines etc. using standard RJ-11 cables.
5. Connect FXO orts to telco lines, PBXs, etc. using standard RJ-11 cables.
6. Connect BRI orts to telco NT equi ment or PBXs using standard S/T RJ-45 cables.
7. Connect PRI ort to telco NT equi ment or PBXs using standard E1 balanced RJ-45 cable.
Accessing the Com.X1 server
1. Default access details for the Com.X1 are:
user: comma
password: farsouth
2. The Com.X1 server GUI can be accessed using the url htt ://<i >, where <i > is the IP
addressed assigned to the unit via DHCP, or one of the statically configured IPs. All
administrative tasks elaborated on below can be erformed from the GUI. Please refer to
the Administrator's guide for more detail.
3. The Com.X1 server can also be accessed via its serial ort using a null-modem cable
with the following settings:
baud rate: 115200
data bits: 8
stop bits: 1
parity: none
4. The Com.X1 server requests its IP address from the LAN / WAN via hysical Ethernet ort
1, (labelled the eth0 interface in the O erating System). This interface can be re-
configured with a static IP in /etc/network/interfaces as follows:
auto eth0
iface eth0 inet static
address xxx.xxx.xxx.xxx
netmask 255.255.255.0
Note that the O erating System networking will need to be restarted after this
configuration change:
sudo /etc/init.d/networking restart
Copyright © 2008-2010 Far South Networ s (Pty) Ltd

Network
1. The Com.X1 server comes re-installed with Ethernet interfaces configured as follows:
Interface DHCP client IP Netmask
eth0 Yes - -
eth1 No 1 2.168.101.1 255.255.255.0
eth2 No 1 2.168.102.1 255.255.255.0
eth3 No 1 2.168.103.1 255.255.255.0
2. The Com.X1 server comes re-installed with the following software:
a. DAHDI with Dynamic s an atches for PRI and analog
b. mISDN with Comma atches for BRI
c. Asterisk
d. Comma-GUI
3. The Com.X1 server is re-configured with fixed IP addresses on the Ethernet orts that
iTAs are connected to.
Ubuntu 8.04 com atible ackages are available at htt ://fsn ub.dnsalias.com/a t
For User Guide and Develo er information lease see htt ://farsouthnet.com/mediawiki
Configuration
1. The Com.X1 has been re-configured with each iTA device sold with the unit
(/etc/comma.conf), including the MAC address and IP address configuration of each unit.
2. The Dahdi and mISDN configuration files have also been re-configured to match the
configuration of the Comma units.
3. The comma manager, Dahdi, mISDN, Asterisk and Comma-GUI start automatically on
system start-u .
NOTE: The Comma unit is reconfigured from the information on the server on every ower-u
or reset. Firmware u grades made available on the Com.X1 server thus become active on the
next iTA restart.
Identifying connected i As
1. From the GUI, select the Hardware anel. A Scan of the network will list additional
devices.
2. Alternatively, from the server, ty e the following:
comma-ls -v
3. Connected iTA devices will be identified by their MAC addresses and IP addresses if
connected correctly, and the hardware configuration and software versions will be listed.
4. If IP addresses are not listed, the unit may be connected in the wrong order. Connect the
units to different Com.X1 Ethernet orts. The units' MAC addresses can be viewed with
their interface configuration in /etc/comma.conf in order to determine the correct
connection order.
Copyright © 2008-2010 Far South Networ s (Pty) Ltd

Logging and Diagnostics
1. From the Comma-GUI, select the Monitoring menu for an extensive monitoring suite
2. The command line interface of the Comma iTA may be accessed from the Comma
Manager directory by ty ing:
comma-console <IP ADDRESS>
3. A log is maintained while the Comma Manager is running, ty ically found at
/var/log/comma.log.
less /var/log/comma.log
4. The Com.X1 server system log kee s a record of system warnings and errors and can be
viewed as follows:
less /var/log/syslog
5. The Asterisk PBX server command line can be accessed form the server as follows:
sudo asterisk -vvvr
Firmware Upgrade
The embedded firmware is downloaded to the Comma unit from the server at every ower-u
or reset. In order to u grade:
1. Co y the new image file to /var/comma/
2. U date the a image=XXX configuration record in the configuration file to the new file
name
3. Restart Comma iTA:
comma-ls –r
4. In an Ubuntu based system, u dating the ackage commaimg will result in u dated
firmware:
sudo aptitude update
sudo aptitude install commaimg
Copyright © 2008-2010 Far South Networ s (Pty) Ltd
Other manuals for Com.X1 PBX
2
Table of contents
Other Far south networks Server manuals
