Page1
DRY ELEMENT ELECTRIC TOWEL RAIL
USER MANUAL AND INSTALLATION INSTRUCTIONS
FOR MODELS:
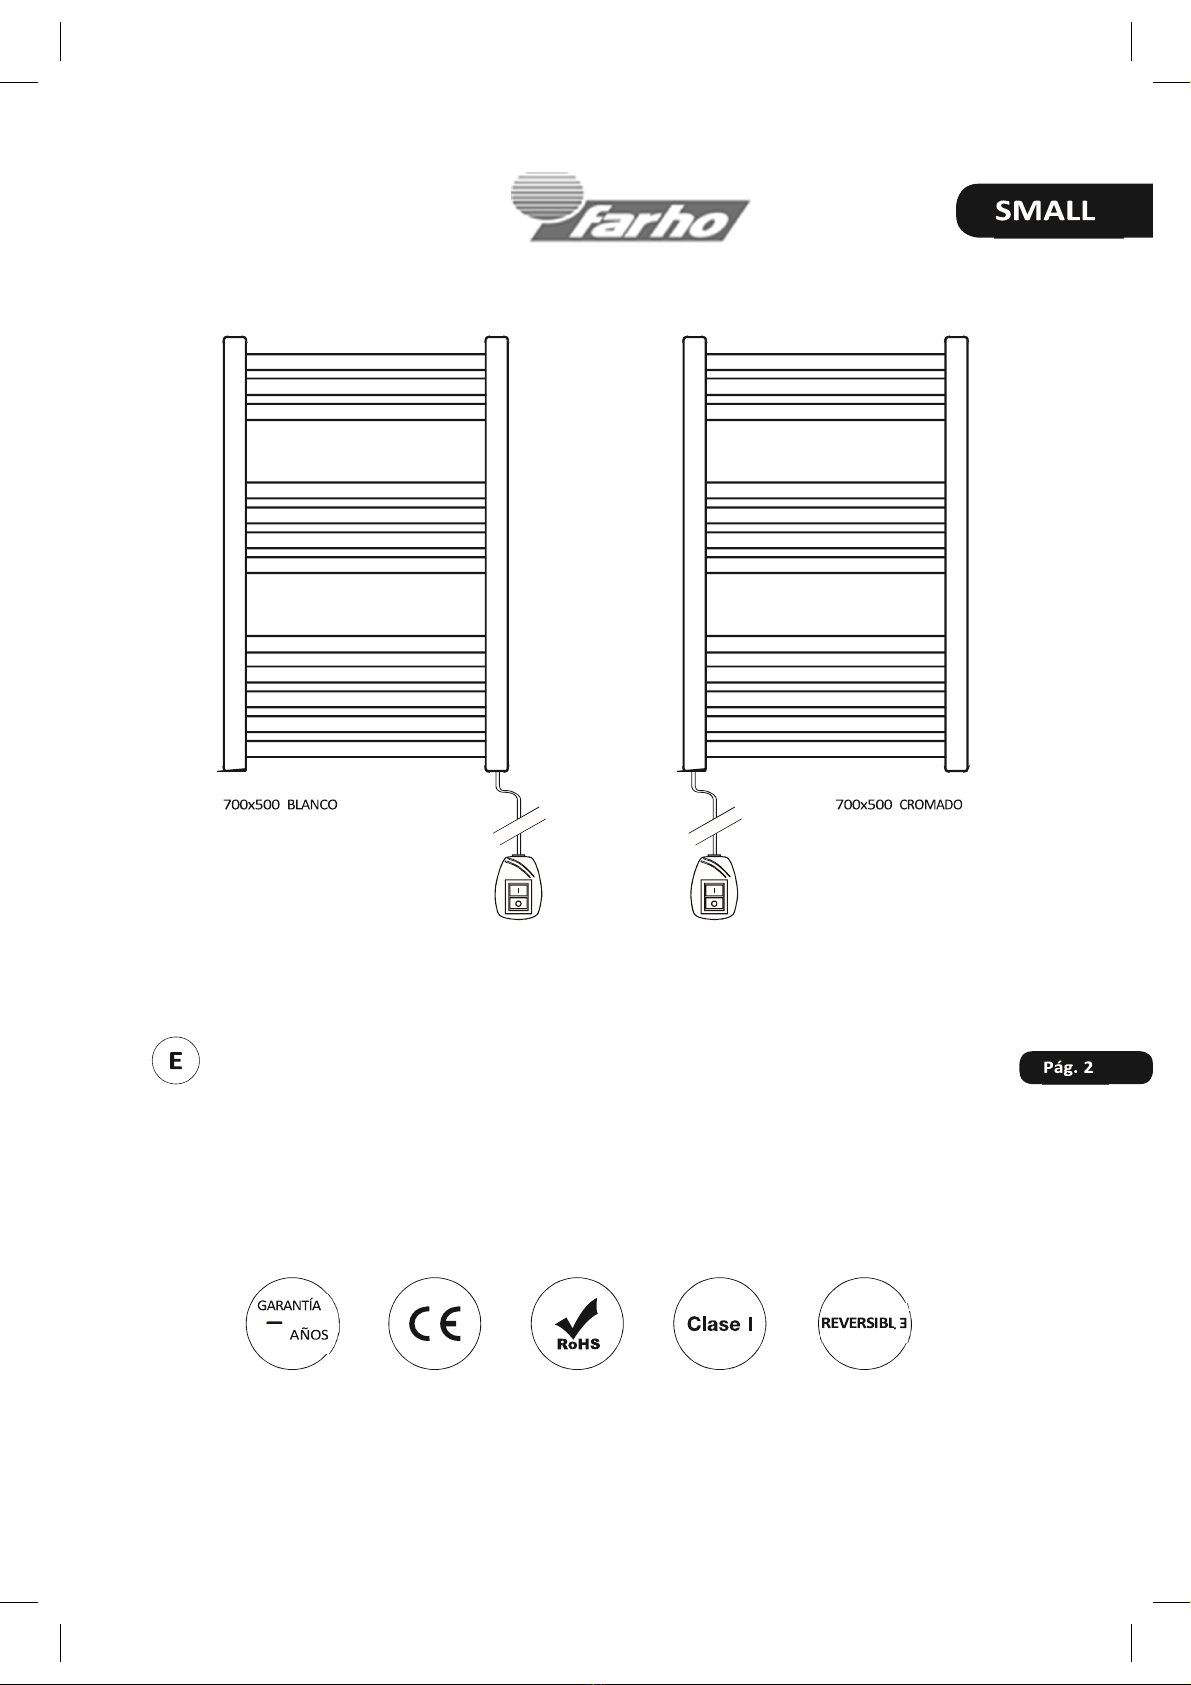
‐ ……………………………………DryElementTowelRail700x500mm250wCHROME–ClassIIPX4
‐ …………………………….……..DryElementTowelRail700x500mm250wWHITE‐ClassIIPX4
‐
WARNINGS
Keep this instruction sheet with care and read it carefully before using this device. You will so obtain the best performance with the
highest safety.
This appliance is intended only for drying textiles washed in water.
This towel rail must be earthed.
Before use, please check that the voltage of the network and that of the appliance are the same (pls. see the technical label).
Always switch off the electricity supply at the mains during cleaning and maintenance.
Electrical safety is guaranteed only if the element is connected to a suitably earthed electricity supply, according to the regulations
in force.
If the supply cord is damaged, it must be replaced by the manufacturer or similar qualified persons in order to avoid hazard.
Failure to comply with the above may endanger the safety of the whole system.
The rail will get very HOT so is NOT suitable for use in locations where this could cause a hazard (e.g. where infirmed persons or
young children will be present unsupervised).
The element must be permanently connected to a suitable electricity supply by way of the cable provided. This should be via a
fused spur in accordance with the IEE Wiring Regulations.
During the 1st and 2nd usage of this towel rail, there may be some vapour coming from the bottom or top of the vertical profiles for
10-15 minutes. This is completely normal and happens from the cleaning chemicals used.
IMPORTANT INFORMATION
This product must be installed by a competent person and in accordance with the current IEE Wiring Regulations. It may be necessary to
notify your local authority building control department or to have the work carried out by a suitably qualified electrician.
The surface of the towel warmer may get very hot so it is not suitable for use in locations where this could be a hazard. In order to avoid a
hazard for very young children this appliance should be installed so that the lowest heated rail is at least 600mm above floor level.
This appliance can be used by children aged from 8 years and above and persons with reduced physical, sensory or mental capabilities or
lack of experience and knowledge if they have been given supervision or instruction concerning use of the appliance in a safe way and
understand the hazards involved. Children shall not play with the appliance. Cleaning and user maintenance shall not be made by children
without supervision.
The element contains a non-adjustable thermostat that will switch off and on as the towel warmer reaches temperature. The element also
contains a non-replaceable thermal fuse safety device that will blow at 119 degrees centigrade if the thermostat were ever to fail.
PLEASE ENSURE THAT YOU WEAR ALL NECESSARY PERSONAL PROTECTIVE EQUIPMENT FOR YOUR SAFETY.
Please check that all components are present and that you are ENTIRELY happy with the size, design and finish BEFORE starting
installation.
Pack Contents
1 x Electric Towel Rail
3 x Bracket Base
3 x Bracket Stem
3 x Bracket Front
3 x Bracket Cover
3 x Wall Plug
3 x Wall Screw
3 x Washer
3 x Bracket Screw
3 x Mini Screw
MOUNTING THE TOWEL RAIL ON THE WALL
This appliance should be fixed on the wall as described below. Only the fixing kit provided
with the appliance should be used. No adhesive shall be used since they are not considered to
be a reliable fixing means.
STEP 1.
Select your desired mounting position and check that the wall is sufficiently strong
enough to hold the weight of the towel rail. Mark your preferred bracket positions on
the wall and drill holes as necessary for the fixings that you are using. The Wall Plugs
supplied are only suitable for solid walls. Please note: If the wall is other than a solid
construction other means of fixings will be required.
STEP 2.
Screw the Bracket Base to the wall using the Wall Screws and Washers provided.