FAST CLEAN Fury RSW55 User manual
OWNER’S MANUAL
FAST
CLEAN
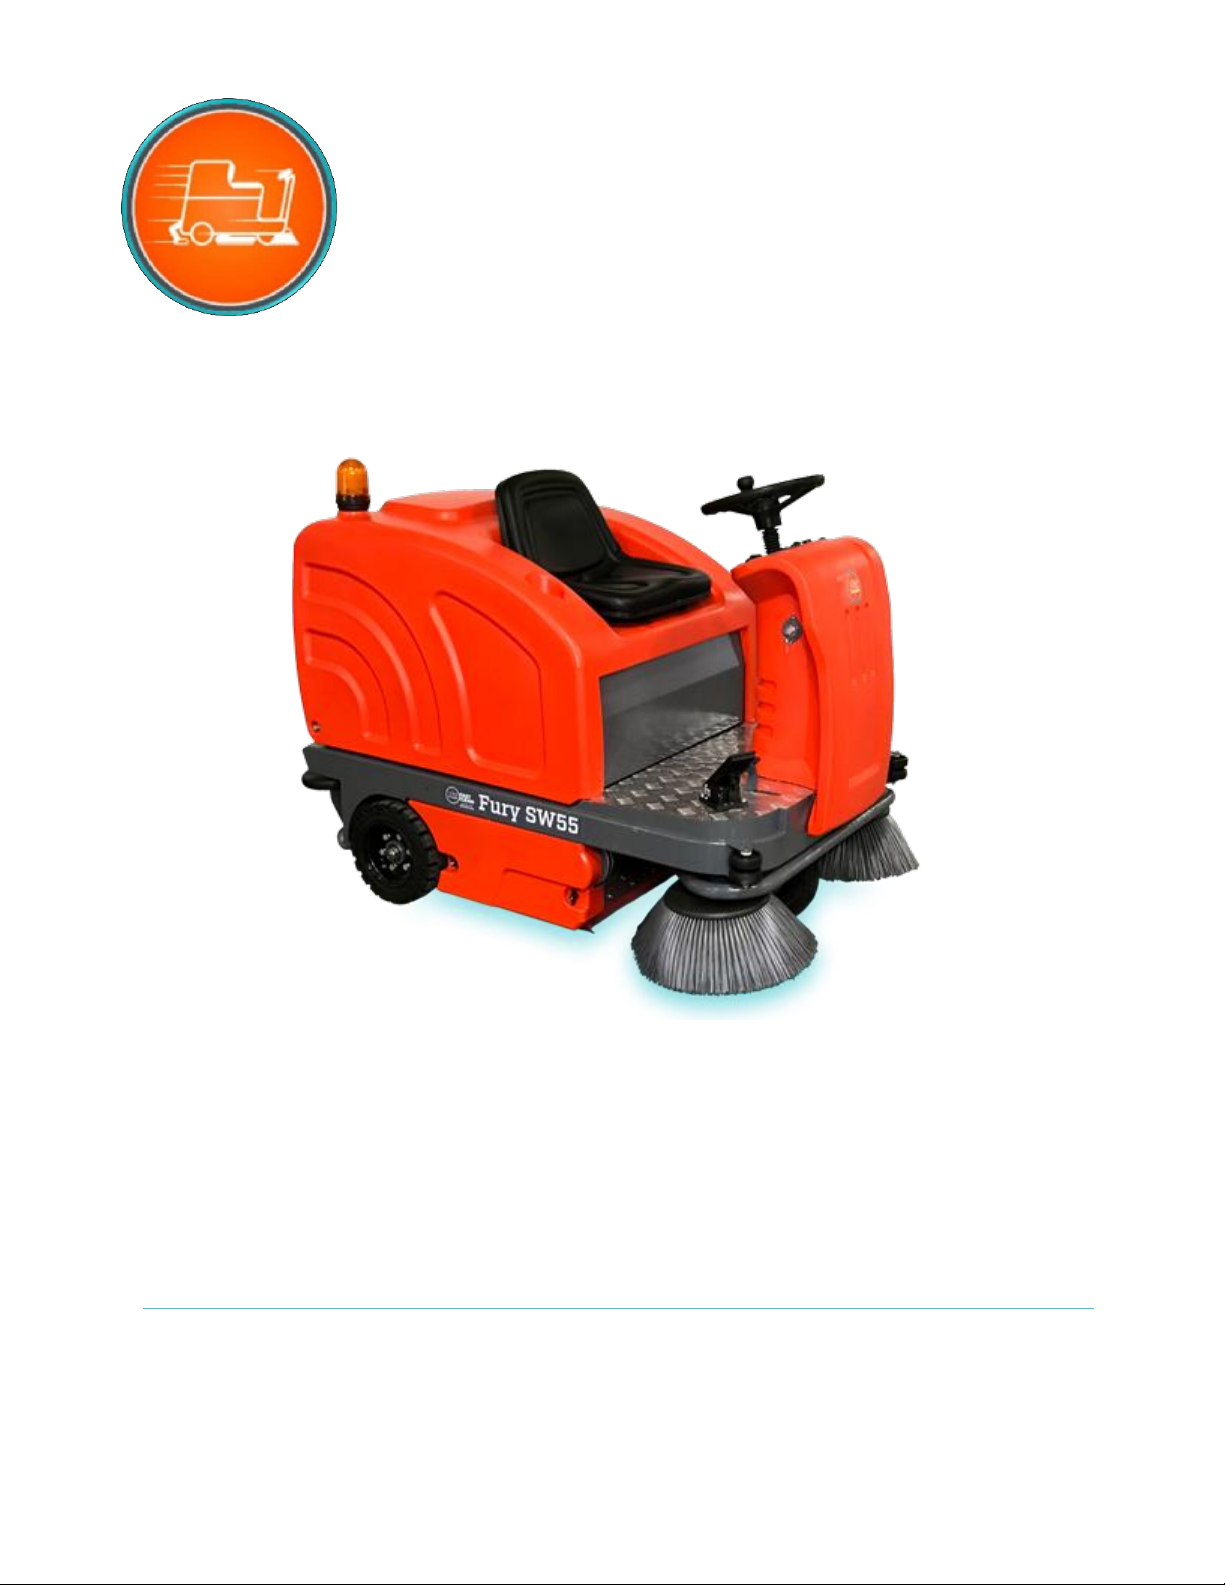
Fury RSW55
Battery Powered Automatic
Indoor/Outdoor Rider Sweeper
FAST CLEAN, INC.
210 Southwest Ave. Tallmadge OH 44278
(833) 801-2358
Fury RSW55
2
Before operation or use of this machine, please carefully
read this manual.
When ordering the replacement parts, please refer to the
spare and accessory parts manual attached to the
machine. Before matching parts or accessories, please
first determine your machine model and serial number.
You can order parts and accessories from any authorized
service center or dealer. This machine can provide
excellent service. Please follow the instructions in the
manual.
Follow manufacturer’s instructions for operating the
machine.
Perform maintenance according to the maintenance
instructions provided in the operation manual.
Use the OE or same-grade parts for maintenance.
Please dispose of old machine components
such as packaging material, battery, etc. and
toxic liquid such as antifreeze and oil
according to your local regulations on waste
disposal and on environmental safety.
Machine Information (Please fill in for future reference.)
Model number-
Machine number-
Machine option-
Sales representative-
Tel. of sales representative-
Customer ID-
Installation date-
Table of Contents
Precautions .......................................................................3
Basic Safety Instructions...................................................3
Maintenance Instructions .................................................3
Unpacking the Machine.....................................................3
Battery Installation & Charging .........................................4
Machine Diagram .............................................................5
Controls ............................................................................5
Before Running the Sweeper ...........................................5
Starting the Machine ........................................................5
Operating the Machine .....................................................6
Maintenance –Side Brooms ............................................6
Maintenance –Main Brush ............................................ 7
Maintenance –Main Brush Drive Belt............................. 8
Maintenance –Dust Suppression Sprayer .................... 8
Maintenance –Internal Drive System............................. 8
Maintenance –Dust Board ............................................. 8
Maintenance –Dust Bin & Dust Filter............................. 9
Storing the Machine ....................................................... 9
Specifications.................................................................. 10
Troubleshooting .............................................................. 10
Maintenance Schedule.................................................... 11
Warranty Card ................................................................ 12

Fury RSW55
3
Basic Precautions
This machine is intended for indoor or outdoor sweeping of
hard floors or paved surfaces. Machine is not intended for
use as a transport vehicle.
Not for use on wet surfaces. Do not attempt to drive the
machine through standing water.
All operators must read, understand, and observe the fol-
lowing safety precautions and guidelines as set forth in this
manual. Manufacturer assumes no responsibility for
damage resulting from improper use of equipment.
Warning! Fire or explosion hazard:
The batteries release hydrogen. Please keep away from
spark or open flame. The battery compartment should be
kept open when charging.
Do not operate the machine where there are flammable
liquids, vapors, or dust. Do not attempt to sweep up any
burning or smoldering materials such as cigarettes,
matches, etc.
Warning! This machine is not equipped with an explosion-
proof motor. If it is used where there is flammable vapor,
liquid, or dust, the electric motor may generate a spark
while starting the machine. This may cause flash fire or
explosion.
Warning! To avoid injury, turn off the power before
performing routine maintenance on the machine. We also
recommend disconnecting the battery wiring before
performing any electrical maintenance.
Basic Safety Instructions
1. Before starting the machine, please ensure that all
safety guards are in place and operating correctly.
2. Proceed slowly when operating on a slope or slippery
surface, or when turning the machine.
3. Please discontinue use and have machine serviced if
it is damaged or malfunctioning.
4. Do not leave machine unattended without first turning
off the power.
5. Do not leave machine unattended on a sloping surface.
Park machine on level ground and engage parking
brake (if equipped).
6. Do not allow children on or around the machine
7. Always pay attention to your surroundings while
operating the machine. Be aware of the location of other
workers around you at all times.
Basic Maintenance Instructions
All maintenance must be carried out by trained, qualified
personnel.
Do not modify the original design of the machine without
consulting the manufacturer.
Use replacement parts provided or recognized by the
manufacturer or local dealer.
Turn off machine and disconnect battery wiring before
performing maintenance. Avoid moving parts. Do not wear
loose clothing that may catch in the machine.
Do not touch motor or other parts of machine that may
heat up during use, immediately after running the machine.
Allow sufficient time for heat to dissipate before performing
maintenance.
If performing maintenance on batteries, wear appropriate
safety gear such as gloves, apron and safety glasses.
Avoid contact with battery acid as it is extremely corrosive.
Wash immediately with soap and water if you do come in
contact with battery acid.
Do not use pressure washer or steam cleaner to clean the
machine. Do not flush the machine with water.
Unpacking the Machine
1. Carefully check to see if the machine or packaging is
damaged. If there was damage incurred in shipping,
please notify your carrier immediately.
2. Check the list of freight contents. If there is any
missing item, please contact your distributor.
Your crate should contain:
Main unit: 1 Fury RSW55 Sweeper
8V batteries: 6 wet, maintenance free batteries
48V/25A battery charger: 1 unit
Cylindrical sweeper brush: 1 brush
Side brooms: 2 brooms
Power keys: 2 keys
Owner’s manual: 1 manual
Optional other accessories- purchased additionally
3. Before unpacking the machine, please remove all
straps, ropes, and fasteners that attach the machine
to the pallet.
Fury RSW55
4
4. Carefully remove the machine from the pallet with the
assistance of others. Warning! Do not directly drive the
machine off the pallet without using a ramp. This could
damage your machine.
Install the Batteries
Note: Please install the batteries after unloading the
machine from the pallet. (See following).
Warning: Fire or explosion hazard. The batteries release
hydrogen. Please keep away from spark or open flame.
The battery compartment should be kept open when
charging.
For safety: Please wear appropriate protective gear: safety
glasses, apron and gloves when performing battery
maintenance or wiring. Avoid contact with battery acid.
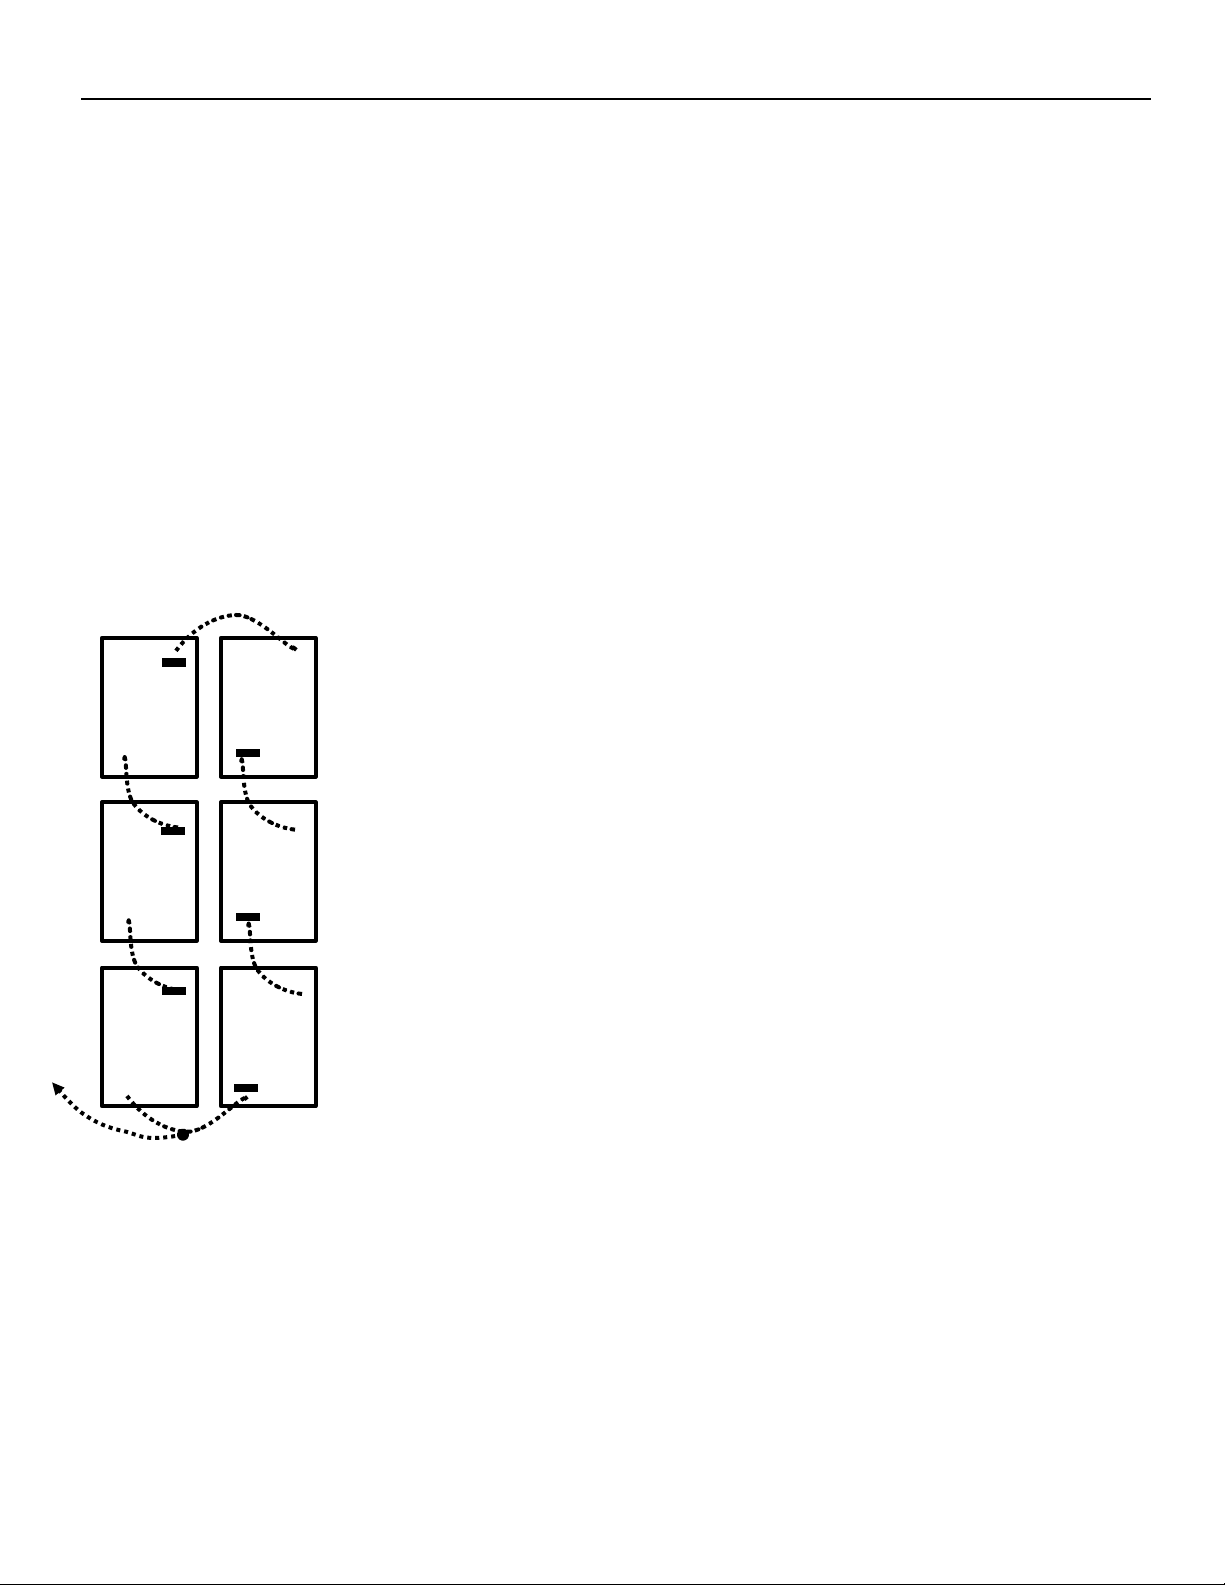
Park the machine on level
ground and switch off main
power (on steering column).
To access the batteries, tip
whole top of machine back.
(Please ensure dust bin
and filter are clean first!)
Place batteries in the
battery compartment and
connect the wiring accord-
ing to the diagram.
Note: Be sure the poles
are properly connected.
Note: Place batteries
carefully into the compart-
ment so as to avoid
damaging the batteries or
the machine.
Before connecting the batteries, please ensure whether
the electrodes and terminals are clean. Use terminal
cleaning fluid and wire brush as required.
Paint a thin layer of metal-free lubricating oil or protective
spray on the connected wiring to avoid battery corrosion.
The battery power gauge displays the remaining charge of
the batteries.
If equipped with digital gauge (0-100%). To extend the
battery life, it is best to recharge the batteries when the
power gauge is less than 50%. Do not let the batteries run
completely out of charge.
If equipped with lights or digital bar gauge: When the
battery is fully charged, all indicators are on. As power is
consumed, the indicator lights go out from right to left. To
extend the battery life, it is best to recharge the batteries
as soon as all the indicator lights have gone out.
Battery Charging
Do not keep the batteries in an uncharged state for a long
time. Letting the batteries run completely down may
damage them. The following instructions apply to the
specific charger for this machine. Be sure to use the
proper charger for this machine in order to avoid damaging
the batteries.
Specification of battery charger:
● Type of charger: for lead-acid maintenance free batteries
● Output voltage - 48V
● Output Current - 25A
● Intended for deep cycle batteries
When servicing the machine, wear appropriate safety gear
such as gloves, apron and goggles.
Warning: Battery acid is highly corrosive. Avoid contact
with battery acid.
1. Move the machine to a well-ventilated area for charging.
2. Park the machine on level ground and turn the key to
the OFF position. Engage parking brake (if equipped).
3. Before charging, check the electrolyte level of each
battery unit (if using non-standard batteries that are not
maintenance free).
4. When charging, open the battery compartment for
ventilation.
5. Insert the AC power cord of the charger into outlet or
other power source.
6. Insert the DC cable of the charger into the battery
charging port at the back of the machine.
7. The charger will automatically begin charging, and will
automatically turn off when batteries are fully charged.
Note: The machine will not be operable when the charger
is connected. Note: If you must discontinue charging
before the charging is completed, do not unplug the DC
+
+
+
+
+
+
Fury RSW55
5
cable of the charger from the socket first. To avoid electric
arc discharge, please unplug the AC power cord first.
8. After charging, check the electrolyte level of batteries
again (if using non-standard non-maintenance-free
batteries).
Warning: Do not place metal tools, shavings, or debris on
batteries as this could cause a spark.
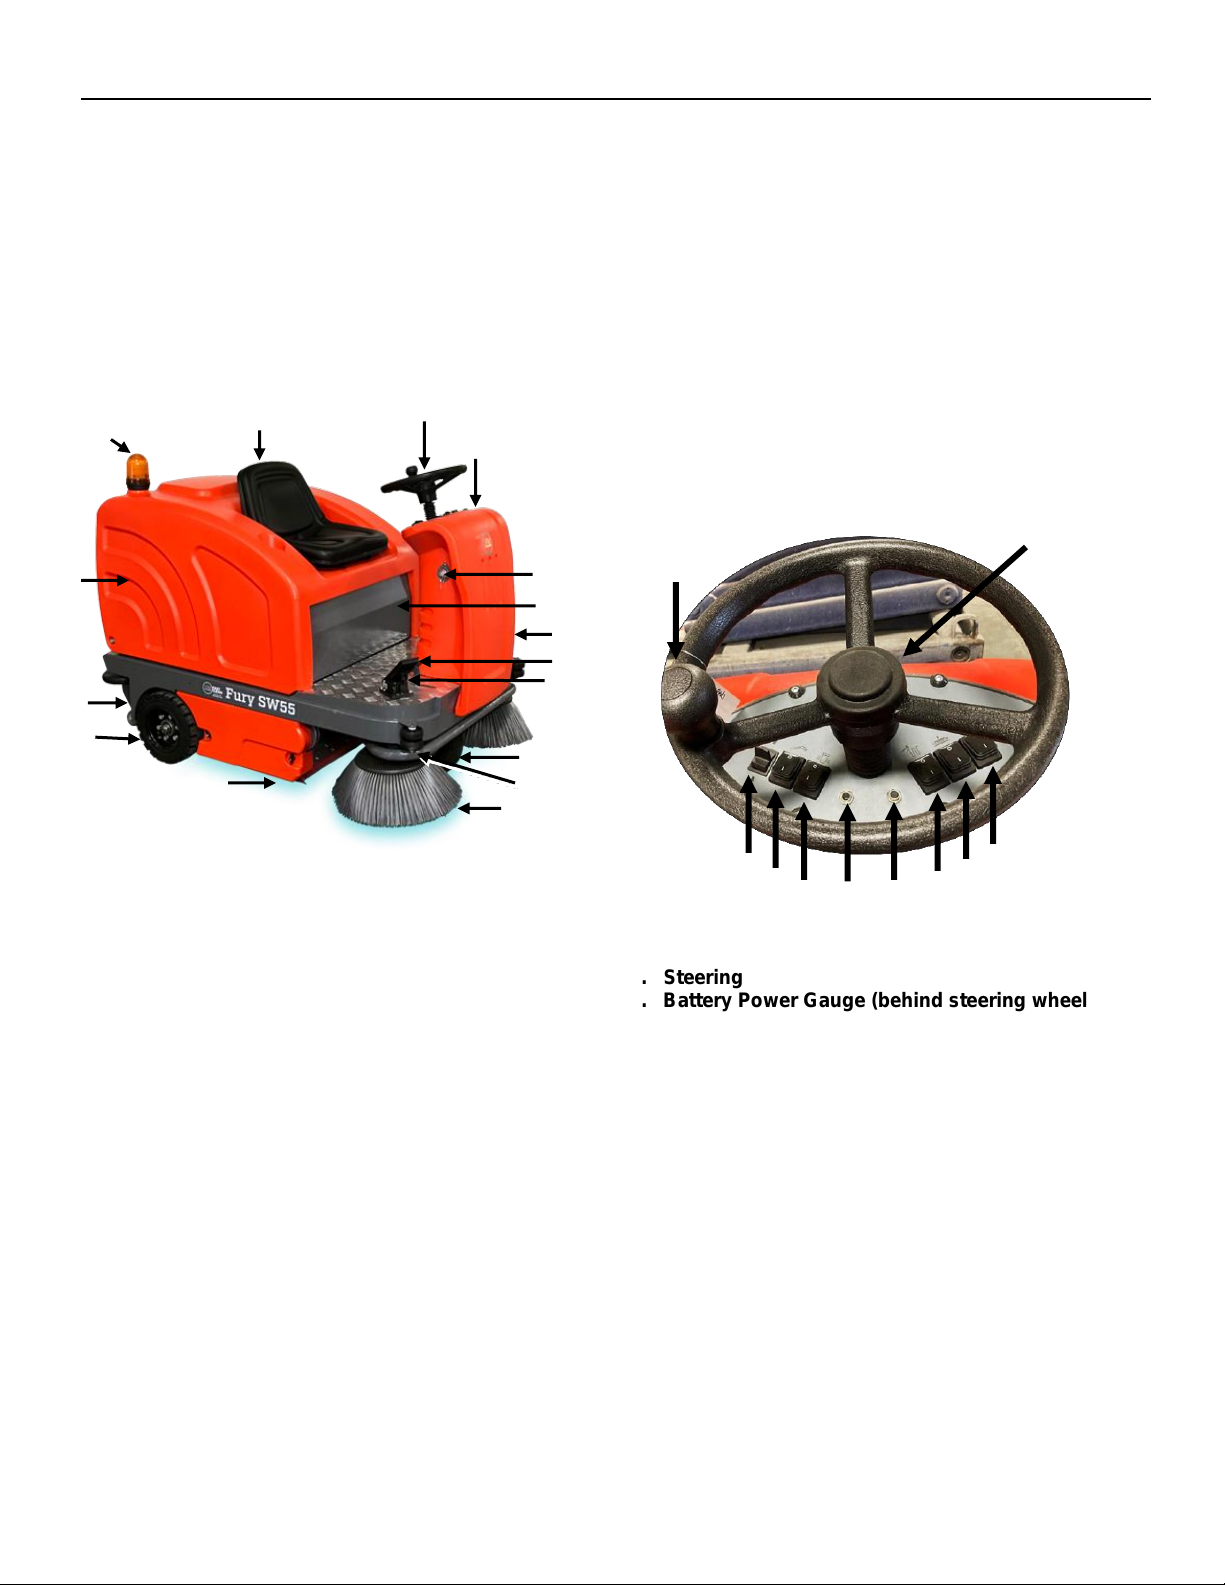
Machine Diagram
1. Warning Beacon
2. Operator Seat
3. Dust Bin (on back)
4. Charging Port (on back)
5. Rear Wheels
6. Main Sweeper Brush & Dust Suppression
Water Tank
7. Steering Wheel
8. Control Panel
9. Power Switch (Key)
10. Battery Compartment (under seat)
11. Dust Board Pedal Raise/Lower (allows
sweeping up of larger debris)
12. Brake Pedal
13. Acceleration Pedal
14. Front Wheel
15. Dust Suppression Spray Nozzles
16. Side Brooms
Checklist Before Running the Sweeper
□ Check the battery power. Charge batteries if power is
below 80%. New batteries take about 10.5 hours to charge.
□ Check the condition of the side brooms and main
sweeper brush. Replace if they are worn out or
damaged. Adjust lower if they do not meet the ground.
(See “Maintenance – Side Brooms” for details).
□ Check for entangling objects wound around or stuck in
the main brush or side brooms. Remove such items.
□ Check that there is water in the dust suppression spray
system. If it is empty or nearly empty, add water through
the port at top left in back.
□ Check that the dust bin is empty. Check for blockages.
□ Check that filtration system has been shaken/cleaned.
Control Panel
1. Steering
2. Battery Power Gauge (behind steering wheel)
3. Forward/Reverse Switch
4. Water Spray Switch (allows nozzles to spray water
around area of side brooms to reduce dust)
5. Backup Warning Beeper
6. Dust Board Raise/Lower Motor Breaker
7. Main Brush Breaker
8. Dust Vibration Switch (activates vibration of dust
filter to shake dust out of filter)
9. Side Broom Switch (activates side brooms)
10. Main Brush and Vac Switch (turns main brush and
vac system on/off)
Starting the Machine
1. Turn the main power key to the ON position.
2. Press the forward/reverse switch.
1
2
3
5
6
7
8
9
11
14
13
1
2
3
4
5
6
7
8
4
12
15
9
10
10
16

Fury RSW55
6
3. Turn on side brooms and main sweeping brush. This will
cause side brooms and main brush to lower into working
position. This will also activate the vac system.
4. Push the accelerator pedal to drive the sweeper forward
or backward. (Activate warning light/backup beeper when
the machine is in reverse).
5. Push the brake pedal to stop the machine.
Important: If there is abnormal noise or operation of the
sweeper, immediately park the machine on level ground,
turn off the power, and inspect for problems. Contact your
local service center.
Note: It is recommended to keep driving speed between 3
to 4 miles per hour.
Operating the Machine
1. This machine should be operated only by trained
professionals who are familiar with its operations.
2. Do not leave the machine running while unattended.
3. Always be aware of your surroundings and the location
of other workers in your area when you are operating the
machine.
4. Warning! Rollover hazard: Do not drive the sweeper
on an incline greater than 20%.
5. Warning: Do not drive the sweeper through standing
water.
6. Warning: Do not attempt to sweep up ropes, belts,
metal wires, or other items which could easily entangle the
sweeping brushes and damage the machine.
7. Warning: Do not attempt to sweep up flammable,
combustible, or burning materials, or reactive metals.
8. Please adjust driving speed to working conditions. Slow
down in congested areas or when turning. Also slow down
when operating on a sloping or slick surface.
9. While operating the sweeper, vibrate the dust filter every
30-40 minutes for a duration of 2 minutes in order to clear
it out and ensure optimal cleaning efficiency. (Exception:
during the first week when breaking in a new machine,
vibrate the dust filter every 15 minutes). Park the machine,
and turn off side brooms and main brush during this
operation.
10. In order to prolong the life of the side brooms, do not
run them unless you are sweeping along a wall or other
large obstacle. The main brush and vac will be sufficient
for cleaning large open areas.
11. If you stop the machine during cleaning, immediately
turn off the main brush and side brooms. Allowing them to
continue to run while machine is stationary could abrade
floors and wear down the brushes.
12. Push the pedal to raise the dust board when sweeping
up debris larger than 2” in height (leaves, crushed pop
cans, paper, etc.). Important: Do not attempt to run the
sweeper over immovable obstacles higher than 2”.
13. If excessive dust is generated duringsweeping (even
after the filter has been vibrated and cleaned), turn on the
dust suppression system which will spraywater around the
side broomsto help reduce dust.
14. While sweeping, periodically check to see if the dust
bin is full, and dump it if necessary. Always empty the dust
bin when finished sweeping.
15. To dump the dust bin, unlatch it in back, pull up handle,
and slide bin out of housing. Takedust bin to trash container
and shake or vac out. Do not blowor hose out. Replace dust
bin and slide forward until the rear edge meets the hook and
seals properly. Relatch. (See “Maintenance – Dust Bin” for
details).
16. When finished sweeping, raise the side brooms and
turn off the main brush and vac. Always store the machine
with brushes raised, as this will prolong their usefulness.
17. Follow routine daily maintenance procedures after
using the machine.
Important: Maintenance, overhaul or repair work should
be done only by a trained professional or an authorized
service center.
Warning: Risk of electric shock. Disconnect the battery
cables before performing any electrical maintenance.
Maintenance –Side Brooms
Before and after using the sweeper, inspect the side
brooms for wear. When the side brooms become worn, the
bristles will not properly make contact with the ground, and
your sweeper will not be able to clean properly.

Fury RSW55
7
Side brooms can be adjusted lower so that the bristles will
make contact with the ground. To lower the side brooms,
please observe the following procedures:
1. Important: Be sure power is off before performing any
maintenance on the machine!
2. Rotate the star-shaped nut clockwise to lift the side
brooms as far as the front bar allows.
3. Rotate the star-shaped nut counterclockwise to lower
the side brooms.
4. If side brooms are fully lowered and still do not meet the
ground, or if bristles are too deformed to clean properly, it
is time to replace the side brooms.
To install new side brooms, please observe the following
procedures:
1. Important: Be sure power is off before proceeding!
2. Unscrew the 3 bolts around the side broom axle. (See
photos below).
Top Side of Left Broom Underside of Broom
3. Remove the right hand broom by turning it clockwise,
and the left hand broom by turning it counterclockwise.
Brooms should pop off easily.
4. Take out the fixed bolts of the old brooms, and place
them into the new brooms.
5. Put new brooms on by turning them opposite from
before (counterclockwise on right and clockwise on left).
6. Screw in the 3 bolts around the broom axle.
7. Follow the previous set of instructions for adjusting the
broom height.
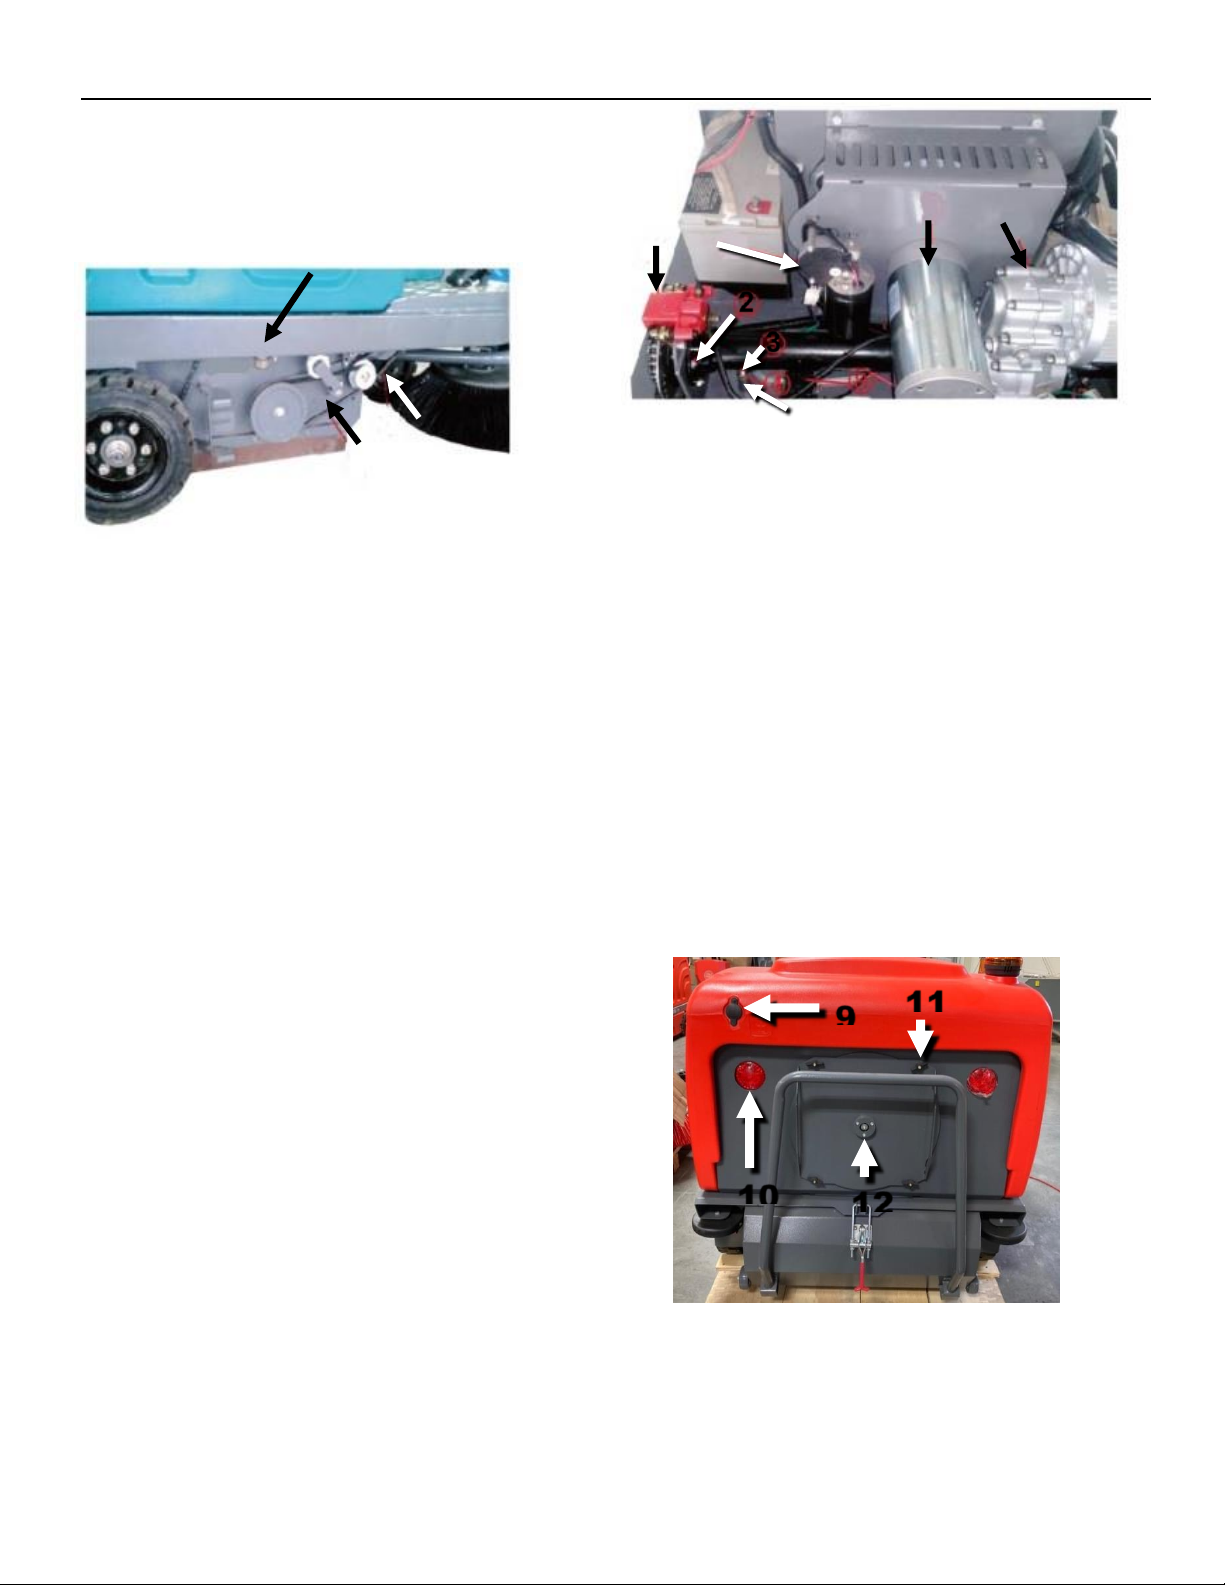
Maintenance –Main Brush
When the main brush wears down, the bristles will not
properly make contact with the ground, and your sweeper
will not be able to clean properly. You will notice when it is
time to adjust the height of the main brush because the
sweeper will leave debris or lines of dust on the ground.
To adjust the main brush lower, please observe the
following procedures:
1. Important: Be sure power is off before performing any
maintenance on the machine!
2. Take off the cover panel on left side of machine near the
floor by removing the wingnuts.
3. Unscrew fastening nut as shown in photo at bottom left (2).
4. Rotate the nut (2) counterclockwise until the bristles of
the main brush are making contact with the ground
(about 1”)
5. Fasten the nuts (2 & 3).
If the main brush is worn out, please observe the following
procedures to replace it.
1. Take off the cover panel on left side of machine near the
floor by removing the wingnuts.
2. Unscrew the nut (4).
3. Take out main brush plug (1).
4. Pull up the rocker arm (5).
5. Remove fastening nuts on bottom (6 & 7).
6. Remove the fender (8).
7. Remove the main sweeper brush.
8. Install the new sweeper brush. Adjust to make both
ends the same height, and make sure the bristles make
proper contact with the ground.
9. Reverse steps 1-6 in order to finish.
Warning: if you reverse the main electrodes when wiring
batteries, this could cause the main brush to operate in
reverse. Be sure to reconnect everything properly. If your
main brush is rotating the wrong way, check the battery
wiring!
1
2
3
4
5
8
6
7
Fury RSW55
8
Maintenance –Main Brush Drive Belt
After 100-150 hours of use, the drive belt for the main
brush should be checked. If the belt is too loose, tighten it
according to the following instructions. If it is severely
worn, replace it.
1. Open the side door on the right.
2. Take out the bolts (9).
3. Tighten the belt tensioner (10). If adjusting, then put
bolts back in, and close the side door. If replacing,
loosen the belt tensioner, and proceed to step 4.
4. Take out the old driving belt. (11)
5. Install the new driving belt.
6. Replace bolts.
7. Close the side door.
Warning! Do not put too much tension on the drive belt, or
this will cause too much pressure on the bearings.
Maintenance –Dust Suppression Sprayer
Empty water tank at least once a week and clean filter.
Periodically unscrew the water tank cap to observe the
water level and check for blockages. (See #9 at right).
Water tank should hold enough water to spray for one run
time (about 7 hours).
Maintenance –Internal Drive System (See photo on
top right):
The main drive system of the Fury RSW55 includes the
motor, gap bridge differential gear case, and clockwise/
counter-clockwise change-over switch, which causes the
sweeper to run forward or backward. The accelerator
pedal controls the speed of the machine (0 - 3.7 mph).
1. Brake cylinder (one on each side of machine)
2. Screws holding in drive chain
3. Bolt to tighten drive chain
4. Screw
5. Dust filter vibration motor
6. Vac motor
7. Drive motor and differential gear case
Adjustment of Drive Chain (as shown in the photo
above):
After 100-150 hours of use, please check the tightness of
the drive chain. If it is too loose or frictions with the
baseboard, tighten it according to the following procedure:
1. Open the Drive System enclosure under the seat.
2. Take out the four screws (2).
3. Take out the screw (4).
4. Tighten the drive chain by turning the bolt (3)
counterclockwise.
5. Replace the screws (2, 4)
Warning: Do not adjust the drive chain too tightly or this
will put too much pressure on the bearings. Adjust the
chain on both sides of machine simultaneously.
Maintenance –Dust Board
9. Water Tank Fill Cap
10. Tail Reflectors
11. Dust Filter Fastener Wing Nuts (to remove Filter)
12. Filter Shaker Bearing
9
10
11
9
10
11
12
1
2
3
4
5
6
7

Fury RSW55
9
The dust filter prevents debris from escaping during
sweeping. To replace a damaged dust filter, remove the
wing nuts (11) and take out the old filter. Install the new
filter in the same position (approx. 1/8” from the ground).
Maintenance –Dust Bin
Latched Unlatched
In order to dump the dust bin, please do the following:
1. Park the sweeper on level ground and turn off the
power with the switch on the main column.
2. Unlatch the bin from its housing (see photos above).
3. Use handlebar to back dust bin out of housing.
4. Simply roll the dust bin to waste disposal/maintenance
area, turn over, and shake out or vac out. Important: Do
not blow or hose out the dust bin.
5. Return clean dust bin
to its housing, push
forward as far as
possible, then refasten
latch. Note: latching
the dust bin will pull it
into place and lock it in.
Maintenance –Dust Filter
Note: Do not run the vibration procedure longer than the
recommended 2 minutes. If the dust filter is especially dirty
or clogging frequently, remove it and tap it lightly over a
trash bin, or use a vacuum.
Note: Do not use a hose, pressure washer, compressed air,
or blower to clean the inside of the dust bin or dust filter.
Depending on use of machine, wear and tear on the filter,
and frequency of vibration cleaning of filter, the dust filter
may need to be replaced at around 250 hours. Consult
your local service center if you have questions.
In order to clean or change the dust filter, please proceed
as follows:
1. Park the sweeper on level ground, and turn off the
power with the switch on the main column.
2. Unscrew the wing nuts as shown in photo below.
3. Carefully slide the dust filter out of its housing.
4. Shake or vac out the filter. Do not use blower or water!
5. Inspect the condition of the seal ring around the filter
core and replace if necessary.
6. Replace the filter in its housing. Note: you must line the
filter up precisely in order for it to slide into proper place.
7. Once filter is in place, the screws will fit through the
holes on the dust cover. Replace the wing nuts on the
screws and tighten properly.
Storing the Machine
1. Charge the batteries before storing. If the machine is to
be stored unused for long periods of time, set up a
schedule to regularly recharge the batteries, as batteries
will slowly lose charge over time even when not in use.
Do not allow batteries to run completely out of charge,
as this could permanently damage them.
2. Thoroughly empty the dust bin and clean the dust filter
with brush or vac.
3. Raise the brushes, engage parking brake (if equipped),
and turn off power. Store the machine in a dry place. Do
not store machine outside.
4. If the sweeper will be stored in a very cold place,
remove all liquids from the machine or add antifreeze.
Fury RSW55
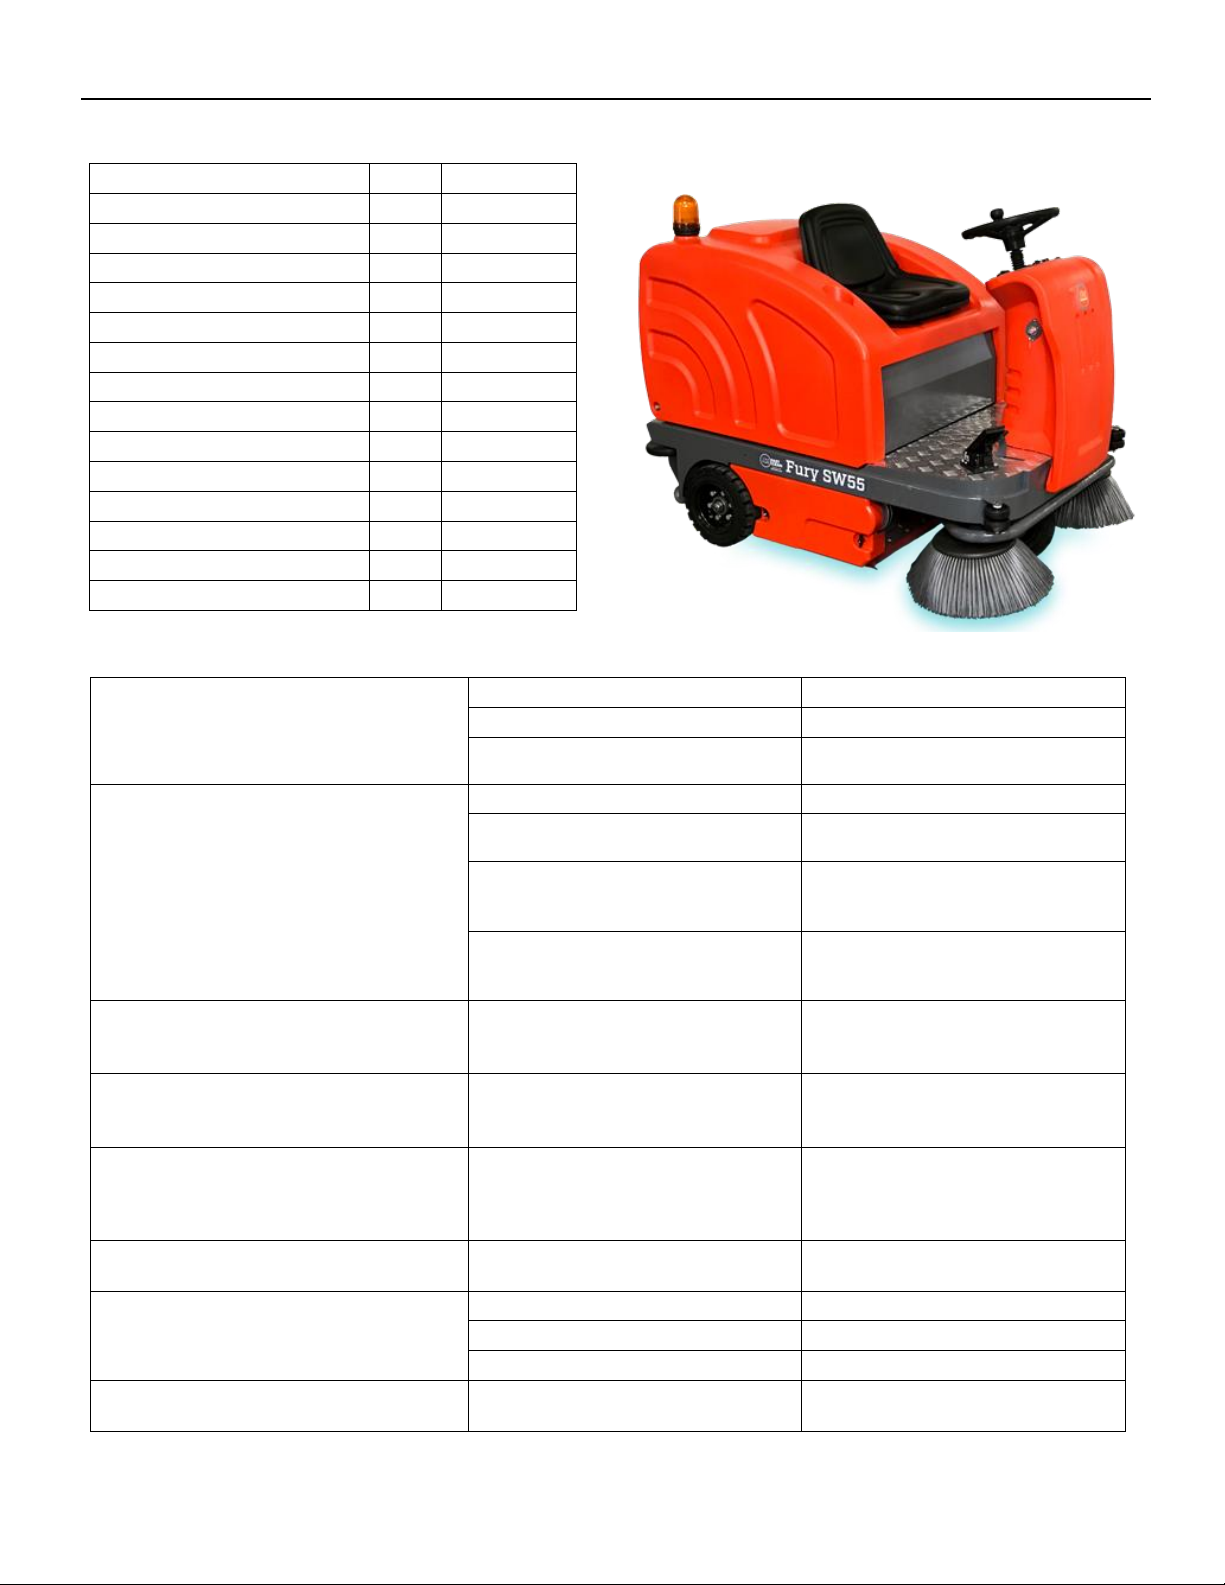
10
Machine Specifications
Specification
Unit
Fury RSW55
Voltage
V
24 (4 x 6V)
Battery Capacity
AH
100
Run Time
hrs
7 (approx.)
Cleaning Efficiency
ft2/hr
53,800
Maximum Floor Grade
%
20
Sweeping Path
in
55
Dust Bin Capacity
gal
34.3
Drive Motor
hp
1.61
Main Brush Motor
hp
1.1
Side Brush Motors
hp
.13 (x 2)
Vac Motor
hp
.54
Lift Motors
hp
.13 (x 2)
Machine Weight (w/batteries)
lbs
1102
Machine Dimensions
in
55 x 39 x 63
Troubleshooting
The machine will not operate.
Batteries have no power.
Charge batteries.
Batteries will not charge.
Replace batteries.
Battery wiring is not connected.
Check battery wiring for loose
connection. Tighten if needed.
The sweeper leaves out large leaves
or large garbage.
Machine is moving too fast.
Slow down while sweeping.
The brushes are not meeting the
floor properly.
Adjust position of side brooms
and main sweeper brush.
Bristles on brush are deformed by
wires or ropes wrapped around
them.
Check side brooms and main
brush for obstructions and
remove them.
The lifting mechanism of the front
dust board does not work.
Repair the dust board, and step
on the pedal to make it lift up or
down.
The sweeper leaves dust on the
ground or dust comes from the side
dust board.
The filter is blocked.
Clean the dust filter. Check it for
clogs.
The debris runs in front of the
machine, but doesn’t go into the
debris hopper.
The front dust board cannot rise
up.
Replace the front dust board.
Step on the pedal to make it lift
up.
The brushes wear out too rapidly.
The brush pressure is too high, or
floors are very coarse.
Adjust brushes up to reduce
pressure. (See Maintenance –
Side Brooms and Maintenance –
Main Brush).
The main brush makes a loud noise
when working.
The brush is entangled by wires or
ropes.
Remove the obstructions. If this
does not help call service center.
The brush does not rotate when
working.
Drive belt is damaged.
Replace drive belt.
The bearing is damaged.
Replace bearing.
The triangular belt is worn.
Replace triangular belt.
The brush and vac motor do not
work.
The overload protection switch
was bumped.
Press the overload protection
switch.

Fury RSW55
11
The drive motor will not advance or
back up when working.
Drive motor chain is broken.
Replace drive motor chain.
The pedal governor is damaged.
Replace the pedal.
The control switch is damaged.
Replace the switch.
The controller is damaged.
Replace the controller.
The electrodynamic vibration
equipment does not work.
Switch has malfunctioned.
Replace the switch.
The fuse has burnt out.
Replace the fuse.
Motor brush is damaged.
Replace motor brush.
Bearing is worn out.
Replace bearings.
Motor coil has burnt out.
Replace motor.
Motor has been overloaded.
Contact your local service center.
The electrodynamic vibration is too
large and the fuse sparks.
The electrodynamic vibration load
is too large, fuse is malfunctioning,
or there is a short circuit.
Contact your local service center.
The side brush or main brush works
but does not rise or fall.
The overload protection switch is
bumped, or the lifter is damaged.
Press the overload protection
switch, or replace the lifting motor,
Run time has shortened.
Batteries have worn out.
Replace batteries.
Battery charger has failed.
Replace charger or contact
service center.
Maintenance and Check-up Schedule
Interval
8 hours
80 hours
150 hours
500 hours
1500 hours
1
Check the battery voltage
2
Check the carbon brush of drive
motor
3
Check the carbon brush of fan
4
Check the condition of main brush
and side brooms
5
Check the cleaning of the filter
6
Check the dashboard
7
Check the tension of the drive belt

Fury RSW55
12
Warranty Card
(please fill out and return to dealer)
Name Phone #
Address
City State Zip
Purchase Date Invoice #
Model # Serial #
Local Dealer Local Dealer City/State
Warranty provided with purchase invoice.
Table of contents
Popular Blower manuals by other brands


Stihl
Stihl BGA 57 instruction manual

Bosch
Bosch DHI1FZUC installation manual

Super Handy
Super Handy GUT078 Operator's manual

Craftsman
Craftsman 358.794740 Operator's manual

Giant-Vac
Giant-Vac Whisper-Jet 60BWJ Assembly instructions operator's manual parts list

pellenc
pellenc AIRION BP Translation original manual