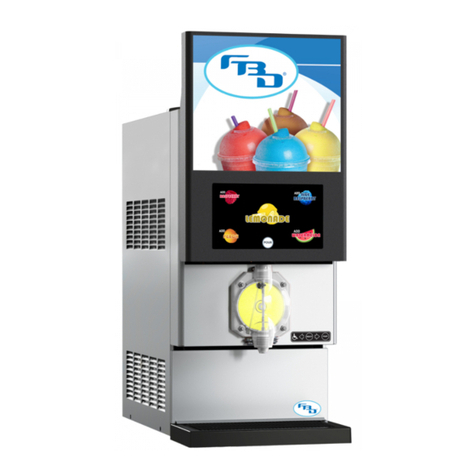
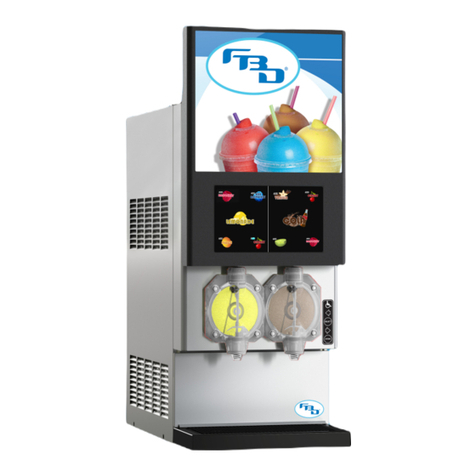
FBD 372 User manual

MULTI-FLAVOR
INSTALLATION &
OPERATION MANUAL
372/771/772
24-M4MF-0001_03
MODELS
MERCHANDISER

This manual is for general informational purposes only and is not intended to cover every potential installation or operational
possibility. The parts and equipment addressed herein are warranted only to the extent covered by FBD’s Parts and Equipment
Warranty. FBD makes no express warranties as to any matter whatsoever and hereby disclaims all implied warranties including,
without limitation, the implied warranties of merchantability and fitness for any particular purpose. In no event shall FBD be liable
or obligated to any customer or to any third party for incidental, consequential, or special damages, regardless of the theory of
liability, arising out of, or in any manner related to FBD parts, equipment or any delay with respect to its delivery.
The information contained in this document is subject to change without notice.
© 2021 FBD Partnership, L.P. All Rights Reserved.
FBD TECHNICAL SUPPORT: 866-323-2777 or www.fbdfrozen.com

INSTALLATION & OPERATION ADDENDUM
MULTI-FLAVOR MERCHANDISERS
1
TABLE OF CONTENTS
1. SAFETY .................................................................................................................................... 3
1.1 ELECTRICAL...................................................................................................................... 3
1.2 GENERAL PRECAUTIONS ................................................................................................. 3
2. SPECIFICATIONS AND REQUIREMENTS................................................................................. 4
2.1 GENERAL REQUIREMENTS ............................................................................................... 4
2.2 DIMENSION AND WEIGHT SPECIFICATIONS ..................................................................... 4
2.3 CONTENT SPECIFICATIONS .............................................................................................. 4
3. INSTALLATION ........................................................................................................................ 5
3.1 INSTALLATION OF 372 MULTI-FLAVOR MERCHANDISER ................................................. 5
3.2 INSTALLATION OF 771/772 TOP-OPENING MULTI-FLAVOR MERCHANDISER .................. 6
3.3 INSTALLATION OF 771/772 SIDE-OPENING MULTI-FLAVOR MERCHANDISER ................. 7
4. MULTI-FLAVOR MERCHANDISER DISPLAY ............................................................................ 8
4.1 START-UP ......................................................................................................................... 8
4.2 SCREEN LAYOUT .............................................................................................................. 9
4.3 INITIAL SET UP ................................................................................................................. 9
5. MENU STRUCTURE ............................................................................................................... 10
5.1 ACCESSING MENUS........................................................................................................ 10
5.2 CHANGE GRAPHICS........................................................................................................ 12
5.3 CHANGE VIDEO............................................................................................................... 13
5.4 CLEAN DISPLAY .............................................................................................................. 14
5.5 INFORMATION ................................................................................................................ 15
5.6 STATUS........................................................................................................................... 15
5.7 ALTERNATIVE FLAVOR LOCKOUT ................................................................................... 16
5.8 CONFIGURE FLAVORS .................................................................................................... 17
FLAVOR TYPES................................................................................................................ 17
CALIBRATE FLAVORS...................................................................................................... 18
5.9 SETTINGS........................................................................................................................ 20
CONSUMER INTERFACE ................................................................................................. 20
DISPENSE SETTINGS ...................................................................................................... 22
MISCELLANEOUS SETTINGS ........................................................................................... 26
5.10 DISPENSE DATA ............................................................................................................. 28
SUMMARY ...................................................................................................................... 28
DRINK COMBINATIONS .................................................................................................. 29
5.11 SYSTEM ADMINISTRATION............................................................................................. 30
PASSWORDS................................................................................................................... 30
MEDIA............................................................................................................................. 31
SETTINGS ....................................................................................................................... 32
SYSTEM .......................................................................................................................... 33
6. ADDING IMAGES TO MERCHANDISER.................................................................................. 34
6.1 ADDING CONTENT TO USB DRIVE .................................................................................. 34
6.2 ACCESSING USB PORTS AND USB CONTENT................................................................. 35
7. STATUS MESSAGES .............................................................................................................. 37
8. TROUBLESHOOTING ............................................................................................................. 38
8.1 77X HARDWARE OVERVIEW............................................................................................ 38
8.2 372 HARDWARE OVERVIEW............................................................................................ 39
8.3 77X VIDEO DOOR HARDWARE OVERVIEW....................................................................... 41
8.4 MERCHANDISER-TO-DISPENSER CONNECTIONS........................................................... 43
8.5 STATUS LEDS.................................................................................................................. 43
8.6 TROUBLESHOOT POWER ISSUES ................................................................................... 44
8.7 TROUBLESHOOT COMMUNICATION ISSUES .................................................................. 44
8.8 TROUBLESHOOT DISPLAY ISSUES.................................................................................. 44
INSTALLATION & OPERATION ADDENDUM
MULTI-FLAVOR MERCHANDISERS
2
TABLE OF CONTENTS (CONTINUED)
8.9 CRITICAL ERROR SCREEN .............................................................................................. 45
8.10 TROUBLESHOOTING OVERVIEW..................................................................................... 45
9. APPENDIX ............................................................................................................................. 46
9.1 DISPENSE FUNCTION ..................................................................................................... 46
9.2 DISPENSE FUNCTION (WITH VARIED DISPENSE SETTINGS)........................................... 47
9.3 DISPENSE FUNCTION (WITH ALTERNATIVE FLAVOR)..................................................... 48

INSTALLATION & OPERATION ADDENDUM
MULTI-FLAVOR MERCHANDISERS
3
1. SAFETY
1.1 Electrical
This accessory must be properly installed according to the instructions in this manual. Proper installation will ensure
that the accessory is properly grounded and prevent possible fatal electric shock or serious injury to the operator. Before
attempting any internal maintenance, disconnect electrical power to the dispenser to prevent personal injury. Only
qualified personnel should service internal components or electrical wiring.
1.2 General Precautions
This equipment, depending on the accessory, can weigh up to 25.6 pounds (11.6 kilograms). To avoid personal injury or
equipment damage, do not attempt to lift the merchandiser without help. Working with a partner is highly recommended.
Take care when lifting and positioning the merchandiser to avoid damage and injury.

INSTALLATION & OPERATION ADDENDUM
MULTI-FLAVOR MERCHANDISERS
4
2. SPECIFICATIONS AND REQUIREMENTS
2.1 General Requirements
The merchandiser is compatible with only the dispenser that corresponds to its merchandiser series, and will not function
properly if installed onto a dispenser outside of that series. The 771 and 772 multi-flavor dispensers belong to the 77x
series and therefore use the same merchandiser model; whereas, a 372 multi-flavor merchandiser should only be installed
on a 372 dispenser.
2.2 Dimension and Weight Specifications
2.3 Content Specifications
* Flavor images automatically scale without distortion.
† Use exact sizes for the background images. Graphics will be stretched and distorted if the size is incorrect.
‡The video area can display either a video or static image. Use exact sizes. Content will be stretched and distorted if the
size is incorrect.
Media Type
Supported
File
Formats
Resolution (W x H in pixels)
372 MFLV 771 MFLV 771 MFLV
Video Door 772 MFLV 772 MFLV
Video Door
Base Flavor & Add-in
Flavor Images* PNG 600 x 500 600 x 500 600 x 500 600 x 500 600 x 500
Background Image(s)†PNG, JPEG 800 x 480 1920 x 1080 1080 x 640 950 x 1080 535 x 640
Video Area‡MP4, MOV,
PNG, JPEG N/A N/A 1080 x 1280 N/A 1080 x 1280
Unit Door Type Width Depth Height Weight
372 MFLV Short Door 15.75" (400 mm) 2.2" (56 mm) 13.5" (342 mm) 8.7 lb (3.9 kg)
771 MFLV
772 MFLV
Short Door
17.0" (432 mm) 2.9" (74 mm)
15.6" (396 mm) 12.9 lb (5.9 kg)
Tall Door 23.1" (587 mm) 18.9 (8.6 kg)
Video Door 26.0" (660 mm) 25.6 lb (11.6 kg)

INSTALLATION & OPERATION ADDENDUM
MULTI-FLAVOR MERCHANDISERS
5
3. INSTALLATION
The following installation instructions apply to merchandisers that are not already installed on dispensers upon arrival.
Since the merchandiser receives power from the dispenser and communicates with the main control board, it is important
that power and serial harnesses be connected correctly during installation.
3.1 Installation of 372 Multi-Flavor Merchandiser
1 Remove the merchandiser from the packaging and inspect it for damage or missing parts.
2Align the merchandiser hinges with the bolt holes located at the top-front of the dispenser, and secure all hex
bolts through the hinge and into the frame.
3Connect the door power and serial communication harnesses to their respective mate on the dispenser
(black connector with black connector, white connector with white connector).
4Push the merchandiser down until it snaps into place. Ensure that the pneumatic faceplate’s activation hose
stays looped and is not pinched when the merchandiser is closed.

INSTALLATION & OPERATION ADDENDUM
MULTI-FLAVOR MERCHANDISERS
6
3.2 Installation of 771/772 Top-Opening Multi-Flavor Merchandiser
1 Remove the merchandiser from the packaging and inspect it for damage or missing parts.
2Remove the collar from each of the brackets on the merchandiser with a 3/32" hex wrench. Place the collars
and wrench nearby so they are accessible for the next step.
3 As shown in figure below: (A) slide each of the hinge pins from the merchandiser into the pivot holes on the
upper brackets on the dispenser (from right to left); (B) place the collars back on the hinge pins and tighten
the set screw on each of the shaft collars with the hex wrench.
4 Snap the shocks securely onto the ball joints on the front of the dispenser.
5Connect the power and serial communication harnesses to their respective mate from the dispenser (black
connector to black connector, white connector to white connector). Slowly push the merchandiser down
into "closed" position.

INSTALLATION & OPERATION ADDENDUM
MULTI-FLAVOR MERCHANDISERS
7
3.3 Installation of 771/772 Side-Opening Multi-Flavor Merchandiser
1 Remove the merchandiser from the packaging and inspect it for damage or missing parts.
2 Add the snap ring (1) to the bracket (2). 3 Install the hinge brackets on the front of the dispenser.
Ensure the snap ring faces toward the outside of the
dispenser.
1
2
4Use a 3/32" hex wrench to loosen and remove the collar from the hinge bracket located on the back of the
door. Repeat on lower bracket. Place collars nearby so they are accessible to add back to the brackets once
the merchandiser is connected to dispenser.
COLLAR
5Align the door hinge bracket pins to the holes on the dispenser's hinge bracket. Place the collar back on the
hinge pin and tighten the set screw with a hex wrench.
6Connect the power and serial communication harnesses to their respective mate from the dispenser (black
connector to black connector, white connector to white connector) and close the merchandiser until it snaps
into place.
DOOR
LATCH

INSTALLATION & OPERATION ADDENDUM
MULTI-FLAVOR MERCHANDISERS
8
4. MULTI-FLAVOR MERCHANDISER DISPLAY
4.1 Start-Up
Once the dispenser has been powered on, the digital screen will begin to boot. The display’s backlight will activate and
will be followed by the FBD logo. It may take up to thirty seconds for the display to fully load. Once the boot sequence
is complete, the FBD logo will be replaced by the multi-flavor interface (shown below). The message on the interface
will vary depending on the state of the dispenser (i.e. if the barrel is off, the message will be "Barrel Off"; if everything is
connected and running, then the message will be "Touch Flavors!").
Interface for 372 MFLV and 771 MFLV
Interface for 772 MFLV Interface for 772 MFLV Video Door

INSTALLATION & OPERATION ADDENDUM
MULTI-FLAVOR MERCHANDISERS
9
4.2 Screen Layout
The multi-flavor setup allows the user to add one or more flavors to dispense with the base flavor in the barrel. The user
can select any variety of flavors; each flavor will be marked as it is selected. When one or more is selected, the POUR
button will appear to indicate that a drink is ready to be dispensed. The dispenser will continue to pour for as long as the
POUR button is held. If the POUR button is pushed without any flavors selected, only the base flavor will dispense. In
addition to displaying the flavor images, the screen will also show status messages.
The flavor messages are displayed as image overlays. When the status message appears, the flavor image will be obscured
so that the message can be seen. There are two flavor messages: "Selected" which is displayed when that flavor has been
selected for dispensing and "Sold Out" which is displayed when a flavor syrup is out.
The status messages will appear at the bottom-center section of the display. These messages will provide status information
for the barrel. For a list of all status messages, please refer to Section 7 of this manual.
After flavor selections are made, the status message area of the display will change to a "PUSH TO POUR" button.
Item Description
1 Flavor Buttons: Select flavor add-ins. Flavor messages will appear over flavors as image overlays.
2 Base Flavor Button: Flavor of the base syrup.
3 Barrel Status: Shows status of barrel.
4 Pour Button: Press and hold to dispense a drink.
5 Video Portion: Displays video (see Section 4.1)
4.3 Initial Set-Up
The flavor images will need to be set as part of the initial set-up of the merchandiser. Please refer to Section 5.1 for
additional information on menu options and Section 5.2 for additional information on updating the images for the flavors
(flavor add-ins and base syrup). Additionally, all flavor injection modules will need to be calibrated before the dispenser is
ready for store operation. Please refer to Section 5.8 for additional information on calibrating flavor modules.
All other door and dispense settings will be pre-configured.
11
1 1 1
1
1
1
22
4
3

INSTALLATION & OPERATION ADDENDUM
MULTI-FLAVOR MERCHANDISERS
10
5. MENU STRUCTURE
5.1 Accessing Menus
The multi-flavor merchandiser allows the user to change the visual content displayed on the interface and the functionality
of the multi-flavor barrel through the service menus. The menu is locked and not accessible to consumers but, once
opened by authorized personnel, can be used to change visual content, barrel settings, and data management. Follow the
steps below to unlock the screen.
1Start by touching any of the four corners and trace around the edges of the display without lifting your finger in a
clockwise or counterclockwise direction until coming back to the corner where you started.
2Enter the store operator, store manager, or service technician password. Please note that the merchandiser has
been set up with default passwords for store operators and store managers. A password can be changed, if desired,
through the service technician access level.
3Once the screen has been unlocked, the menu options will appear. There are three levels of access and the
available options will vary based on the password used. Please refer to the Menu Options by Access Level table in
this section for a breakdown of available menus. Additionally, every screen will also show a back or home
button to navigate through the menus.

INSTALLATION & OPERATION ADDENDUM
MULTI-FLAVOR MERCHANDISERS
11
MENU OPTIONS BY ACCESS LEVEL
LEVEL AVAILABLE MENUS
Store Operator Configure flavor buttons and background images.
Option available to sample dispense to verify flavor(s) selected.
Configure content on video portion of display. Either a video or a static image can
be selected.*
Temporarily disables the touchscreen so the display can be cleaned.
View information menu. Lists door software, settings, dispense software, part
numbers, serial number, and legal information.
Shows status of connected devices such as USB drives, accelerometer, and
dispenser communication. Icon will change based on the overall state.
Store Manager • Same options as store operator.
Lock/unlock alternative flavors.
Service Technician†•Same options as store manager.
Configure flavors - Set up add-in flavor types and calibrate their flow rates.
Access to door and dispense settings.
Used to configure settings, view status, and diagnose DRAFTSERV ®.DRAFTSERV®
is a third party add-on tool that is disabled by default.DRAFTSERV® is a registered
trademark of DraftServ Technologies, LLC. For additional information, contact
FBD Sales.
View drink dispense data.
System administration controls. Controls other settings and parts of the interface
functionality such as passwords for store operators or managers.
*Option only available for video doors.
†Intended for use by trained service technicians only.

INSTALLATION & OPERATION ADDENDUM
MULTI-FLAVOR MERCHANDISERS
12
5.2 Change Graphics
The "Change Graphics" menu allows the operator to update the flavor and background images displayed on the main user
interface. This menu is available to the store operator, store manager, and service technician. Once selected from the
menu screen, please follow the steps below to change the images.
1Select the graphic element to change (flavor or background) on the layout found on the top left side of the screen.
When a graphic element is selected, it will be highlighted by a blue box and its description will be listed below the
layout. Two tabs are located on the right of the menu. The filter tab (left) is used to select a pre-configured filtering
option. If no filters are found, then only the “All Images” filter will be shown. The image gallery tab (right) displays
the filtered images available to choose from. Touch the desired image from the scrolling image gallery on the right.
Available images found in the image gallery are based on the selected element. Additional images can be added
using a USB drive. Refer to Section 6 for information on adding media to the merchandiser. Repeat process for each
element.
2 Once a graphic element is selected, a preview of the image selection will be shown.
3Background images may be chosen from the image gallery on the right, or solid background colors can be selected
by pressing the "Select Custom Background Color" button on the bottom left side of the screen. A color selection
window will appear. Once a color is selected, the text on the top left side will change to match the selected color.
Press the green check mark to return to the previous screen and a preview of the selected color will be shown.
4Once all flavor and background images are set, press the green check mark to save the settings. The images may
take several seconds to load. Alternatively, press the red X to cancel changes. WARNING: Older software revisions
may not have the option to cancel changes and will not show the check mark or red X. Instead, the back and home
icons will be visible; press either to save the changes.

INSTALLATION & OPERATION ADDENDUM
MULTI-FLAVOR MERCHANDISERS
13
5.3 Change Video
The "Change Video" menu allows the operator to update the content displayed on the video portion of the door for
merchandisers with video capabilities. Either a static image or video can be used. This menu is available to the store
operator, store manager, and service technician. Once selected from the menu screen, please follow the steps below to
change the images.
1Upon entering the menu, a scroll box of available images and videos will be shown. The following symbols may be
superimposed on the items:
Video Files
Image Files
Files that either have an incorrect aspect ratio or are too large in resolution (greater than 1920 pixels).
Video files that are too short in duration (less than 4 seconds).
2Select a desired video or image. A preview of the video or image will appear in the video area. Please note that
videos and images with a red X should not be used. Videos with yellow yield sign can be used but they will be
converted to a static image.
3Complete setup by pressing the green check mark in the upper left corner to save the setting. Alternatively, press
the red X to cancel changes.
4 Additional videos and images can be added using a USB drive. Refer to Sections 6.1 and 6.2 for more information.

INSTALLATION & OPERATION ADDENDUM
MULTI-FLAVOR MERCHANDISERS
14
5.4 Clean Display
The "Clean Display" menu disables the screen's touch function to allow the user to clean the display. This menu is available
to the store operator, store manager, and service technician.
1Once selected, a dialog box will appear to verify that the clean display option is being requested. Select the green
check mark to initiate the clean display mode.
2 A 20 second timer will appear. The screen will be unresponsive to touch during the timer countdown.
3 Apply glass cleaner to a soft, lint-free rag and wipe down the screen. Once the timer runs down, the screen will
reactivate.

INSTALLATION & OPERATION ADDENDUM
MULTI-FLAVOR MERCHANDISERS
15
5.5 Information
The “Information” menu displays details about the door software and dispenser firmware. This menu is available to
the store operator, store manager, and service technician. The information in this menu is useful when contacting FBD
Technical Support for troubleshooting. The menu also provides a "View Licenses" button that, when selected, will provide
a QR code which will direct users to a website with legal information.
5.6 Status
The “Status” menu provides the status information useful for diagnostics. This menu is available to the store operator,
store manager, and service technician. When selected, the diagnostic tool can help verify each of the following:
• Communication: A green check mark indicates an active connection between the dispenser and merchandiser. A
red X indicates there are connection issues or there is no communication.
• USB Drives: The merchandiser can detect if a USB has been connected. A green check mark indicates the
merchandiser detects a USB drive. A yellow triangle indicates there is no USB detected. A yellow triangle displayed
for this option is normal, and only indicates a problem if it continues to be shown while a USB is connected.
• Accelerometer: The accelerometer is used to detect the orientation of the door. When the door is open, the down-
lighting will turn off automatically and turn back on when the door is closed. A green check mark indicates the
accelerometer is working. A red X indicates there is a problem with the accelerometer.

INSTALLATION & OPERATION ADDENDUM
MULTI-FLAVOR MERCHANDISERS
16
5.7 Alternative Flavor Lockout
The "Alternative Flavor Lockout" can prevent any flavor set up as an "alternative" flavor from being dispensed. This icon
will only be shown in the menu when at least one alternative flavor has been set up under the "Configure Flavors" menu
option (please refer to Section 5.8 for additional information on setting up flavor types).
This option is available only to the store manager and service technician. The icon will appear for store operators if there
are any alternative flavors set up and, when selected, the screen will prompt for a password to be entered. Only the store
manager or service technician passwords can enable or disable the lock.
When the lockout is engaged (closed lock), any flavor set up as an alternative flavor will appear as locked on the main
screen and cannot be selected to dispense with the base product. When the lockout is disengaged (open lock), the
alternative flavors can be dispensed as normal. To engage, simply select the icon; the image will change from an open lock
to a closed lock. To disengage, select the closed lock icon and the image will change to an open lock.
Engaged Lock
Disengaged Lock

INSTALLATION & OPERATION ADDENDUM
MULTI-FLAVOR MERCHANDISERS
17
5.8 Configure Flavors
The "Configure Flavors" menu is used to change flavor types and perform flow rate calibrations for flavor syrups. This
menu is only available to service technicians. Once selected, there are two tabs that can be accessed: "Flavor Types" and
"Calibrate Flavors." The "Flavor Types" option is not required to be set up for operation of the dispenser, however, the
"Calibrate Flavors" option must be completed as part of the initial set-up.
Flavor Types
This menu allows you to specify the type of flavor for each of the flavor add-ins. The default type is "Standard." If a flavor
needs to be locked from dispensing on the main screen, then it will need to be changed to "Alternative." Please refer to
Section 5.7 for information on how to lock alternative flavors. The flavor can also be set to "Disabled" which will remove it
completely from the user interface.
If the flavor images have not been set, the screen will show the blank buttons for each of the flavors. Tapping the blank
flavor button will open the "Change Graphics" menu (Section 5.2) and allow you to change the flavor images. Once
images are selected, press the back button to return to the "Flavor Types" screen and the updated flavor images will be
shown.
If any of the flavors need to be changed from "Standard Flavor" to "Alternative Flavor" or "Disabled," press the "Standard
Flavor" button next to the corresponding flavor. A drop-down menu will appear. Select the desired flavor type. Repeat
as needed for each of the flavors.

INSTALLATION & OPERATION ADDENDUM
MULTI-FLAVOR MERCHANDISERS
18
Calibrate Flavors
The flavor injection modules must be calibrated before the dispenser is ready for store operation. The calibration procedure
requires access to the product tray. Before beginning the procedure, remove the drip tray, splash plate, and front cover to
access the flavor modules.
1From the "Calibrate Flavors" tab, select the "ounces" button in "Step #1" to set the desired sample size. On the
pop-up window, move the slider to the desired value, and press the green check mark to confirm the selection.
This value will be the sample size used to validate the amount dispensed during calibration. Select a sample size
that is easy to verify with the tools at hand.
2To configure the desired flow rate, scroll down and tap the "oz/sec" button for the flavor being calibrated. On the
pop-up window, move the slider to the desired value and press the green check mark to confirm the selection.
3Place a measuring cup under the faceplate and press the "Start" button to dispense the product. Measure the
amount of product dispensed and compare to the set "Sample Size" from Step 1. If the amounts match, the
module is correctly calibrated. If the amounts do not match, the flavor module will need to be manually adjusted.
Other manuals for 372
2
This manual suits for next models
2
Table of contents
Other FBD Merchandiser manuals